
Before you begin development, you will need to set up your sandbox and production environments by completing the following tasks:
- Set up a Site Admin account in your PayNearMe Business Portal.
- Choose Your Authentication Method
- Set up your Base URIs.
- Set up your Authentication.
- Ensure your security protocols are updated.
- Start Testing.
Set Up a User Account in the Business Portal
Currently, the application that generates API keys resides in the PayNearMe Business Portal, which requires login credentials. Once you've signed your NDA, your Sales representative will invite you to your site's portal where you can set up an account, access the API Explorer, and set up your API keys.
Choose Your Authentication Method
PayNearMe supports two authentication methods for API version 3.0 outbound calls: HMAC signature and OAuth 2.0 Bearer tokens. Outbound API calls must be authenticated using one of these methods. If your request includes an Authorization: Bearer {access_token} header, PayNearMe uses OAuth to authorize access; otherwise, you'll need to include a hash-based message authentication code (HMAC) signature.
Authenticating CallbacksAll server-side callbacks must be authenticated using the HMAC signature method. This includes API calls that were authenticated using the OAuth 2.0 method. To set up callbacks for your site, you'll need to create an API key pair and set up the authentication signature as detailed in the "HMAC Signature Method" section below.
HMAC Signature Method
If you choose to authenticate API calls with a signature, you will need to create an API key pair and code your application to create the signature value prior to sending the request. Additionally, all PayNearMe callbacks are authenticated using the signature method—even if you use OAuth to the authenticate the original API calls.
Create an API Key Pair
To create your initial API keys, you will need to access the Developer section of the PayNearMe Business Portal (i.e., click Developer from the portal's main menu) and complete the steps listed below. Additional keys can be created programmatically via the /create_api_key call.
-
Click API Documentation > API Keys & Signatures.
-
Scroll down to the “Create a New API Key” section.
-
In the Nickname field, enter a nickname for your key pair.
-
If desired, change the email address associated with the keys in the Email field. The portal automatically uses the email associated with your User ID.
-
In the API Version Number field, use the dropdown to select the API version for the key pair.
-
To create an IP address allowlist for API calls using this key, enter the IP address(es) from which API requests are allowed to be made in the Allowed IPs field. If adding more than one address, use a semicolon to separate them. Use CIDR notation to designate a range of IP addresses (e.g.,
192.168.1.0/24). -
To create an IP address blocklist for API calls using this key, enter the IP address(es) that should be blocked from making API requests in the Blocked IPs field. If adding more than one address, use a semicolon to separate them. Use CIDR notation to designate a range of IP addresses (e.g.,
192.168.1.0/24). -
Click Create. The portal scrolls to the top of the page and displays your new Key Identifier and Secret Key.
-
Copy both values, especially the Secret Key, as it will only display once. Store all key values in secure locations and do not share keys with the other users.
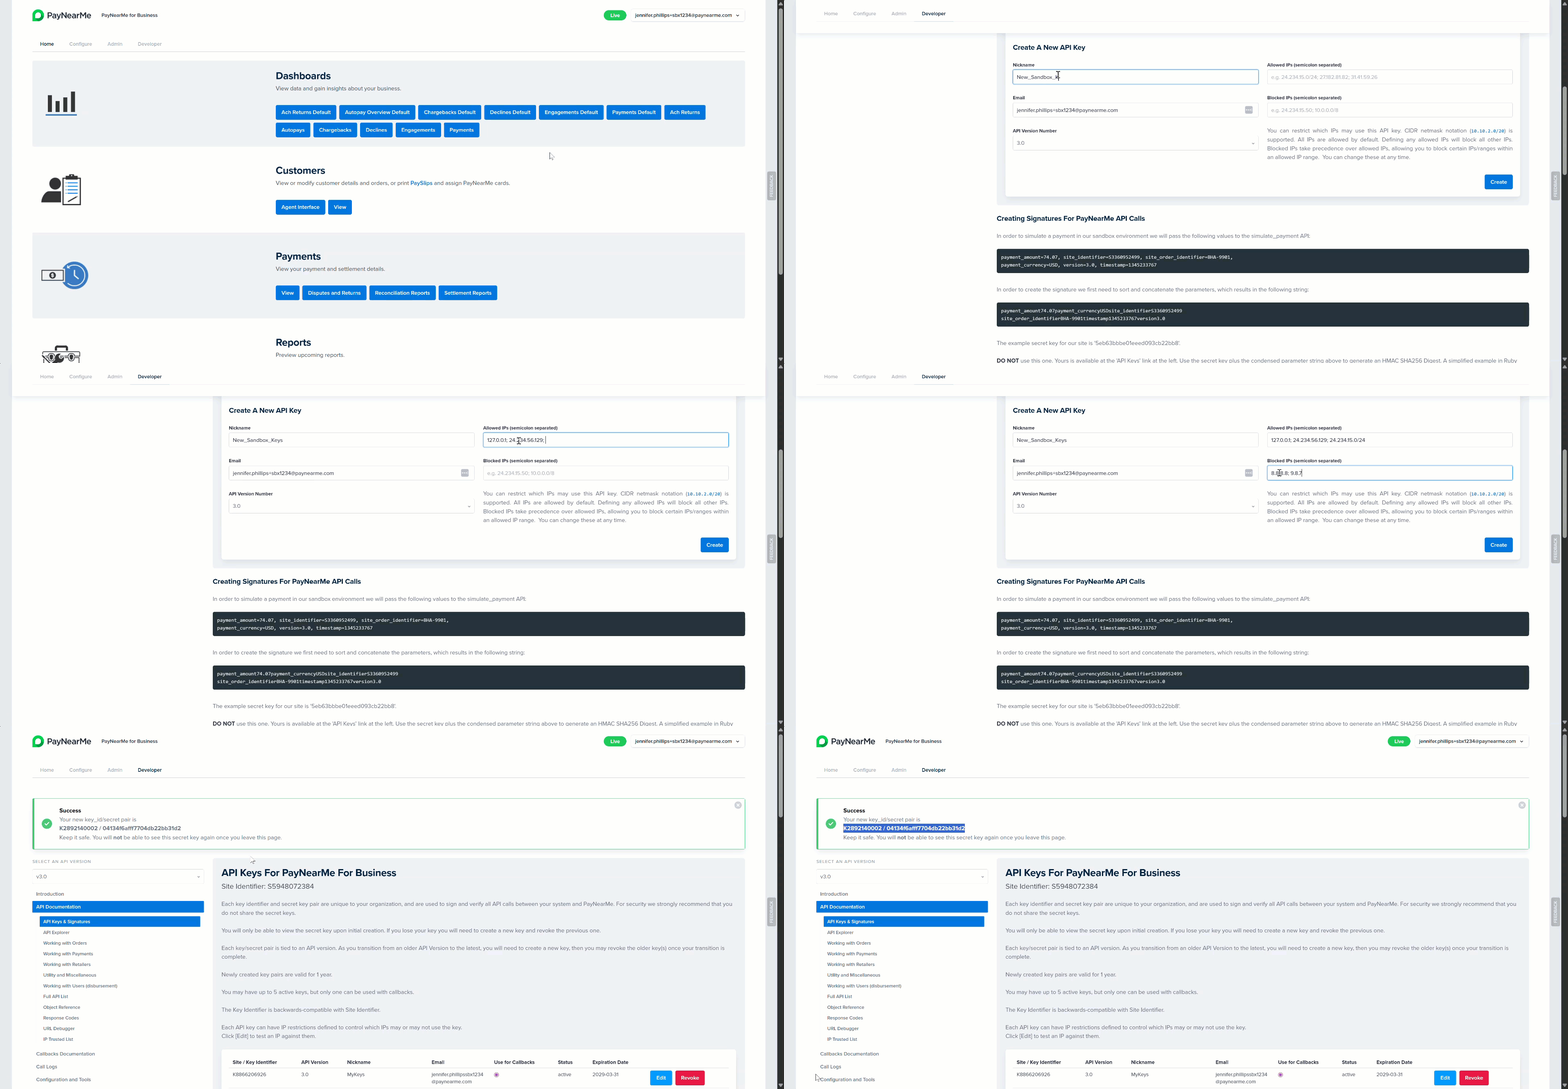
All current and revoked API keys display in a list on the API Keys & Signatures page in the PayNearMe Business Portal. Each site can have up to 5 active API key pairs, but only one API key pair can be used for callback authentication. All key pairs are valid for 1 year after creation. For information on rotating your API keys in compliance with PayNearMe Key Rotation requirements, see the API Key Rotation Guidelines.
Set Up Your Authentication Signature
Your API requests and all PayNearMe callbacks must include a hash-based message authentication code (HMAC) signature. An HMAC signature is a string of characters that authenticate messages received from the API and server-side callbacks. This authentication method protects the integrity of request messages and helps to prevent malicious attacks like cross-site scripting and brute-force attacks. See the Authentication page for detailed instructions and code samples for setting up a signature.
Set Up the Request Call
You'll add the calculated HMAC signature to the signature parameter in the payload of your API request. The following sample displays an example /create_order request using the HMAC signature authentication method. See Troubleshooting Signature Errors if you receive signature calculation errors.
curl -X POST https://api.paynearme-sandbox.com/json-api/create_order -L \
  -d order_amount=500 \
  -d order_currency=USD \
  -d order_is_standing=true \
  -d order_type=any \
  -d site_customer_identifier=123456789 \
  -d site_identifier=S6560527010 \
  -d version=3.0 \
  -d timestamp=1783460169 \
  -d signature=e39fa205684d44aca1db2e3579120cd17dd87ba202bb061674b4f294eb29bb26
OAuth 2.0 Method
If you prefer to authenticate API calls with OAuth 2.0, you will need to generate credentials and request an access token prior to sending the request. Tokens must be cached and refreshed at or near expiration.
Generate Credentials
To generate and configure your OAuth credentials, log into the Business Portal and complete the following steps:
-
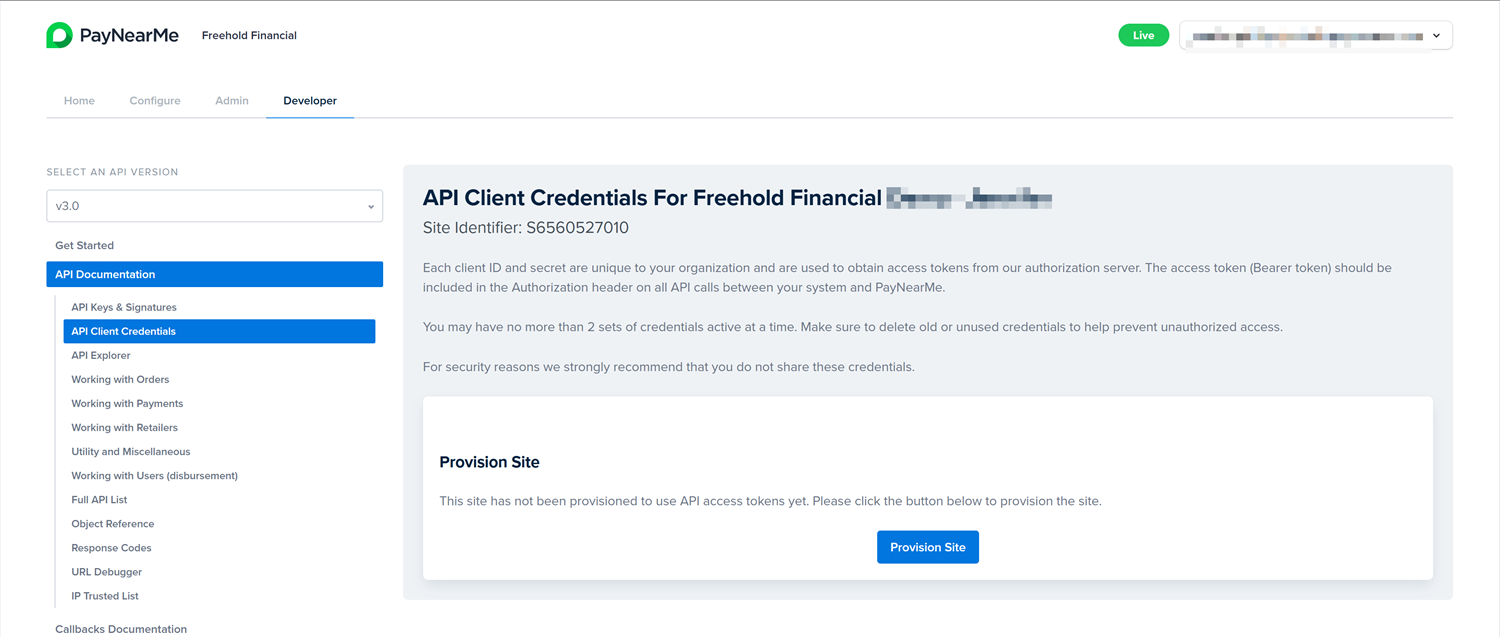
Navigate to Developer > API Documentation > API Client Credentials.
-
Click Provision Site. This is a one-time action for each site. A confirmation success message displays. Provisioning creates a scope in the PayNearMe identity provider and ties it to your site's external ID.
-
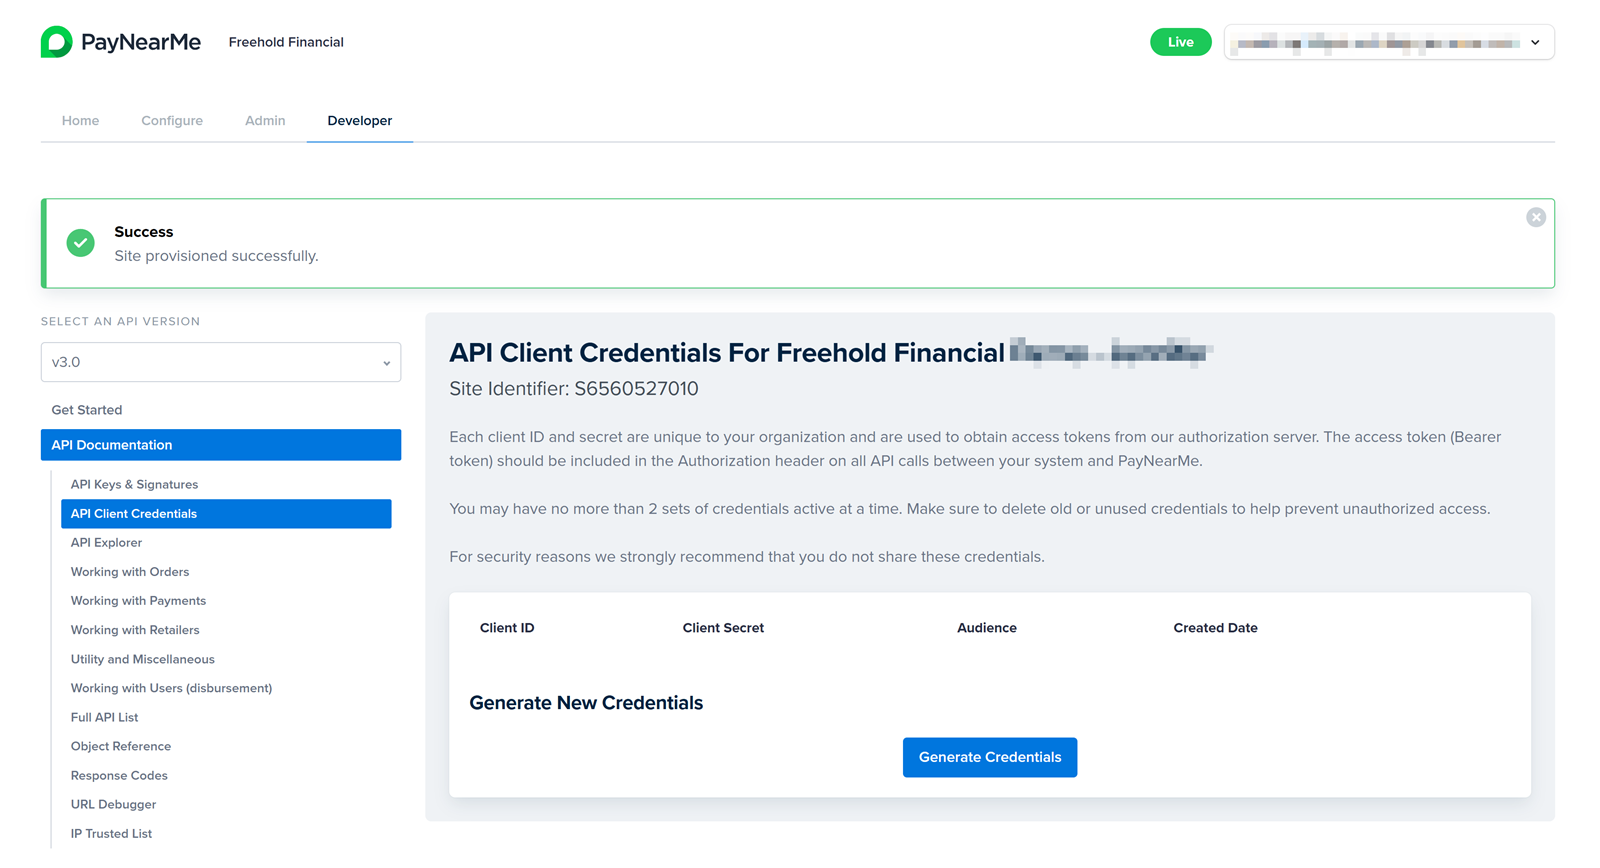
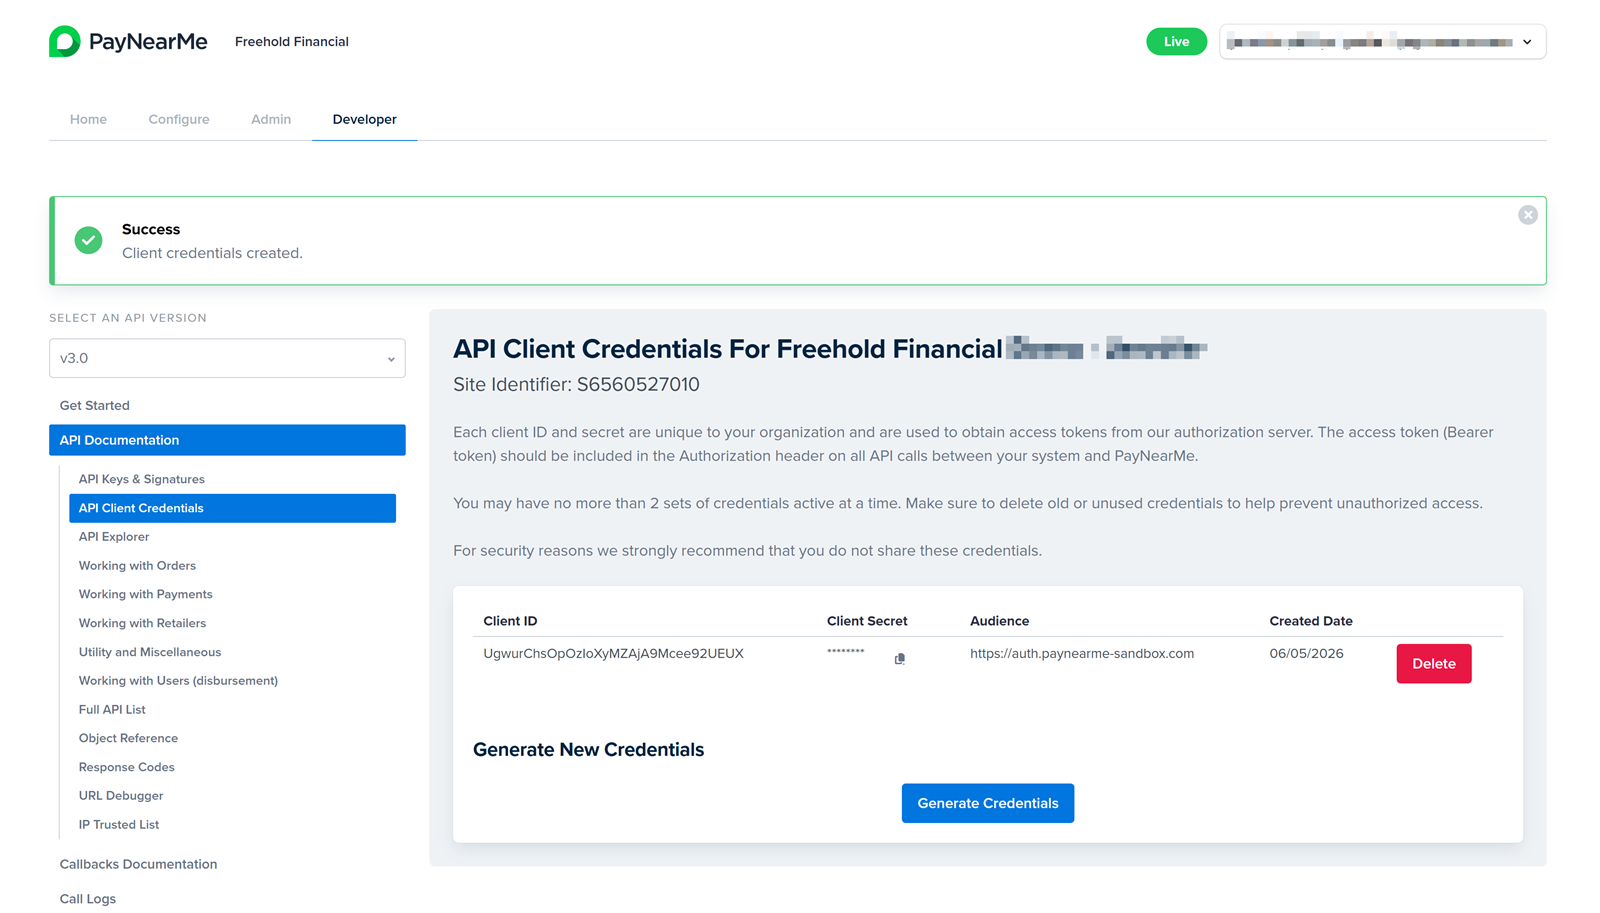
Click Generate Credentials. A success confirmation message displays.
-
Verify that Client ID, Client Secret, Audience, and Created Date display correctly.
-
Use the clipboard icon to copy the Client Secret. Store the Client ID, Client Secret, and Audience in a secure location (e.g., a secrets manager).
As long as the Client Secret is not exposed, you do not need to routinely change it.
Request an Access Token
Send a POST request with grant_type, client_id, client_secret, and audience to the PayNearMe login host for your environment.
| Environment | Token URL |
|---|---|
| Sandbox | https://login.paynearme-sandbox.com/oauth/token |
| Production | https://login.paynearme.com/oauth/token |
You can send the body as JSON or as application/x-www-form-urlencoded.
Example Request (JSON Data)
curl --request POST \
     --url https://login.paynearme-sandbox.com/oauth/token \
     --header 'content-type: application/json' \
     --data '{
  "grant_type": "client_credentials",
  "client_id": "YOUR_CLIENT_ID",
  "client_secret": "YOUR_CLIENT_SECRET",
  "audience": "YOUR_TOKEN_AUDIENCE"
}'
Example Request (URL-Encoded Form Data)
curl --request POST \
     --url https://login.paynearme-sandbox.com/oauth/token \
     --header 'content-type: application/x-www-form-urlencoded' \
     --data 'grant_type=client_credentials&client_id=YOUR_CLIENT_ID&client_secret=YOUR_CLIENT_SECRET&audience=YOUR_TOKEN_AUDIENCE'
Example Response
{
  "access_token": "eyJhbGciOiJSUzI1NiIsInR5cCI6IkpXVCJ9...",
  "token_type": "Bearer",
  "expires_in": 86400
}
The expires_inresponse parameter is the token lifetime in seconds. A typical value is 86400 (24 hours). Store expires_in and the time you received the token so your application can refresh the access_token before expiration.
Use the following code samples to request tokens from your application. Replace placeholders with your Client ID, Client Secret, Audience, and the correct Token URL for your environment.
require 'uri'
require 'net/http'
require 'json'

url = URI('https://login.paynearme-sandbox.com/oauth/token')
http = Net::HTTP.new(url.host, url.port)
http.use_ssl = true

request = Net::HTTP::Post.new(url)
request['content-type'] = 'application/json'
request.body = {
  grant_type: 'client_credentials',
  client_id: 'YOUR_CLIENT_ID',
  client_secret: 'YOUR_CLIENT_SECRET',
  audience: 'YOUR_TOKEN_AUDIENCE'
}.to_json

response = http.request(request)
puts response.read_body
<?php
$url = 'https://login.paynearme-sandbox.com/oauth/token';
$body = http_build_query([
'grant_type' => 'client_credentials',
'client_id' => 'YOUR_CLIENT_ID',
'client_secret' => 'YOUR_CLIENT_SECRET',
'audience' => 'YOUR_TOKEN_AUDIENCE',
]);
$ch = curl_init($url);
curl_setopt($ch, CURLOPT_POST, true);
curl_setopt($ch, CURLOPT_POSTFIELDS, $body);
curl_setopt($ch, CURLOPT_HTTPHEADER, ['Content-Type: application/x-www-form-urlencoded']);
curl_setopt($ch, CURLOPT_RETURNTRANSFER, true);
$response = curl_exec($ch);
curl_close($ch);
echo $response;
?>const https = require('https');
const querystring = require('querystring');
const body = querystring.stringify({
grant_type: 'client_credentials',
client_id: 'YOUR_CLIENT_ID',
client_secret: 'YOUR_CLIENT_SECRET',
audience: 'YOUR_TOKEN_AUDIENCE',
});
const options = {
hostname: 'login.paynearme-sandbox.com',
path: '/oauth/token',
method: 'POST',
headers: {
'Content-Type': 'application/x-www-form-urlencoded',
'Content-Length': Buffer.byteLength(body),
},
};
const req = https.request(options, (res) => {
let data = '';
res.on('data', (chunk) => { data += chunk; });
res.on('end', () => { console.log(data); });
});
req.write(body);
req.end();using System;
using System.Net.Http;
using System.Collections.Generic;
using System.Threading.Tasks;
class Program {
static async Task Main() {
var client = new HttpClient();
var url = "https://login.paynearme-sandbox.com/oauth/token";
var form = new FormUrlEncodedContent(new[] {
new KeyValuePair<string,string>("grant_type", "client_credentials"),
new KeyValuePair<string,string>("client_id", "YOUR_CLIENT_ID"),
new KeyValuePair<string,string>("client_secret", "YOUR_CLIENT_SECRET"),
new KeyValuePair<string,string>("audience", "YOUR_TOKEN_AUDIENCE"),
});
var response = await client.PostAsync(url, form);
Console.WriteLine(await response.Content.ReadAsStringAsync());
}
}import java.net.URI;
import java.net.http.HttpClient;
import java.net.http.HttpRequest;
import java.net.http.HttpResponse;
import java.net.URLEncoder;
import java.nio.charset.StandardCharsets;
import java.util.stream.Collectors;
import java.util.Map;
public class OAuthTokenRequest {
public static void main(String[] args) throws Exception {
String body = Map.of(
"grant_type", "client_credentials",
"client_id", "YOUR_CLIENT_ID",
"client_secret", "YOUR_CLIENT_SECRET",
"audience", "YOUR_TOKEN_AUDIENCE"
).entrySet().stream()
.map(e -> URLEncoder.encode(e.getKey(), StandardCharsets.UTF_8) + "=" +
URLEncoder.encode(e.getValue(), StandardCharsets.UTF_8))
.collect(Collectors.joining("&"));
HttpRequest request = HttpRequest.newBuilder()
.uri(URI.create("https://login.paynearme-sandbox.com/oauth/token"))
.header("Content-Type", "application/x-www-form-urlencoded")
.POST(HttpRequest.BodyPublishers.ofString(body))
.build();
HttpResponse<String> response = HttpClient.newHttpClient()
.send(request, HttpResponse.BodyHandlers.ofString());
System.out.println(response.body());
}
}#!/usr/bin/env python3
import json
import urllib.request
import urllib.parse
url = 'https://login.paynearme-sandbox.com/oauth/token'
data = urllib.parse.urlencode({
'grant_type': 'client_credentials',
'client_id': 'YOUR_CLIENT_ID',
'client_secret': 'YOUR_CLIENT_SECRET',
'audience': 'YOUR_TOKEN_AUDIENCE',
}).encode('utf-8')
req = urllib.request.Request(
url,
data=data,
headers={'Content-Type': 'application/x-www-form-urlencoded'},
method='POST',
)
with urllib.request.urlopen(req) as resp:
print(resp.read().decode('utf-8'))Set Up the API Call
When using OAuth for your API requests, you can omit the signature parameter, but will need to add the Authorization: Bearer {access_token} header to the the call. The following sample displays an example /create_order request using the OAuth 2.0 authentication method.
curl --request POST \
     --url https://api.paynearme-sandbox.com/json-api/create_order \
     --header 'accept: application/json' \
     --header 'content-type: application/json' \
     --header 'Authorization: Bearer YOUR_ACCESS_TOKEN' \
     --data '{
  "site_identifier": "S2155373459",
  "timestamp": "1636142061",
  "version": "3.0",
  "order_amount": "500",
  "order_currency": "USD",
  "site_customer_identifier": "11223344",
  "order_type": "any",
  "order_is_standing": "true"
}'
Set Up Your Base URIs
The following table displays the base URIs to which you’ll append the API endpoints. Note that these URIs are different for each environment.
| Environment | URI |
|---|---|
| Sandbox | https://api.paynearme-sandbox.com/json-api |
| Production | https://api.paynearme.com/json-api |
Ensure Your Security Protocols are Updated
To ensure the highest level of security for communication with PayNearMe services, all clients are required to use at least TLS 1.2 and avoid outdated protocols such as 3DES. PayNearMe's services are now deployed on Fastly’s edge network, which supports the more secure TLS 1.3 by default.
PayNearMe recommends using TLS 1.3 for optimal security, as it includes stronger ciphers such as the following:
- TLS_AES_256_GCM_SHA384
- TLS_CHACHA20_POLY1305_SHA256
- TLS_AES_128_GCM_SHA256
If you are using TLS 1.2, the supported ciphers include the following:
- ECDHE-RSA-AES128-GCM-SHA256
- ECDHE-ECDSA-AES128-GCM-SHA256
- ECDHE-RSA-AES256-GCM-SHA384
- ECDHE-ECDSA-AES256-GCM-SHA384
- ECDHE-RSA-CHACHA20-POLY1305
- ECDHE-ECDSA-CHACHA20-POLY1305
Please ensure that 3DES and other outdated ciphers are not used in your implementation, as they are no longer supported for secure connections. For more details on Fastly’s TLS support and recommendations, refer to the official Fastly TLS Prerequisites and Limitations documentation.
TLS RequirementsFor more information on PayNearMe's required TLS settings for API access, see the Required TLS Settings topic. For a step-by-step guide on how to review your TLS and cipher suite settings, see the Reviewing Your TLS Version and Cipher Suites topic in the API Reference.
Start Testing
Following PayNearMe's sandbox testing guidelines reduces two key risks: overwriting or corrupting production consumer data, and accidentally triggering notifications or interactions with sandbox orders by consumers or agents. These practices apply to both API and bulk upload methods, with extra care required for bulk file uploads.
Sandbox Testing Guidelines
- Use dummy data: Never use real consumer information (account numbers, names, phone numbers, email addresses) in the sandbox environment. Use anonymized or placeholder data instead.
- Separate environments strictly: Never write sandbox data to production or vice versa.
- Control directory access: Ensure processes and scripts cannot mix or accidentally access
/productionand/sandboxSFTP directories. Implement environment validation checks to enforce this. - Restrict artifact distribution: Do not share mobile payment links, barcodes, or other sandbox-generated artifacts with consumers or agents.
- Use fresh accounts for retesting: Avoid repeatedly testing against the same accounts. If you need to rerun a test, create new ones instead.