Disbursing from the Business Portal
The PayNearMe Business Portal enables employees to view, manage, and disburse funds to debit cards and bank accounts. The business portal can be used alone or in conjunction with the full API.
All employees who are granted the disbursement role will automatically be enabled for multi-factor authentication. The current multi-factor authorization uses one-time passwords generated by phone apps like Google Authenticator and Duo. When the employee first signs into the Business Portal, he or she will have to scan the QR code to set up the one-time password.
Depending on the assigned role, an employee can complete the following tasks:
- View pending and completed disbursements
- Create disbursements
- Send a text/email to consumer to associate a debit card or bank account
- Capture the required employee click-throughs
- Push funds to a card or bank account for a pending disbursement
Viewing Disbursements
To view disbursements in the Business Portal, access the home screen and then click Accounts under the Disbursements section.
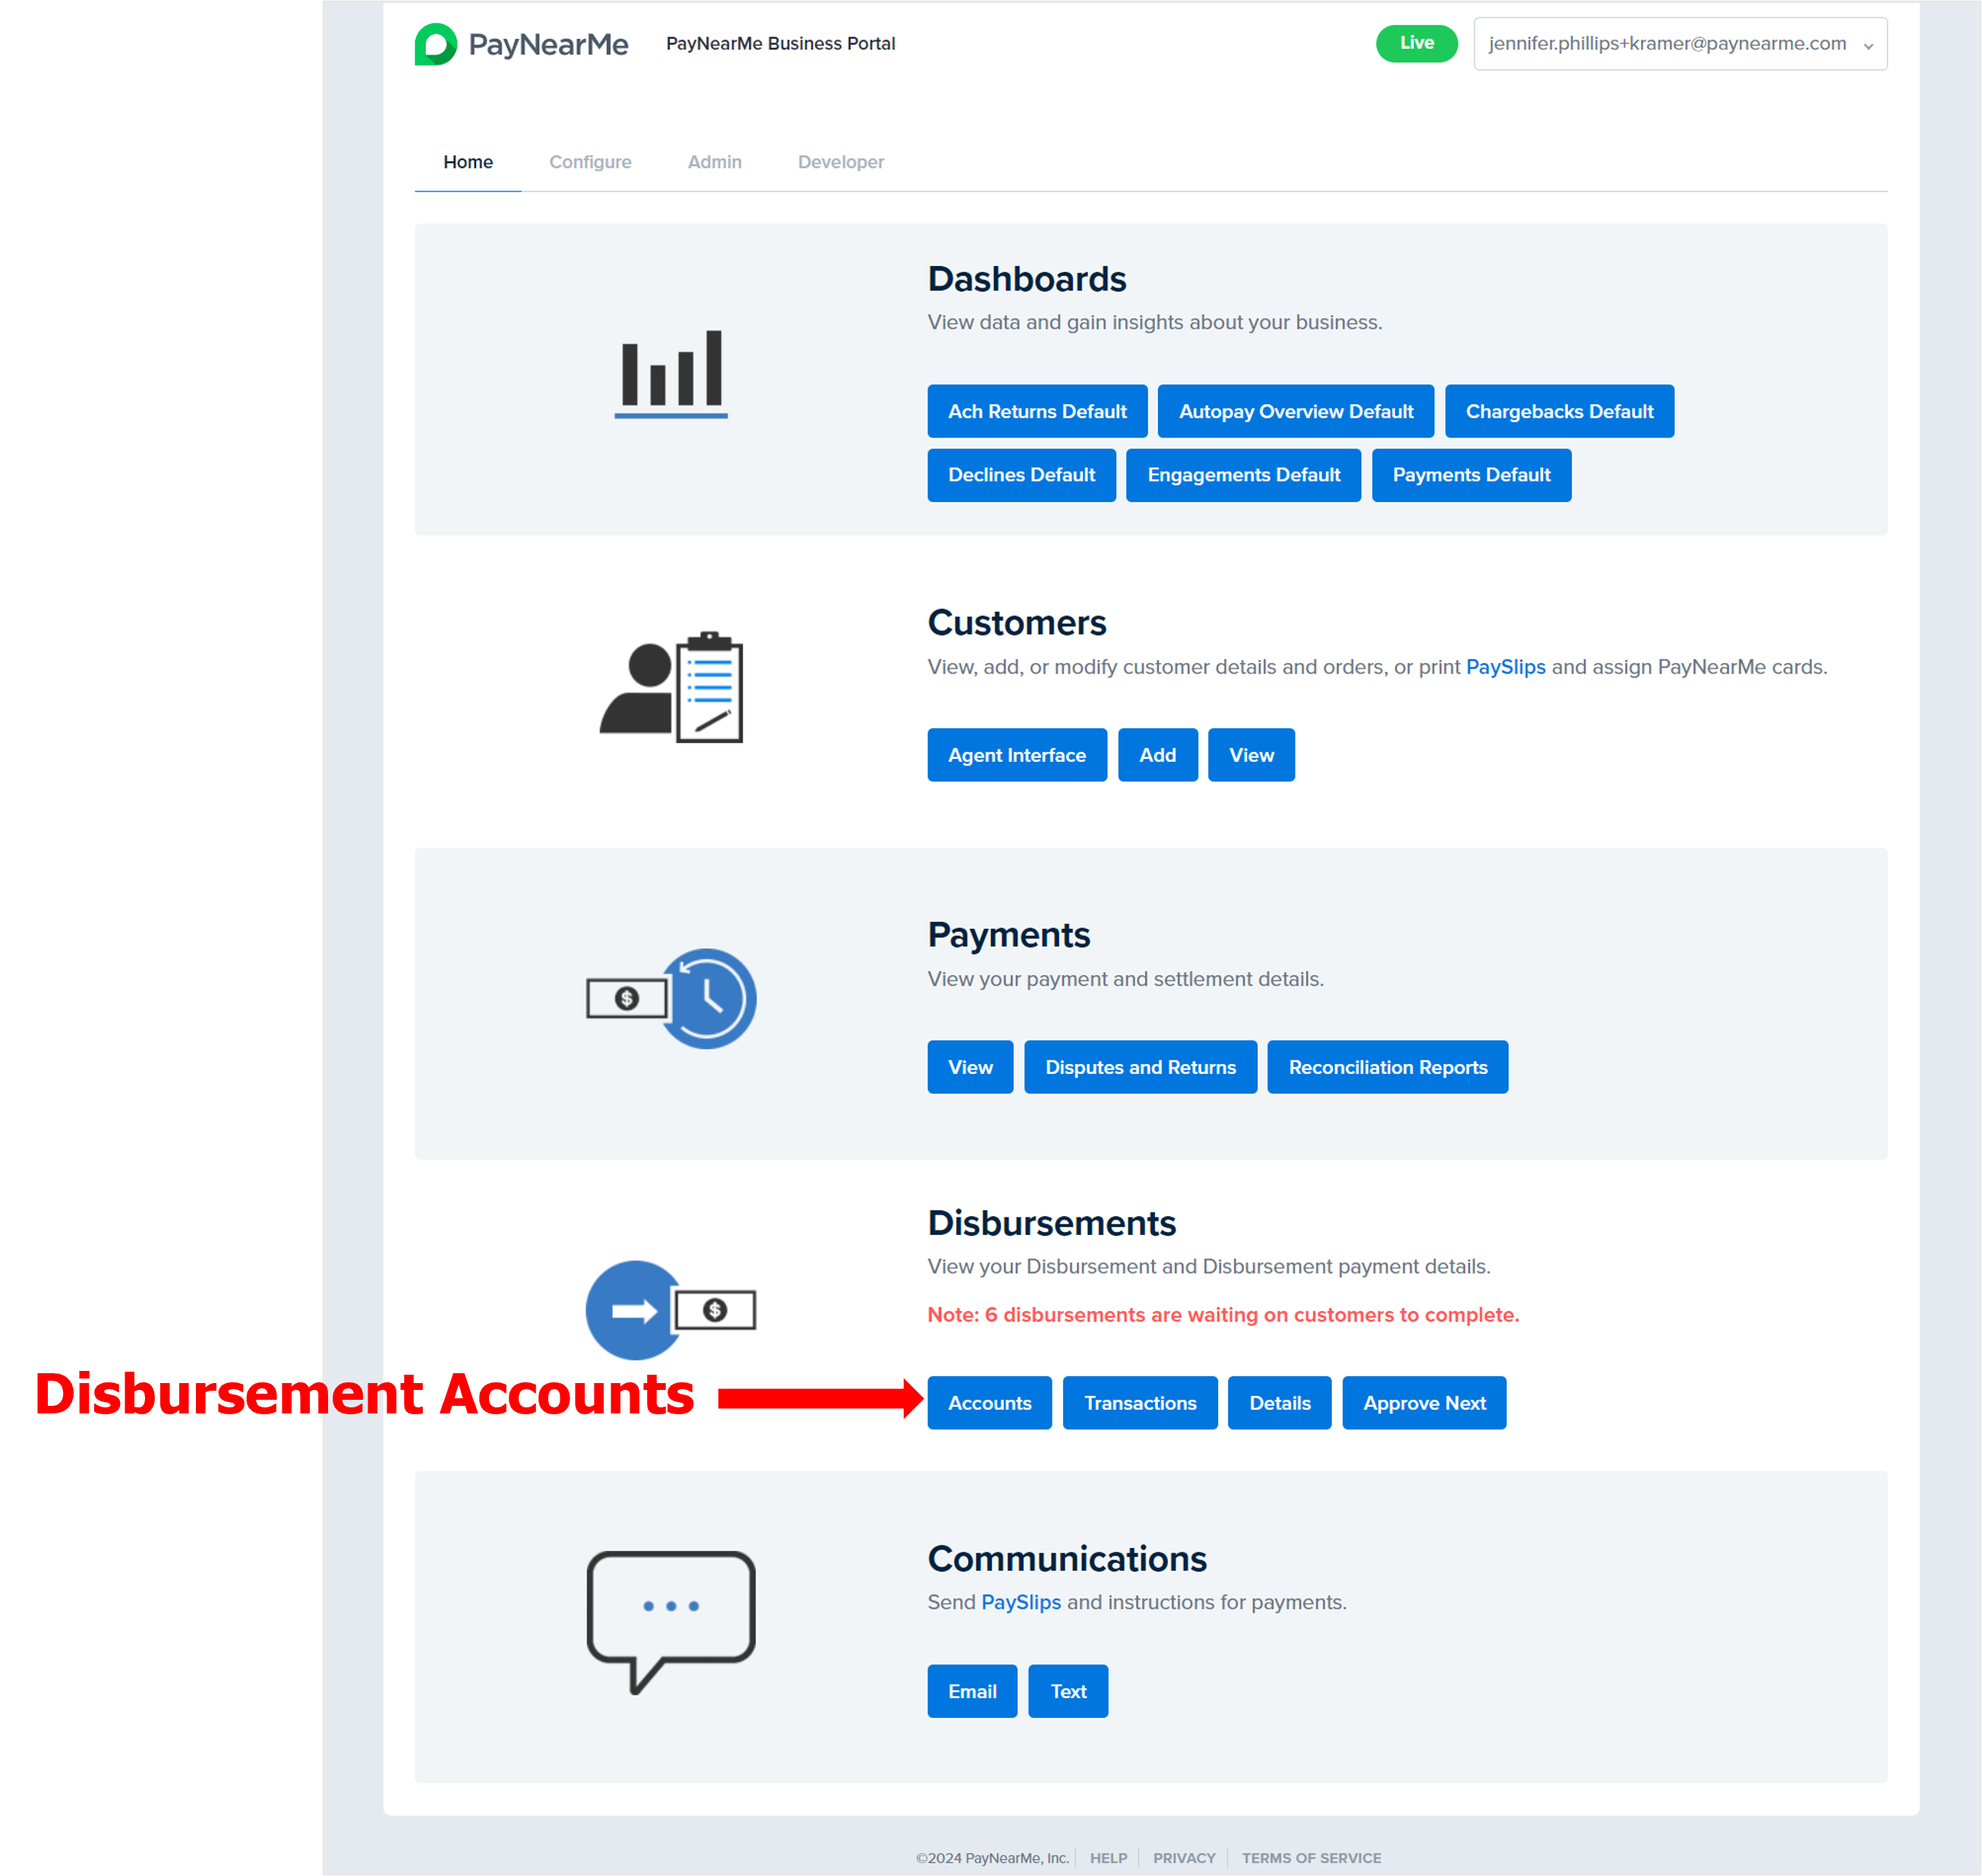
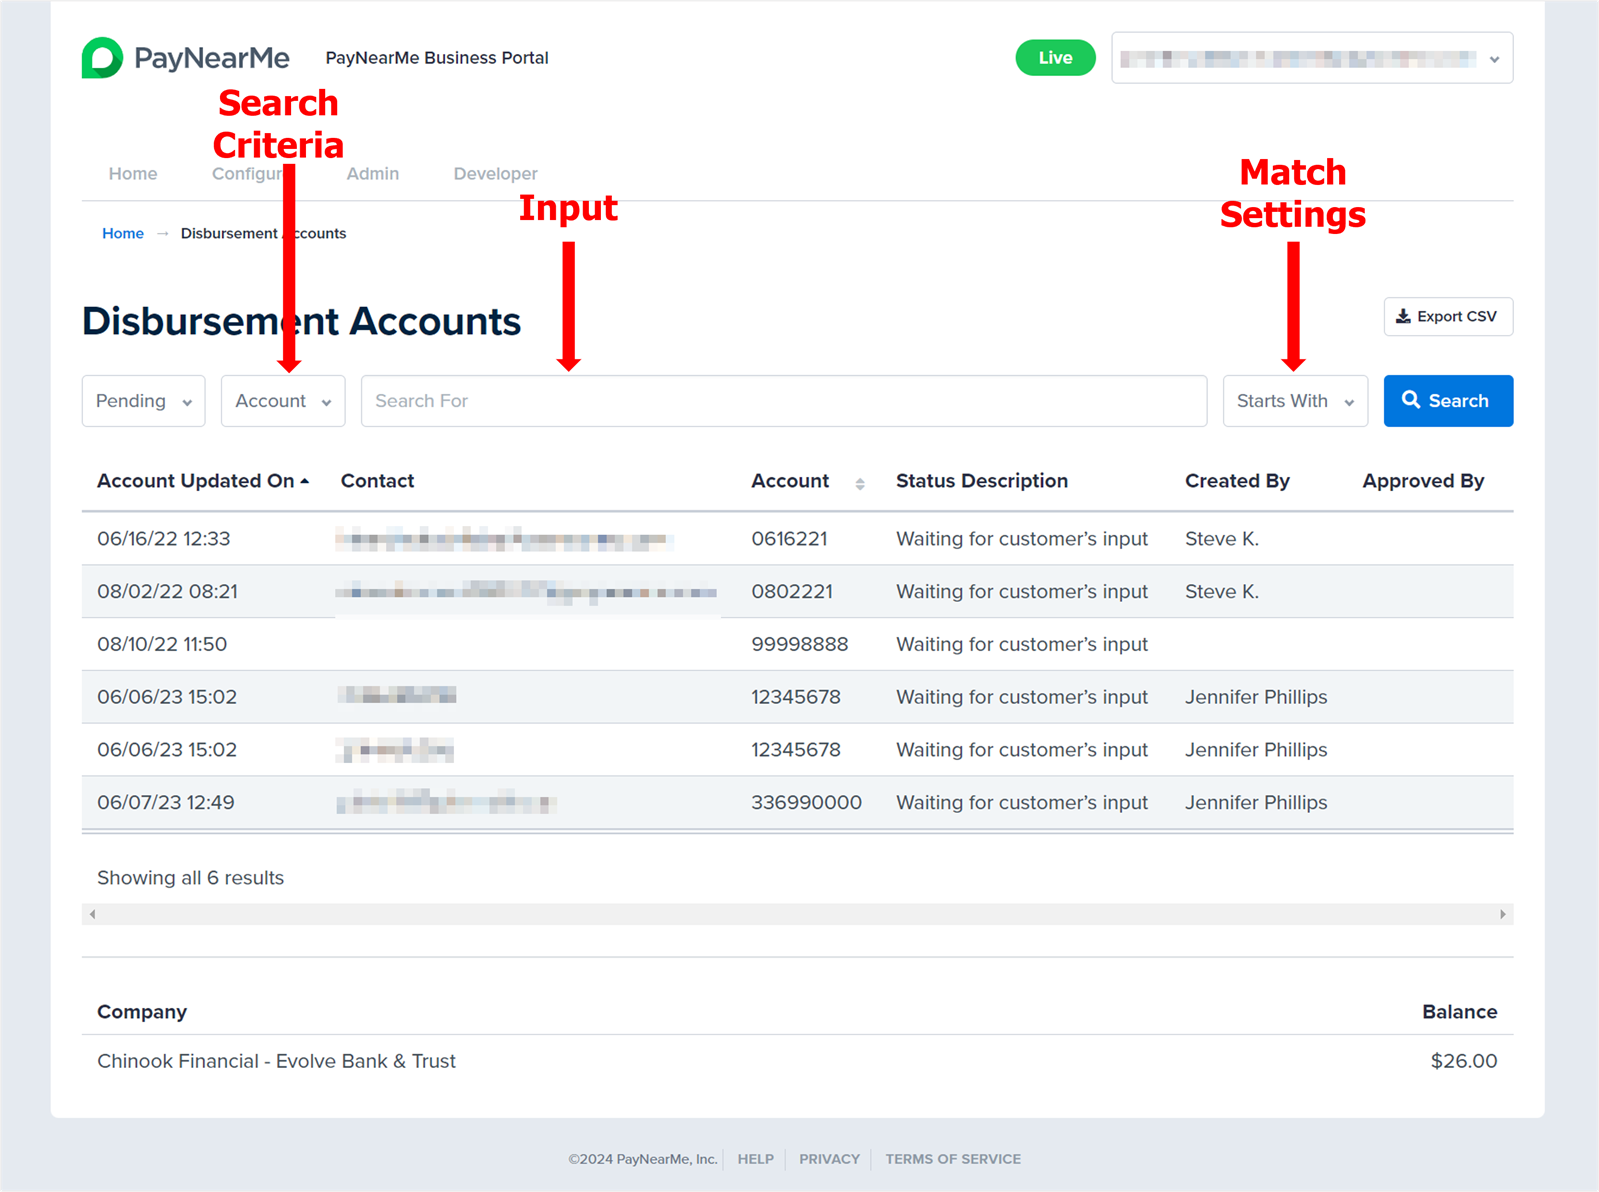
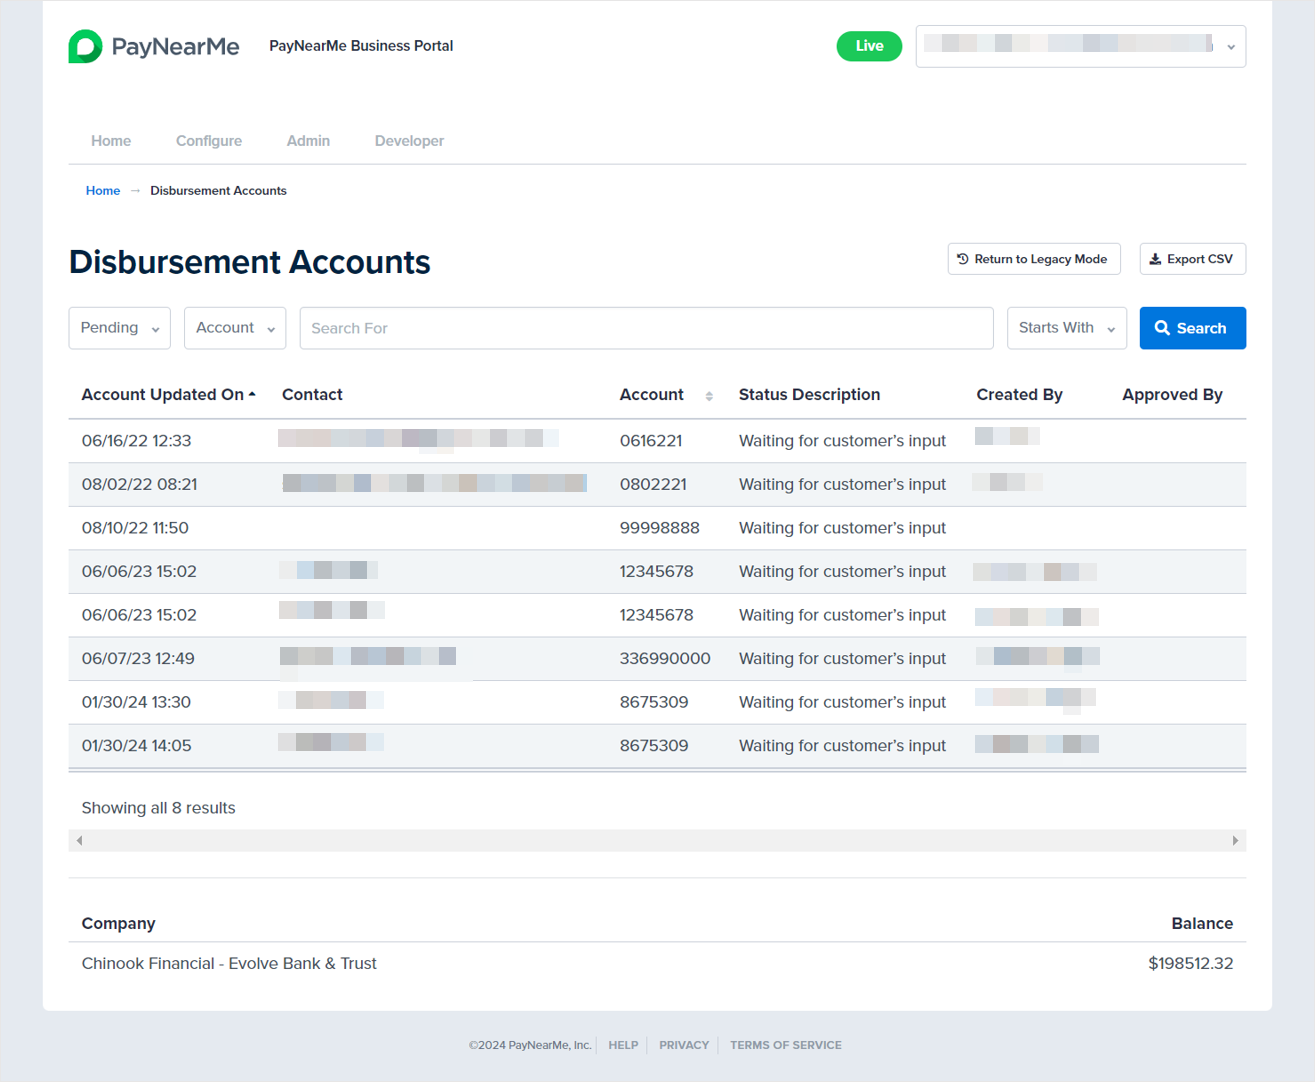
This will open the Disbursement Accounts page.
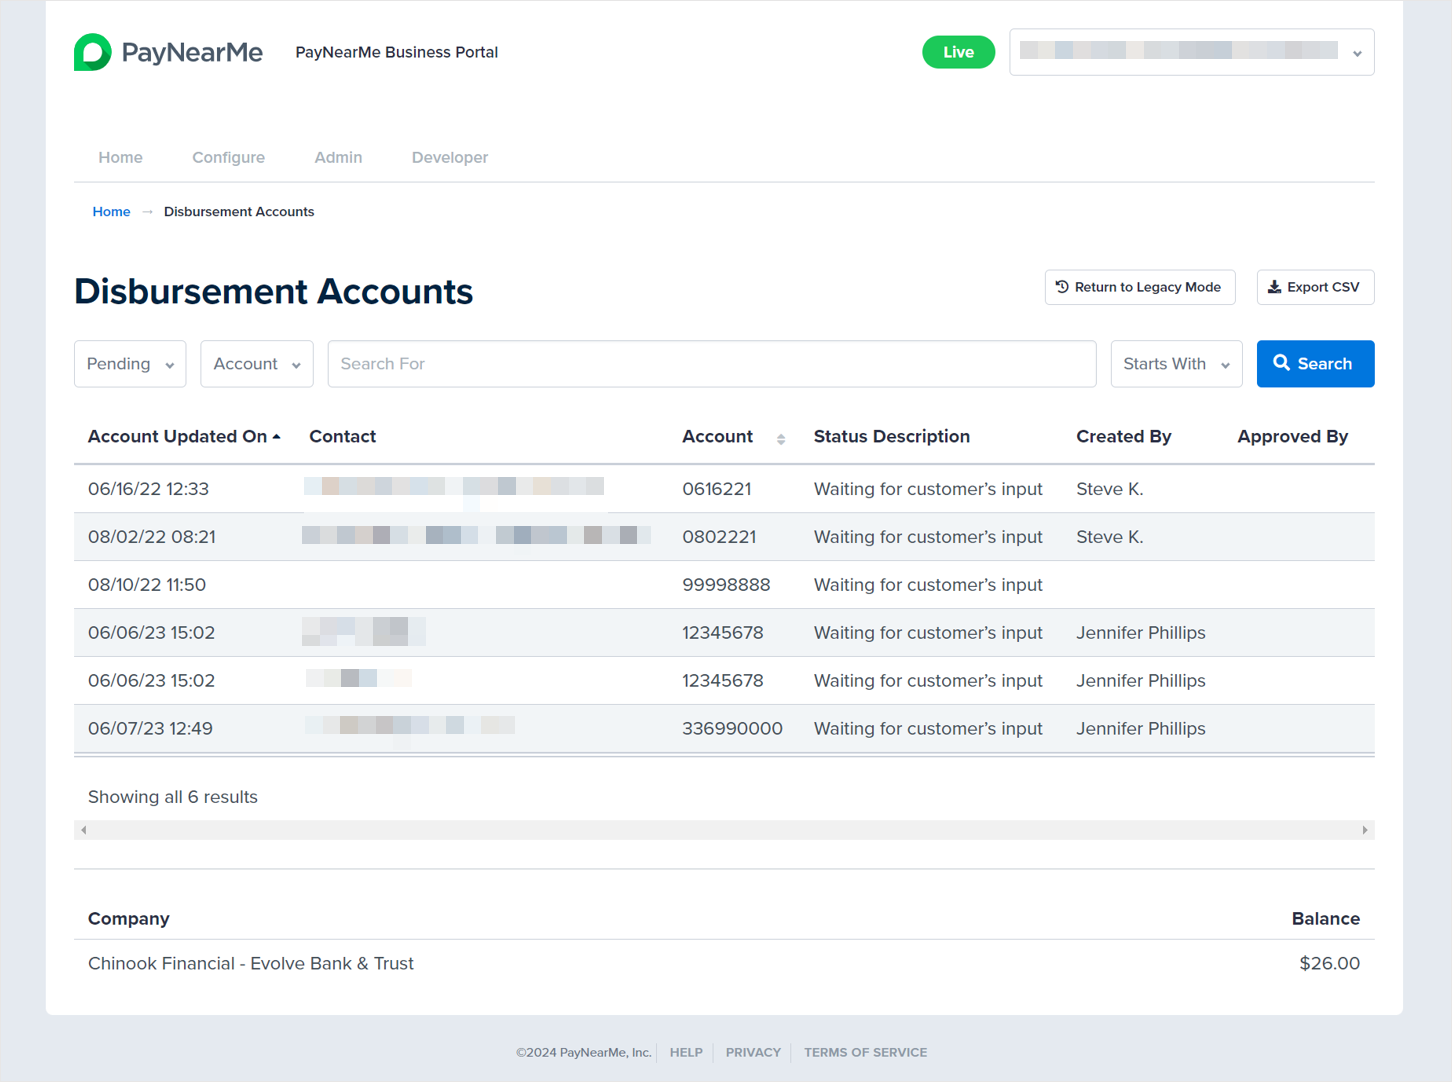
From here you can filter the displayed list of disbursements by the following:
- Unapproved
- Pending
- Completed
- Canceled
- Returned
- All
Disbursement Accounts PageYour Disbursement Accounts page may look different depending on your role and permissions.
You can also search for a specific disbursement account by the following:
- Account Number
- Consumer Name
- Phone Number
Use the Match Settings dropdown to select whether you want to search the input as an Exact Match, an account number or name that Starts With the input, or an account number or name that Contains the input. The Match Settings dropdown only displays for Account Number and Name searches (i.e., email and phone number searches must be exact matches).
Creating a New Disbursement
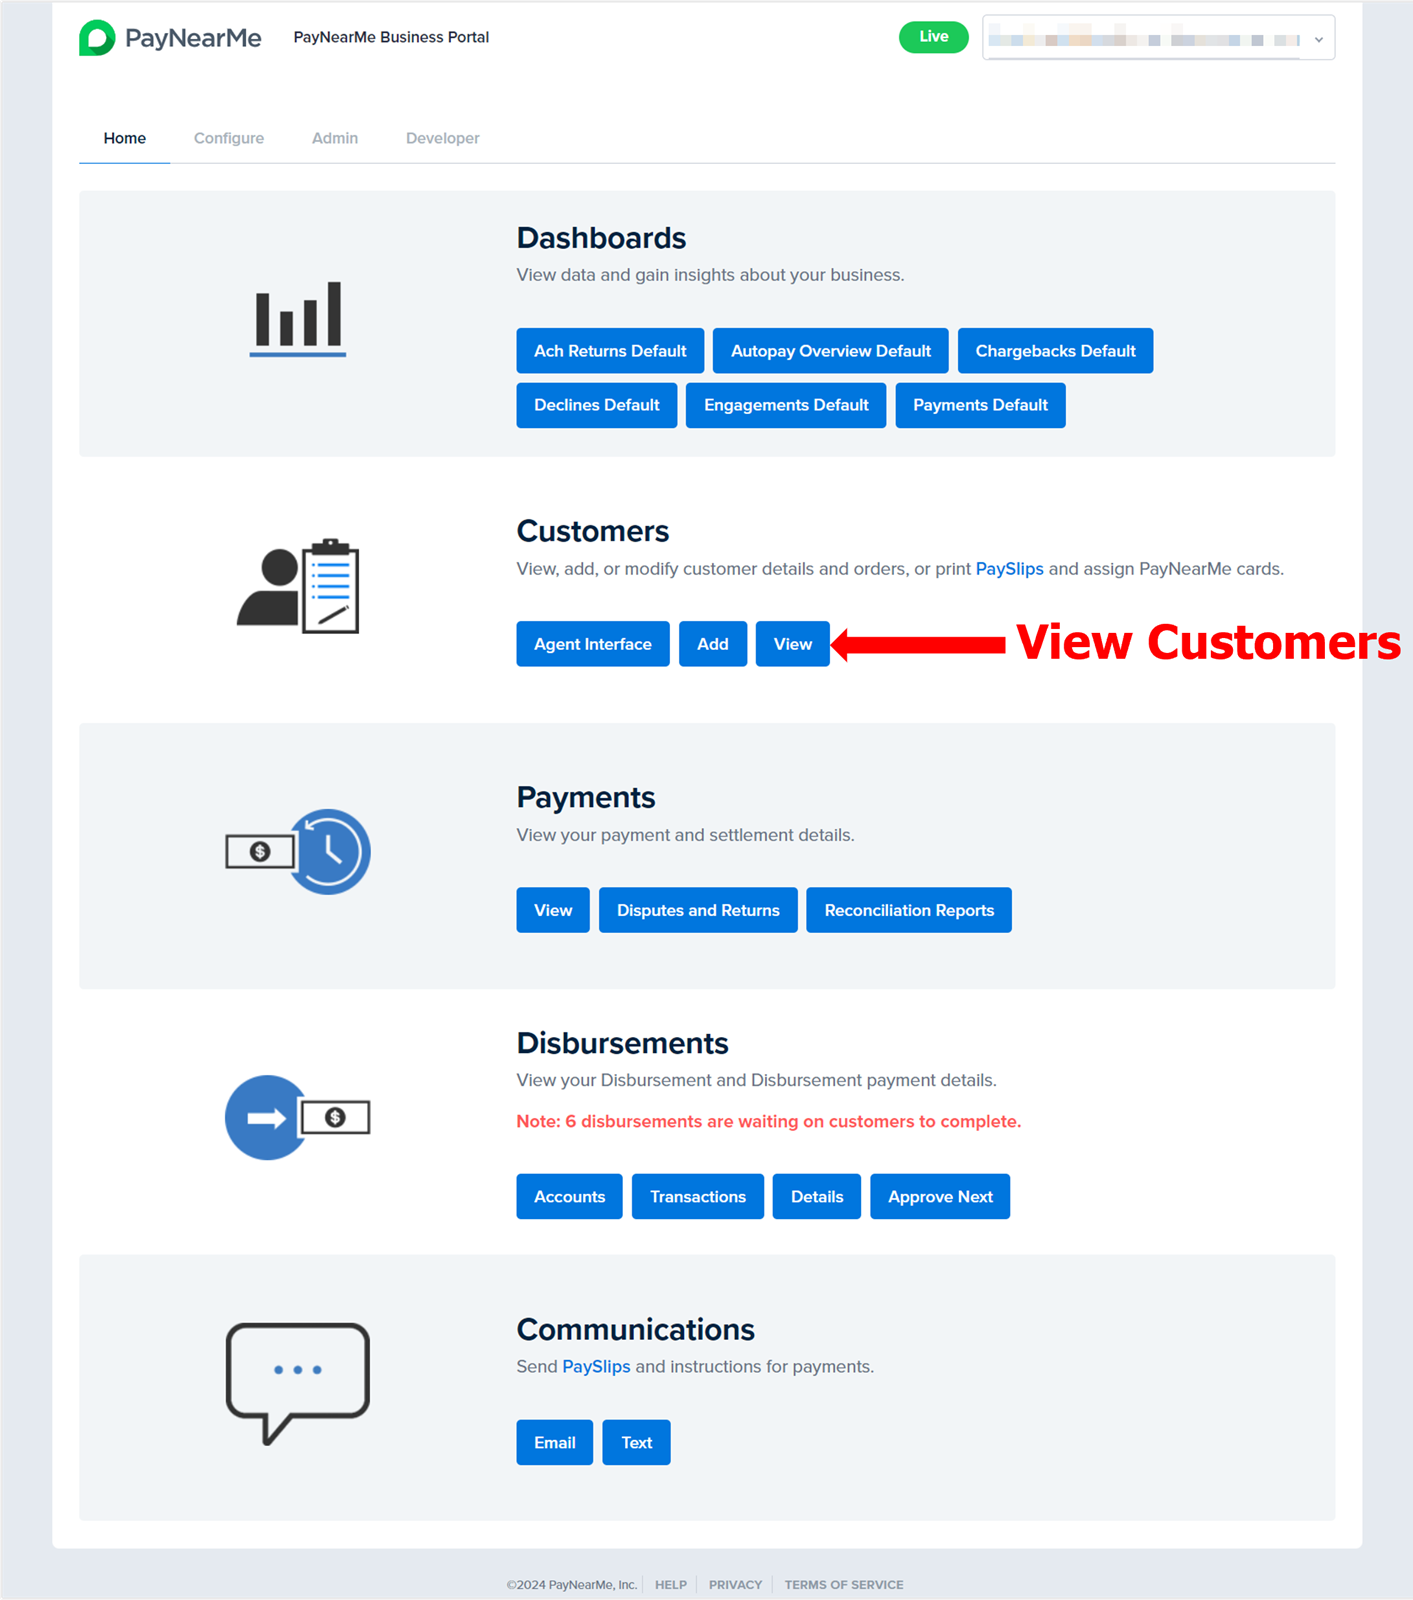
To create a new disbursement from the Business Portal, access the home screen and then click View under the Customers section.
The Customers page displays. Search for the consumer by his/her/their name, account number, email address, or phone number to narrow down the list of accounts.
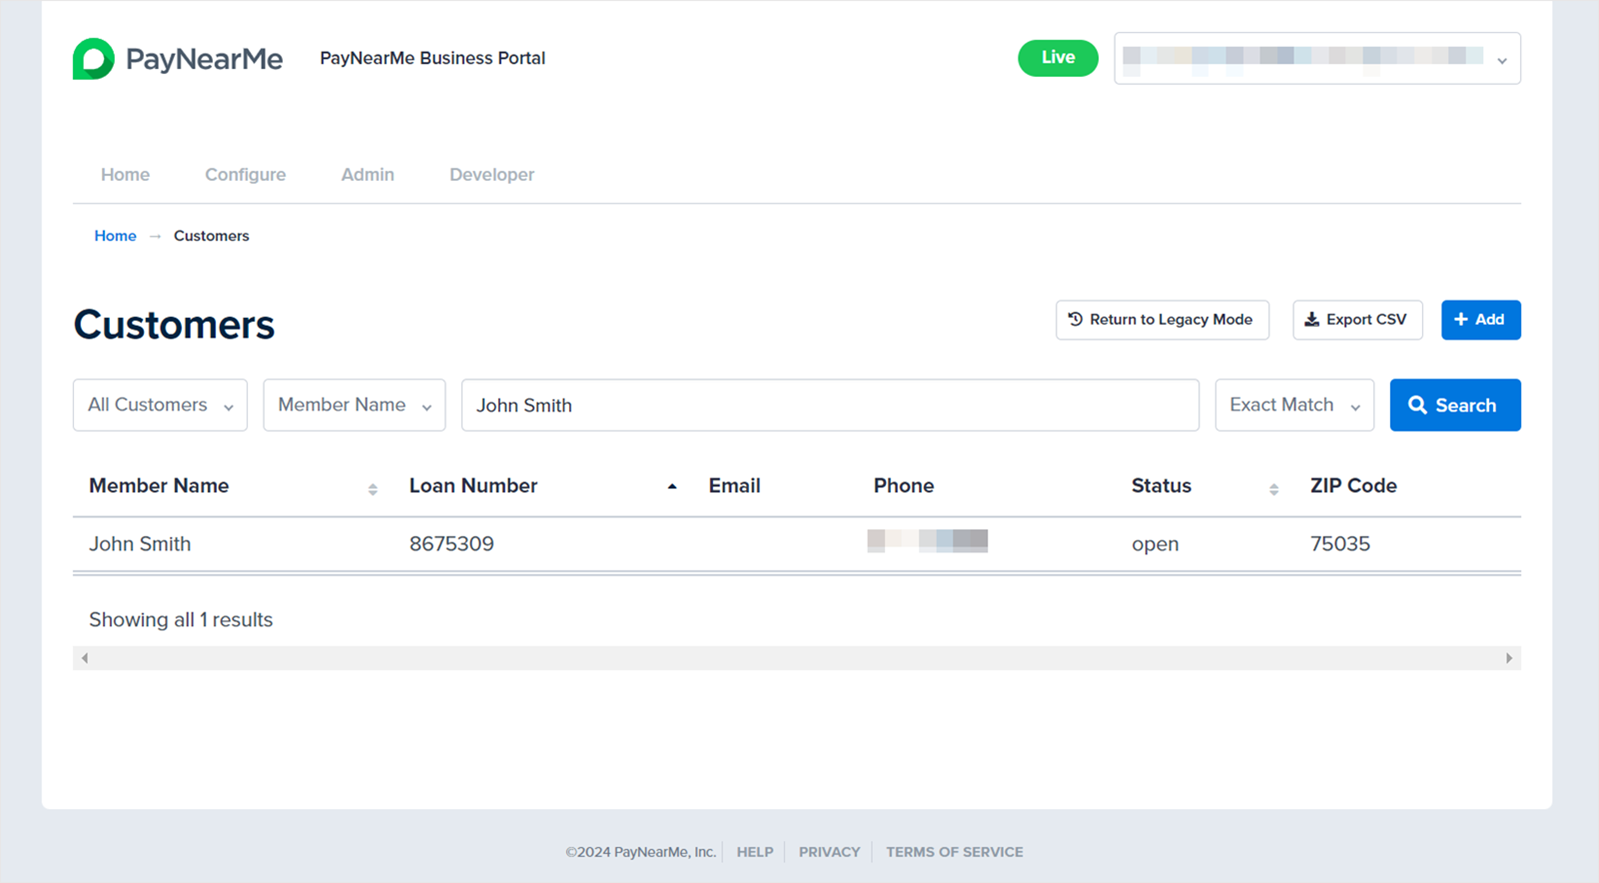
Click the row on which the consumer's account displays. The consumer's Customer Information page displays. Scroll to the Actions section and click the Send New Disbursement action.

The Customer Verification screen displays.
Customer Identity VerificationIf the customer’s identity has already been verified, the Business Portal displays the New Disbursement screen.
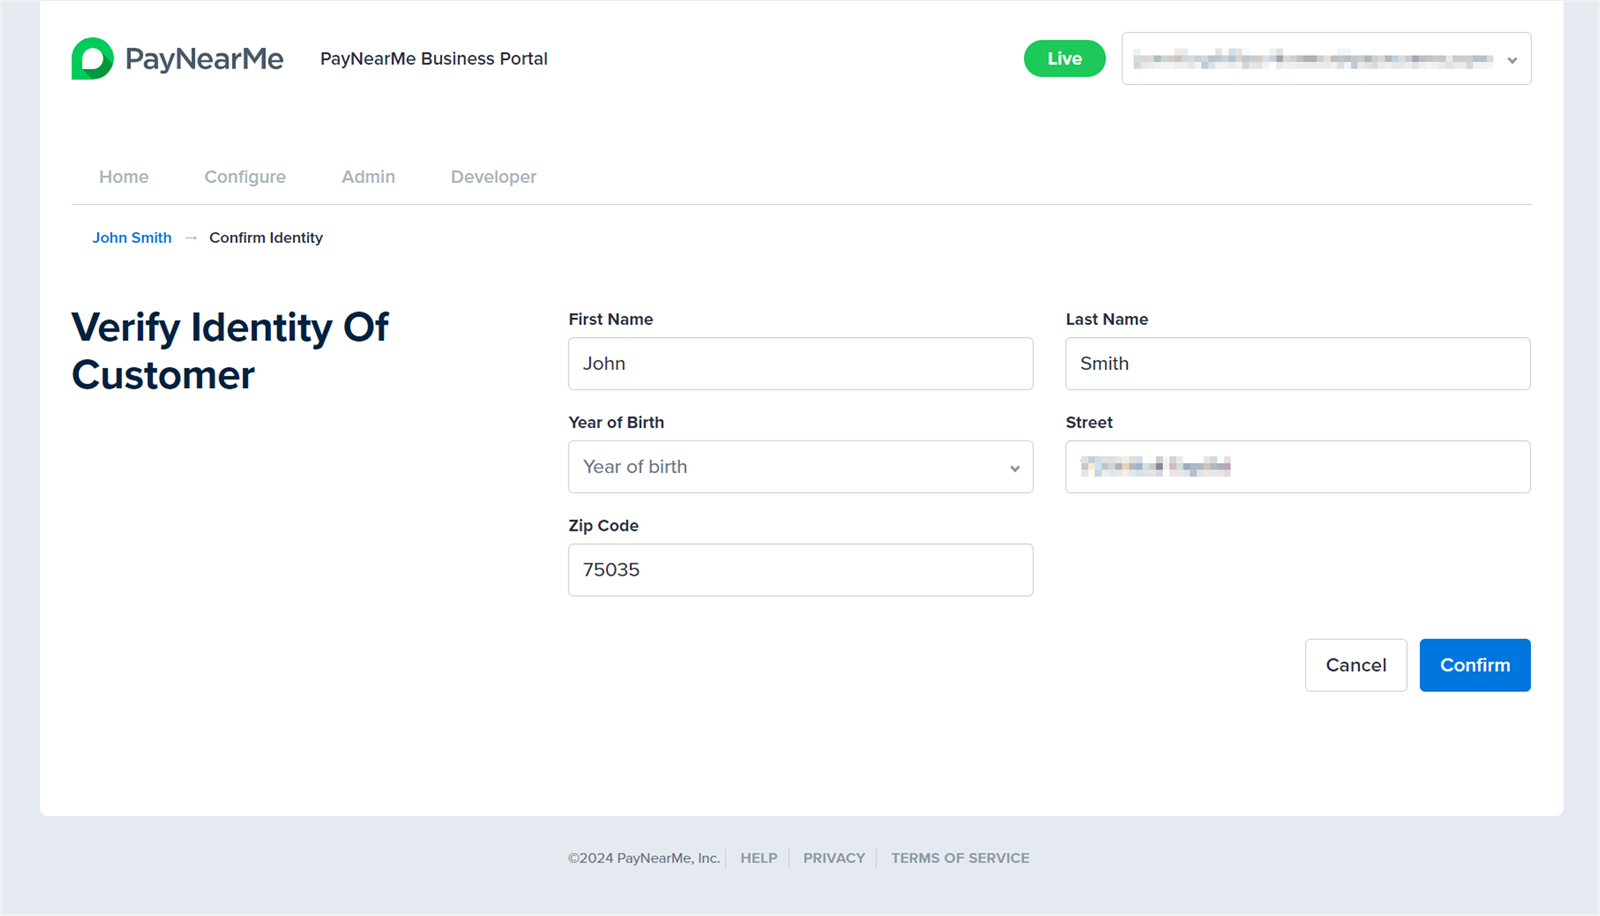
Complete the following fields and then click Confirm.
| Field | Description |
|---|---|
| First Name | The consumer's first name. |
| Last Name | The consumer's last name. |
| Year of Birth | The consumer's four-digit year of birth. Use the dropdown to select this value. |
| Street | The first line of the consumer's billing address. |
| Zip Code | The consumer's billing zip code. |
PayNearMe attempts to verify the customer’s identity via various KYC and OFAC checks. If verified, the New Disbursement page displays. If the customer’s identity cannot be verified, the Business Portal displays an error message and allows you to enter the information again up to two more times.

Complete the following fields on the New Disbursement page and then click Continue.
| Field | Description |
|---|---|
| Reason for Sending | Use the dropdown to select one of the following reasons for sending the disbursement:
|
| Memo | Enter a short note regarding the disbursement. |
| Amount | Enter the total principal amount of the disbursement. |
The Business Portal returns to the customer’s details page with a message displaying whether the disbursement was successfully staged and, if configured, what phone number or email address was used to notify the customer.
The customer receives a Smart Link via text or email, which takes him/her/them to the Consumer Portal.
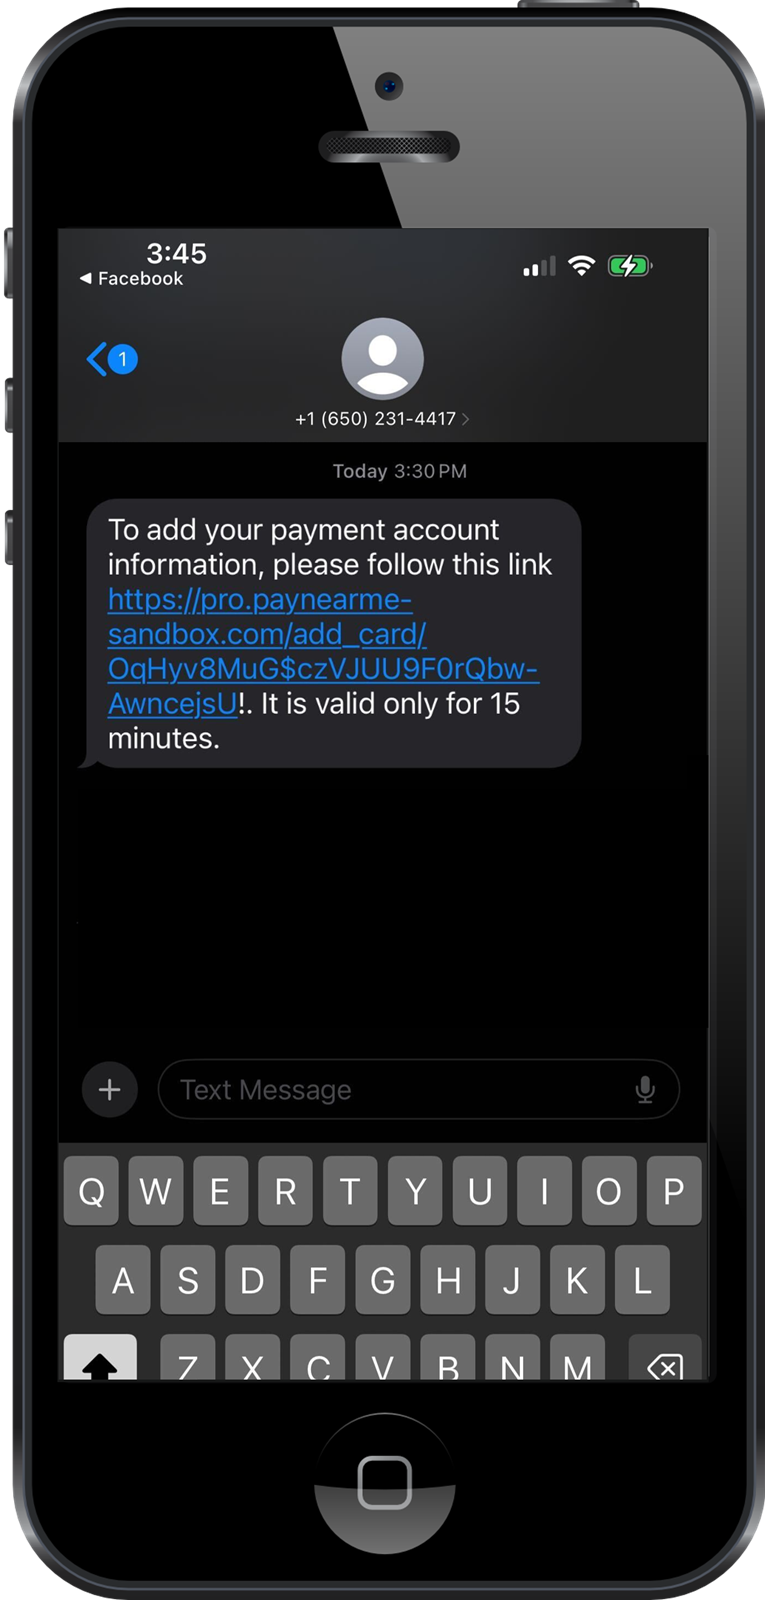
From there he/she/they can enter and submit his/her/their debit card or bank account information for disbursement approval.
Approving a Disbursement
After the customer has submitted the bank account where PayNearMe will send the funds, the disbursement goes into “Waiting for Approval” status. To approve an staged disbursement, access the home screen in the Business Portal and then click Accounts under the Disbursements section. Use the dropdown in the datagrid filter field to select Unapproved Disbursements. This will display all disbursements waiting for approval.
Searching for DisbursementsYou can also search for a specific disbursement account using the consumer's account number, name, email address, or mobile phone number.

Click the line that displays the disbursement. The disbursement's page displays.
Using the Approve Next ButtonYou can also access a disbursement's page by clicking the Approve Next button under the Disbursements section. The Business Portal will display the oldest disbursement that needs to be approved. After approval, return to the homepage and repeat the process until all outstanding disbursements have been approved and the funds transmitted.
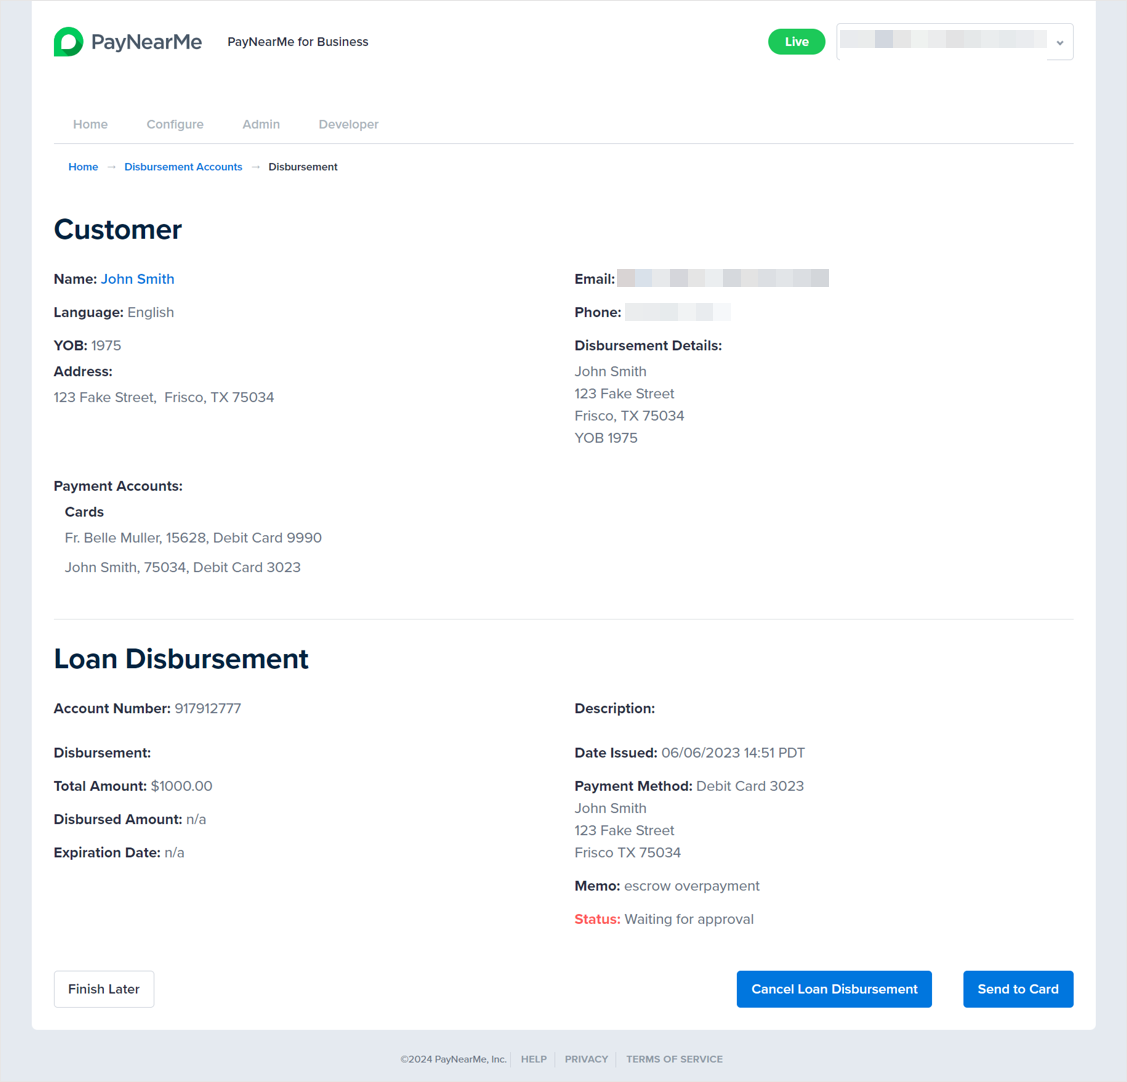
Click the Send to Card button. The Send Money page displays.
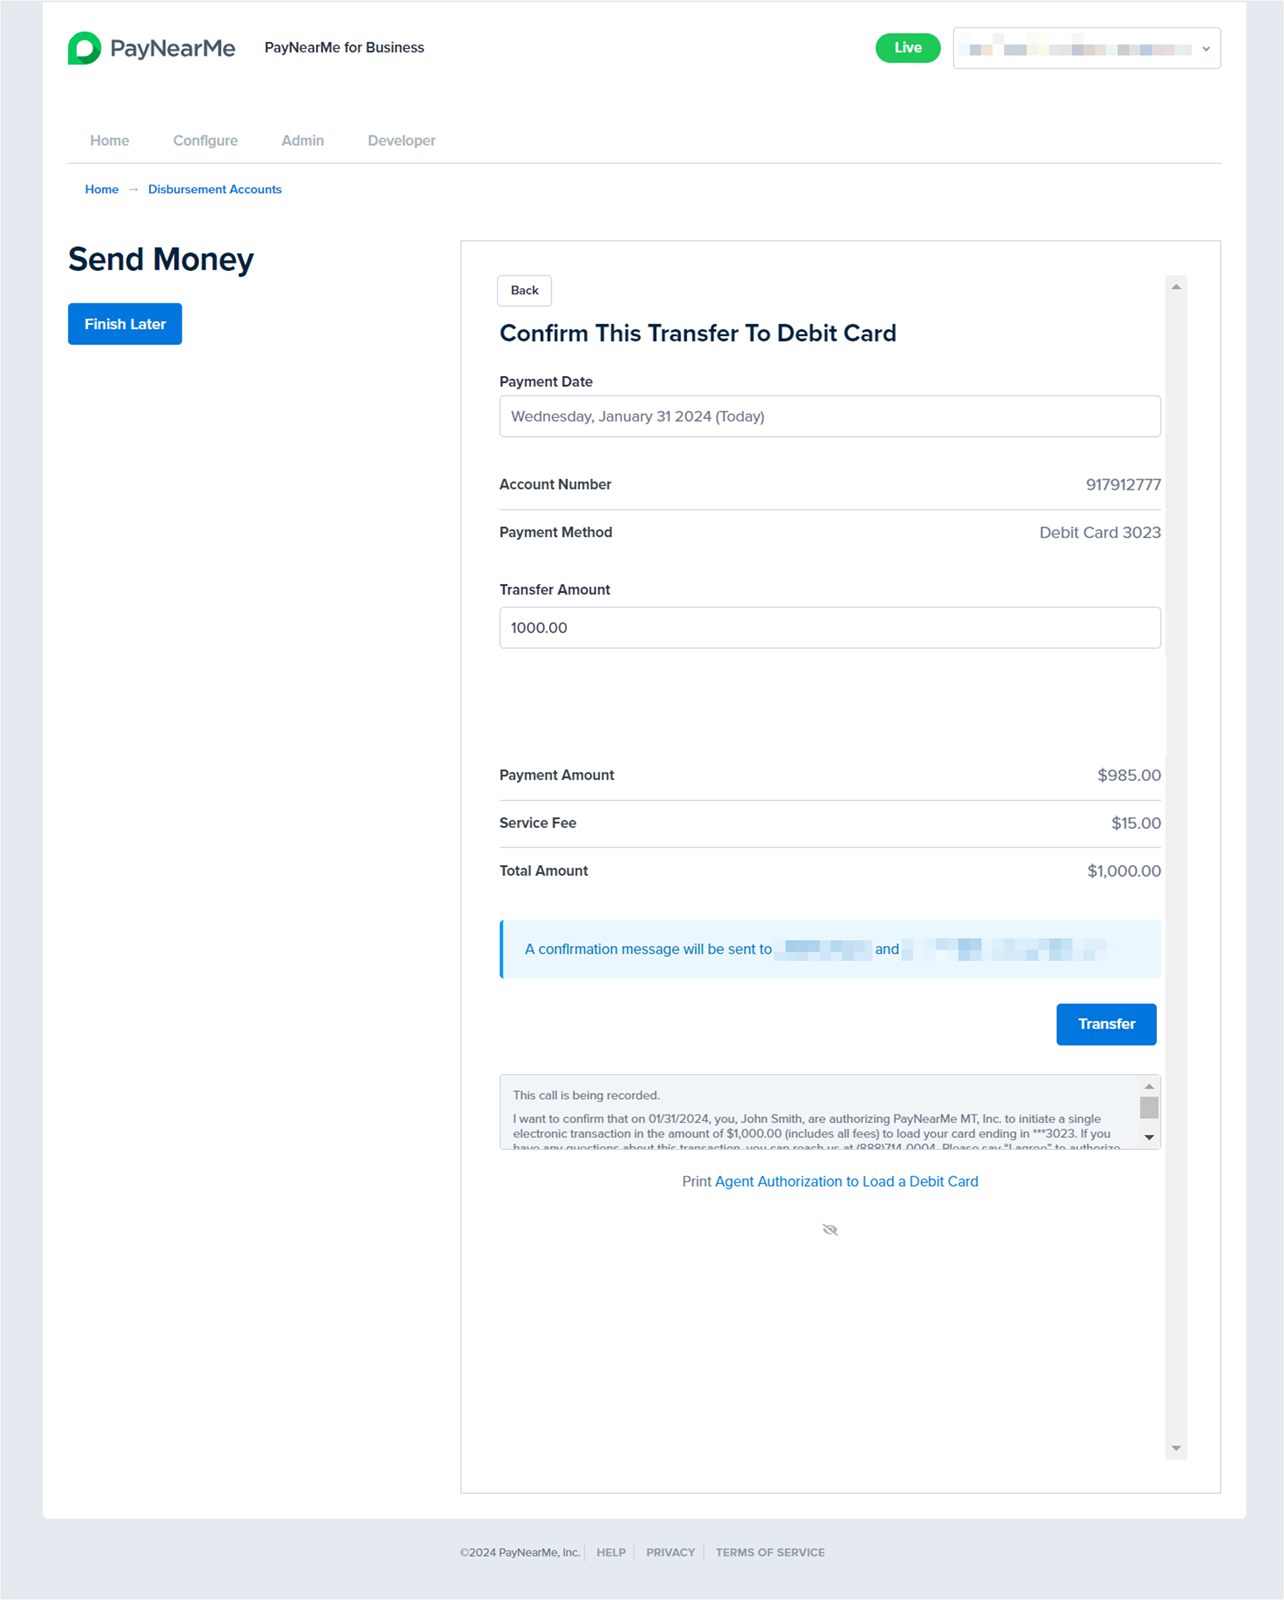
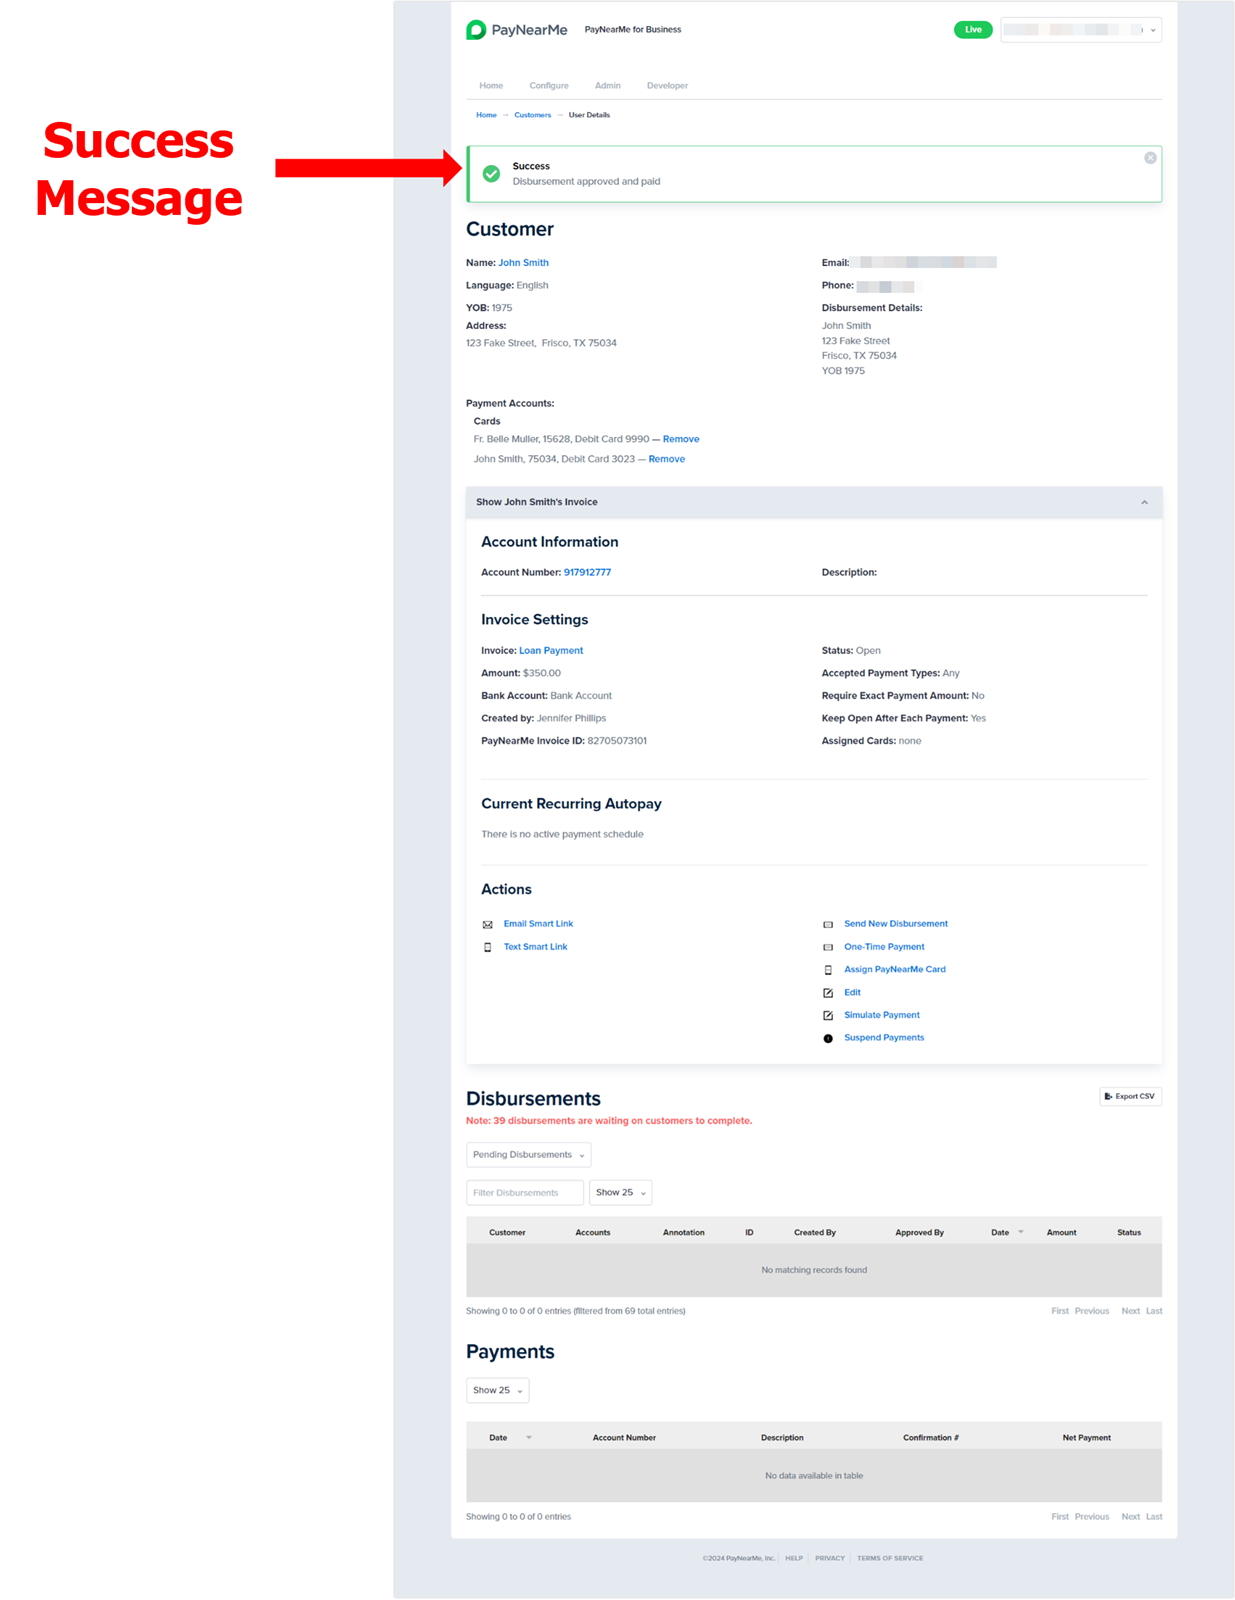
Click the Transfer button. The Business Portal processes the payment and returns you to the consumer's Customer page with a message indicating whether or not the funds transfer was successful.
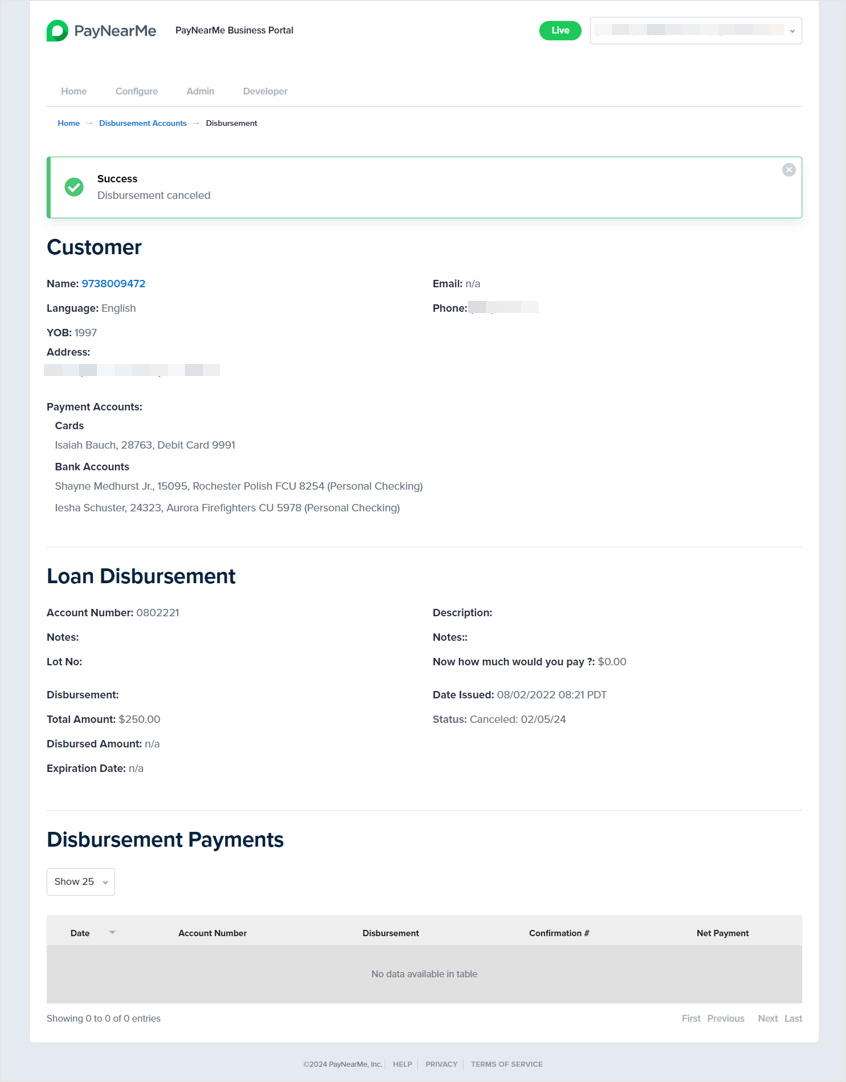
Canceling a Disbursement
Only staged disbursements in Unapproved and Pending (waiting on customer's input) status can be canceled. To cancel a staged disbursement, access the home screen in the Business Portal and then click Accounts under the Disbursements section. Use the dropdown in the datagrid filter field to select either Unapproved or Pending Disbursements. This will display all disbursements either waiting for approval or waiting for the consumer's input.
Searching for DisbursementsYou can also search for a specific disbursement account using the consumer's account number, name, email address, or mobile phone number.
Click the line that displays the disbursement. The disbursement's page displays.
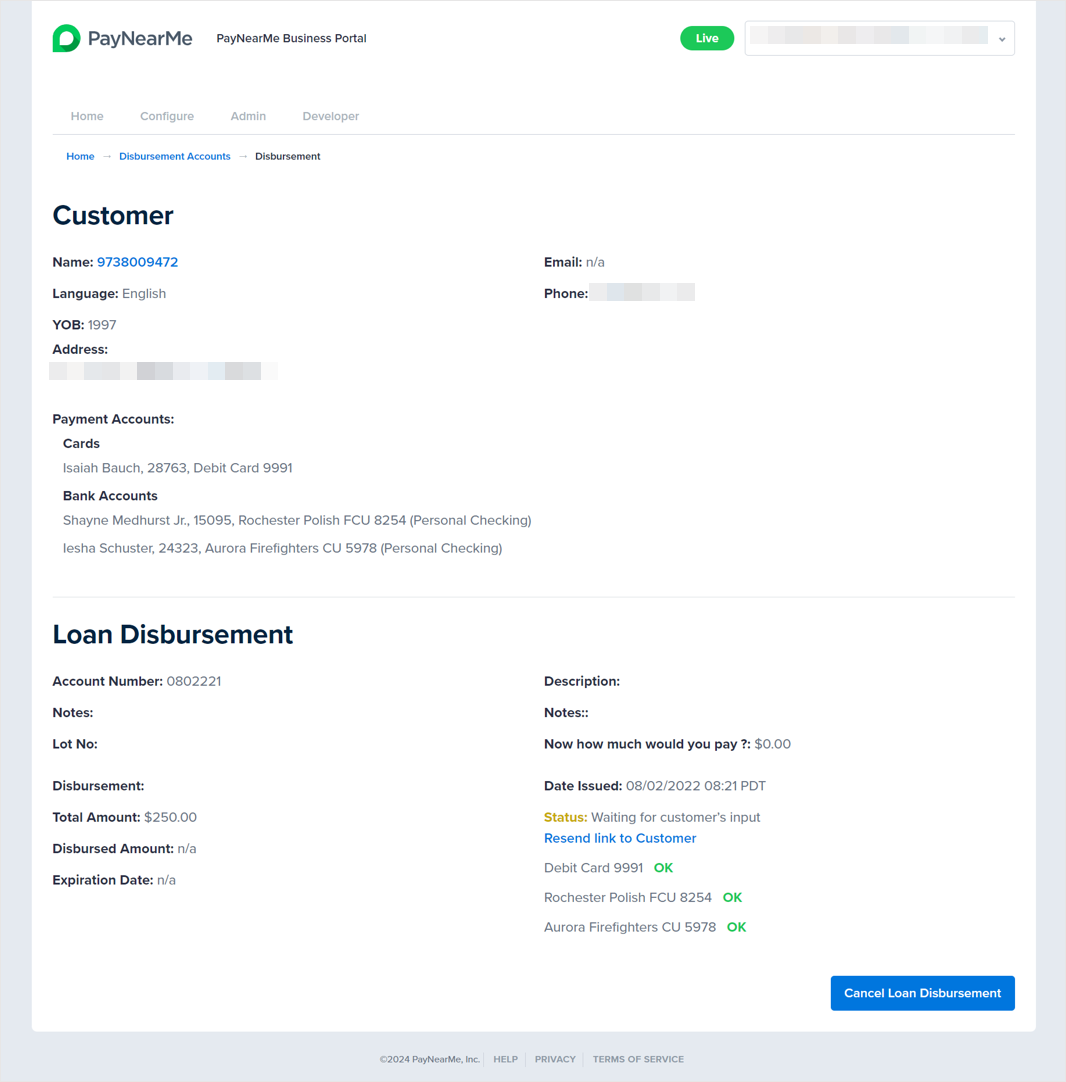
Click the Cancel Loan Disbursement button (or Cancel Adjustment or Cancel Refund--the text of the button changes depending on the type of disbursement). A message displays asking you to confirm the cancellation. Click OK to confirm the cancellation. The Business Portal displays a message indicating whether or not the disbursement was successfully canceled.