
Configuring an Azure Instance
Use the following settings when configuring PayNearMe on your Azure instance, which will use these settings to generate the SAML certificate for your site.
Sandbox vs. ProductionThe settings below are for the sandbox environment. You will need to generate a new certificate for the production environment.
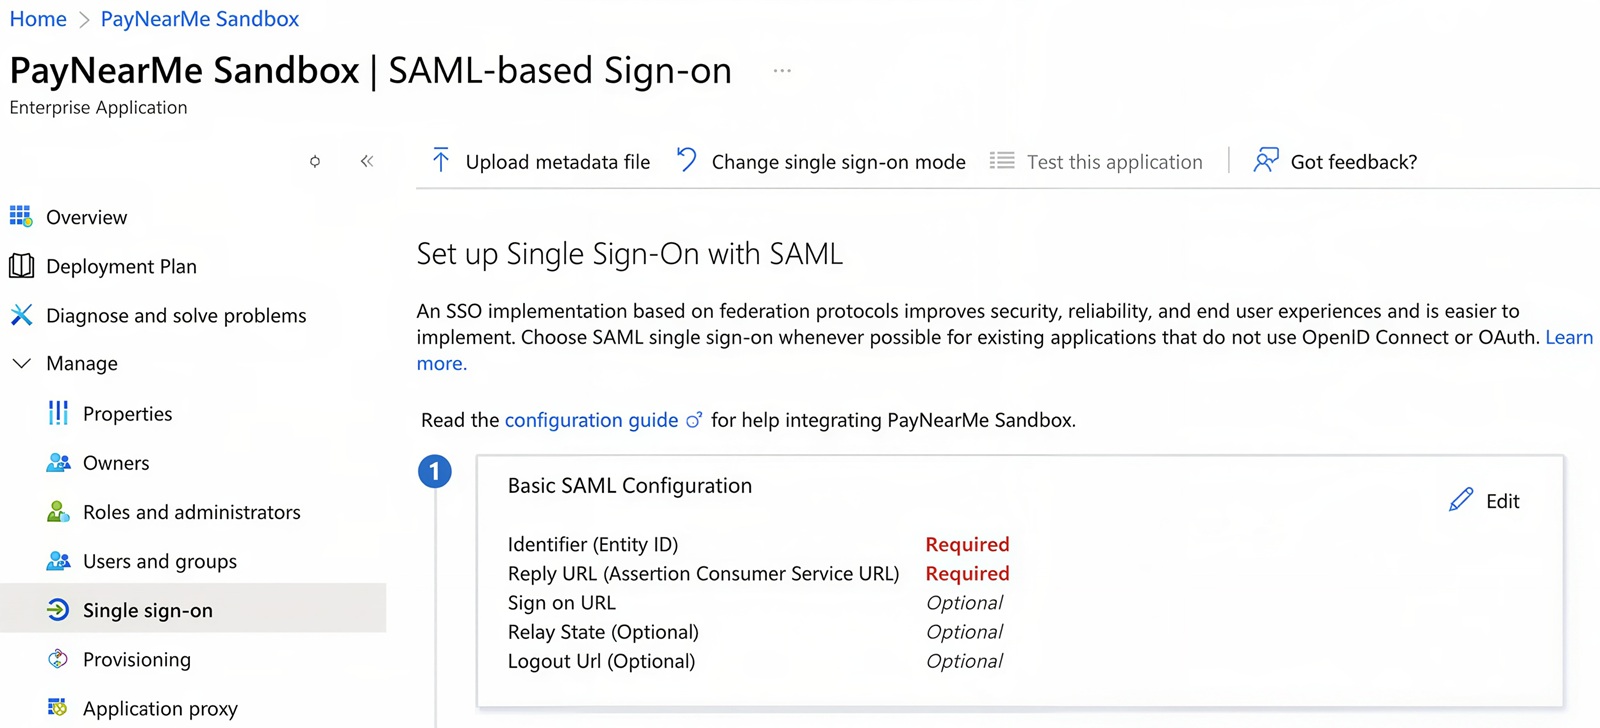
Basic SAML Configuration
| URL | Description |
|---|---|
| Identifier (Entity ID) | https://pro.paynearme-sandbox.com/users/saml/metadata |
| Reply URL (Assertion Consumer Service URL) | https://pro.paynearme-sandbox.com/users/saml/auth |
| Sign On URL | Optional |
| Relay State | Optional |
| Logout URL | Optional |
Attributes and Claims
| Attribute | Description |
|---|---|
| givenname | user.givenname |
| surname | user.surname |
| emailaddress | user.mail |
| name | user.userprincipalname |
| user_type | “bpo” |
| Unique User Identifier | user.userprincipalname |
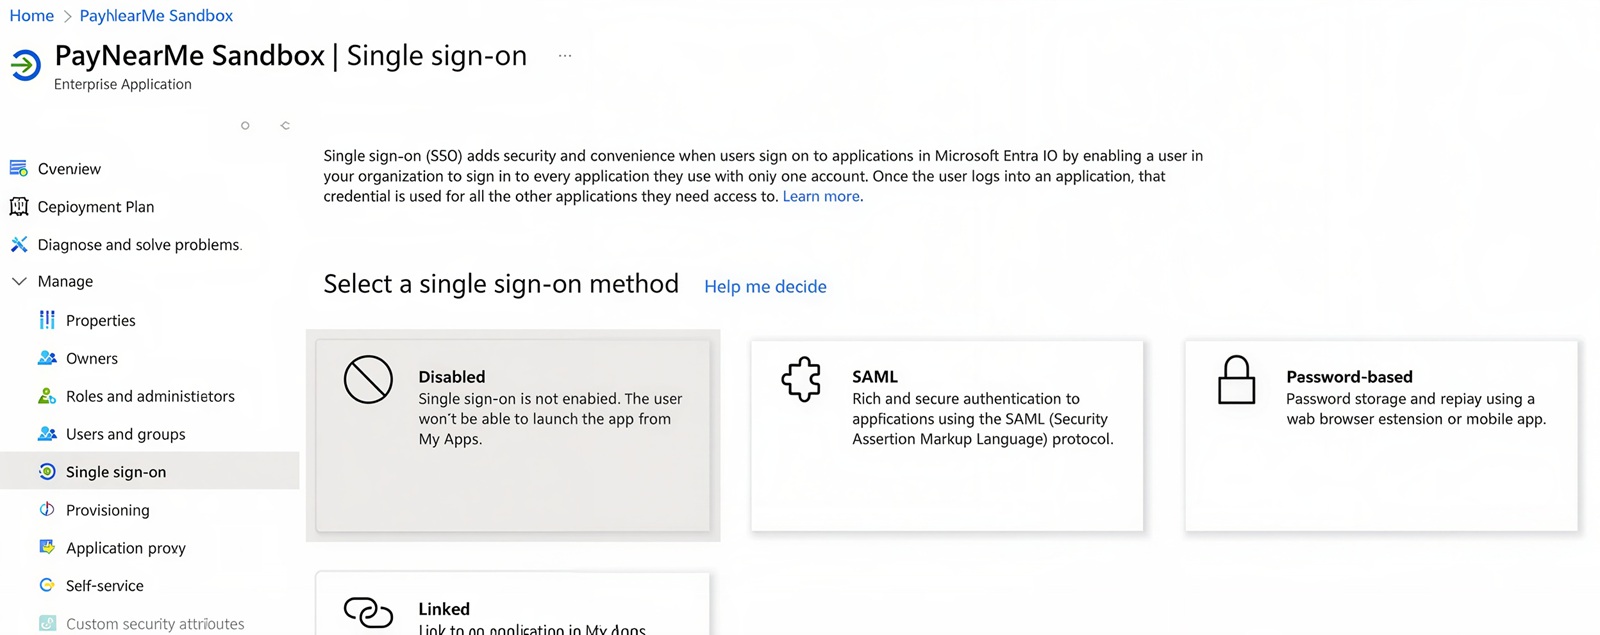
Setting Up Enterprise Applications
Define two Entra ID enterprise applications, one each for sandbox and production environments. The following are instructions for setting up the sandbox enterprise application. Repeat these instructions for production.
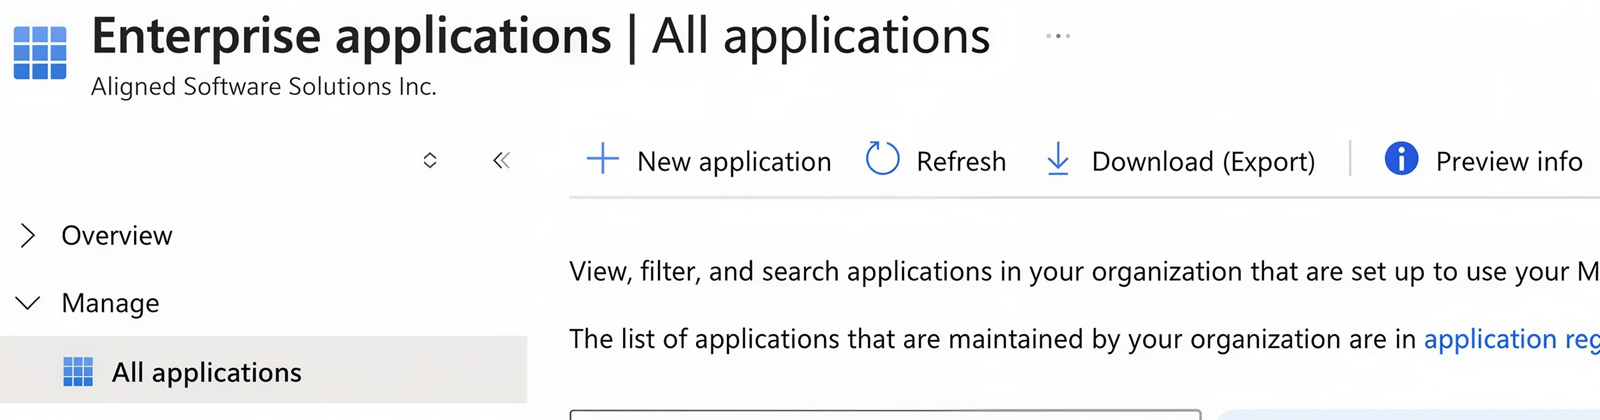
-
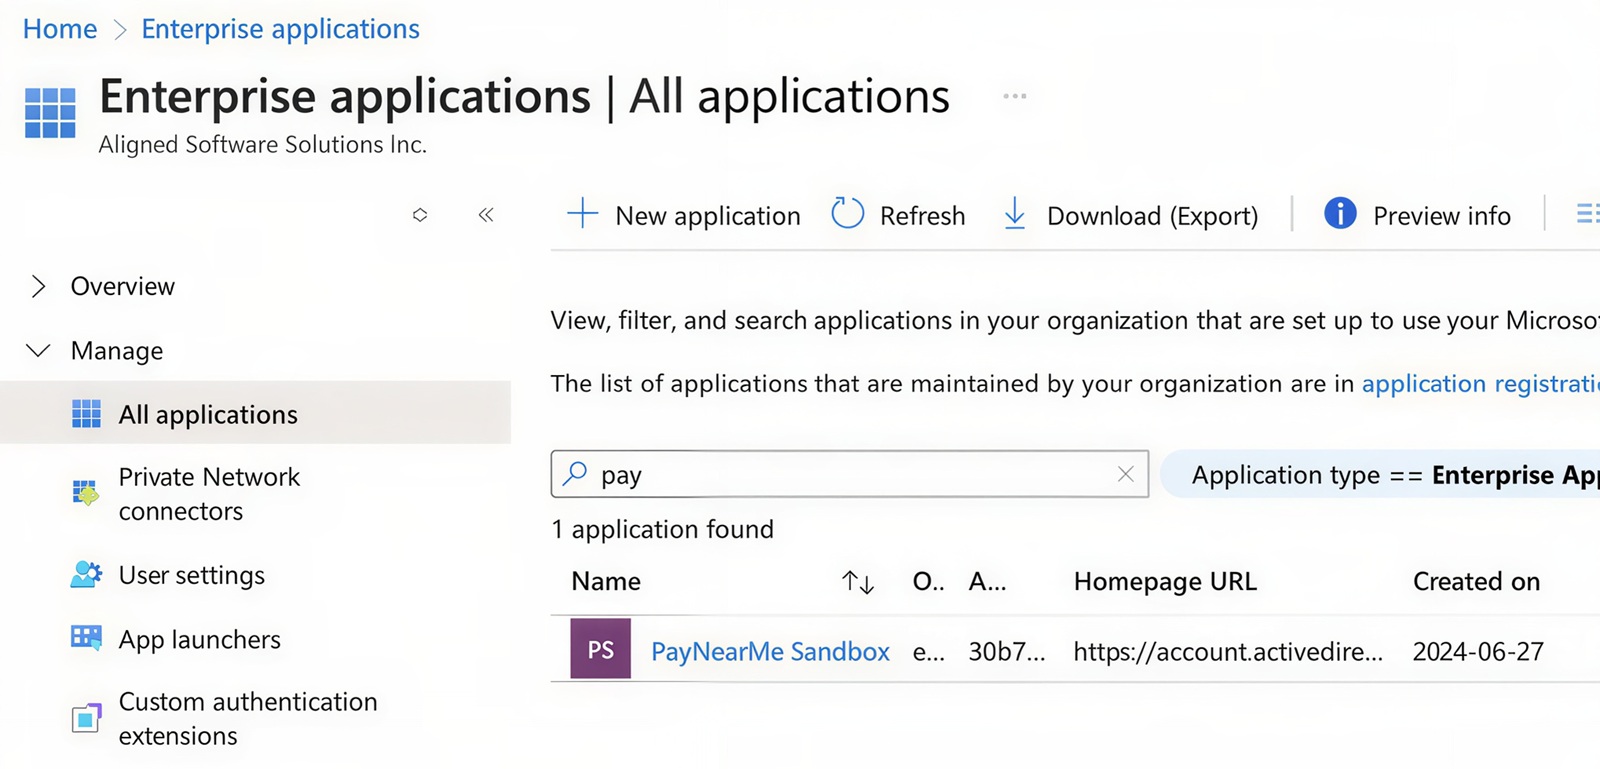
Click New application. In the Entra ID Enterprise applications > All applications blade.
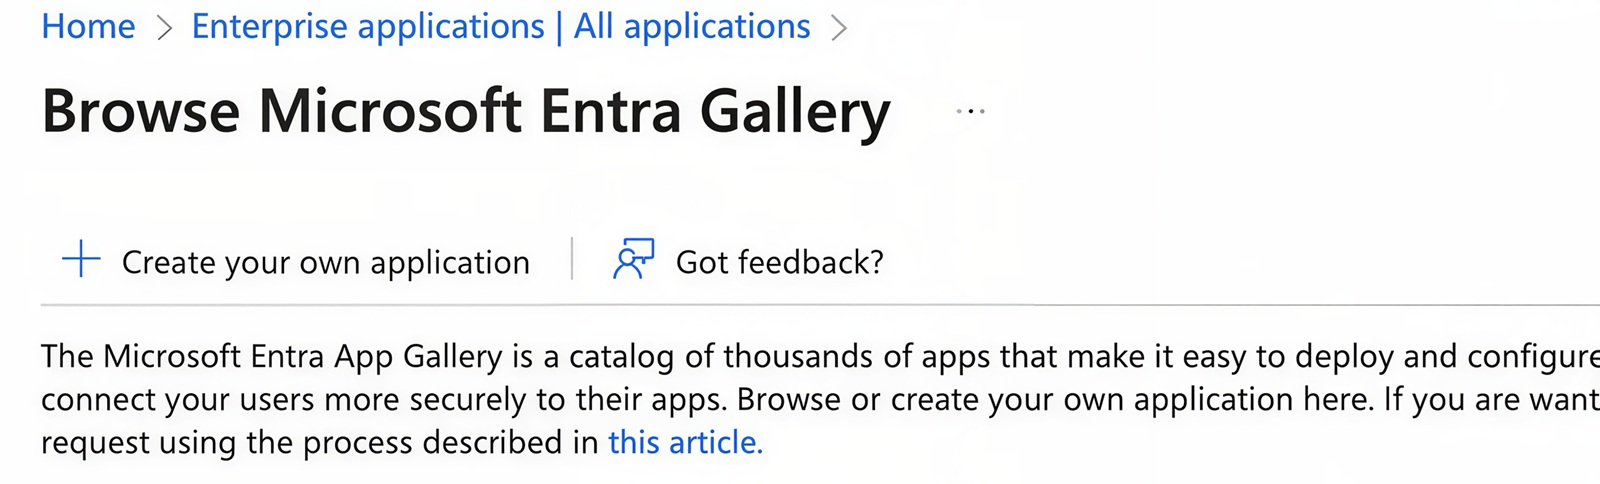
-
Click on Create your own application in the new page.
-
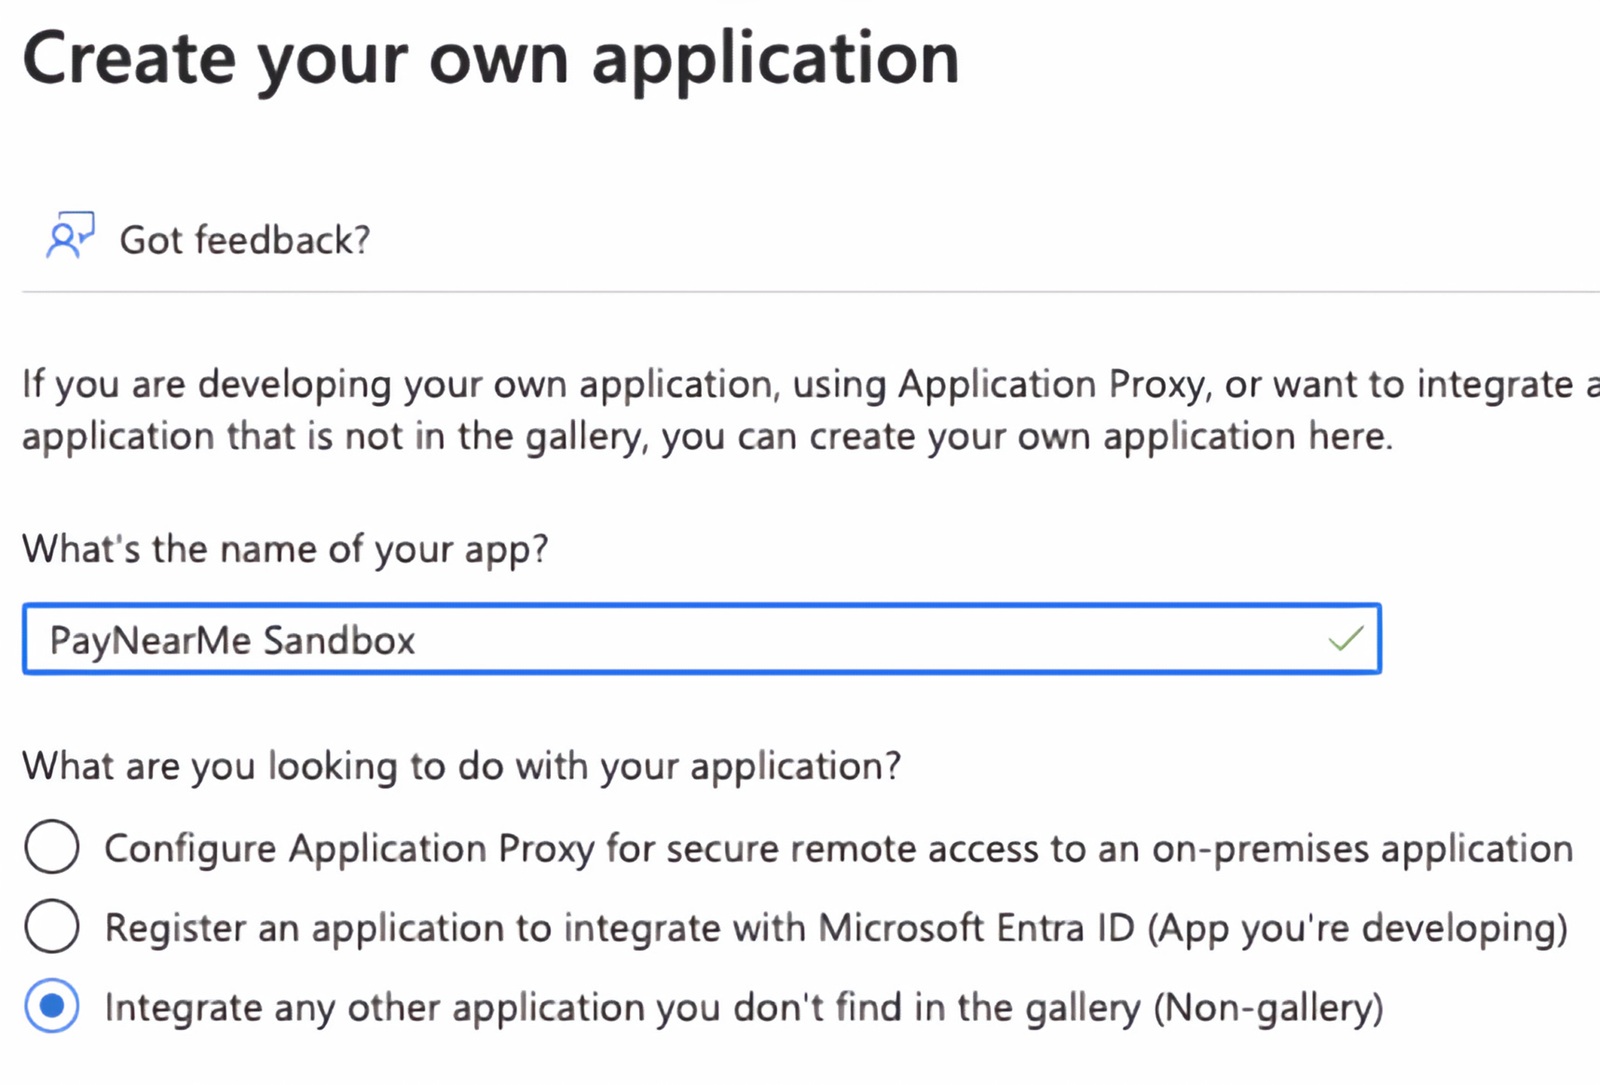
Enter
PayNearMe Sandboxas the name of the new app, and select Integrate any other application you don’t find in the gallery (Non-gallery).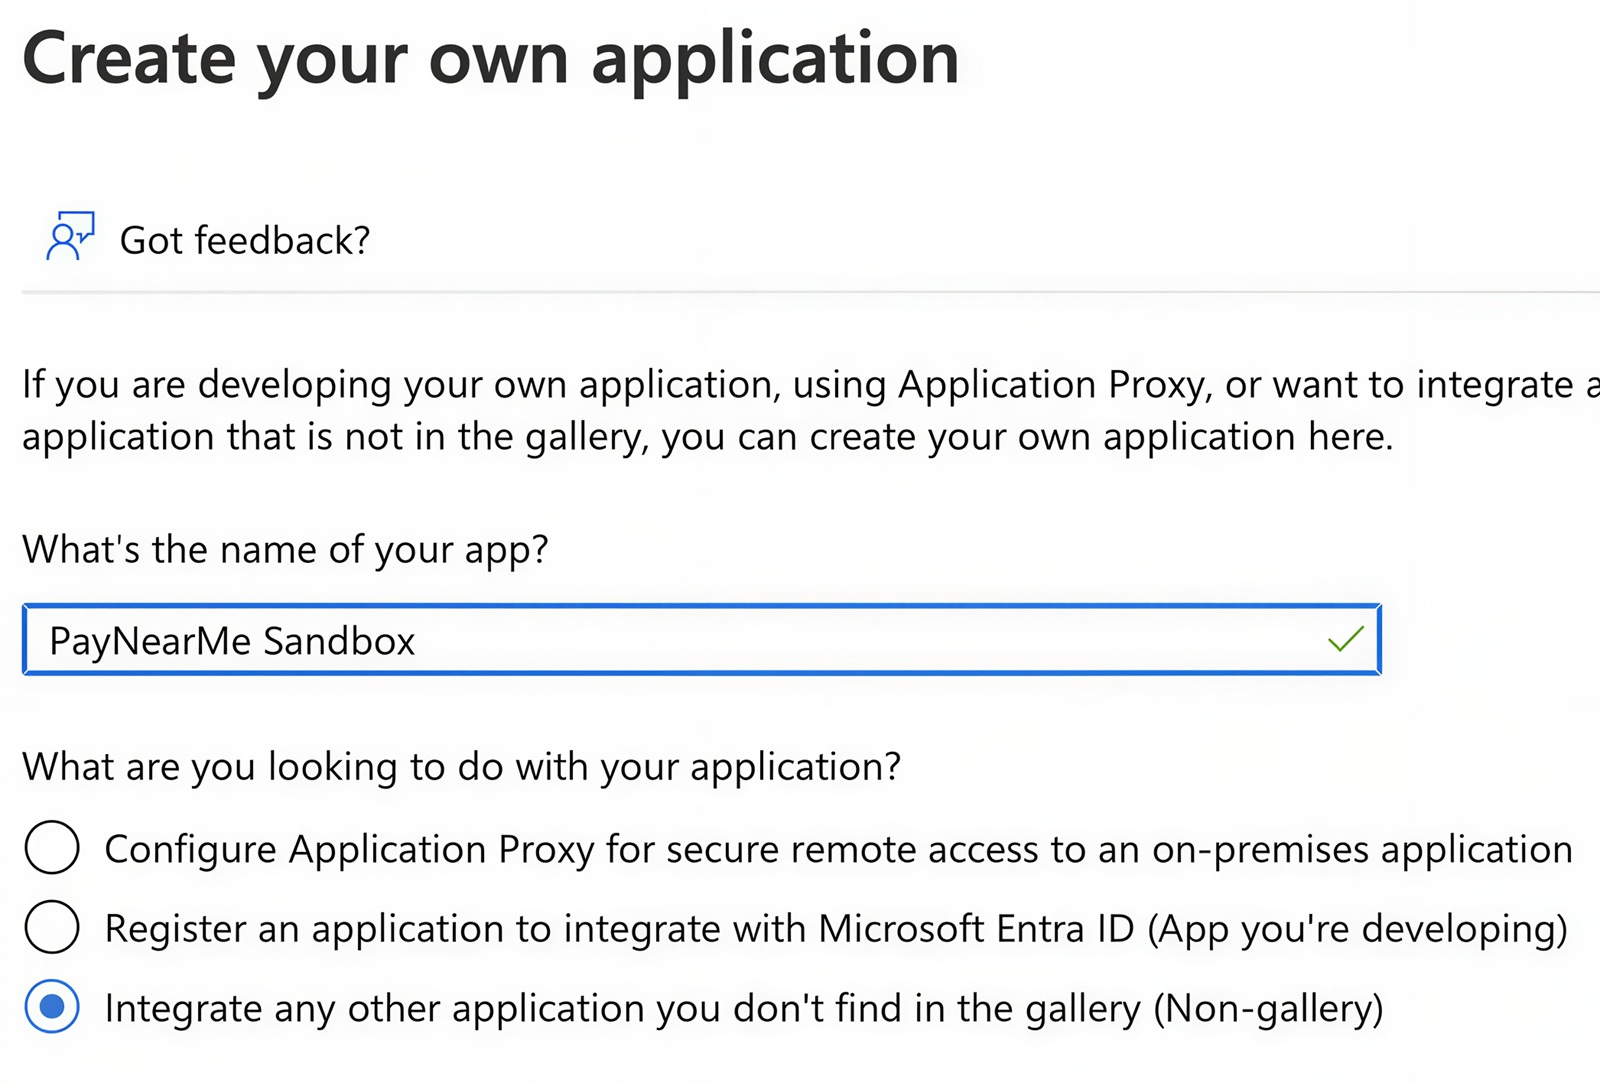
-
Open the Manage > Single sign-on blade for the newly created application.
-
Click edit in the Basic SAML Configuration box.
-
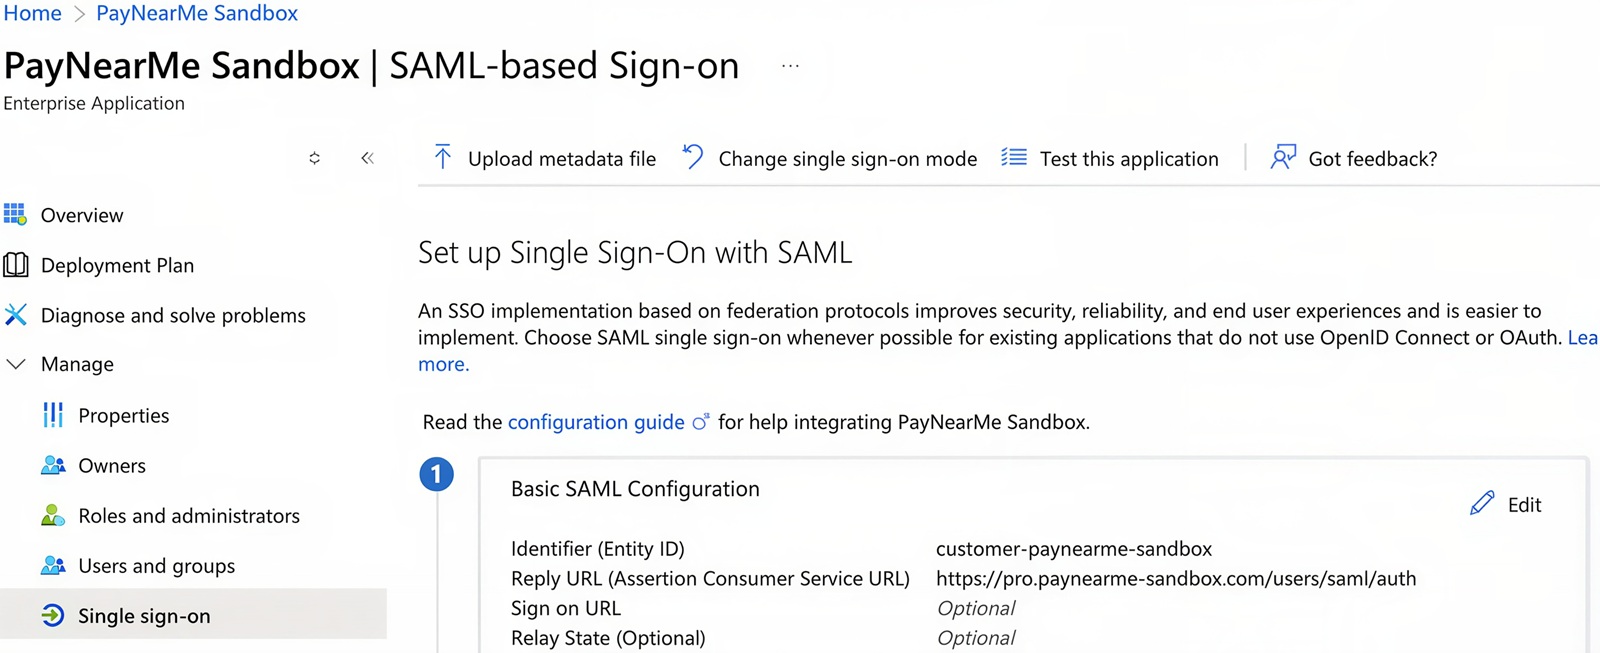
Add the provided instance id value in the Identifier (Entity ID).
-
Add
https://pro.paynearme-sandbox.com/users/saml/authas the Reply URL (Assertion Consumer Service URL). -
Click Save.
Configuring the SAML Claims Using Entra ID Security Groups
The user_type claim controls the application role assumed by the user in PayNearMe. The following instructions assume two application roles, agent and merchant, and one PayNearMe site, PayNearMe Sandbox.
-
Define one Entra ID security group for each application role. Choose a prefix that identifies the site, and append the application role to it. For example,
PayNearMe-Sandbox-, with the security groups beingPayNearMe-Sandbox-agentandPayNearMe-Sandbox-merchant.-
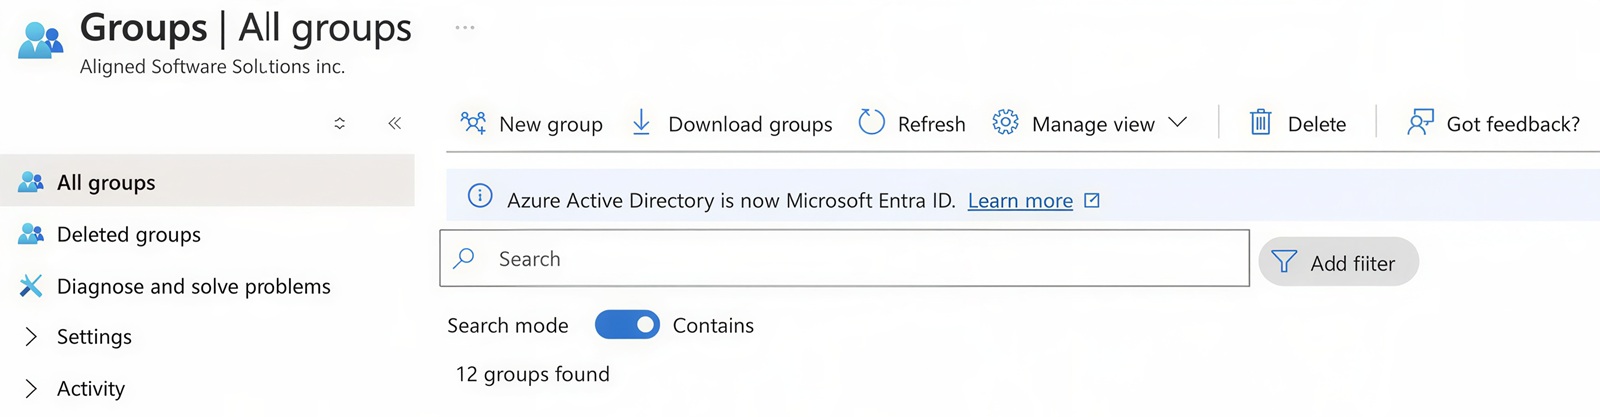
Open the Entra ID Groups > All groups blade in the Azure Portal:
-
Click
New group. -
Fill in the details below:
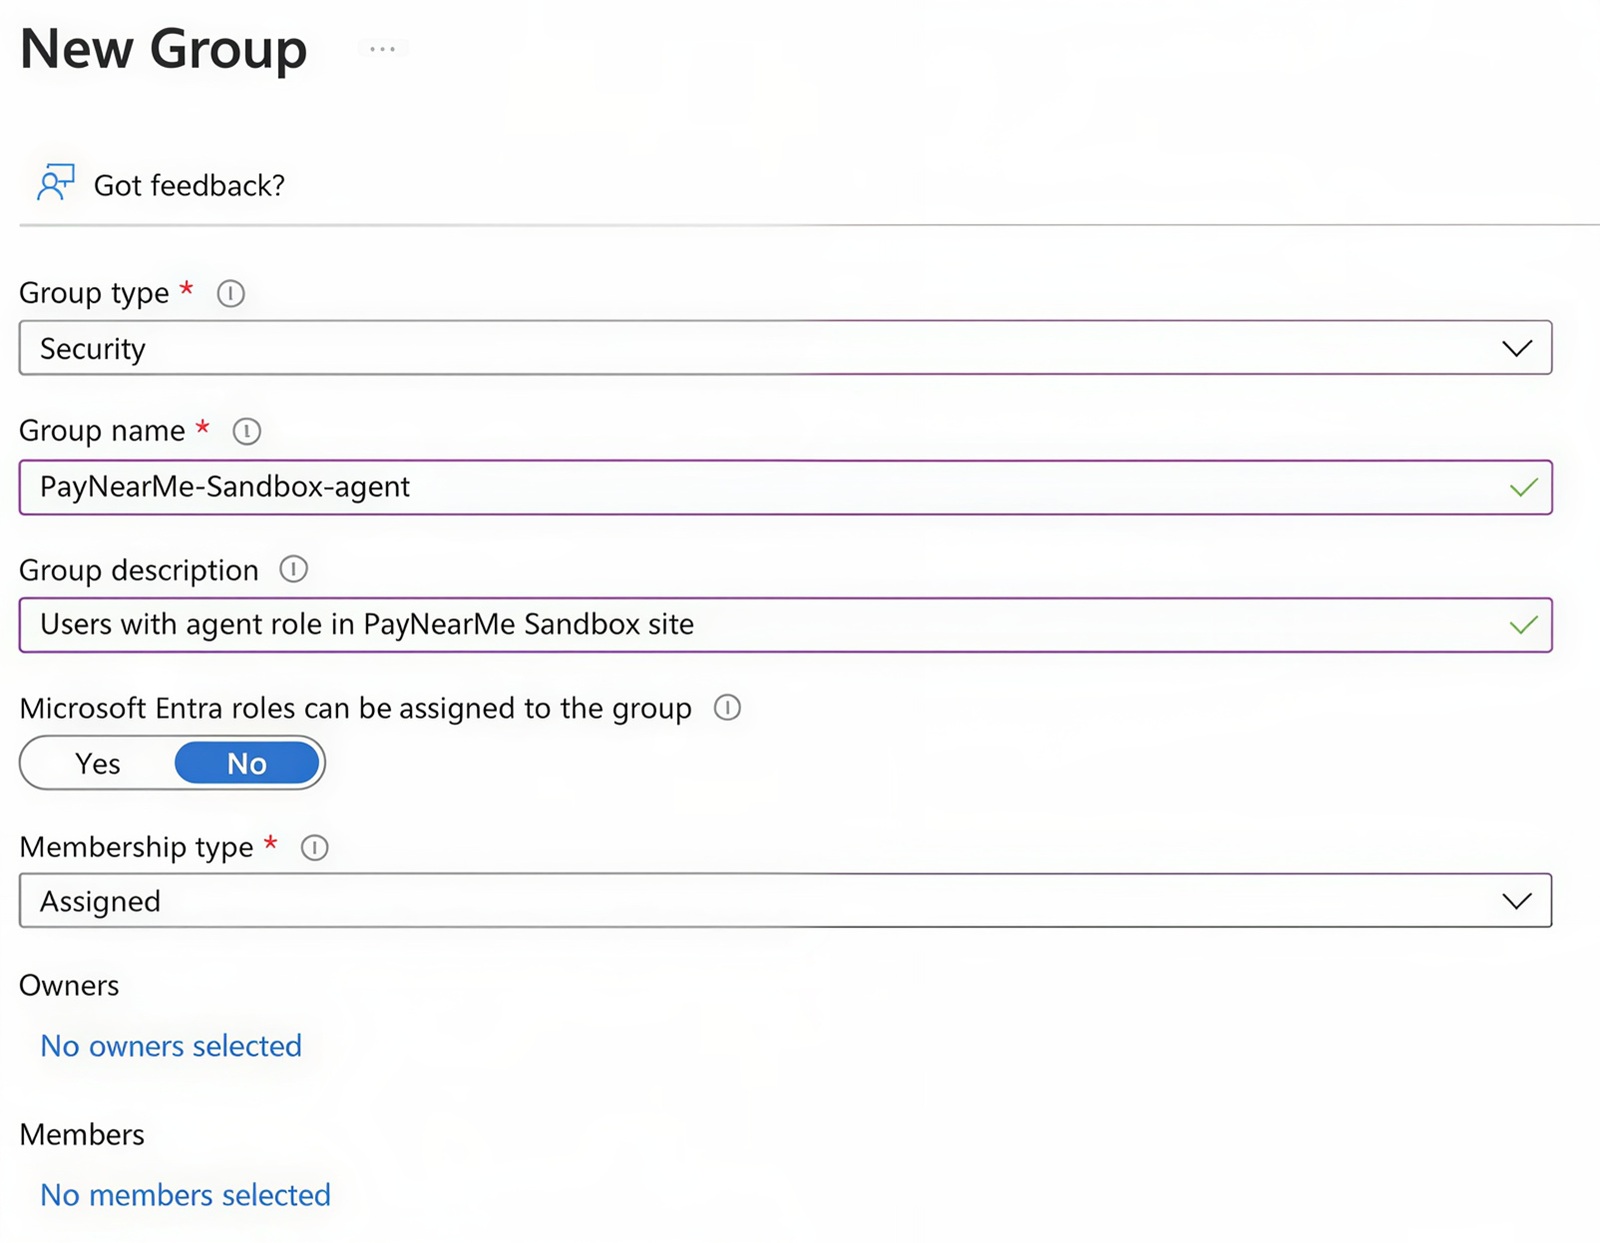
-
Click
Create. -
Repeat for all application roles.
-
-
Assign the security groups to the corresponding enterprise application.
-
Locate the enterprise application in the Enterprise applications blade:

-
Click on the enterprise application name.
-
Select the
Manage>User and groupssection. -
Click
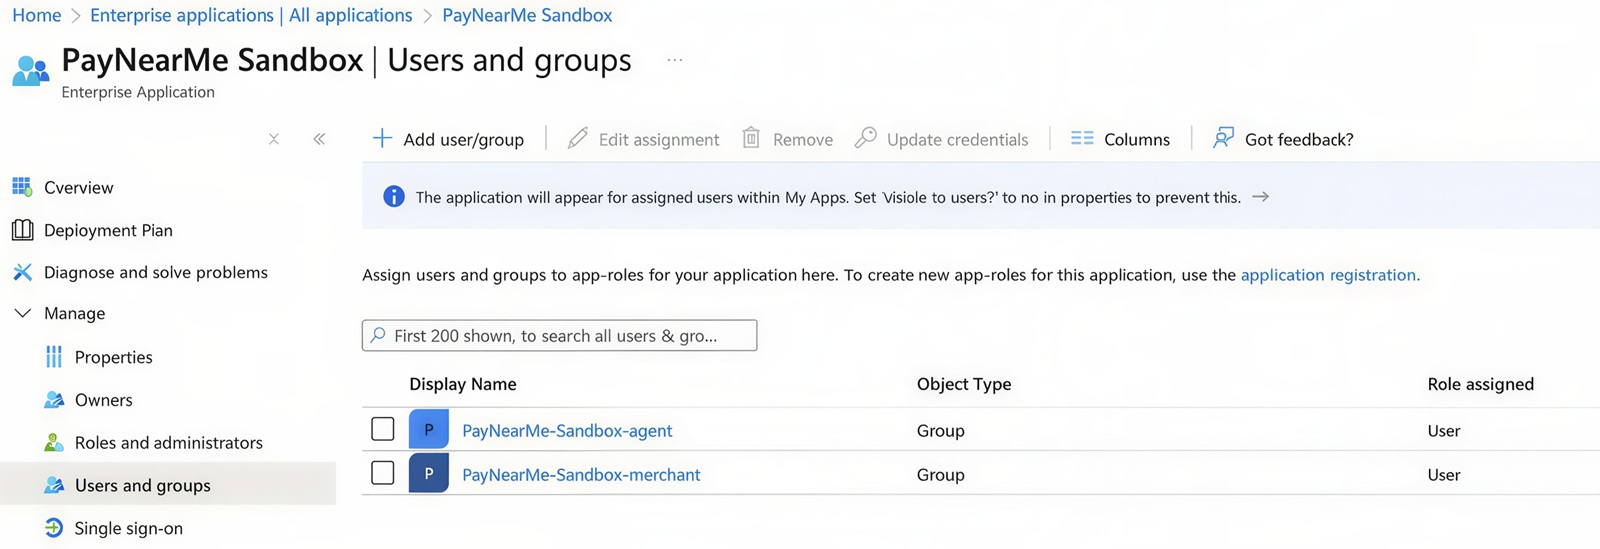
Add user/groupand add all security groups created in step 1. -
The final result should be:
-
-
Define the SAML claims.
-
Locate the enterprise application in the Enterprise applications blade:
-
Click on the enterprise application name.
-
Select
Single sign-on: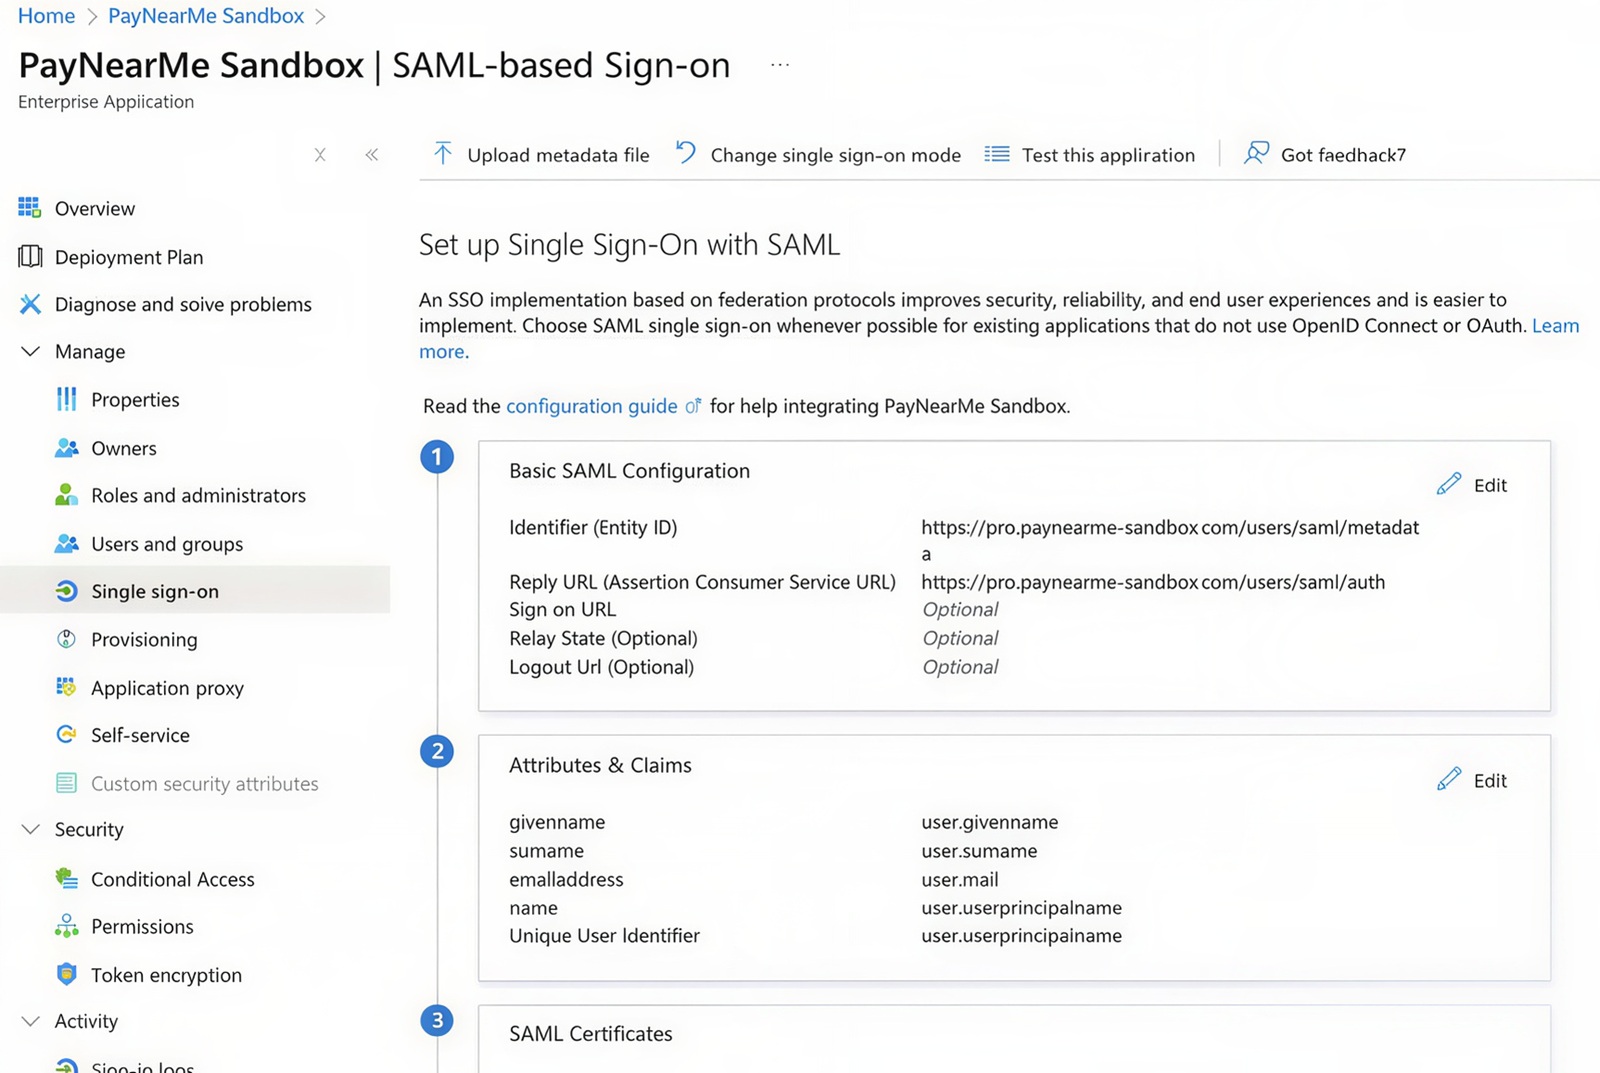
-
Click
EditunderAttributes & Claimssection.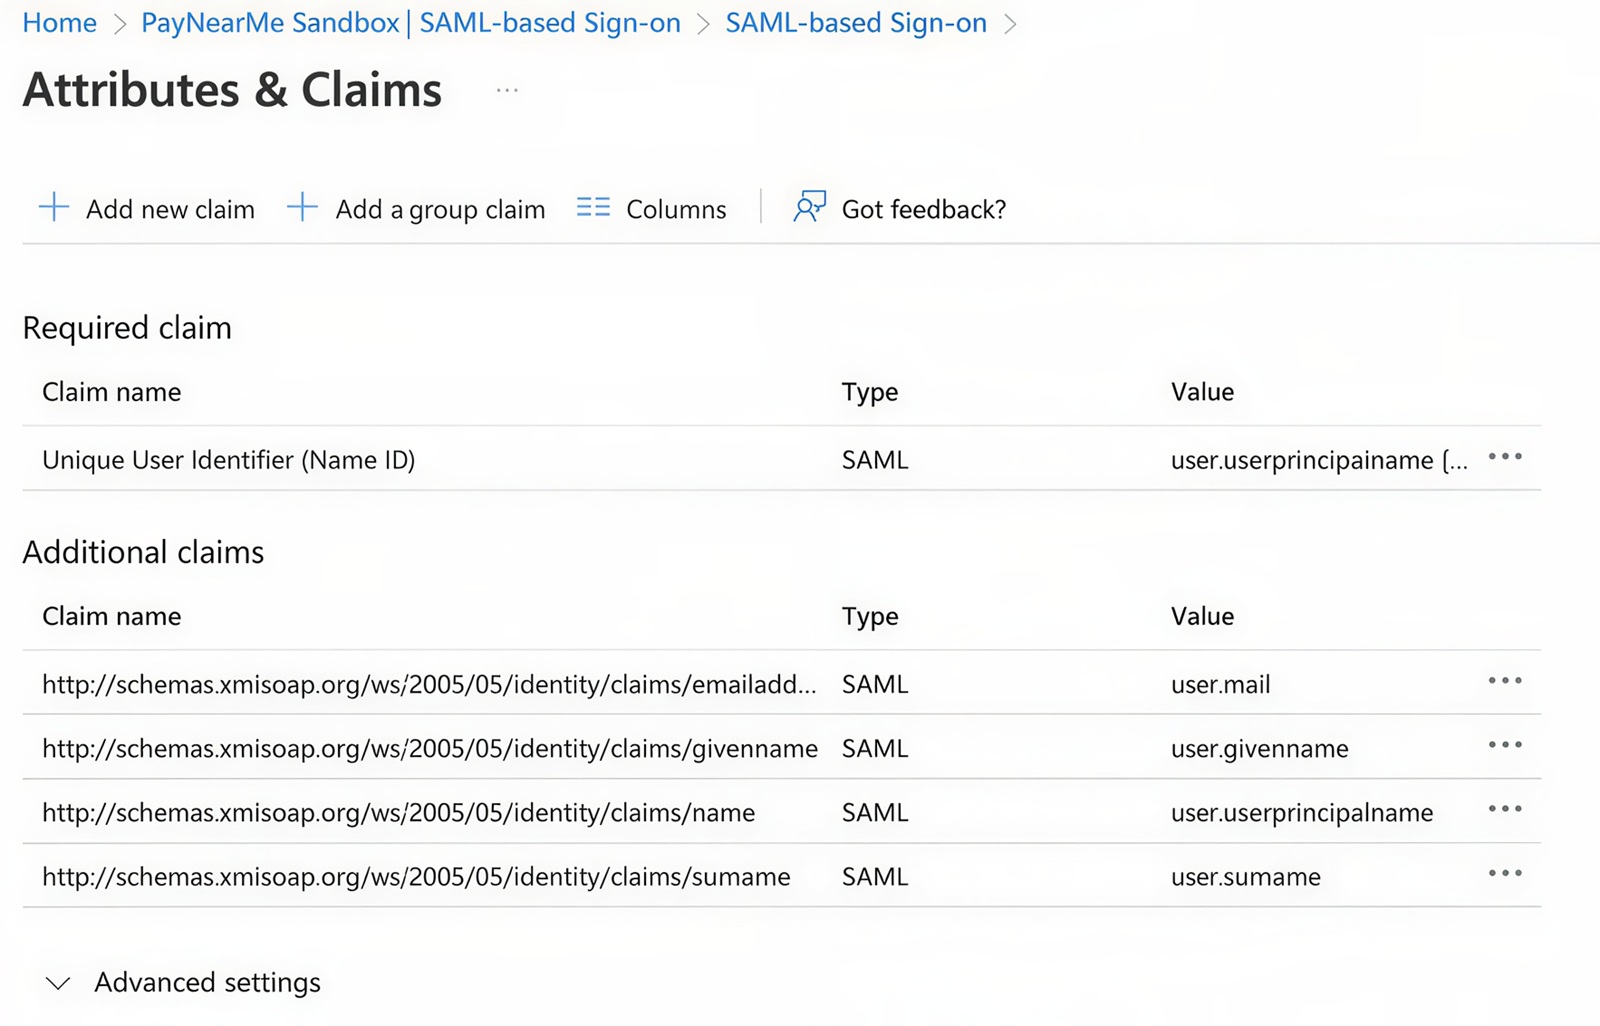
-
Delete all additional claims by clicking the
...menu next to each default claim, selectingDeleteand confirming. -
Add the following claims:
Name Source Value urn:mace:dir:attribute-def:emailAttributeuser.mailfirst_nameAttributeuser.givennamelast_nameAttributeuser.surnamesiteAttribute"<provided site value>"
-
Click
Add a group claimand enter the following (values listed in the text below
screenshot):Field Value Which groups associated with the user should be returned in the claim Groups assigned to the applicationSource attribute Cloud-only group display namesFilter groups Checked Attribute to match Display nameMatch with PrefixString PayNearMe-SandboxCustomize the name of the group claim Checked Name user_typeNamespace Leave empty Emit groups as role claim Unchecked Apply regex replace to groups claim content Checked Regex pattern ^PayNearMe-Sandbox-(?'role'.*)$Regex replacement pattern {role}Expose claim in JWT tokens in addition to SAML tokens Unchecked 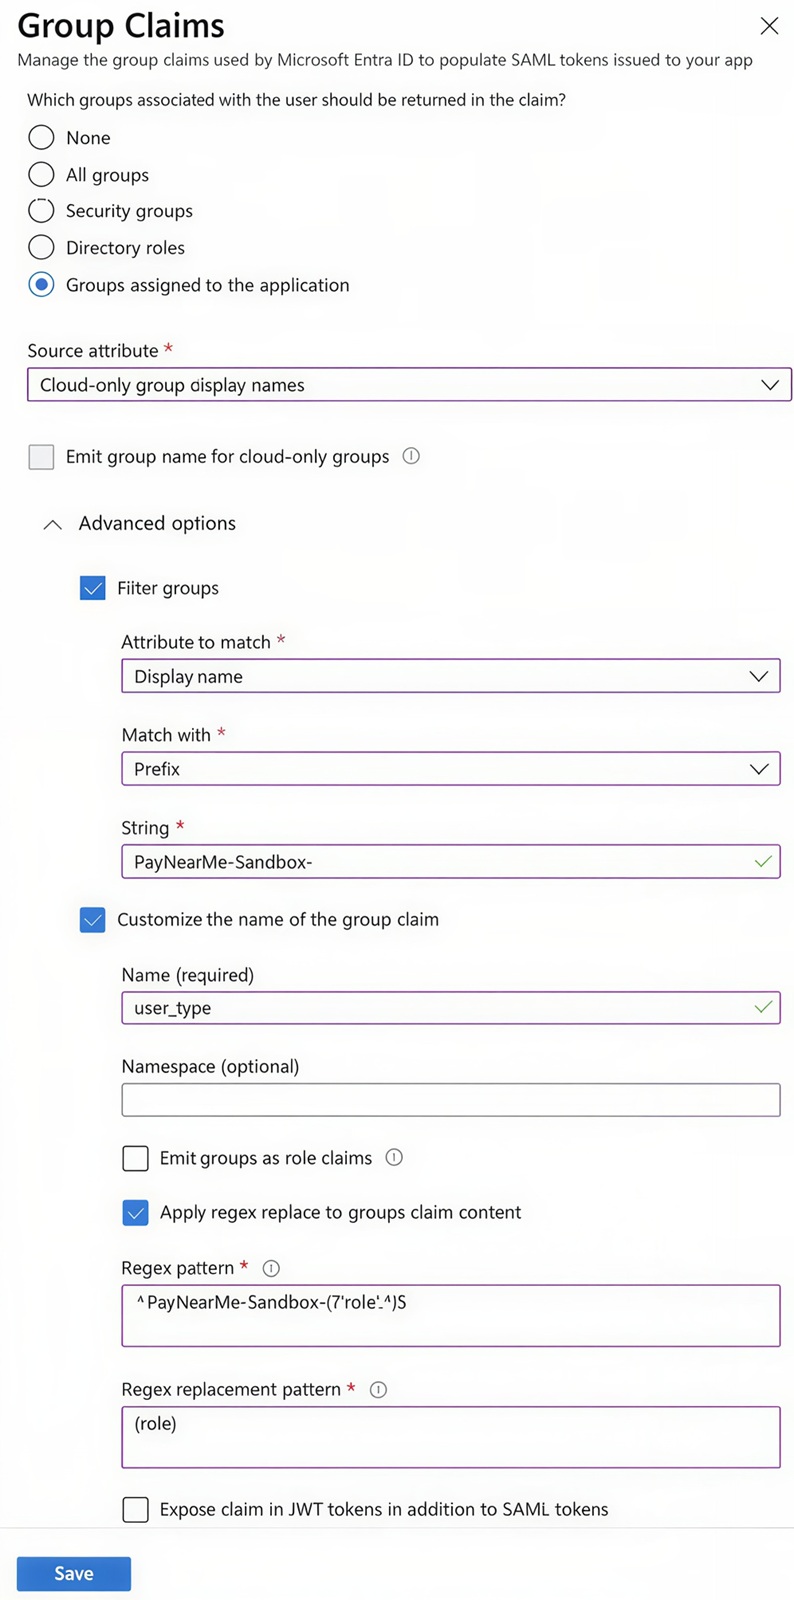
-
Click
Save. -
The
Attributes & Claimsshould be: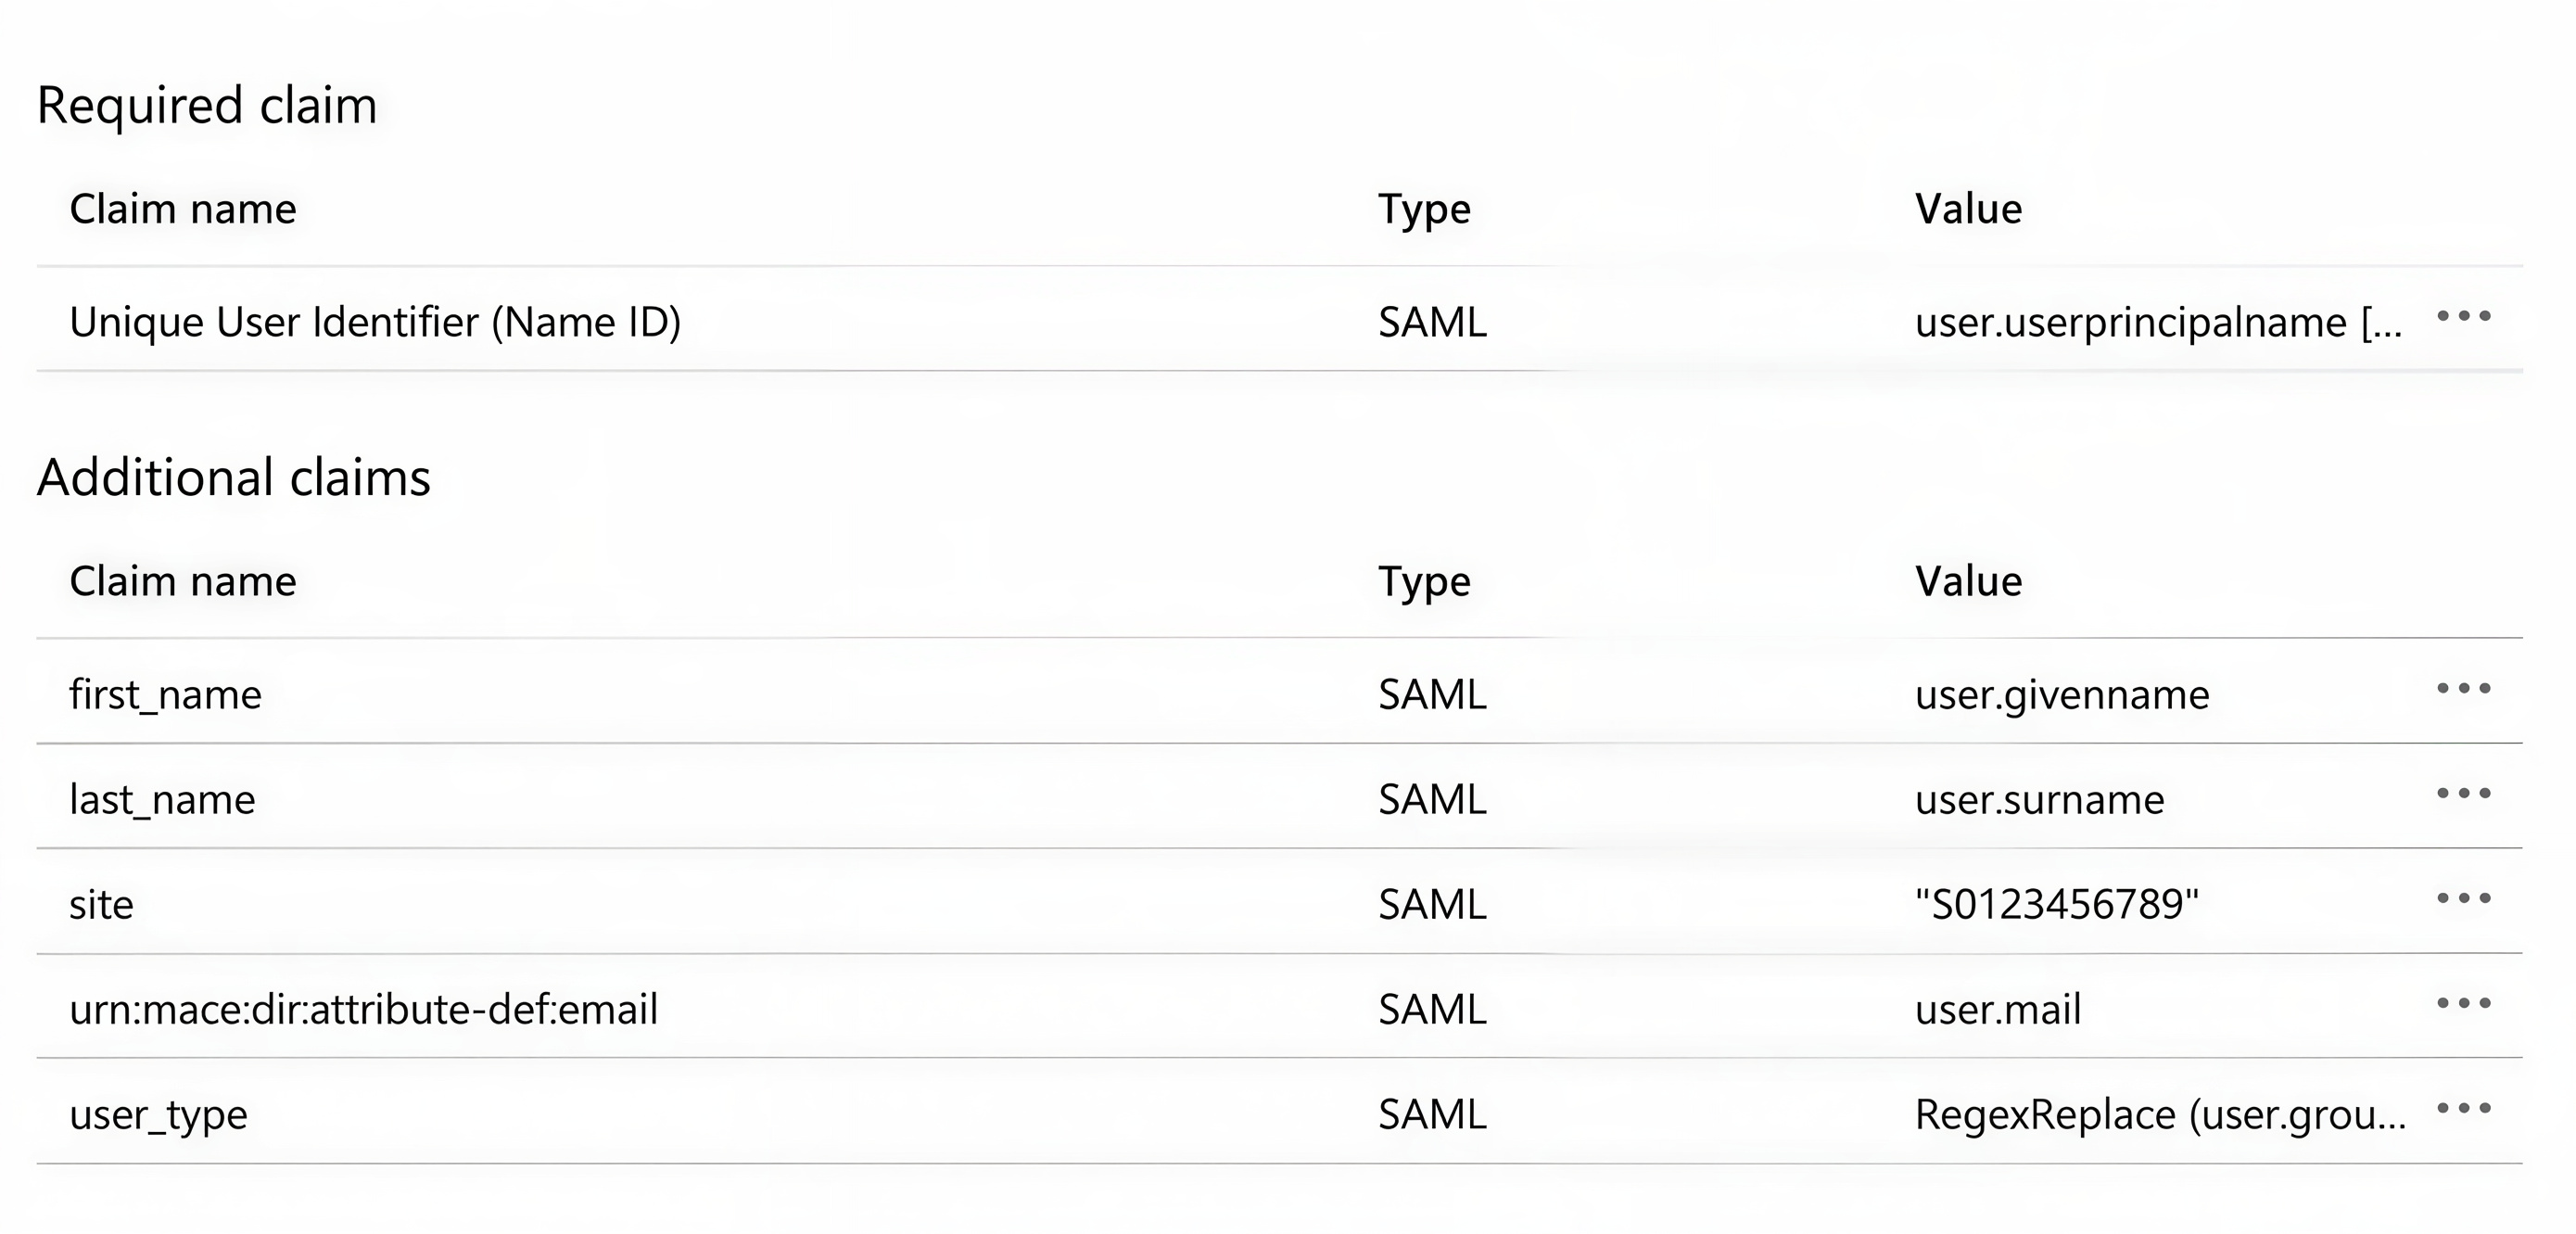
-
Add users to the security groups as appropriate. Users will now be redirected and logged in to the PayNearMe site when accessing the enterprise application.
-
Users and Security GroupsA user should only be added to a single security group for each site. For example, if you have configured two sites,
PayNearMe SandboxandPayNearMe Production, a user can belong toPayNearMe-Sandbox-agentandPayNearMe-Production-merchant, but not toPayNearMe-Sandbox-agentandPayNearMe-Sandbox-merchant. In the latter scenario the resultinguser_typeclaim forPayNearMe Sandboxwill be malformed and the user won't be able to access the
PayNearMe site.
Generating Connection Values
After generating and sending PayNearMe the SAML certificate for your site, we’ll use the certificate to generate the certificate fingerprints and login URL for your configuration.
Parameter | Description | Example |
|---|---|---|
Azure AD Identifier | The Azure Active Directory identifier. | https://sts.windows.net/17c47e7e-2b45-48b1-a5ba-5df2bb60cce5/ |
SP Entity ID | The SP Entity ID is a URL where a service provider publishes public information about its SAML configuration. The metadata document published by the service provider shows its public certificate that can be used to verify the signature of authentication requests initiated from the service itself. This ID typically includes the business name, environment, and type of SSO configuration. | |
Certificate Fingerprint | The Identity provider (Idp) certificate fingerprint is exchanged out-of-band between the sender and the receiver and is configured on the receiving end. It uniquely identifies a certificate with the public key that the sender uses to sign the SAML messages that it sends. In most cases a client will supply PayNearMe with a X509 certificate within a metadata file which then needs to be converted into a thumbprint. For example,
To convert the X509 certificate to a thumbprint, complete the following steps:
| |
IdP Cert Fingerprint Algorithm | Use the | http://www.w3.org/2001/04/xmldsig-more#rsa-sha1 |
Login URL | The identity provider portal URL where users will sign-on. | https://login.microsoft.com/17c47e7e-2b45-48b1-a5ba-5df2bb60cce5/saml2 |
*This algorithm has been deprecated and may not work.