
Managing Users
Before your team can begin managing consumer and payment data in the PayNearMe Business Portal, you’ll first need to establish user accounts for your staff. Each account is tied to a specific role—a defined collection of permissions that govern access to portal features such as customer management, payments, disbursements, communications, and reporting. Your PayNearMe Technical Account Manager (TAM) will initially configure the Admin user(s), who hold comprehensive privileges, including adding and managing users. From there, Admins can dynamically assign tailored roles to additional team members, ensuring each individual only accesses the modules and functionality pertinent to their responsibilities—whether that involves viewing payments, sending communications, initiating disbursements, or processing refunds.
The following section provides a detailed overview of how to create and manage user accounts in the Business Portal, along with the access permissions associated with each role.
Understanding the Different Permissions
Each role is comprised of a curated list of different permissions that grant access to different screens and functionality in the Business Portal and Agent Interface. The following table provides a description of each permission that can be included in a role.
| Permission | Description |
|---|---|
| Admin | Provides access to the Admin tab where users can edit business details, view/add users, and review the site’s charge history and invoices (if available). |
| Create Customers/Accounts | Grants access to the Customers section and gives the user the ability to create customers and accounts for payments and disbursements. NOTE: Requires the View Customers/Accounts permission. |
| Edit Customers/Accounts | Grants access to the Customers section and gives the user the ability to edit customer and account information such as name, email, and phone number (NOTE: This does not include the preferred phone number as only the consumer can edit this value.) for payments and disbursements. |
| View Customers/Accounts | Grants access to the Customers section where the user can view customer and account information for payments and disbursements. |
| View Payments | Grants access to the Payments section where the user can view payment information. |
| Configure | Grants access to the Configure tab where users can update merchant details (e.g., edit the merchant logo, configure callback URLs, etc.) and the Business Portal and Agent Interface features can be configured. |
| Communicate | Gives users the ability to send emails and texts to consumers. |
| Agent Interface | Gives the user access to the Agent Interface where he/she can view customer and payment data. NOTE: All merchant users should have access to the Agent Interface. |
| Developer | Provides access to the Developer tab where the user can access API documentation, create and manage their API keys, review API call logs, and use the callback debugger. |
| Manage Users | Provides access to the Admin tab where business portal users can be managed (i.e., created, edited, and/or removed). |
| Reports | Provides access to Reconciliation and Settlement reports in the Payments section. |
| Agent Interface Electronic Payments | Grants the ability to process an electronic payment (e.g., ACH, card, Apple Pay, and Google Pay) within the Agent Interface. NOTE: Requires the Agent Interface permission. |
| Refund Electronic Payments | Grants the ability to initiate a partial or full refund for an electronic payment. |
| Supervisor | Provides ability to override merchant business rules. For example, if there is a minimum payment requirement set by a business rule, then a supervisor would be able to override this restriction and process the payment. NOTE: This permission only displays when Business Rules are enabled and active for a client site. |
| Alternate Autopay Authorizations | Provides access to a different list of autopay authorization methods including a telephone recording, a signed authorization agreement, or a clicked-through web flow where the consumer agrees to scheduled payments. |
| Schedule Autopay | Grants the ability for a user to set a recurring autopay schedule in the Agent Interface. |
| Cancel Autopay | Grants the ability for a user to cancel a recurring autopay schedule in the Agent Interface. |
| Waive Fees | Grants the ability to waive fees. NOTE: Requires an Agent Waived pricing plan. |
| Dashboards | Provides access to the Insights Dashboards. |
| View Disbursements | Provides access to the Disbursements section where users can view disbursement details. It also enables users to view disbursements from the Customer Details screen. NOTE: This permission must be enabled with the the View Payments permission. |
| Approve Disbursements | Provides access to the Disbursements section where users can approve disbursements. It also enables users to approve disbursements from the Customer Details screen. NOTE: To minimize risk, PayNearMe recommends that user accounts be granted either the Approve Disbursements permission or the Create Disbursements permission, but not both. |
| Create Disbursements | Provides access to the Disbursements section where users can create disbursements. It also enables users to create disbursements from the Customer Details screen. NOTE: To minimize risk, PayNearMe recommends that user accounts be granted either the Approve Disbursements permission or the Create Disbursements permission, but not both. |
| Cancel Disbursements | Provides access to the Disbursements section where users can cancel disbursements. It also enables users to cancel disbursements from the Customer Details screen. |
| No Card Entry | Prevents users from adding debit or credit cards in the Business Portal/Agent Interface. |
| No ACH Entry | Prevents users from adding bank accounts in the Business Portal/Agent Interface. |
| Agent Cannot Edit | Prevents users from editing consumer information in Agent Interface. |
| Cannot Cancel Payments | Prevents users from canceling unprocessed payments in the Business Portal/Agent Interface. |
| Chargeback Disputes | Grants access to the Disputes and Returns screen and gives users the ability to dispute chargebacks. |
| Manage Risk | Grants the user the ability to unblock ACH payment methods that were previously blocked because of returns. |
| Sensitive Data | Grants the user access to view Personal Identifiable Information (PII). |
| Beta Features | Grants access the Beta Features section where users can preview and test upcoming features to the Business Portal. |
Creating Users in the Business Portal
Once your PayNearMe TAM has set up your Administrator account, you can log into the Business Portal and begin creating user accounts.
Creating an Individual User Account
To create one user account at a time, complete the following steps:
-
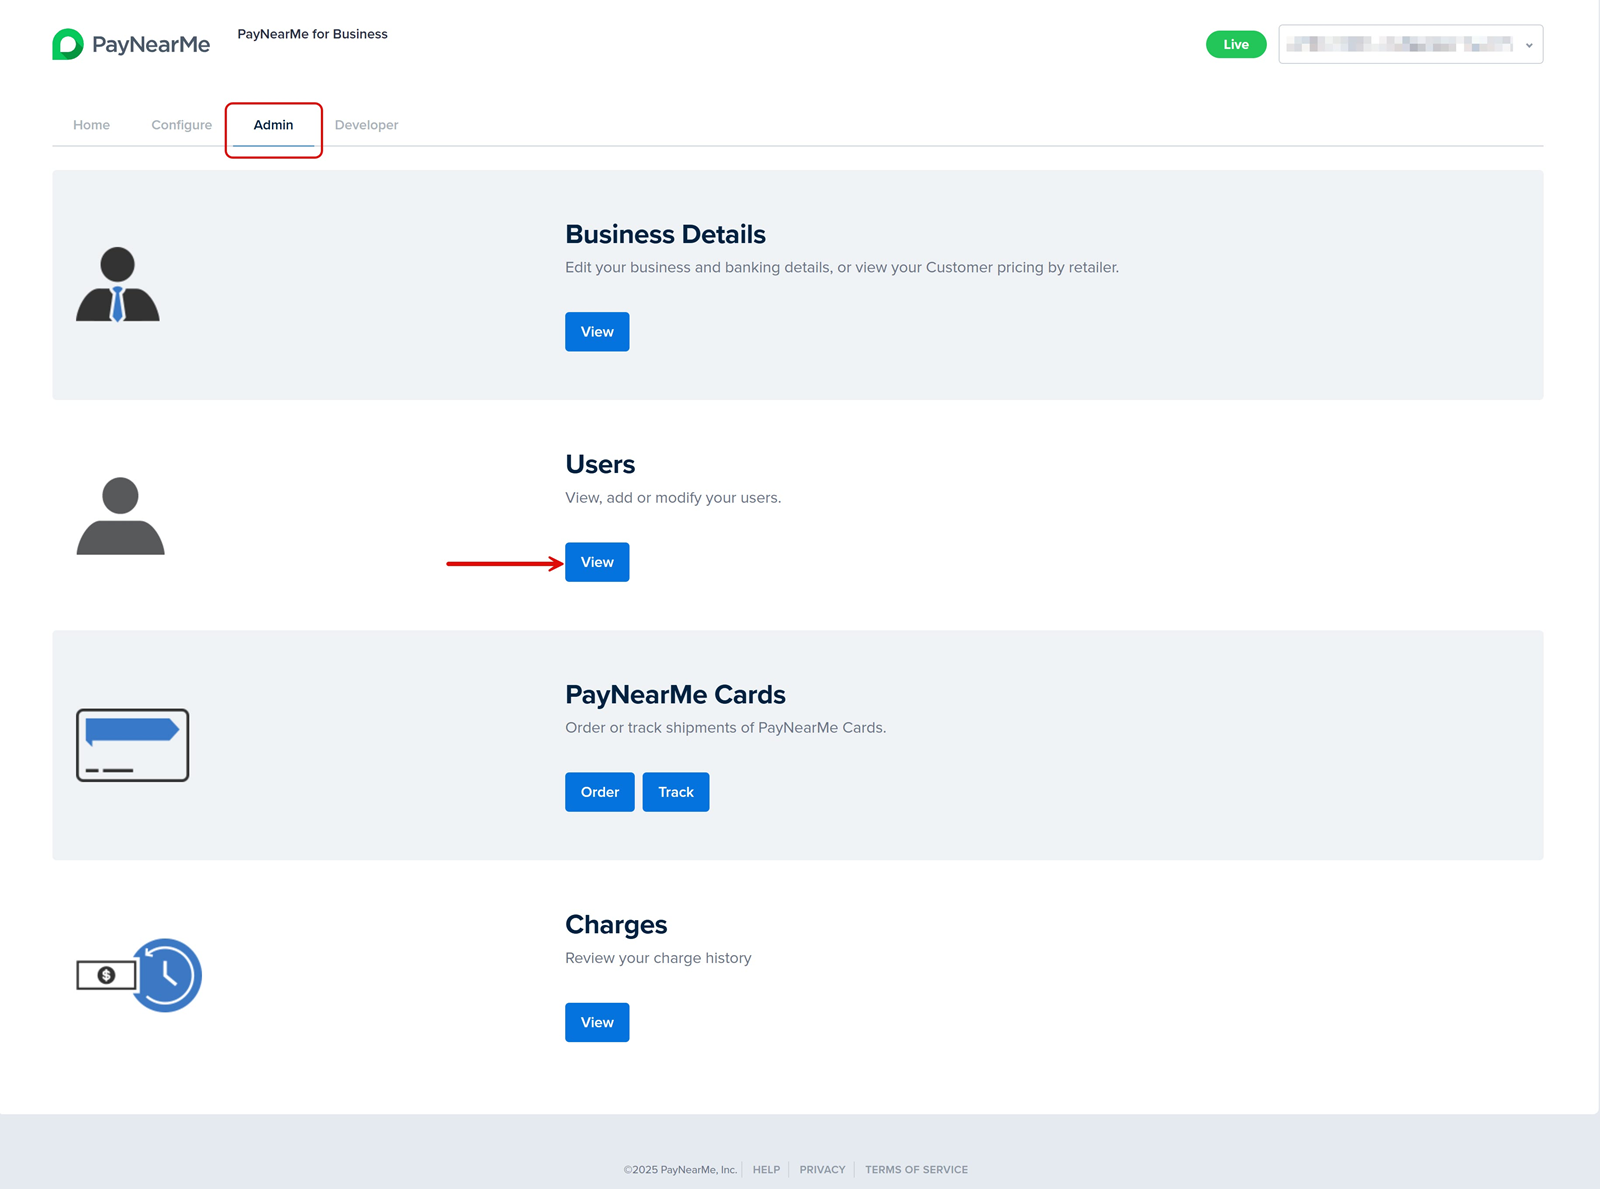
From the Business Portal homepage, click the Admin tab and then View in the Users section.
-
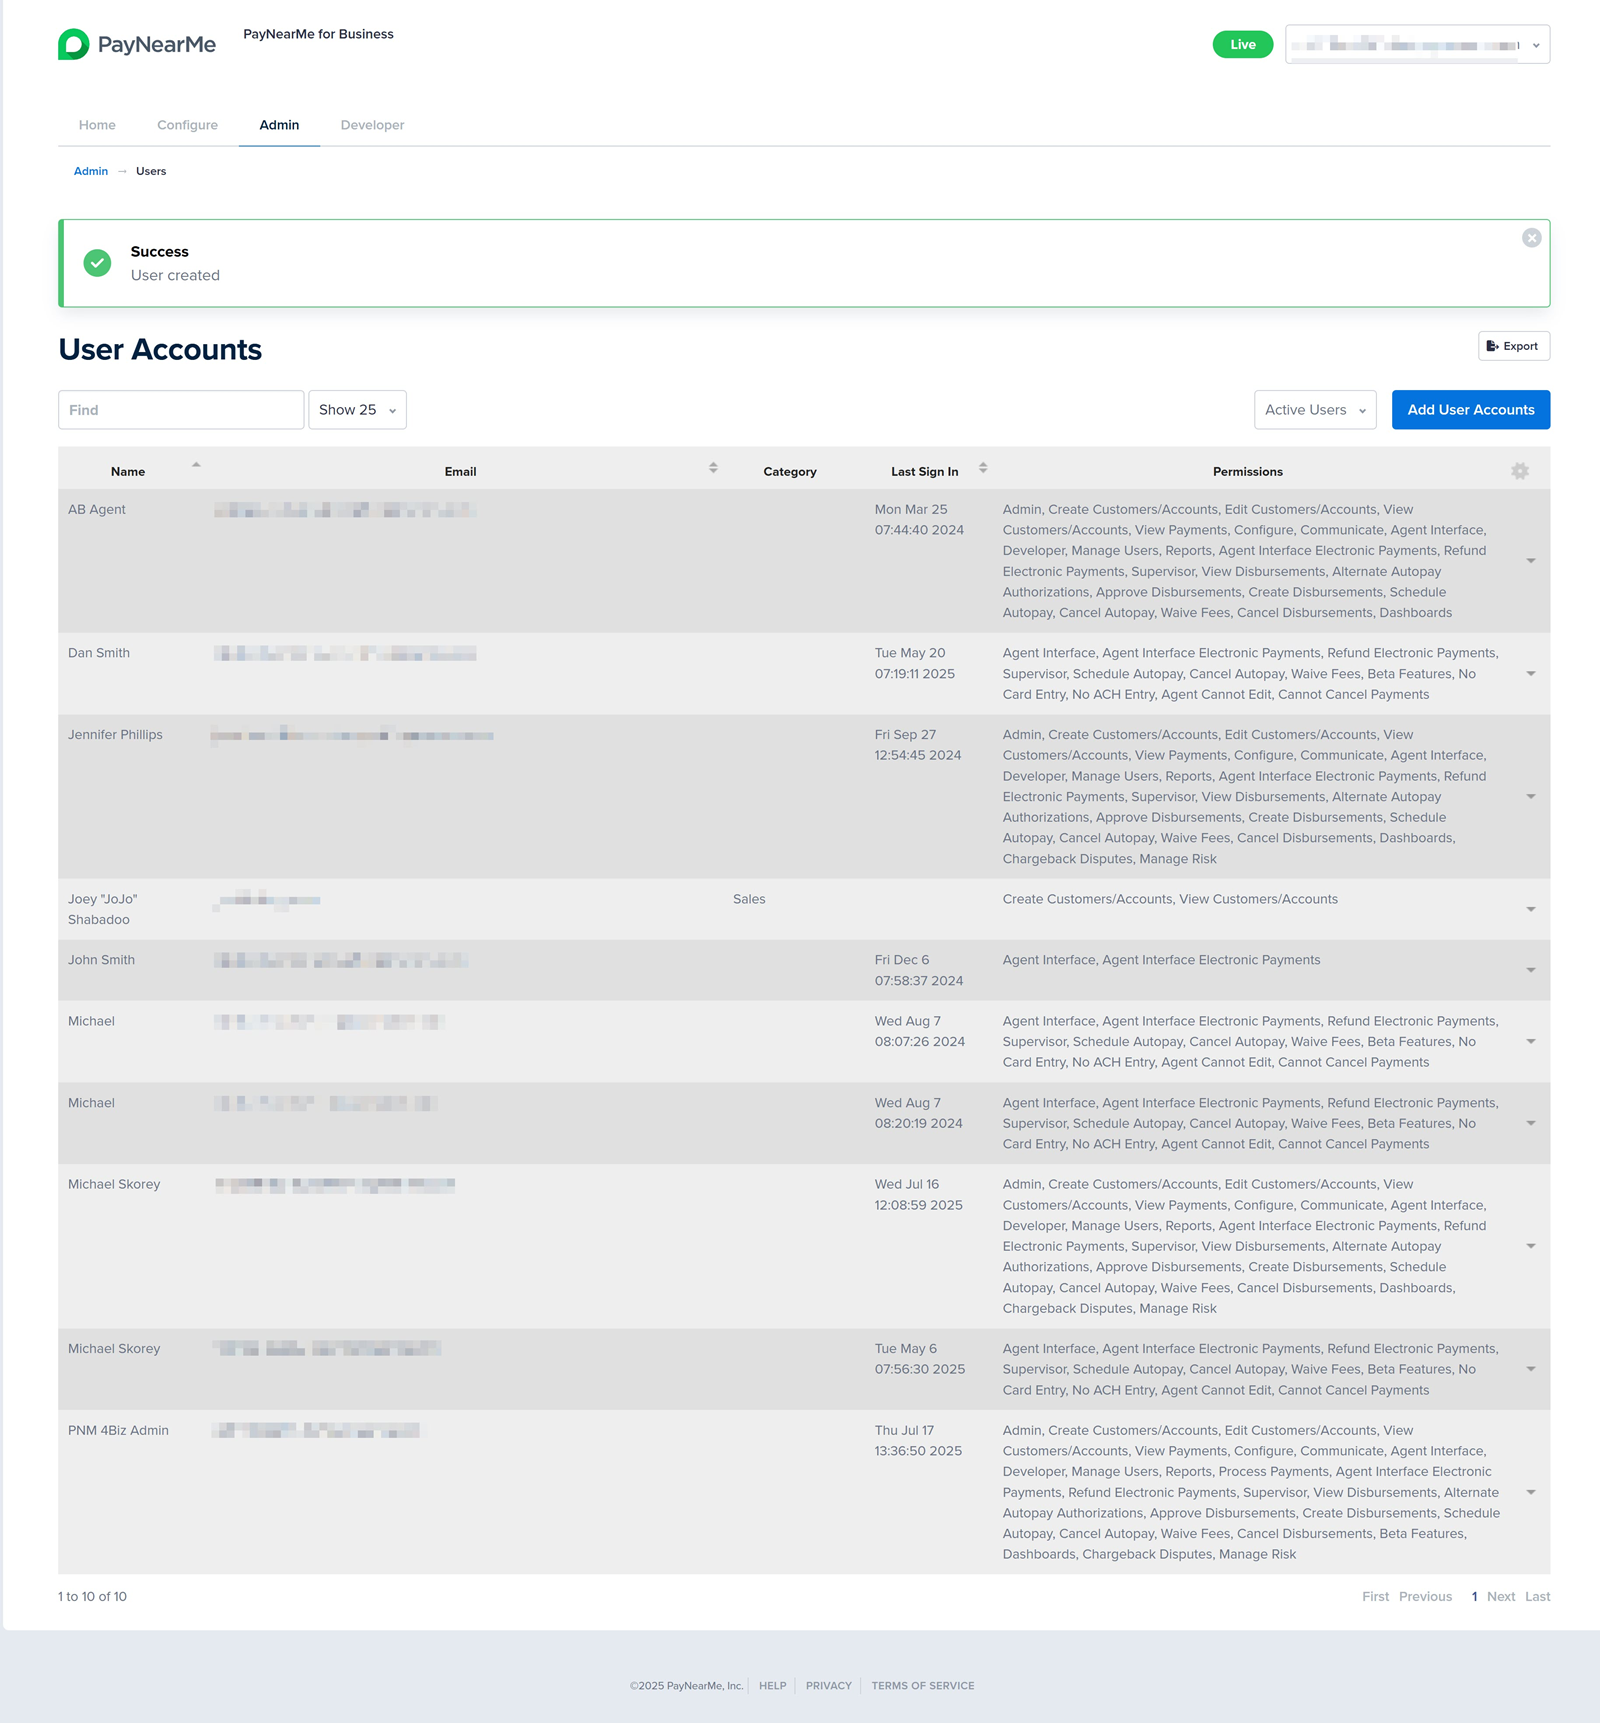
The User Accounts screen displays. Click Add User Accounts to display the Add User screen.
-
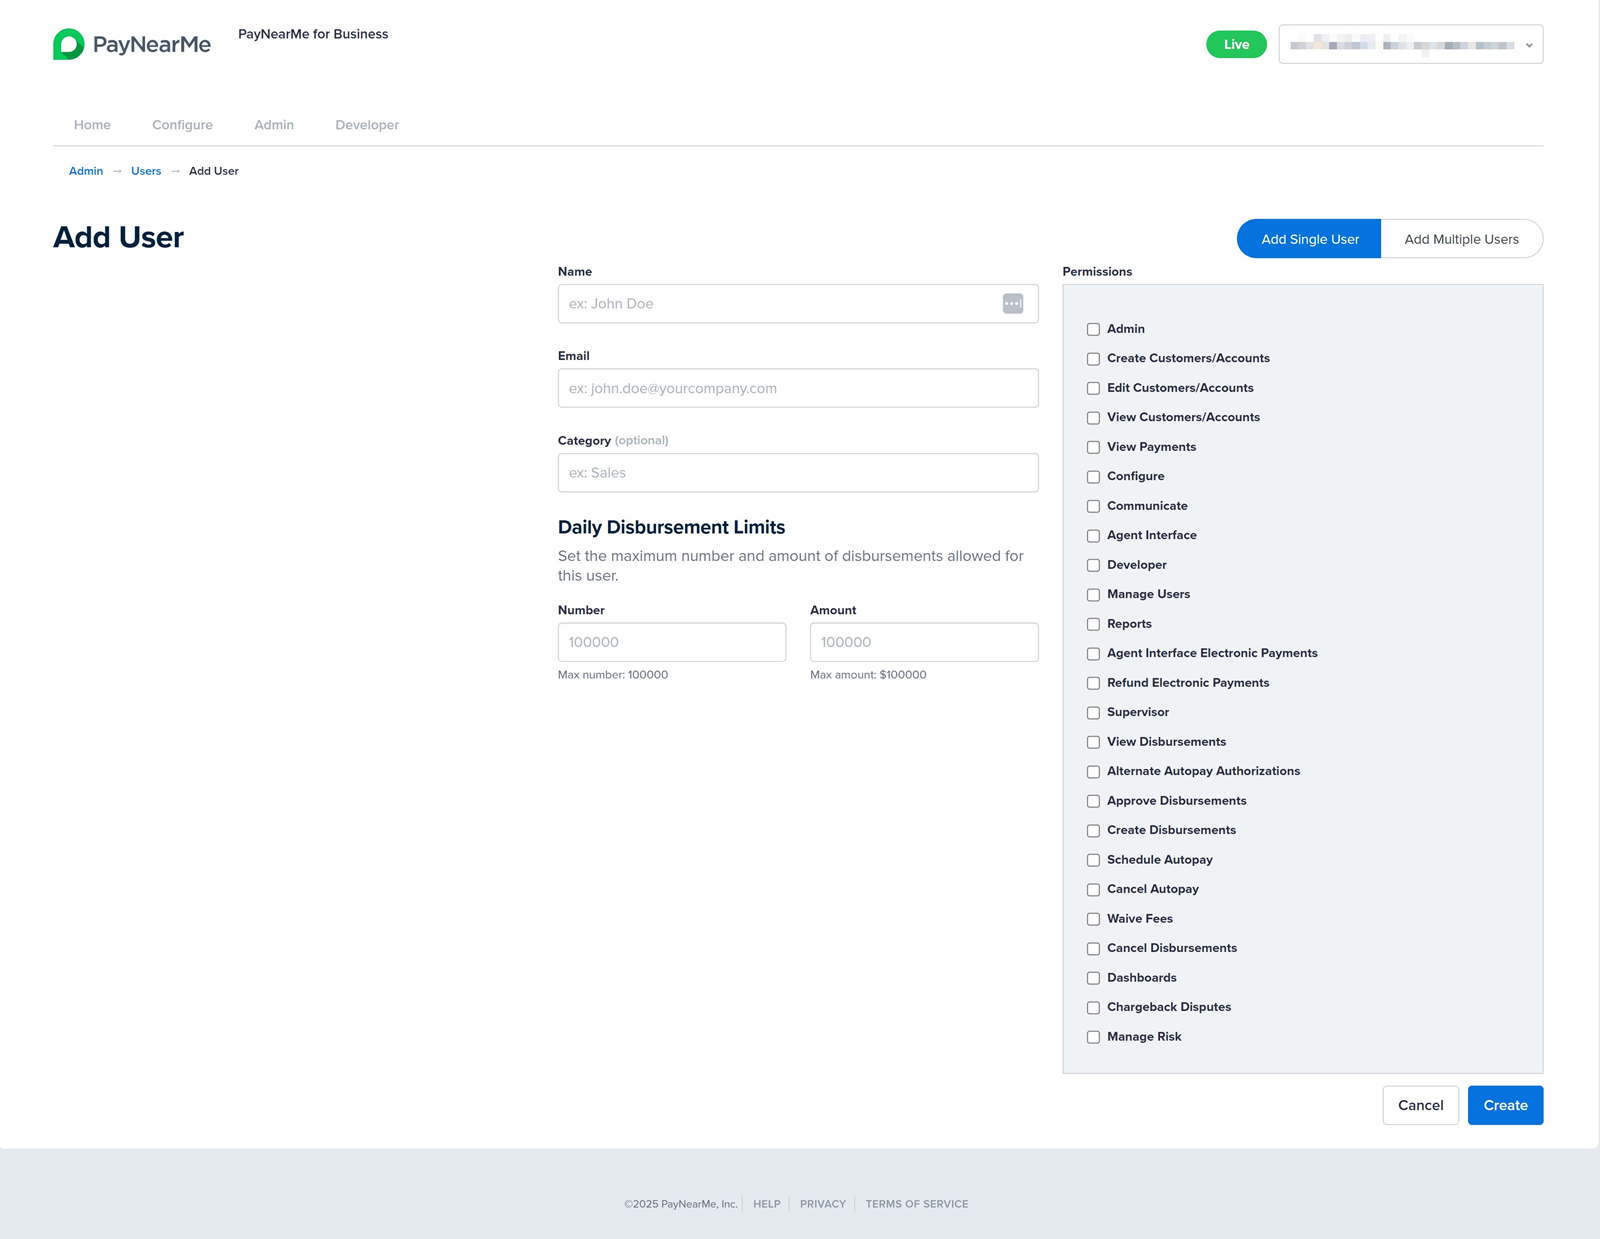
Ensure the Add Single User option is selected (i.e., blue) and then enter the first and last name of the user in the Name field.
-
Enter the user's email address in the Email field.
-
Enter the user type/role in the Category field. This field is optional.
-
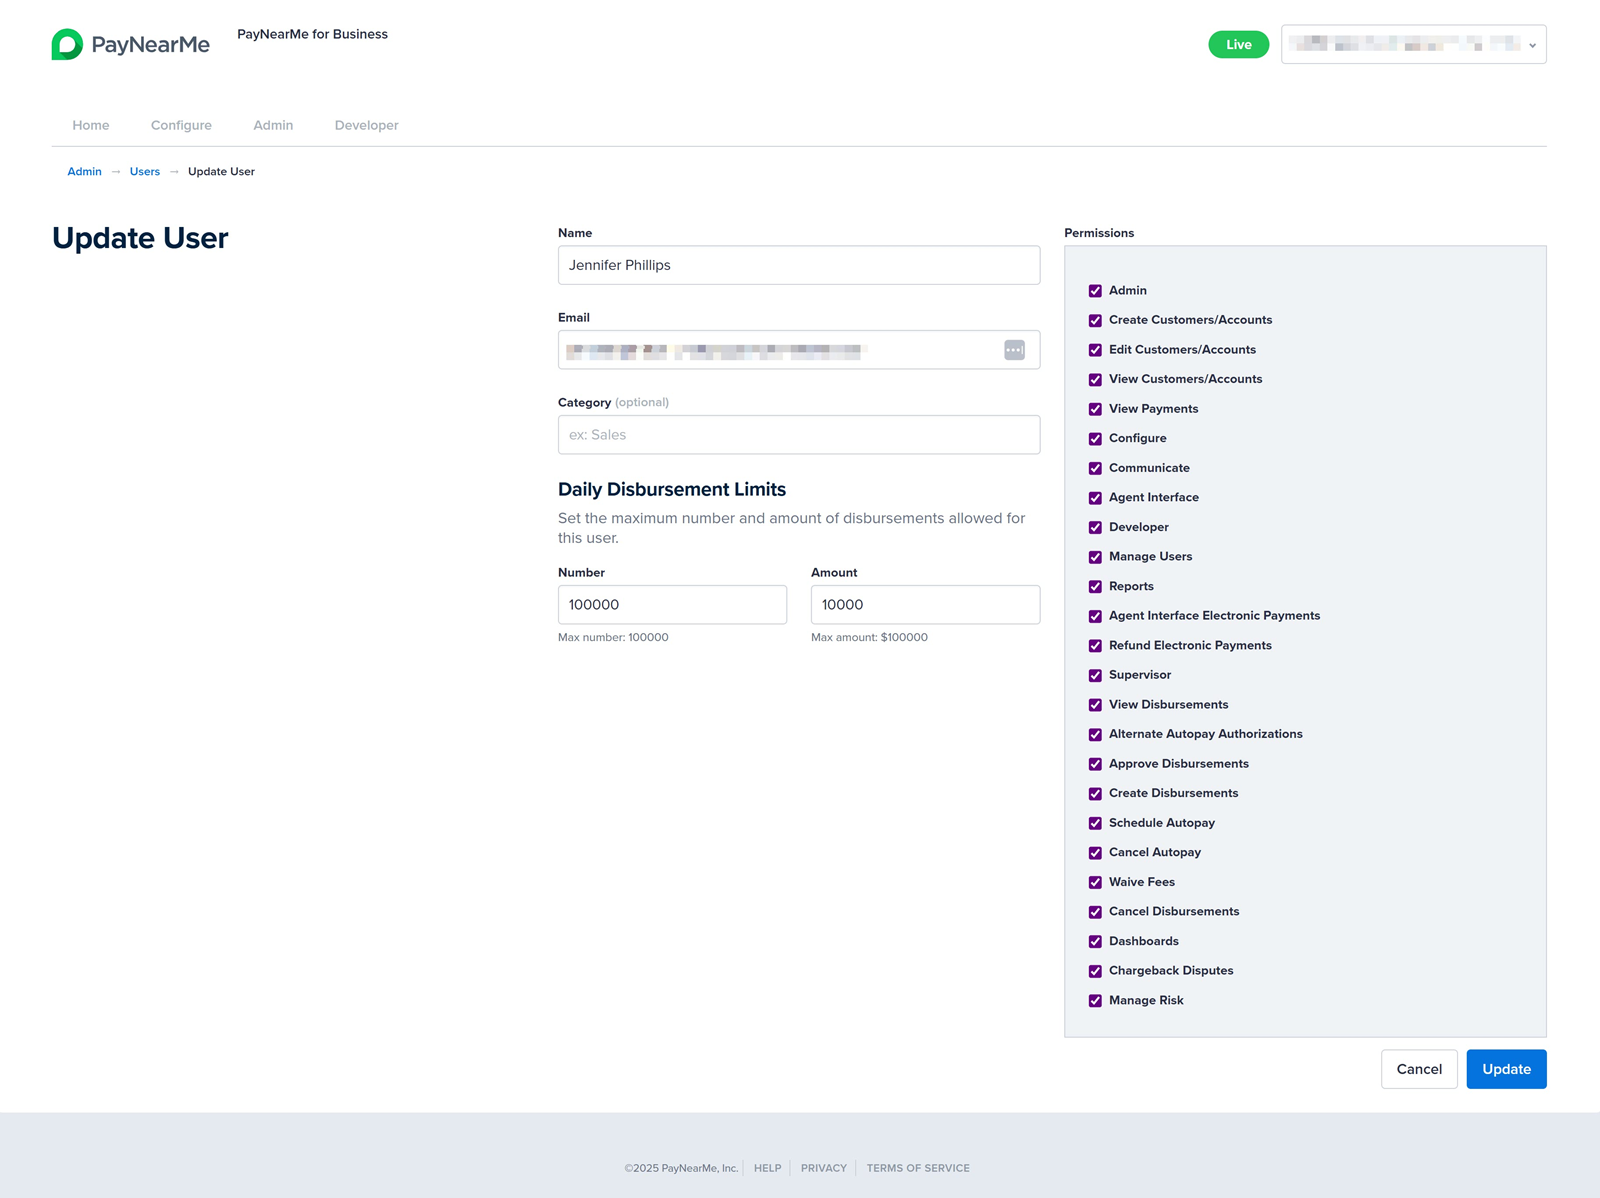
If your site is configured to process disbursement payments, you can define daily disbursement limits at the individual user level. To do this, specify the maximum number of disbursements the user is allowed to initiate per day in the Number field, and enter the maximum total dollar amount permitted for daily disbursements in the Amount field. By default, PayNearMe enforces a maximum of 100,000 disbursements per user per day and a daily disbursement limit of $100,000 per user.
-
In the Permissions section, select the checkbox next to each permission you wish to assign to the user account. Certain permissions are interdependent and must be enabled together. The Business Portal will display confirmation messages when such dependencies exist. For example, enabling Create Customers/Accounts also requires View Customers/Accounts to be selected.
-
Click Create after completing the required fields and selecting the relevant permissions. The Business Portal returns you to the User Accounts screen and displays a message indicating if the user was successfully created.
Creating Multiple User Accounts
To create multiple users accounts at once, complete the following steps:
-
From the Business Portal homepage, click the Admin tab and then View in the Users section.

-
The User Accounts screen displays. Click Add User Accounts to display the Add User screen.

-
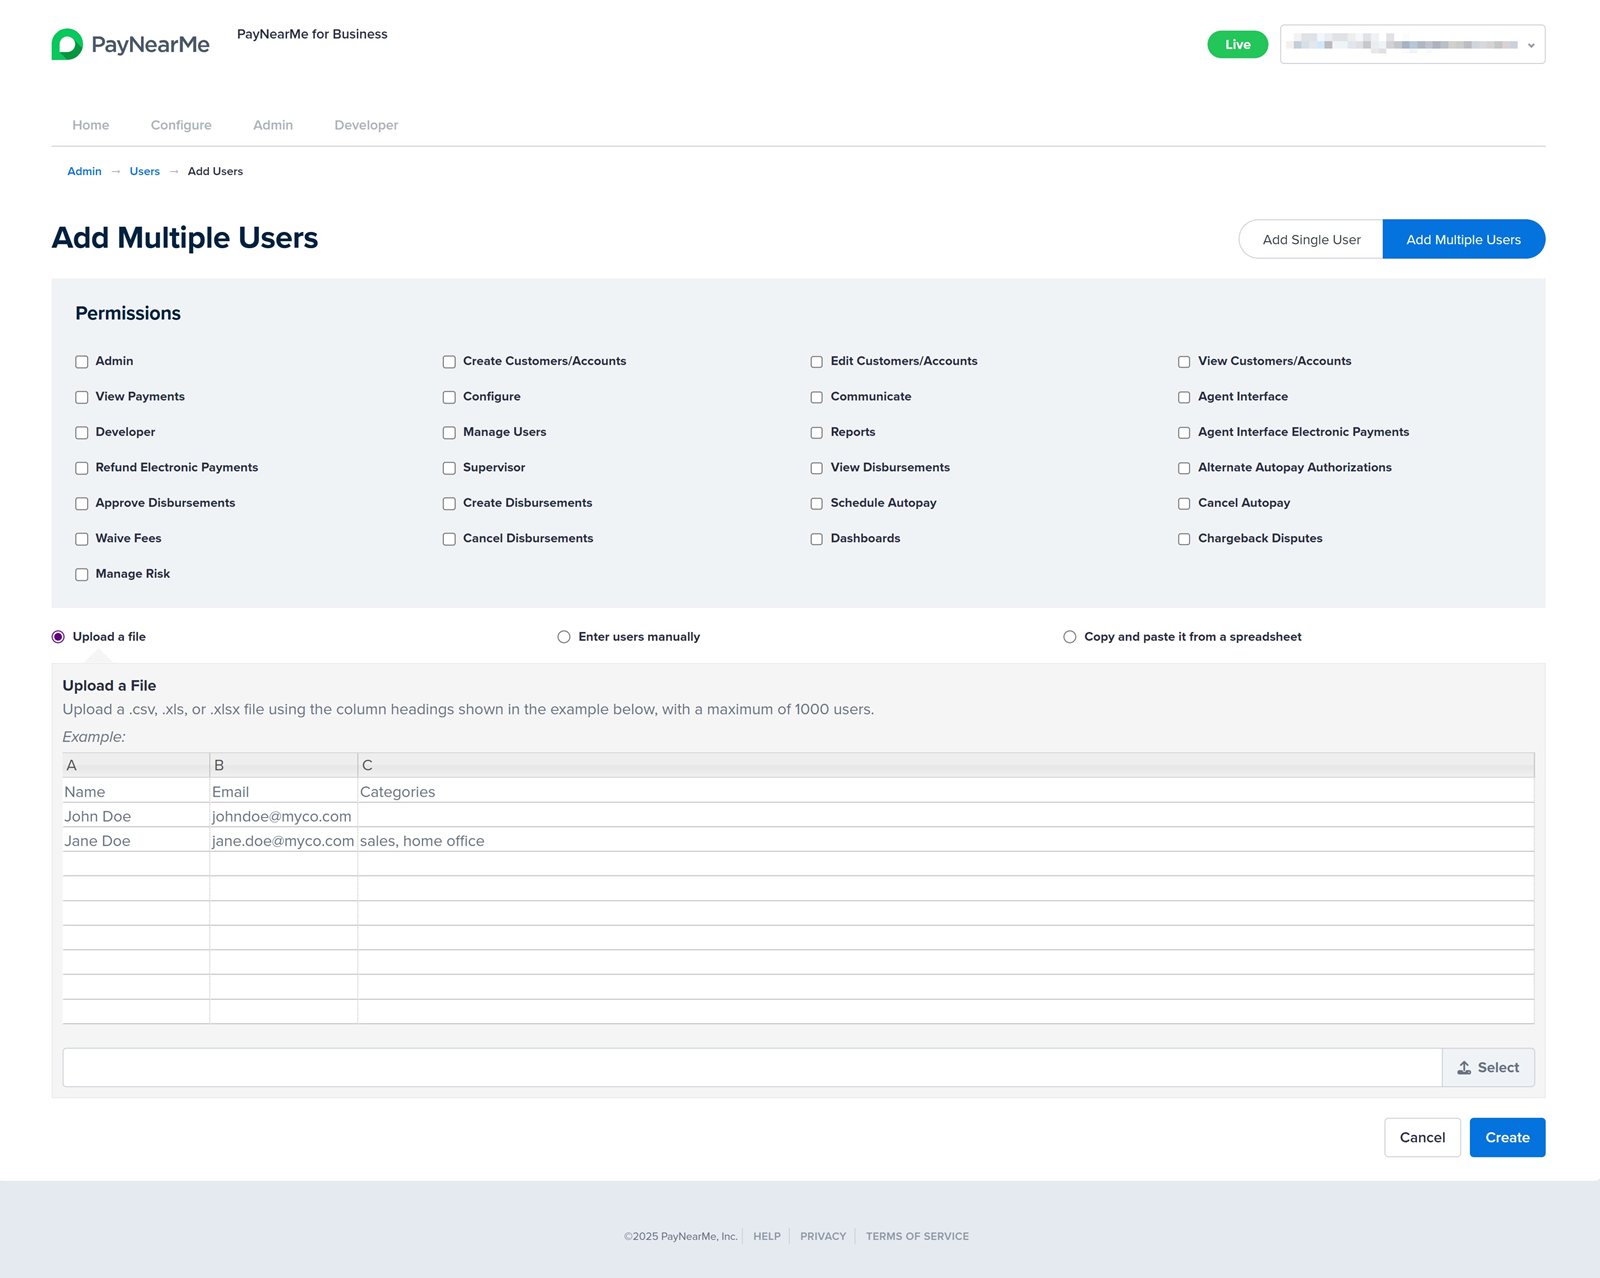
Select the Add Multiple Users option. The Add Multiple Users screen display.
-
In the Permissions section, select the checkboxes next to each permission you wish to assign to this group of user accounts. Certain permissions are interdependent and must be enabled together. The Business Portal will display confirmation messages when such dependencies exist. For example, enabling Create Customers/Accounts also requires View Customers/Accounts to be selected.
-
Choose one of the following methods to upload the users of this group: upload a file, manually enter the data, copy and past from a spreadsheet.
Upload a File
Upload up to 1000 users at a time by creating a .csv, .xls, or .xlsx file with column headers for the user's Name, Email, and Categories. Select the Upload a file button (if not already selected) and then complete the following steps:
- Click Select. A file explorer window displays.
- Select the file and then click Open on the file explorer window. The file name displays in the Business Portal.
- Click Create. The Business Portal displays the list of users from the file in form.
- Click Confirm. The Business Portal returns you to the User Accounts screen and displays a message indicating if the user group was successfully created.
Manually Enter each User
Select the Enter Users Manually button and then complete the following steps in the form that displays:
- Enter the first and last name of each user in the under the Name column heading.
- Enter the email address of each user under the Email column heading.
- Enter the user type/role of each user under the Category column heading.
- Click Create.
- Review the data you've entered to ensure it's correct and then click Confirm. The Business Portal returns you to the User Accounts screen and displays a message indicating if the user group was successfully created.
Copy and Paste from a Spreadsheet
Select the Copy and paste it from a spreadsheet button and then complete the following steps in the form that displays:
- Ensure your spreadsheet matches the Name, Email, Categories column heading format and then copy it.
- Paste your data into the form that displays in the Business Portal and then click Create.
- Review the data you've pasted in to ensure it's correct and then click Confirm. The Business Portal returns you to the User Accounts screen and displays a message indicating if the user group was successfully created.
Disbursement Limits When Creating Multiple UsersDisbursement limits cannot be added to a user account when creating multiple users at once. After creating the user account, you must manually add disbursement limits to each account through the Edit action. For more information on editing permissions, see Editing User Accounts.
Editing User Accounts
Use the Edit action to add or remove permissions for certain user accounts. To edit the permissions of a user account, complete the following steps:
-
From the Business Portal homepage, click the Admin tab and then View in the Users section.

-
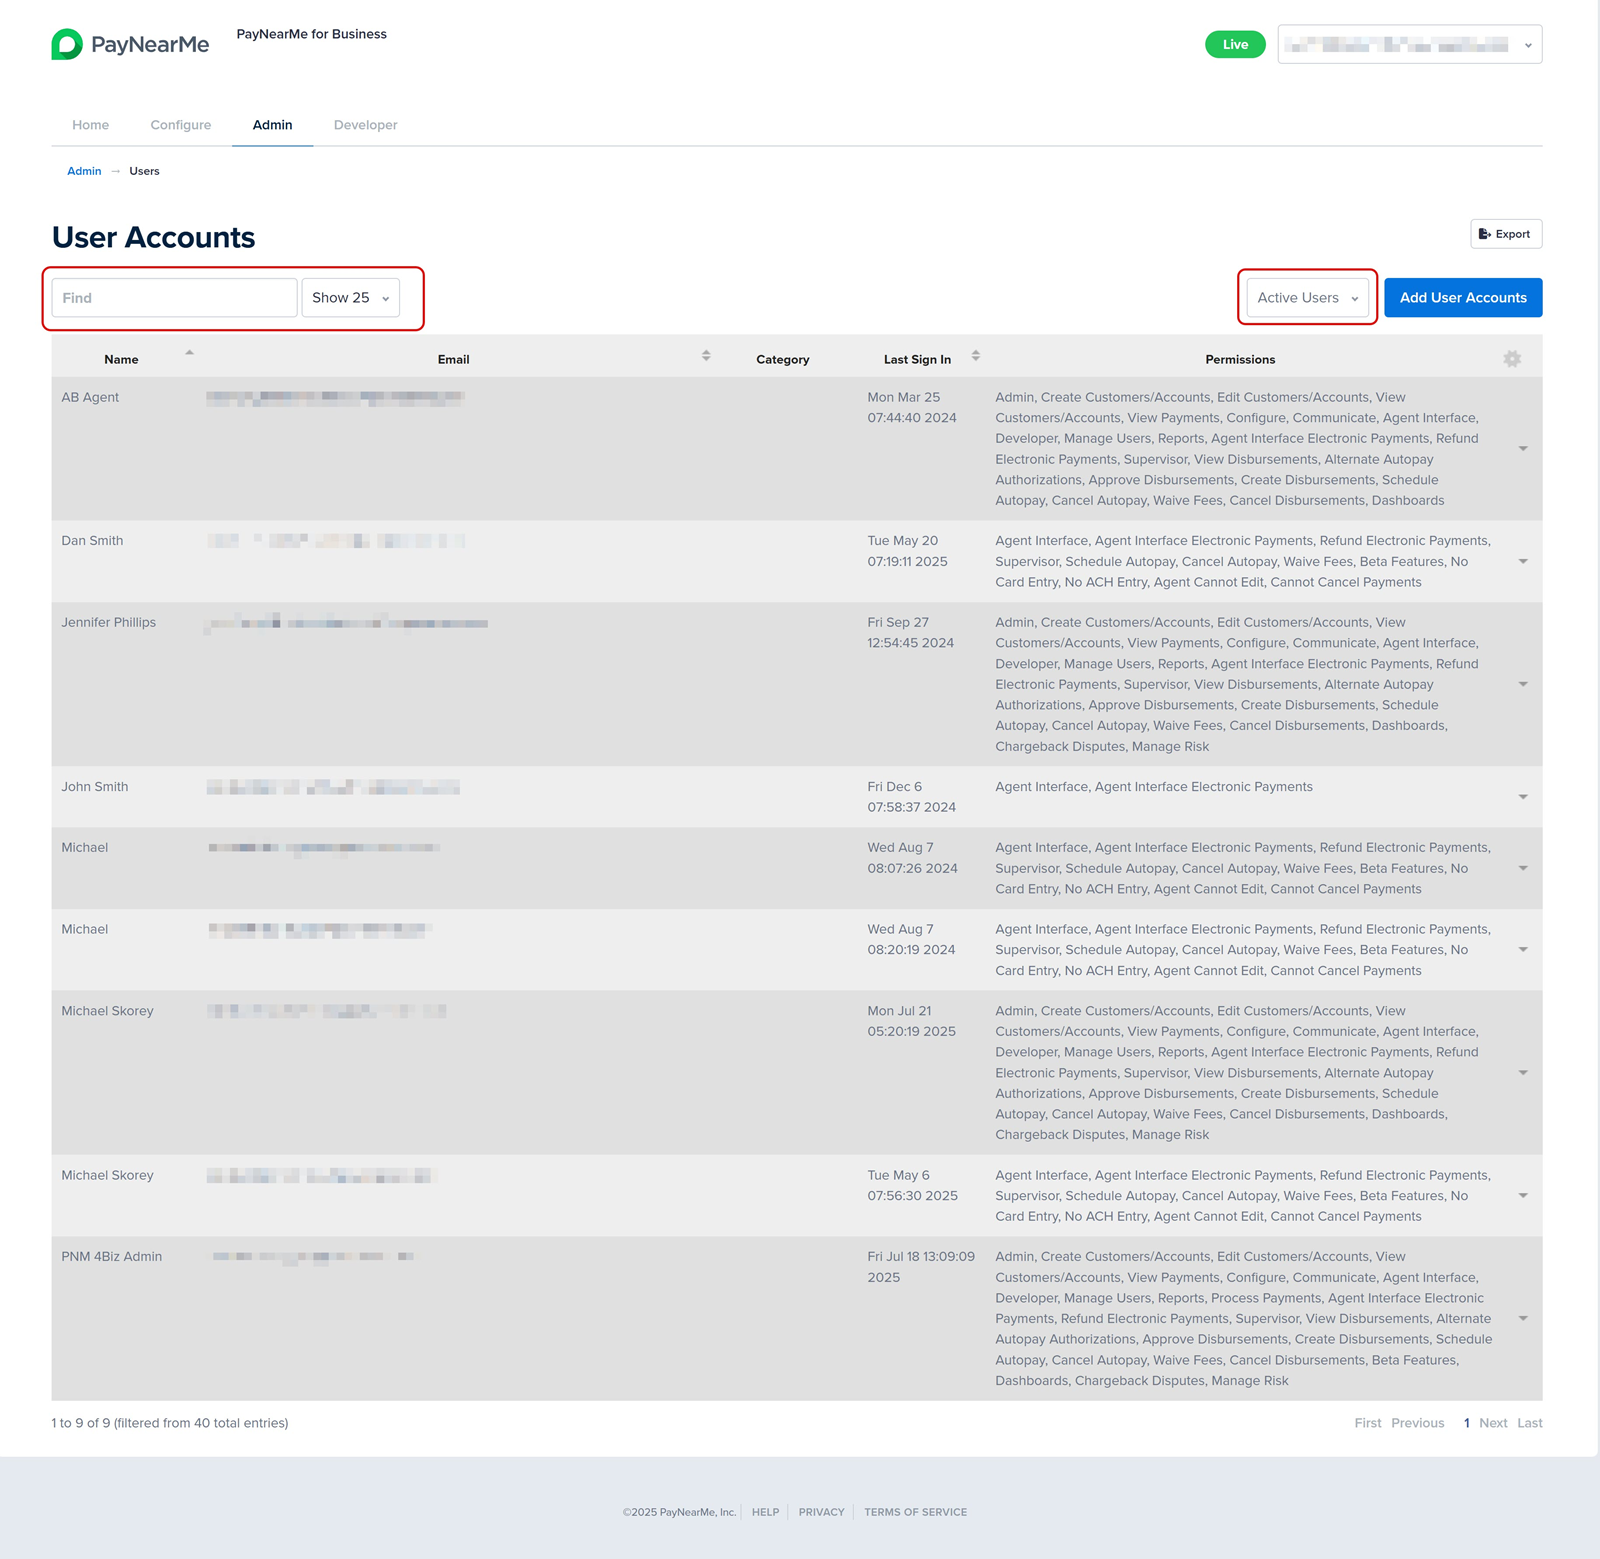
The User Accounts screen displays. Use either the Search field or the Account Status filter to find the user account you want to edit.

-
When you find the account you want to edit, hover your cursor on the dropdown arrow that displays next to the account and select Edit.
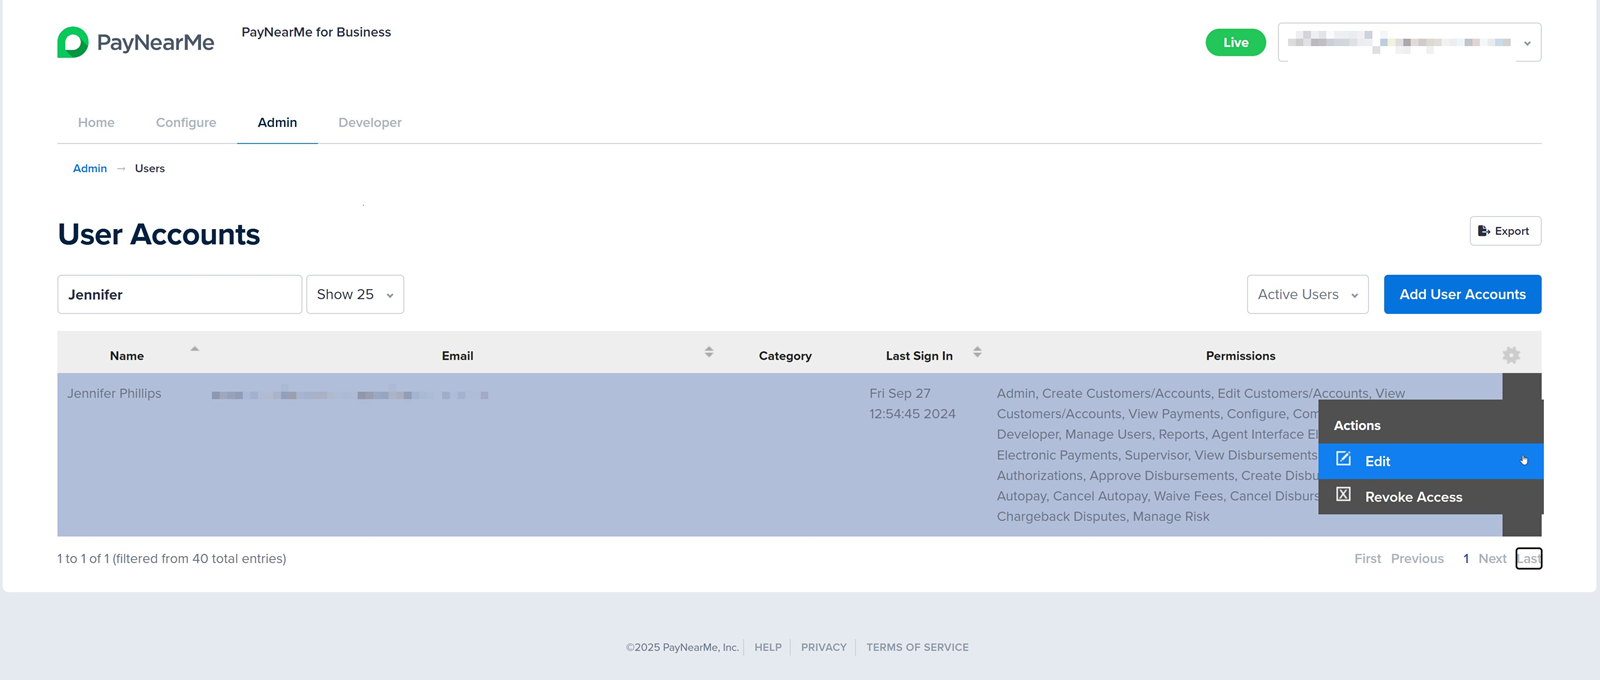
-
The Update User screen displays. Edit the desired fields and permissions.
-
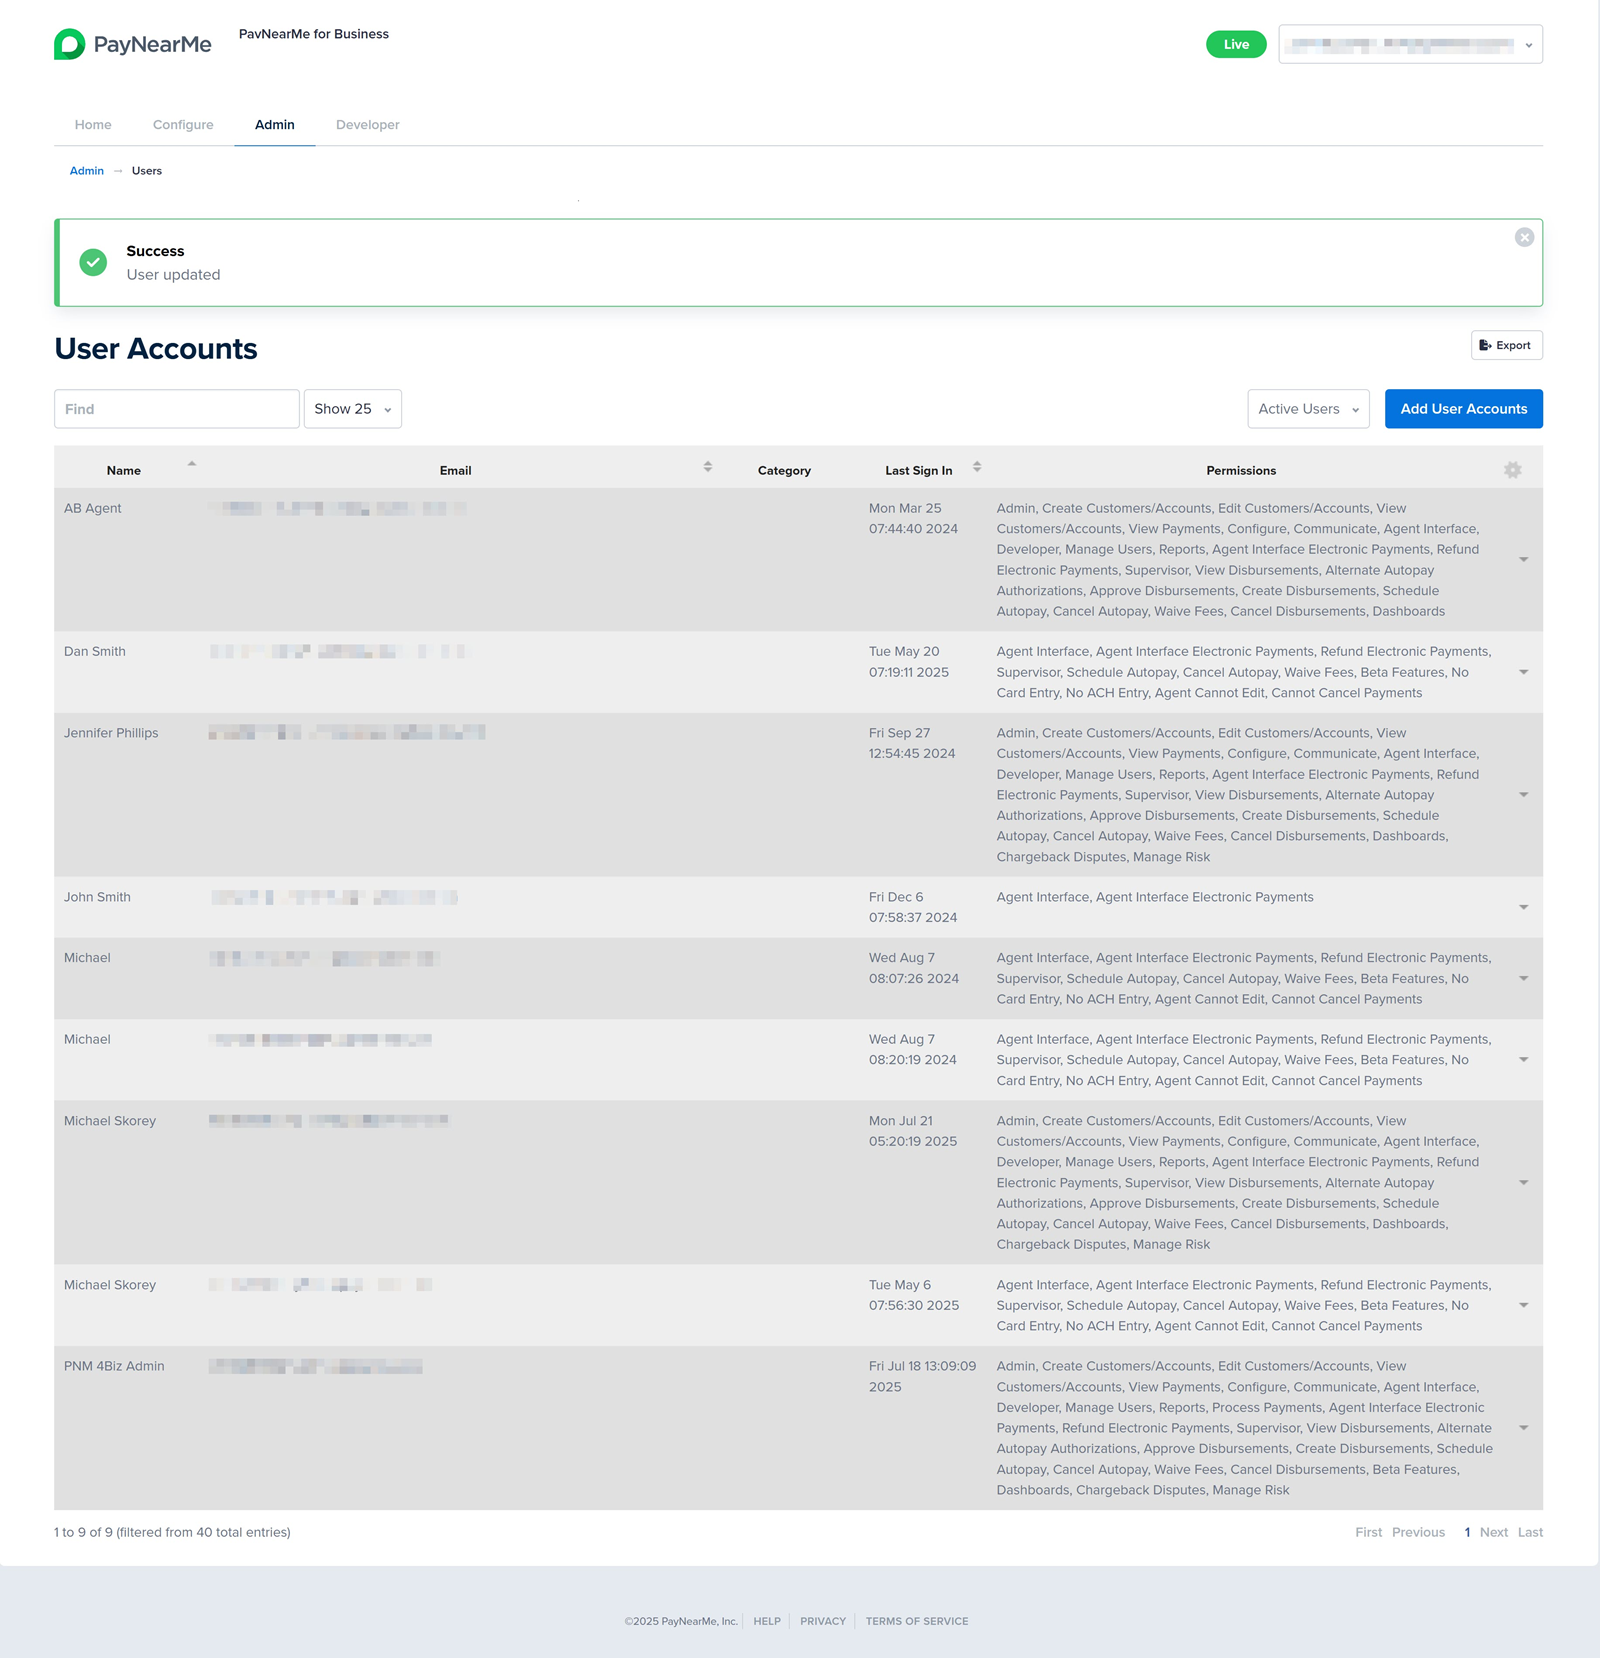
Click Update. The Business Portal returns you to the User Accounts screen and displays a message indicating whether or not the update was successful.
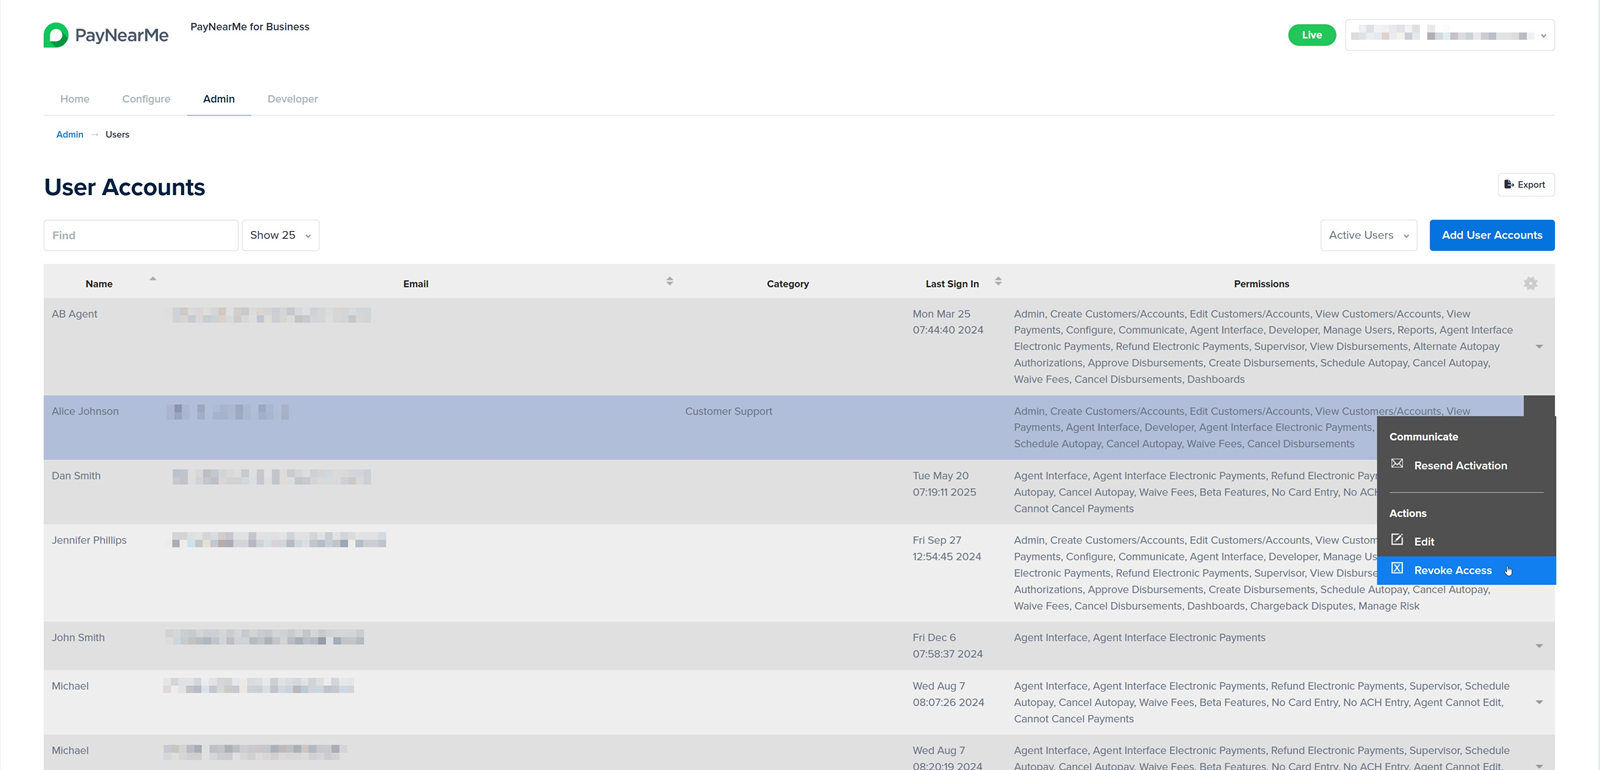
Revoking User Accounts
Revoking a user account completely removes the user's access to the Business Portal. Revoked user accounts can be displayed on the User Accounts screen by selecting All Users from the Account Status filter. Revoked user accounts can be reactivated through the Edit action.
To revoke a user account, complete the following steps:
-
From the Business Portal homepage, click the Admin tab and then View in the Users section.

-
The User Accounts screen displays. Use either the Search field or the Account Status filter to find the user account you want to revoke.
-
When you find the account you want to revoke, hover your cursor on the dropdown arrow that displays next to the account and select Revoke Access.
-
The Business Portal displays a message asking you to confirm you want to revoke this user's access. Click OK to confirm the action.
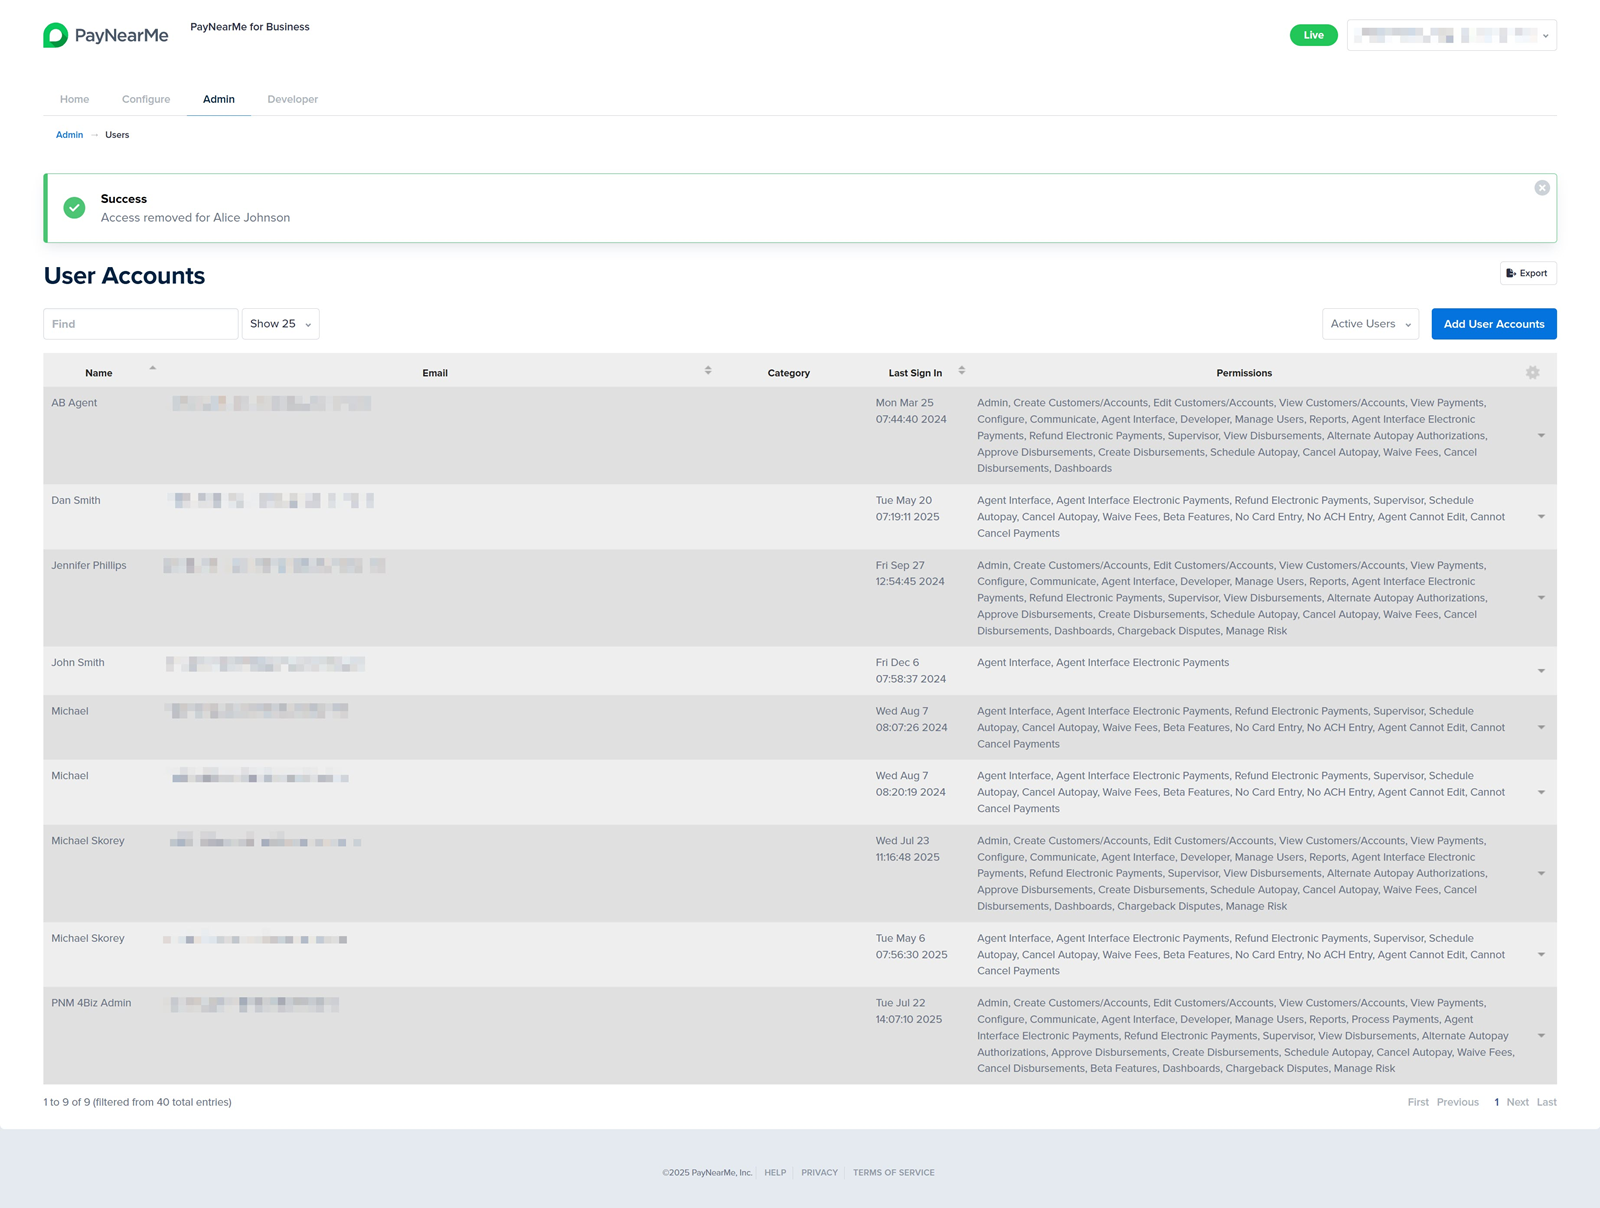
-
The Business Portal returns you to the User Accounts screen and displays a message indicating if the user account was successfully revoked.
Updated about 2 months ago