One-Time Payments in the Agent Interface
Printing a Payslip for a Cash Payment
All cash payments require a barcode that the retailer scans before accepting the payment. Consumers can print the barcode, send a link to it to their email addresses or phone via the Consumer Portal, or add it to their mobile wallets (e.g., Apple Wallet). Agents can also print a payslip on behalf of the consumer by accessing the consumer’s Account page and clicking the Print Cash Payslip button.
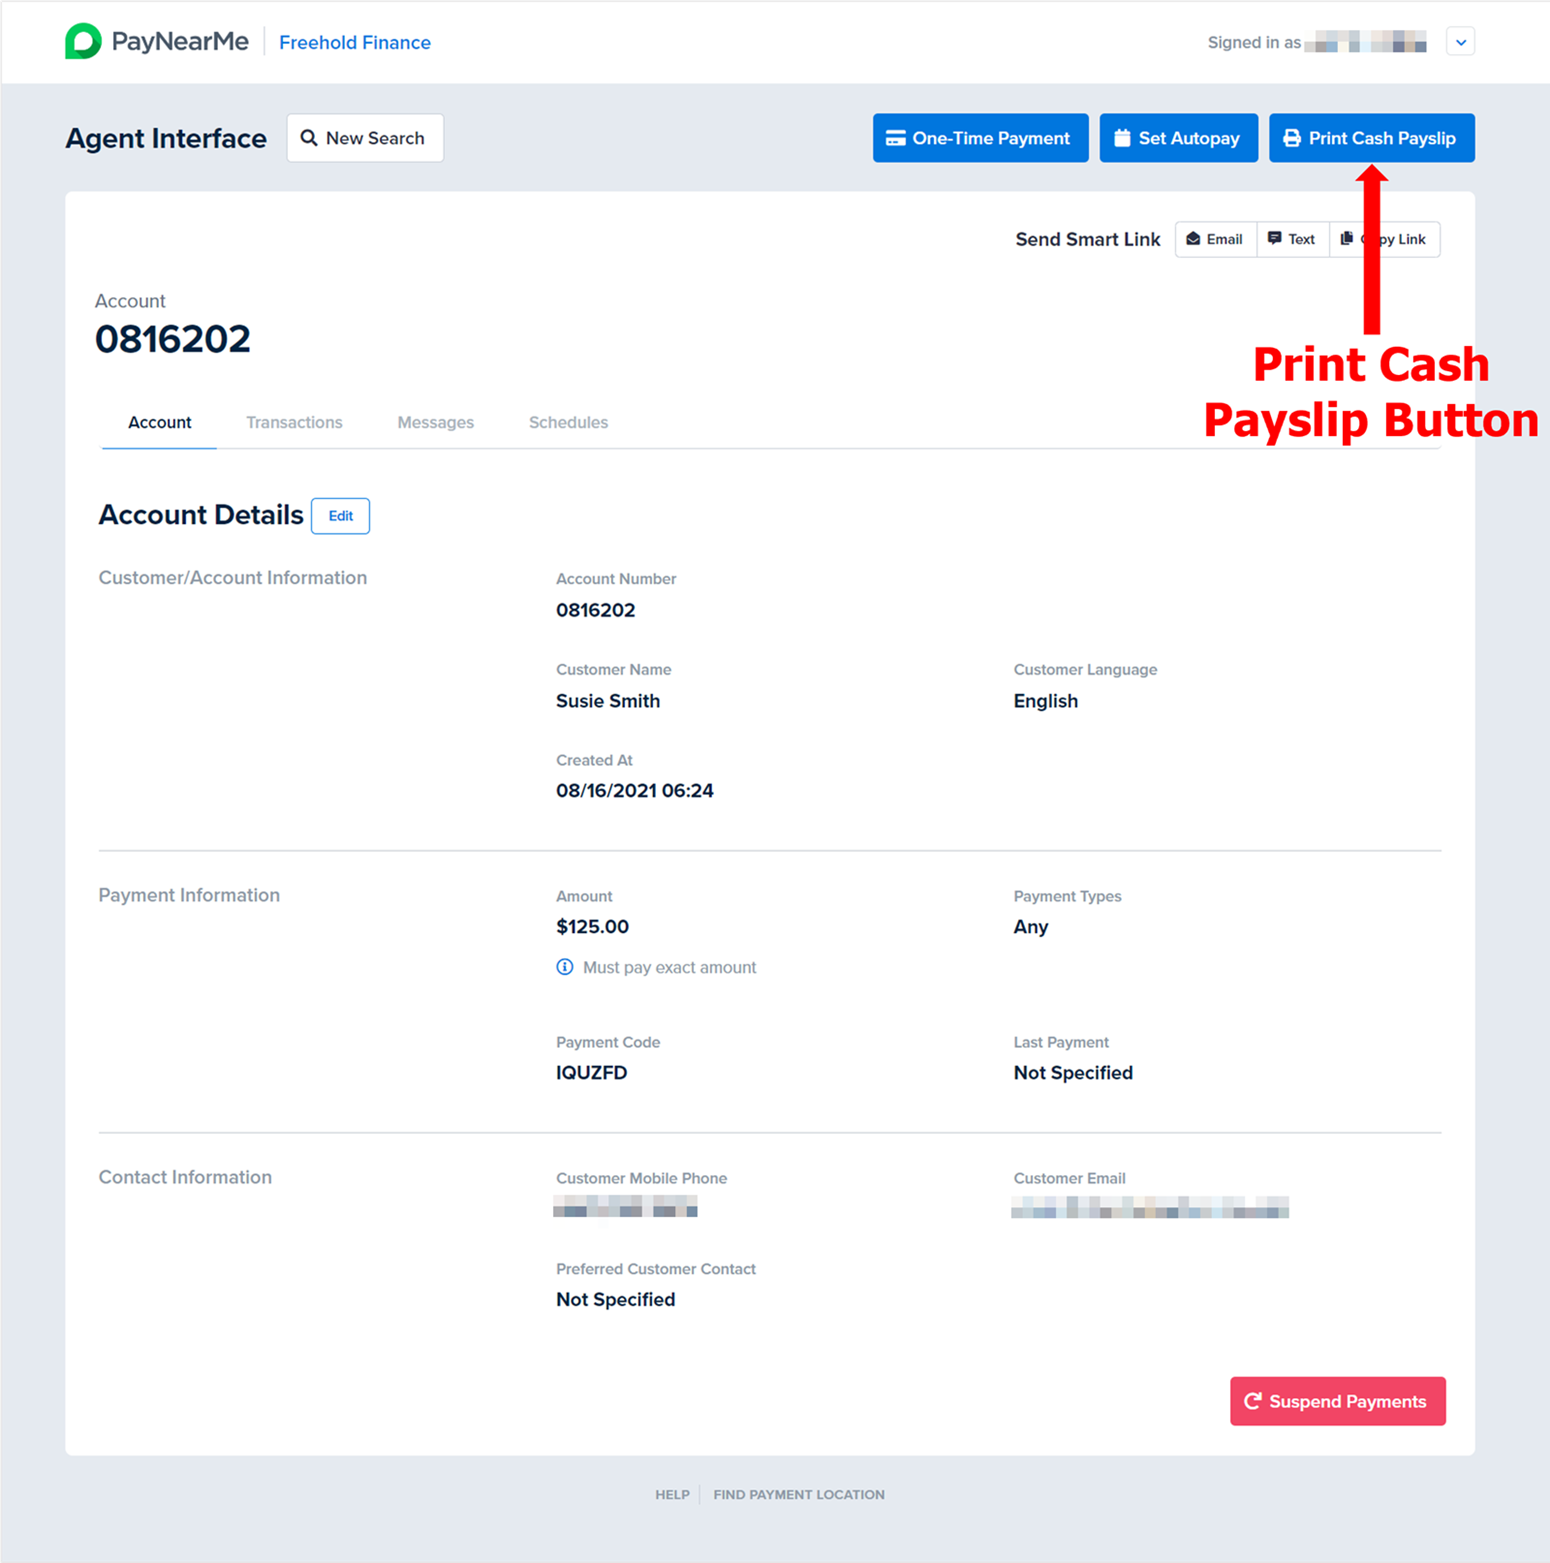
A dialog box displays with the printer settings where you can send the payslip. The payslip opens in a separate browser window.
Making an Immediate One-Time Payment
To make an immediate one-time payment for a consumer, access his/her/their Account page and complete the following steps:
-
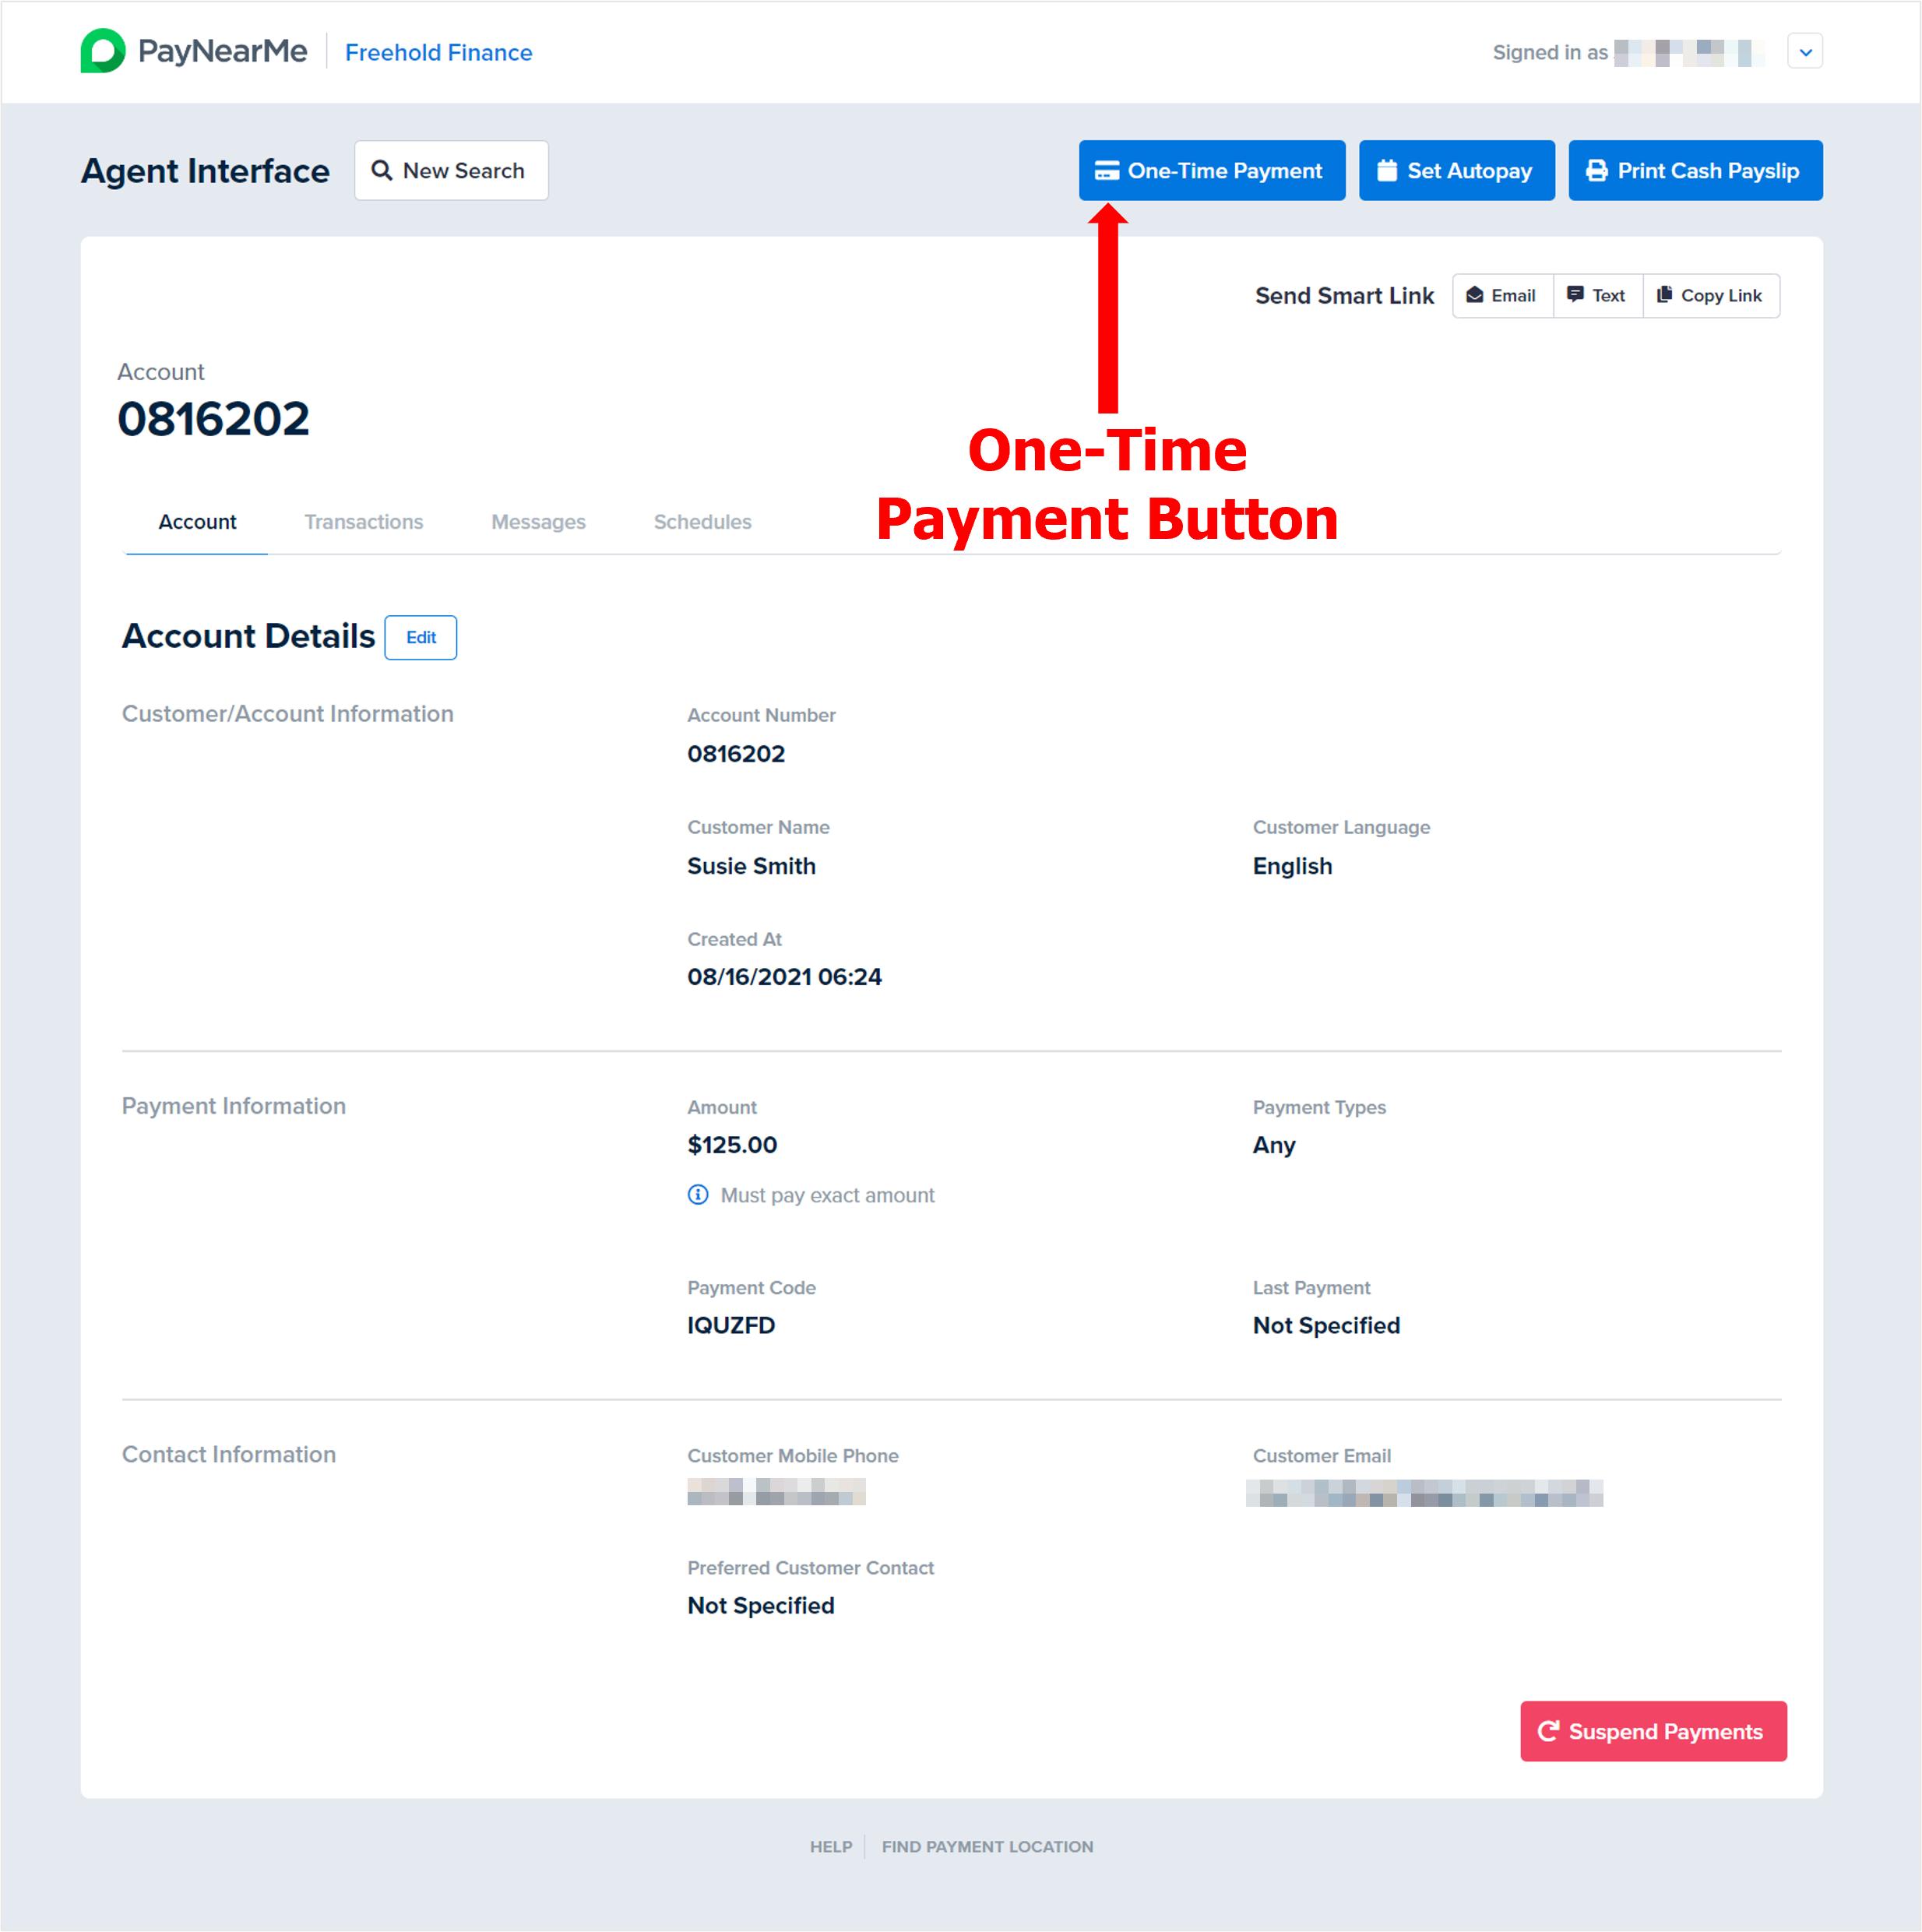
Click the One-Time Payment button in the upper right corner of the Account page or use the Ctrl+1 keyboard shortcut.
-
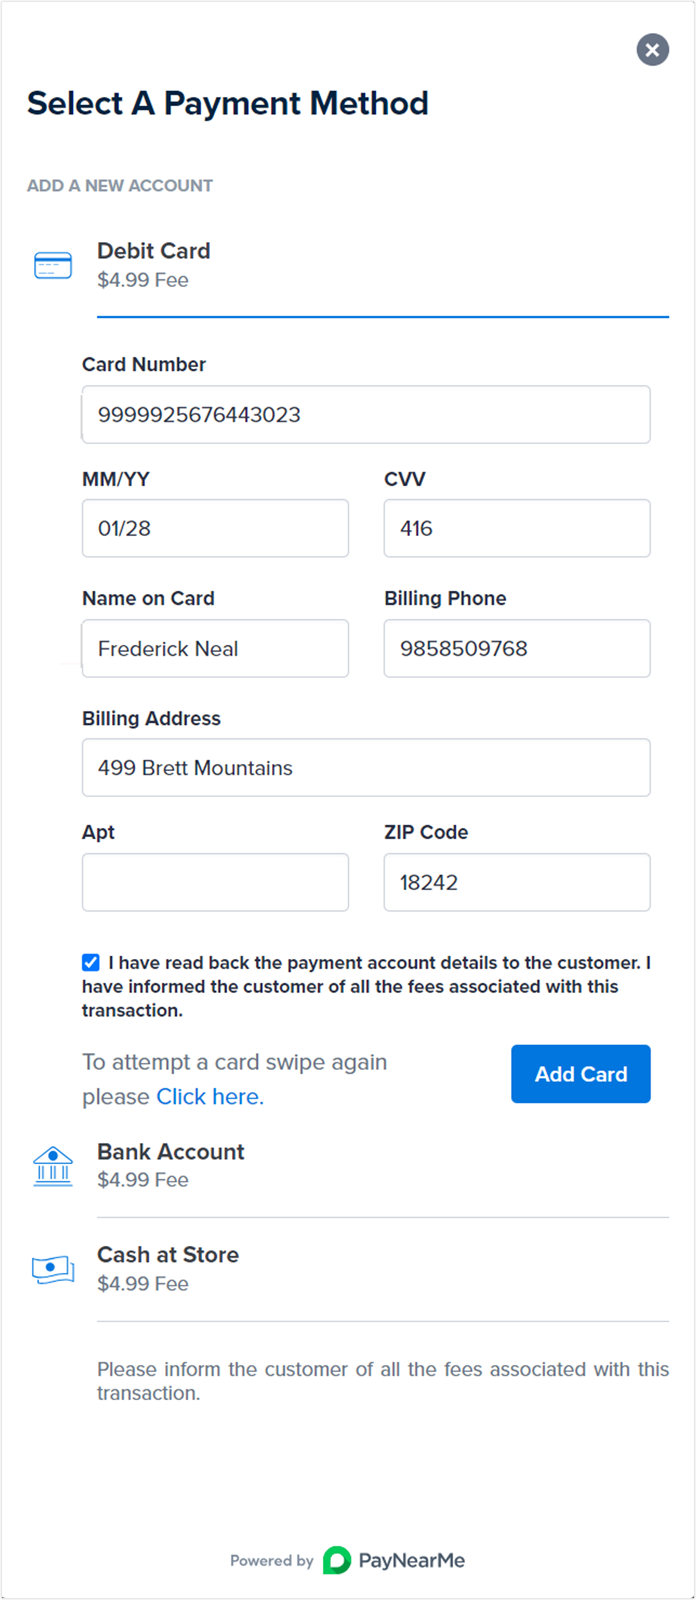
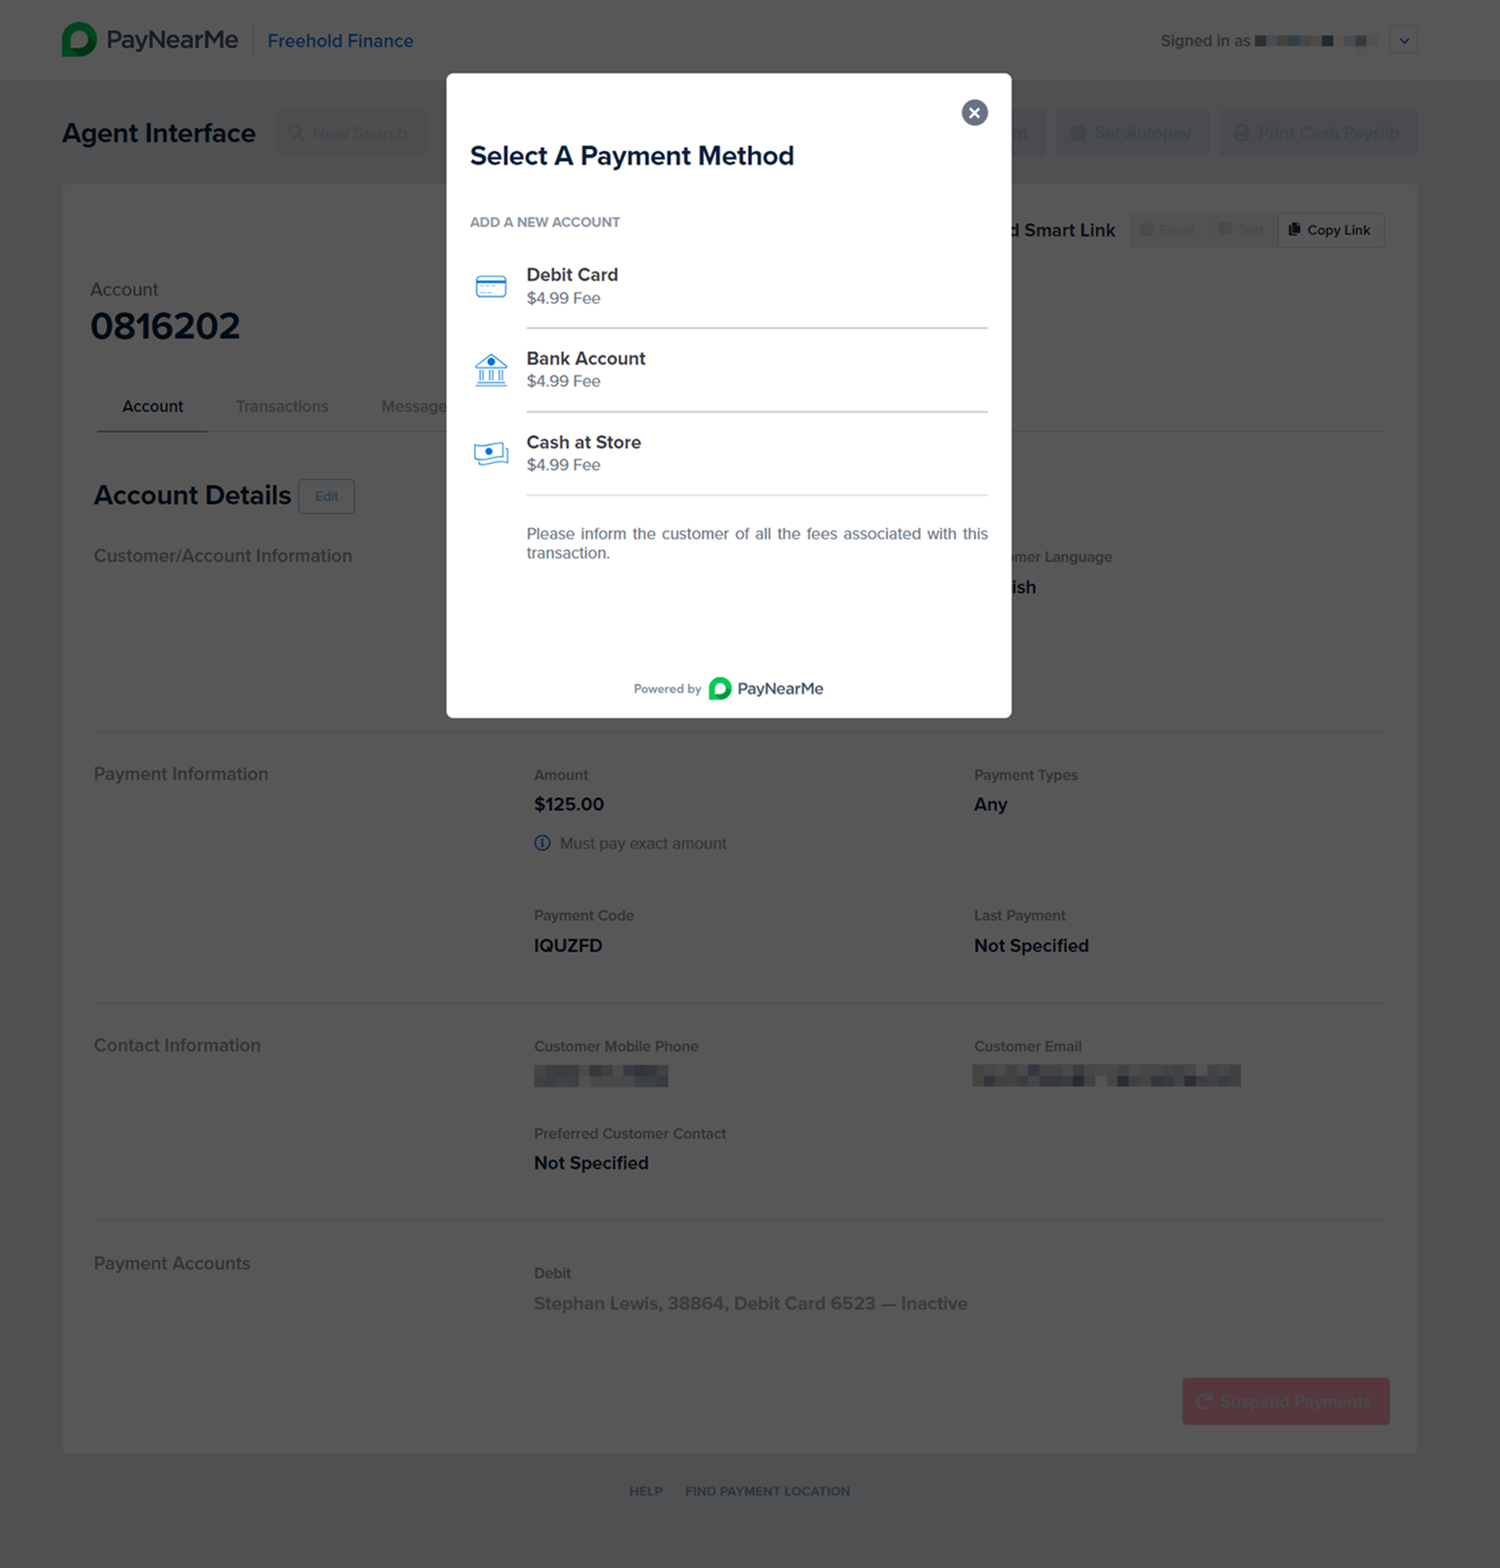
The "Select a Payment Method” modal displays. Click on the payment method the consumer wants to use to make a payment. NOTE: The available payment methods listed will depend on which payment methods your business supports.

-
Enter the required payment method data:
-
Debit cards can be swiped or manually entered. For manual entry, ensure the Card Number, Expiration Date, CVV, Name on Card, Billing Phone, Billing Address, and ZIP Code fields are correct by reading the payment account details back to the consumer for confirmation. Also, ensure that you’ve checked the “I have read back the payment account details to the customer. I have informed the customer of all the fees associated with this transaction.” checkbox before clicking Add Card.
CVV RequirementsThe CVV security code must be entered when adding a new credit or debit card and when attempting payments with an existing credit or debit card. PayNearMe does not store CVV security codes to comply with PCI DSS requirements. Clients, however, can choose to only require security codes when adding the card and then allow subsequent payments made with that same card to go through without the CVV input. To implement this configuration, consult your PayNearMe Technical Account Manager.
-
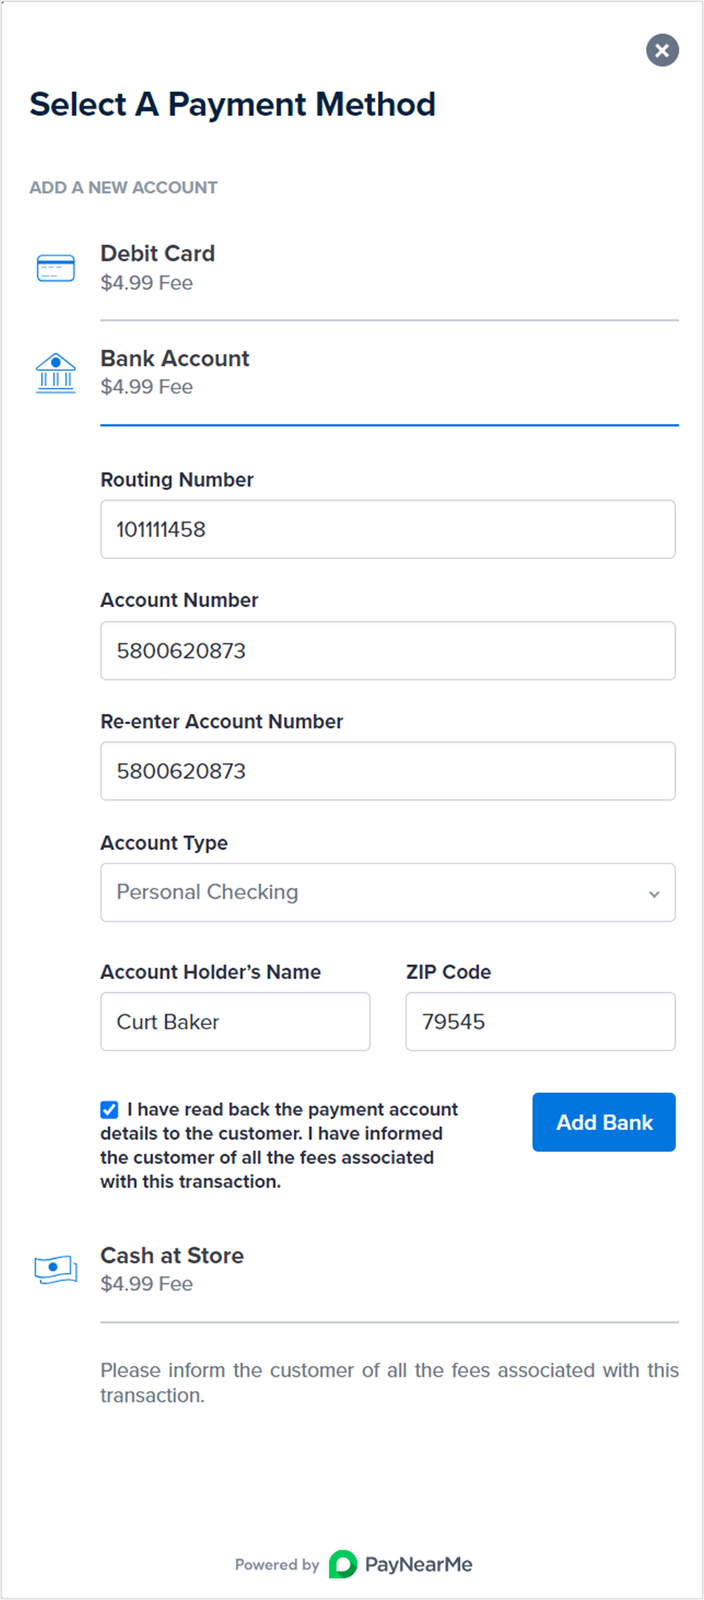
Bank account information must be manually entered. Ensure the Routing Number, Account Number, Account Type, Account Holder’s Name, and ZIP Code fields are correct by reading the payment account details back to the consumer for confirmation. Also, ensure that you’ve checked the “I have read back the payment account details to the customer. I have informed the customer of all the fees associated with this transaction.” checkbox before clicking Add Bank.
-
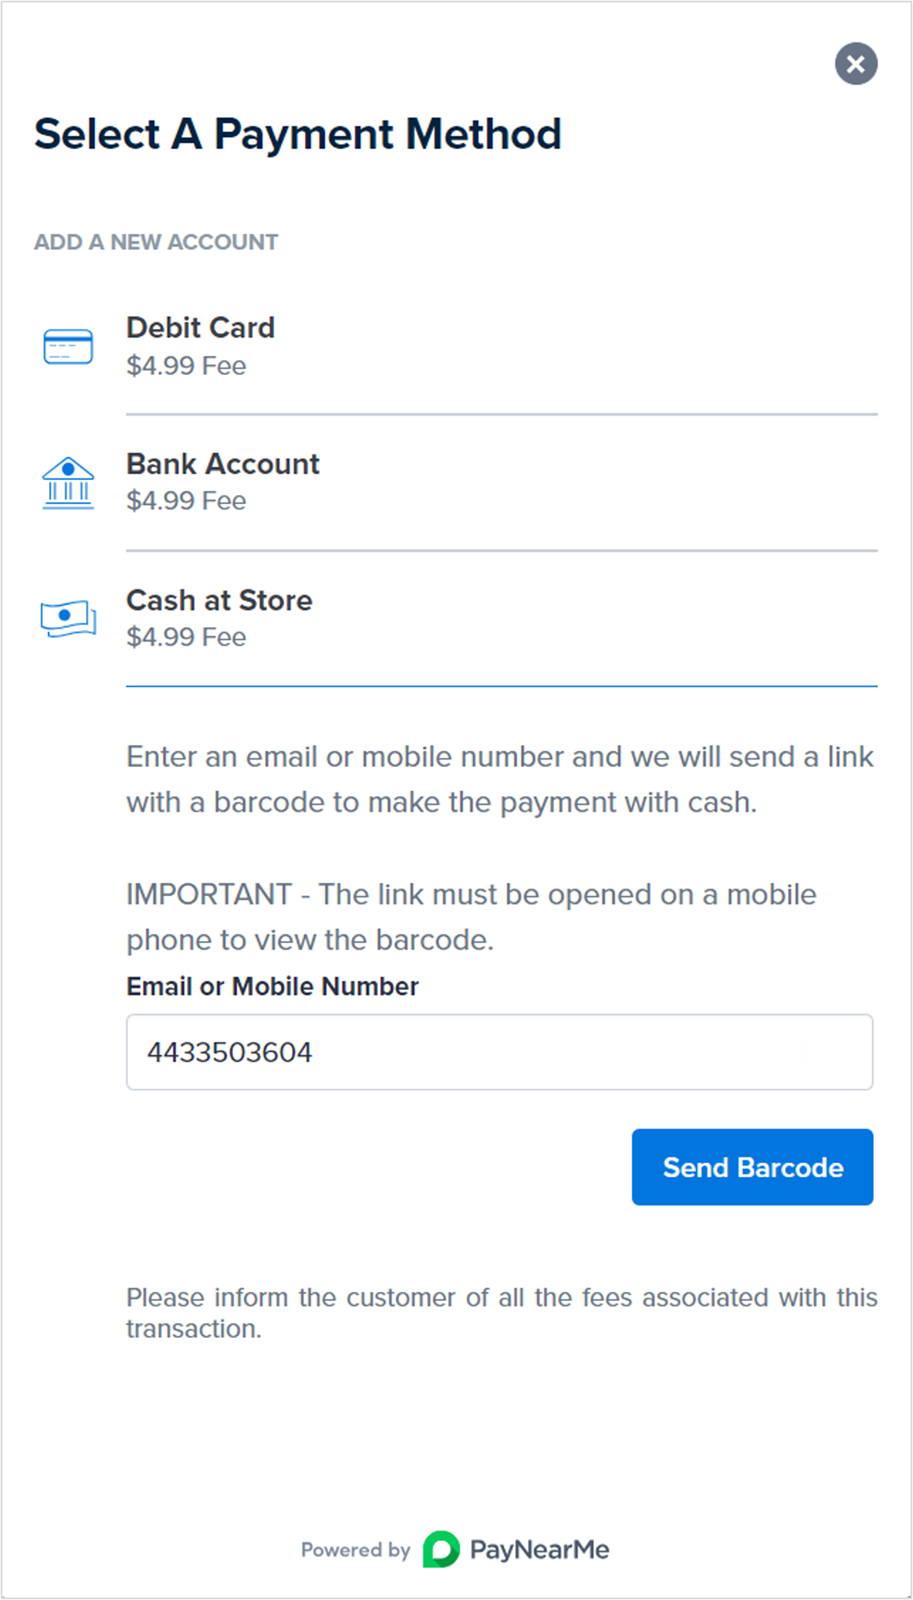
For cash transactions, enter the consumer’s email address or mobile phone number before clicking the Send Barcode button. PayNearMe will send the consumer a barcode which he/she/they can then take to a supported retailer to complete the payment in cash.
-
-
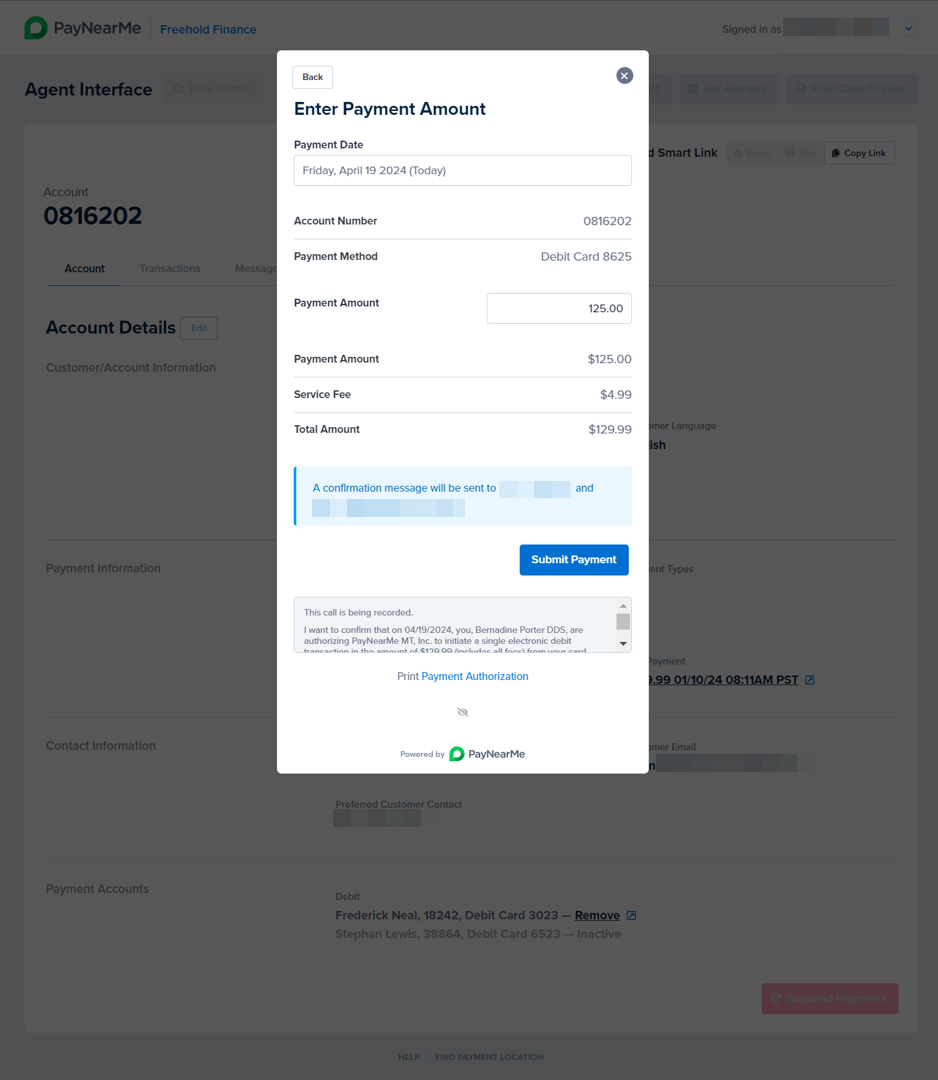
After adding the preferred payment method, the portal displays the “Enter Payment Amount” screen.
-
If allowed, enter the payment amount in the Payment Amount field. NOTE: Some payment amounts may be a fixed amount that cannot be changed.
-
If enabled, enter your notes in the Agent Notes text field. This field enables agents to record up to 500 characters of pertinent notes about the consumer's account and/or payment. These notes can then be ingested into your LMS system of record for auditing and/or compliance purposes. To enable agent notes, contact your PayNearMe Technical Account Manager.
-
Read the payment authorization verbiage that displays in the gray box back to the consumer. If the consumer would prefer a written payment authorization, click the Print Payment Authorization link that displays below the gray box. If the consumer accepts the authorization, click Submit Payment.
-
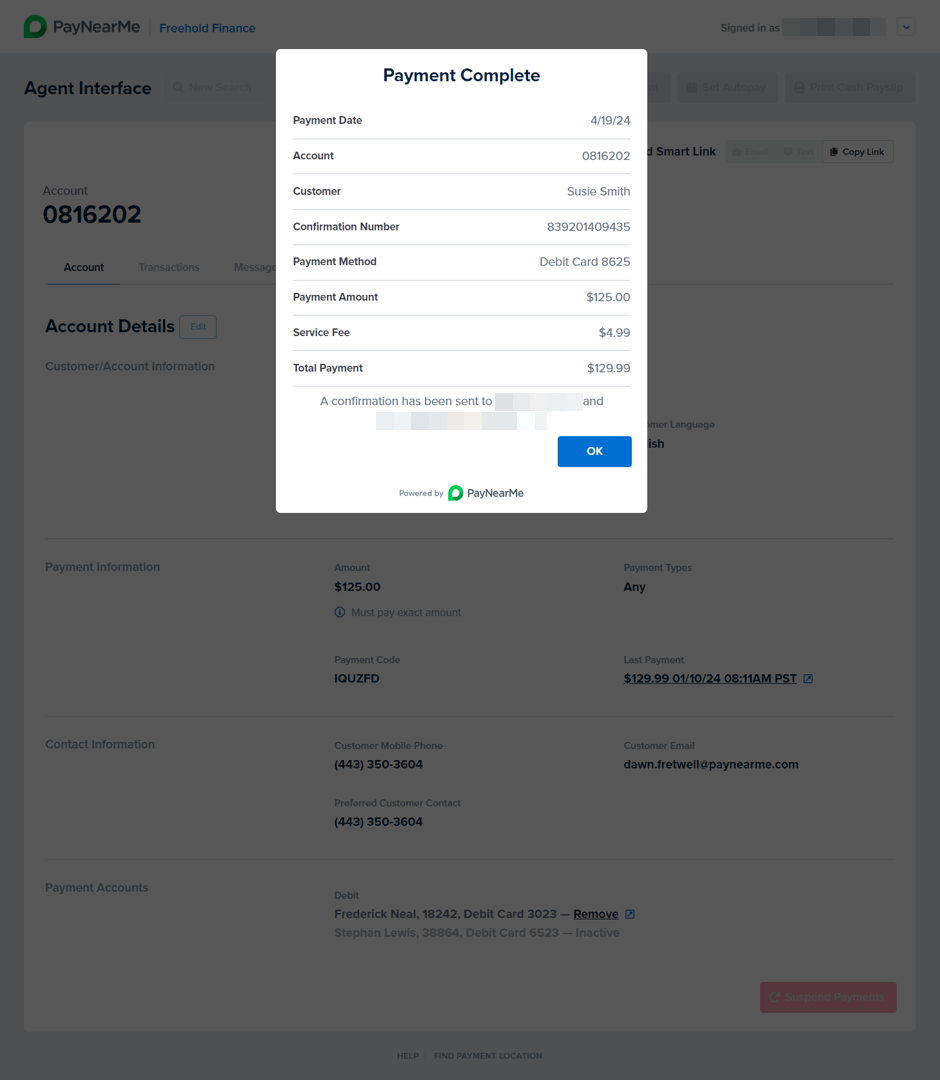
The Agent Interface processes the payment submission and displays a transaction receipt.
Scheduling a One-Time, Future-Dated Payment
To schedule a one-time, future-dated payment for a consumer, access his/her/their Account page and complete the following steps:
-
Click the One-Time Payment button in the upper right corner of the Account page or use the Ctrl+1 keyboard shortcut.

-
A “Select a Payment Method” screen displays. Click on the payment method the consumer wants to use to make a payment. NOTE: The payment methods listed will depend on which payment methods your business supports.
-
Enter the required payment method data:
-
Debit cards can be swiped or manually entered. For manual entry, ensure the Card Number, Expiration Date, CVV, Name on Card, Billing Phone, Billing Address, and ZIP Code fields are correct by reading the payment account details back to the consumer for confirmation. Also, ensure that you’ve checked the “I have read back the payment account details to the customer. I have informed the customer of all the fees associated with this transaction.” checkbox before clicking Add Card.
CVV RequirementsThe CVV security code must be entered when adding a new credit or debit card and when attempting payments with an existing credit or debit card. PayNearMe does not store CVV security codes to comply with PCI DSS requirements. Clients, however, can choose to only require security codes when adding the card and then allow subsequent payments made with that same card to go through without the CVV input. To implement this configuration, consult your PayNearMe Technical Account Manager.

-
Bank account information must be manually entered. Ensure the Routing Number, Account Number, Account Type, Account Holder’s Name, and ZIP Code fields are correct by reading the payment account details back to the consumer for confirmation. Also, ensure that you’ve checked the “I have read back the payment account details to the customer. I have informed the customer of all the fees associated with this transaction.” checkbox before clicking Add Bank.

-
-
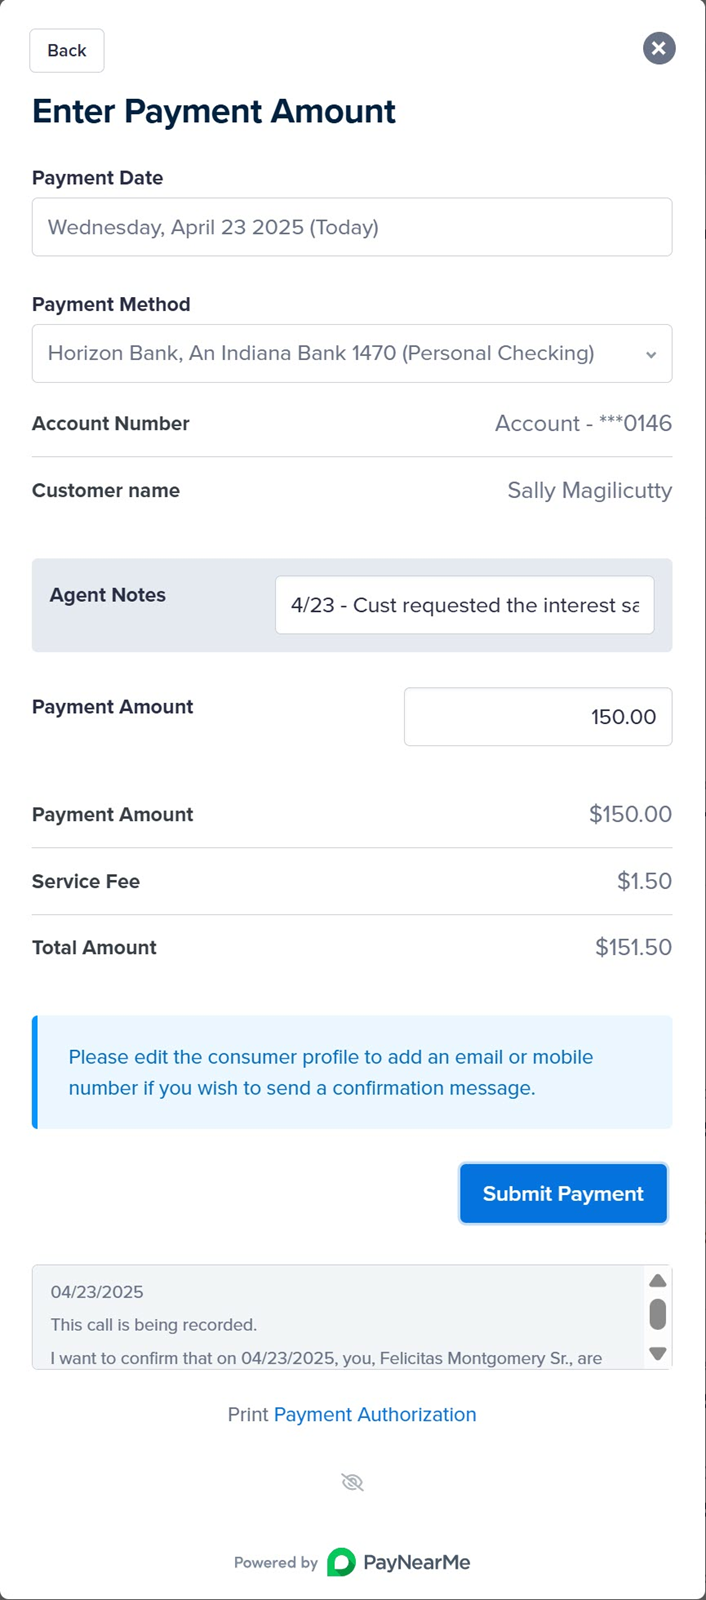
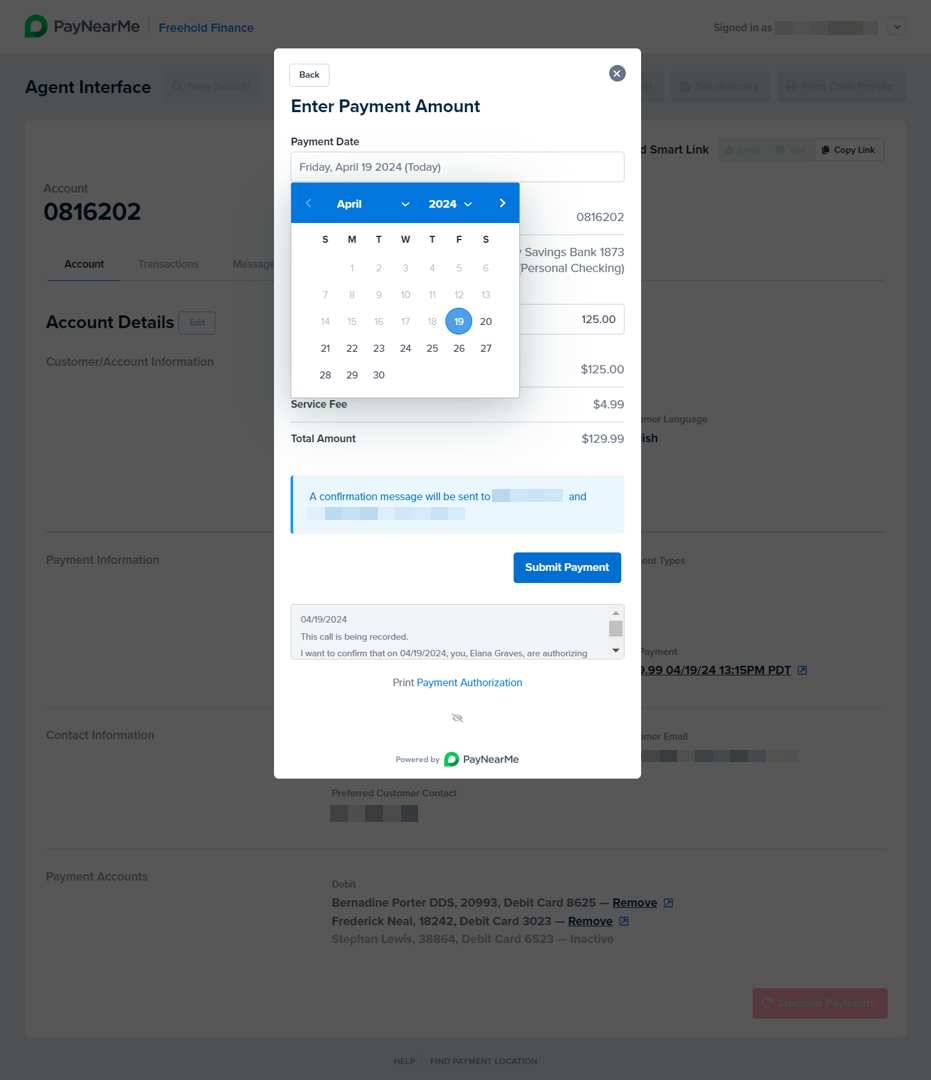
After adding the preferred payment method, the portal displays the “Enter Payment Amount” screen.

-
Click the Payment Date field and use the date picker to select the date when the consumer wants to make the payment.
-
If allowed, enter the payment amount in the Payment Amount field. NOTE: Some payment amounts may be a fixed amount that cannot be changed.
-
If enabled, enter your notes in the Agent Notes text field. This field enables agents to record up to 500 characters of pertinent notes about the consumer's account and/or payment. These notes can then be ingested into your LMS system of record for auditing and/or compliance purposes. To enable agent notes, contact your PayNearMe Technical Account Manager.

-
Read the payment authorization verbiage that displays in the gray box back to the consumer. If the consumer would prefer a written payment authorization, click the Print Payment Authorization link that displays below the gray box. If the consumer accepts the authorization, click Submit Payment.
-
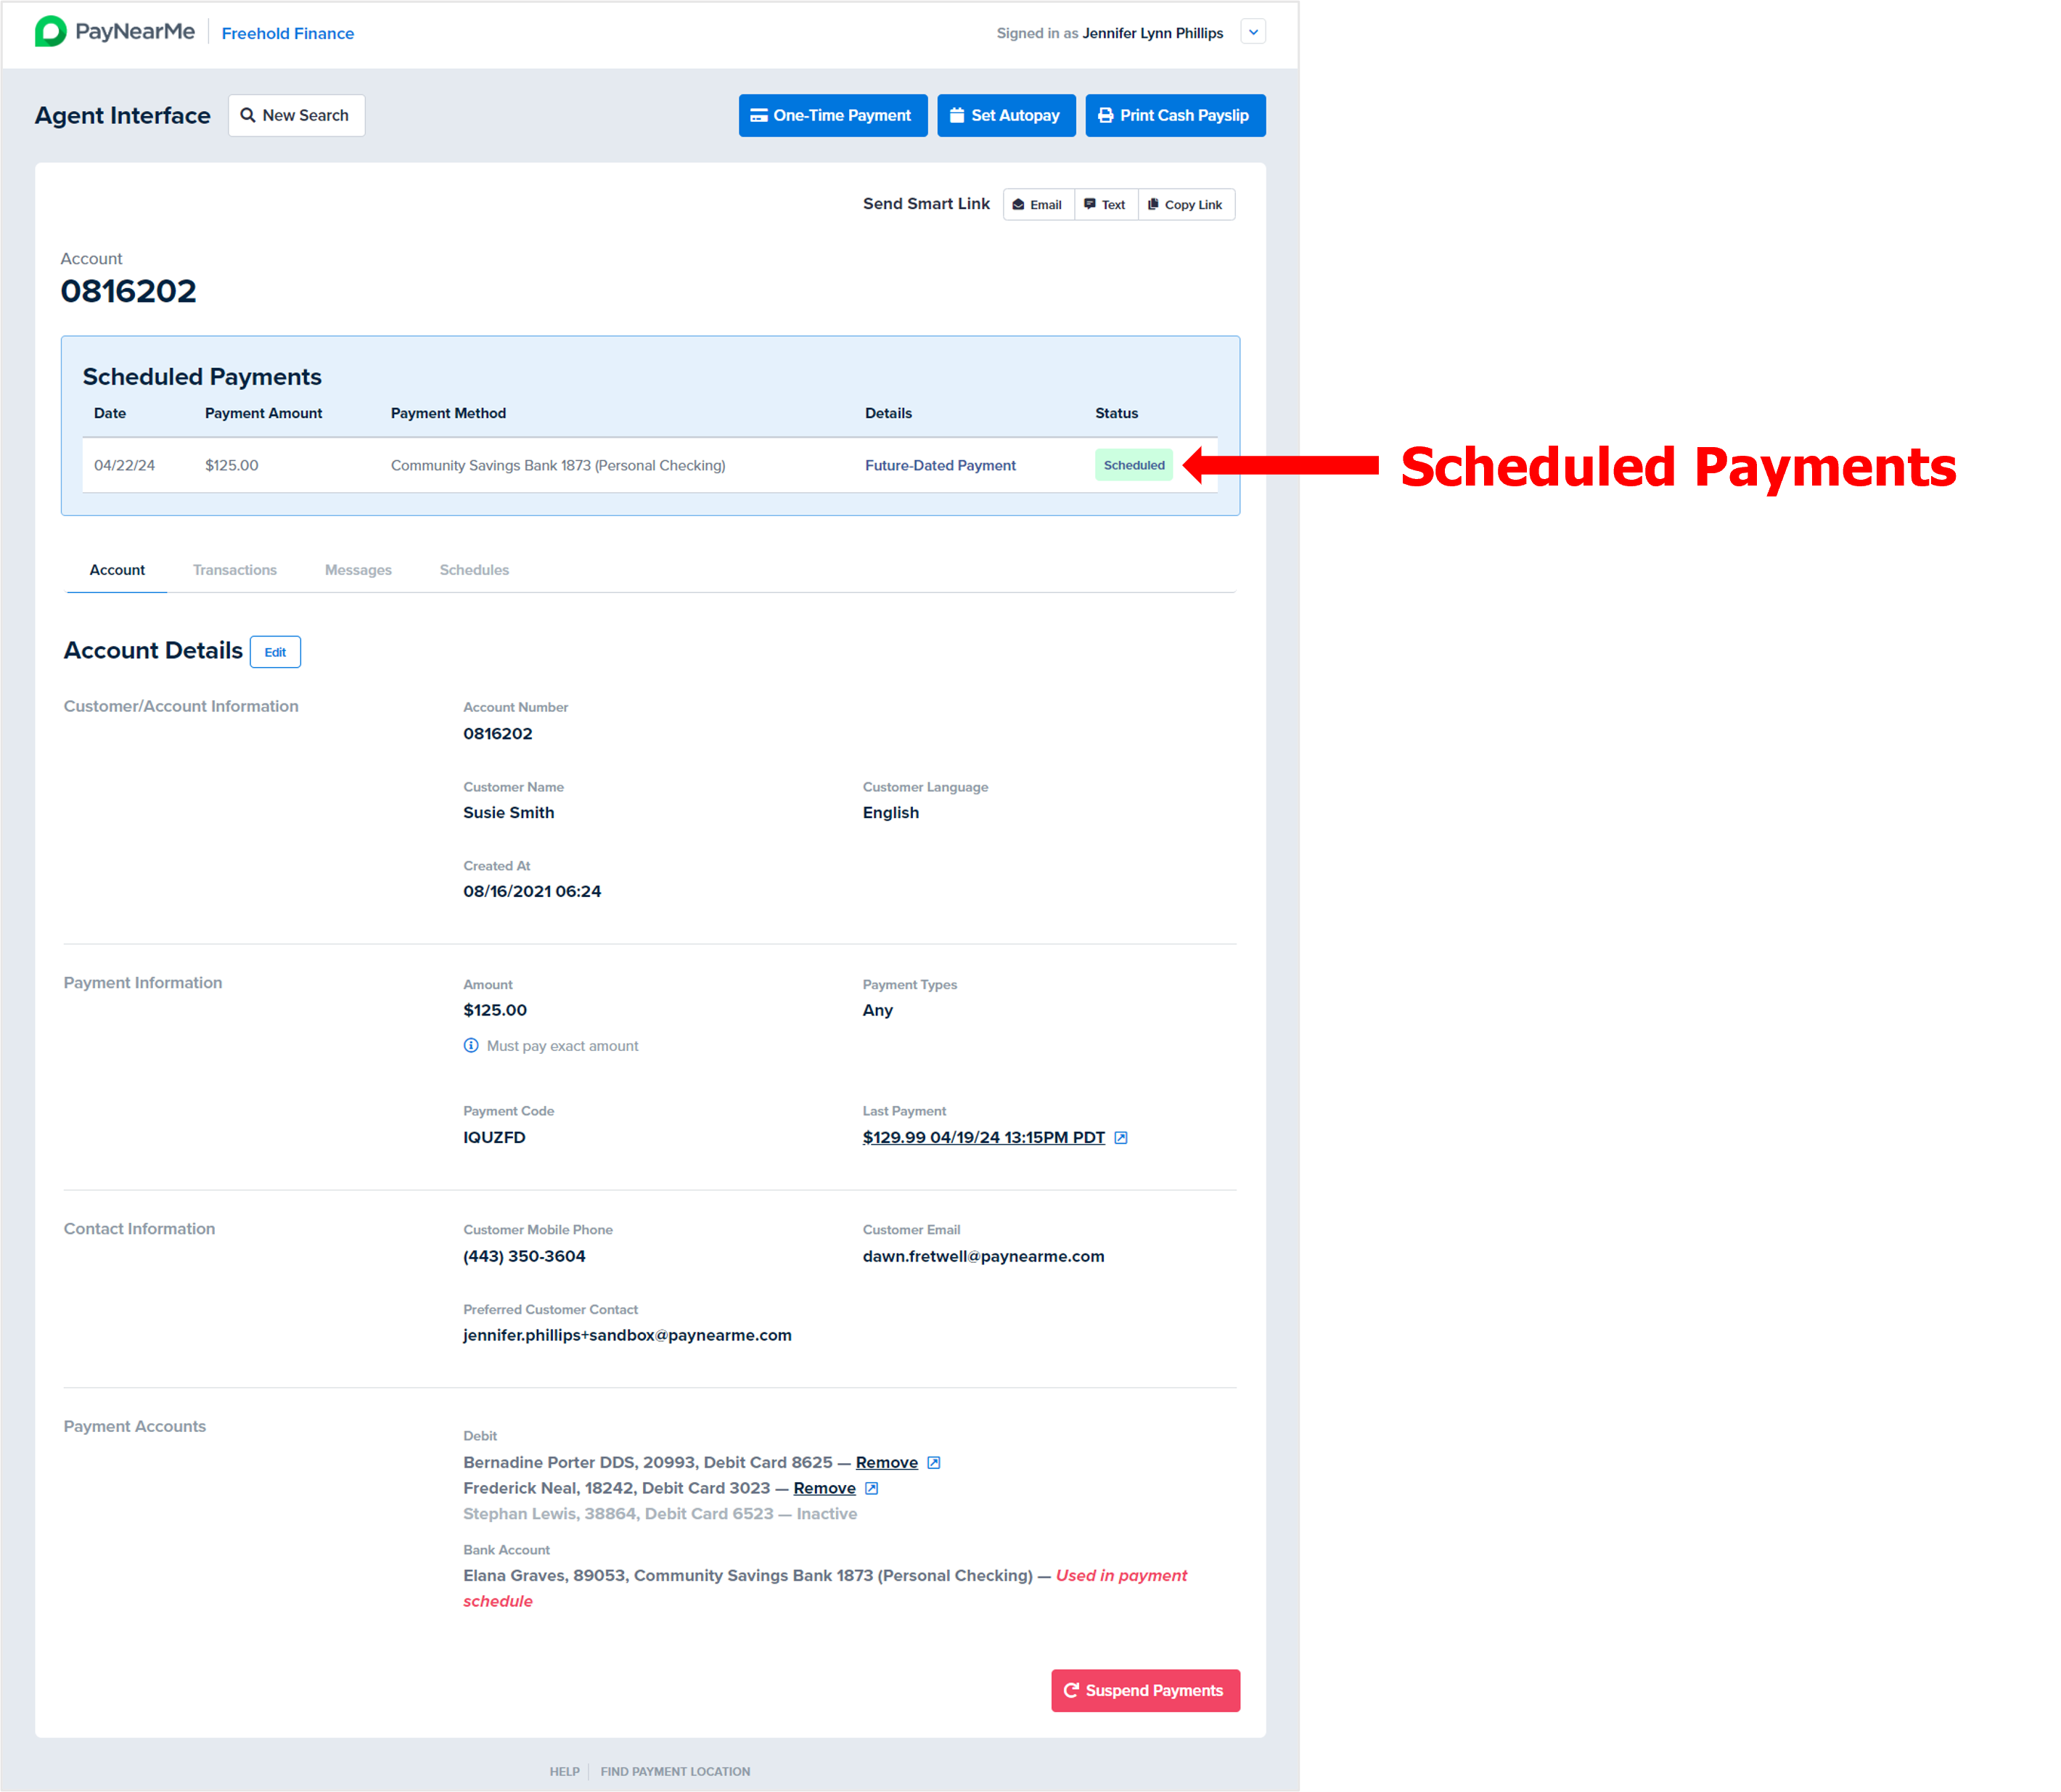
The Agent Interface creates a one-time, scheduled transaction and displays its details.
-
Click OK to return to the Account page, which now prominently displays the scheduled transaction.
Setting Up Multiple One-Time Payments for a Consumer
The Agent Interface can be configured to enable agents to make or schedule a one-time payment and then schedule up to five future-dated, one-time payments within a single modal window. This feature streamlines the payment process, allowing agents to efficiently accommodate consumers who require greater flexibility than a standard autopay schedule offers (i.e., non-standard cadence (every three weeks), different payment methods for different payment amounts, etc.). To enable this functionality, consult your PayNearMe Technical Account Manager.
Once enabled, agents can follow the payment flow described in either the Making an Immediate One-Time Payment or the Scheduling a One-Time, Future-Dated Payment section above and then complete the following steps to set up additional payments.
-
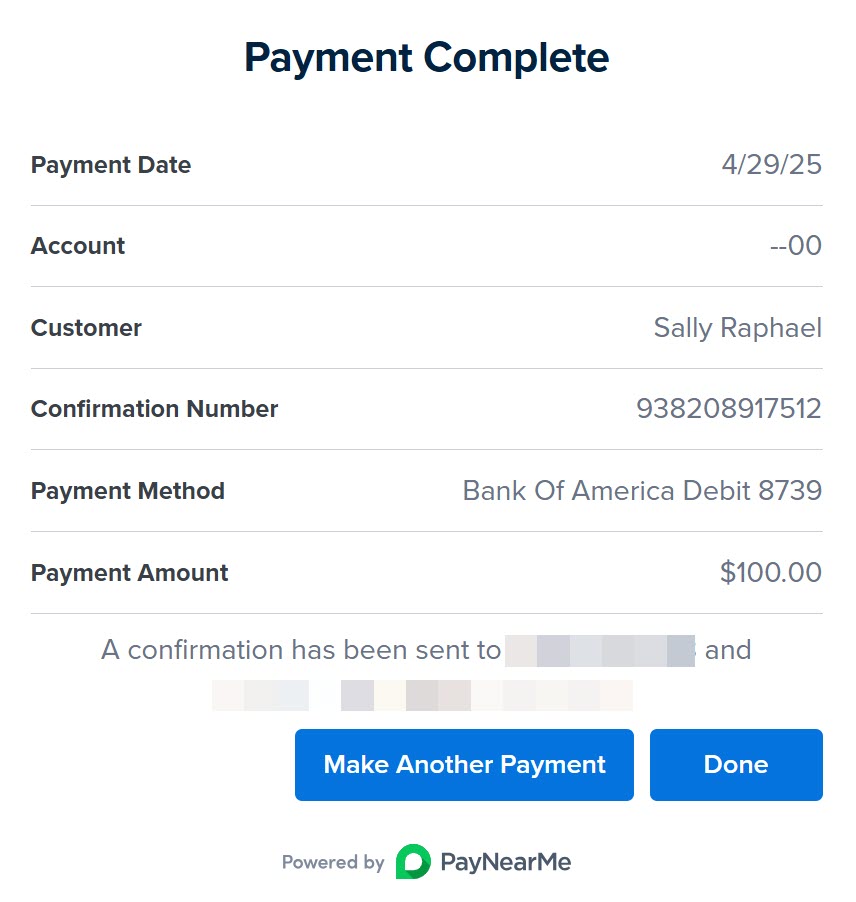
After submitting the payment, the "Payment Complete" screen displays in the One-Time Payment modal.
-
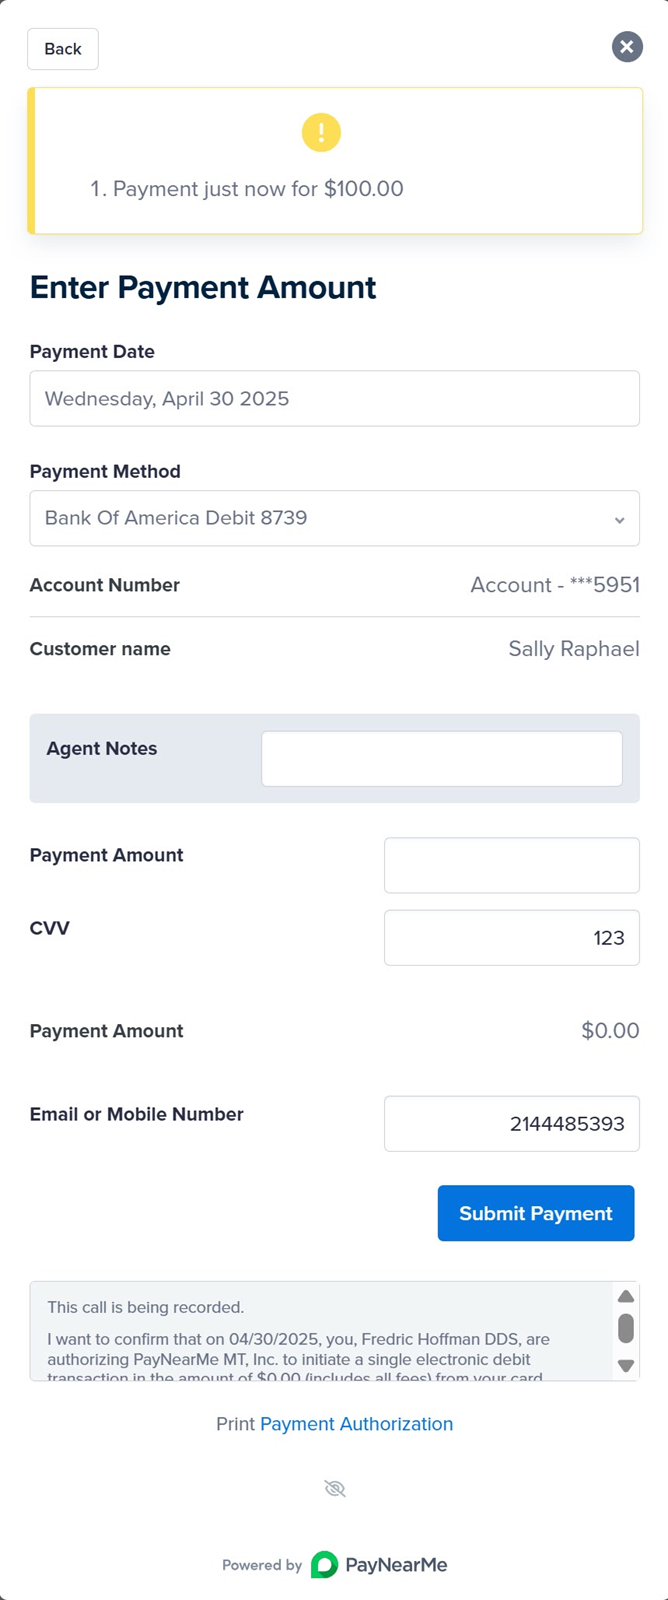
Click Make Another Payment. The modal returns you to the "Enter Payment Amount" screen with a banner showing how many payments have been submitted thus far.
-
If desired, use the date picker in the Payment Date field to select the date of the next payment. Notice that it defaults to one day in the future.
-
Use the dropdown menu in the Payment Method field to select from a list of existing payment methods or click the Add Another option to add and select a new payment method.
-
If enabled, enter your notes in the Agent Notes text field. This field enables agents to record up to 500 characters of pertinent notes about the consumer's account and/or payment. These notes can then be ingested into your LMS system of record for auditing and/or compliance purposes. To enable agent notes, contact your PayNearMe Technical Account Manager.
-
Enter the amount the consumer wants to pay for this payment in the Payment Amount field.
-
If using a card, enter the CVV number in the CVV field.
-
Ensure the Email or Mobile Number field displays either the consumer's email address or mobile phone number.
-
Read the payment authorization verbiage that displays in the gray box back to the consumer. If the consumer would prefer a written payment authorization, click the Print Payment Authorization link that displays below the gray box. If the consumer accepts the authorization, click Submit Payment.
-
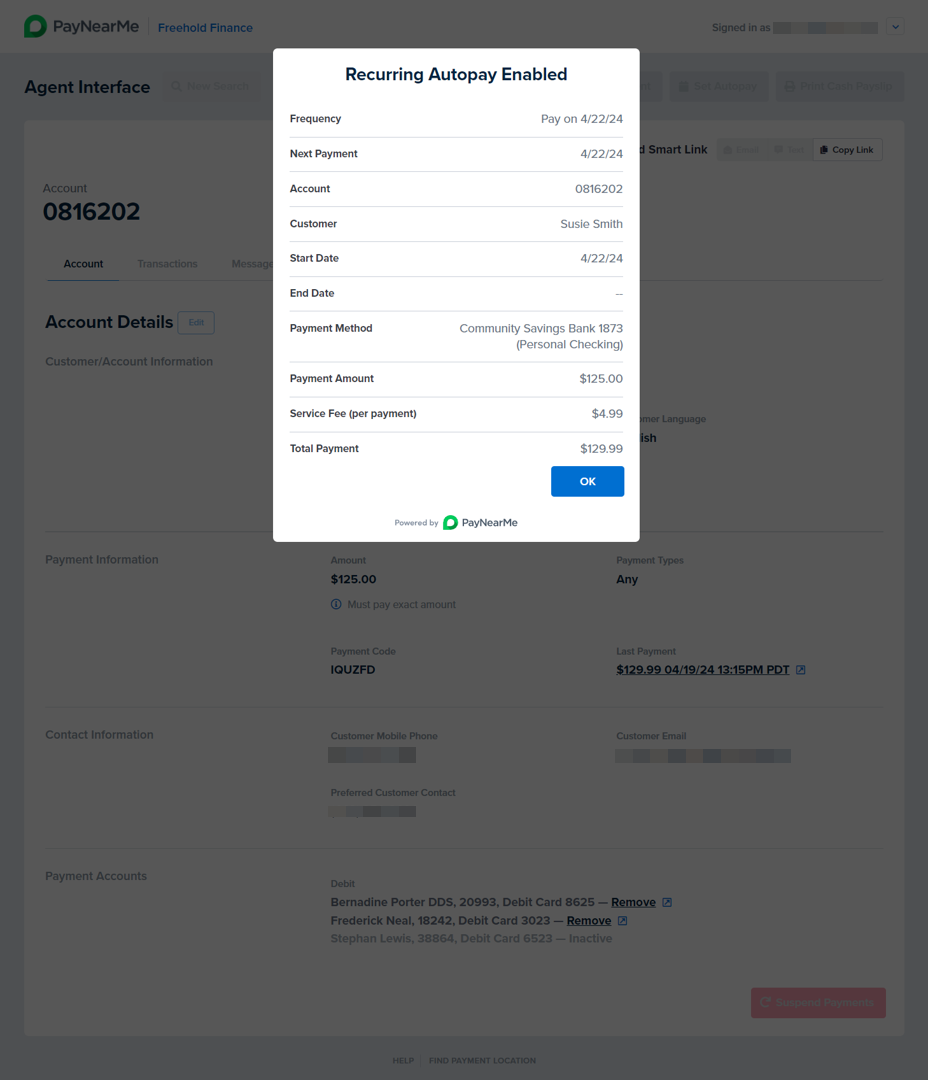
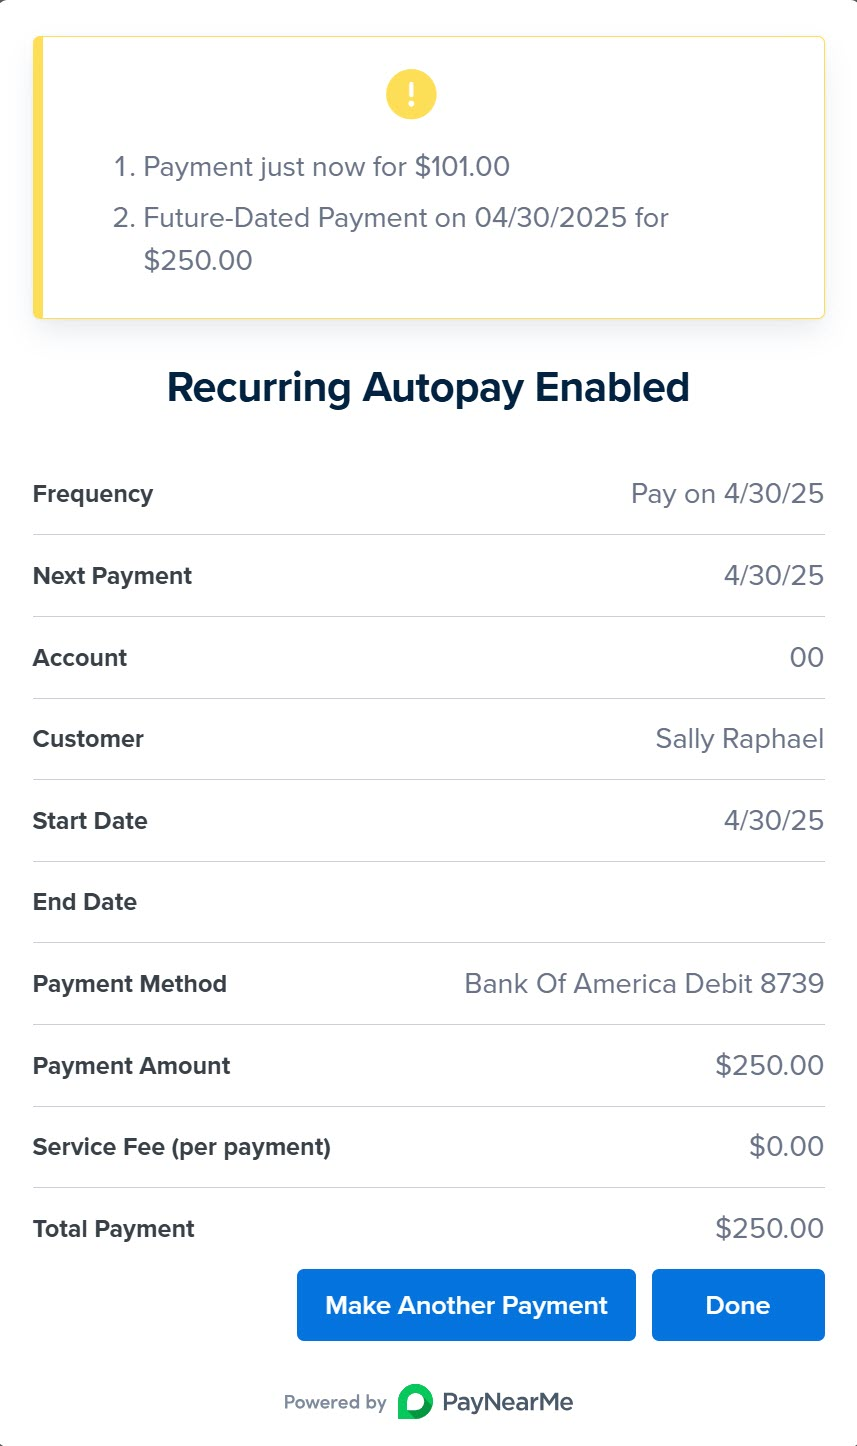
The Recurring Autopay Enabled screen displays showing the parameters of the scheduled payment.
-
To schedule another payment, click Make Another Payment and repeat steps 3-9. The "Enter Payment Amount" screen updates the banner showing the number of payments made or scheduled thus far.

Canceling One-Time Payments
All unsettled transactions can be canceled; otherwise, you’ll need to submit a refund transaction. For ACH payments, this is before the daily batch transfer to the bank. For card payments, the cutoff time is based on the card processing network.
Canceling Immediate One-Time Payments
To cancel an immediate one-time payment for a consumer, access his/her/their Account page and complete the following steps:
-
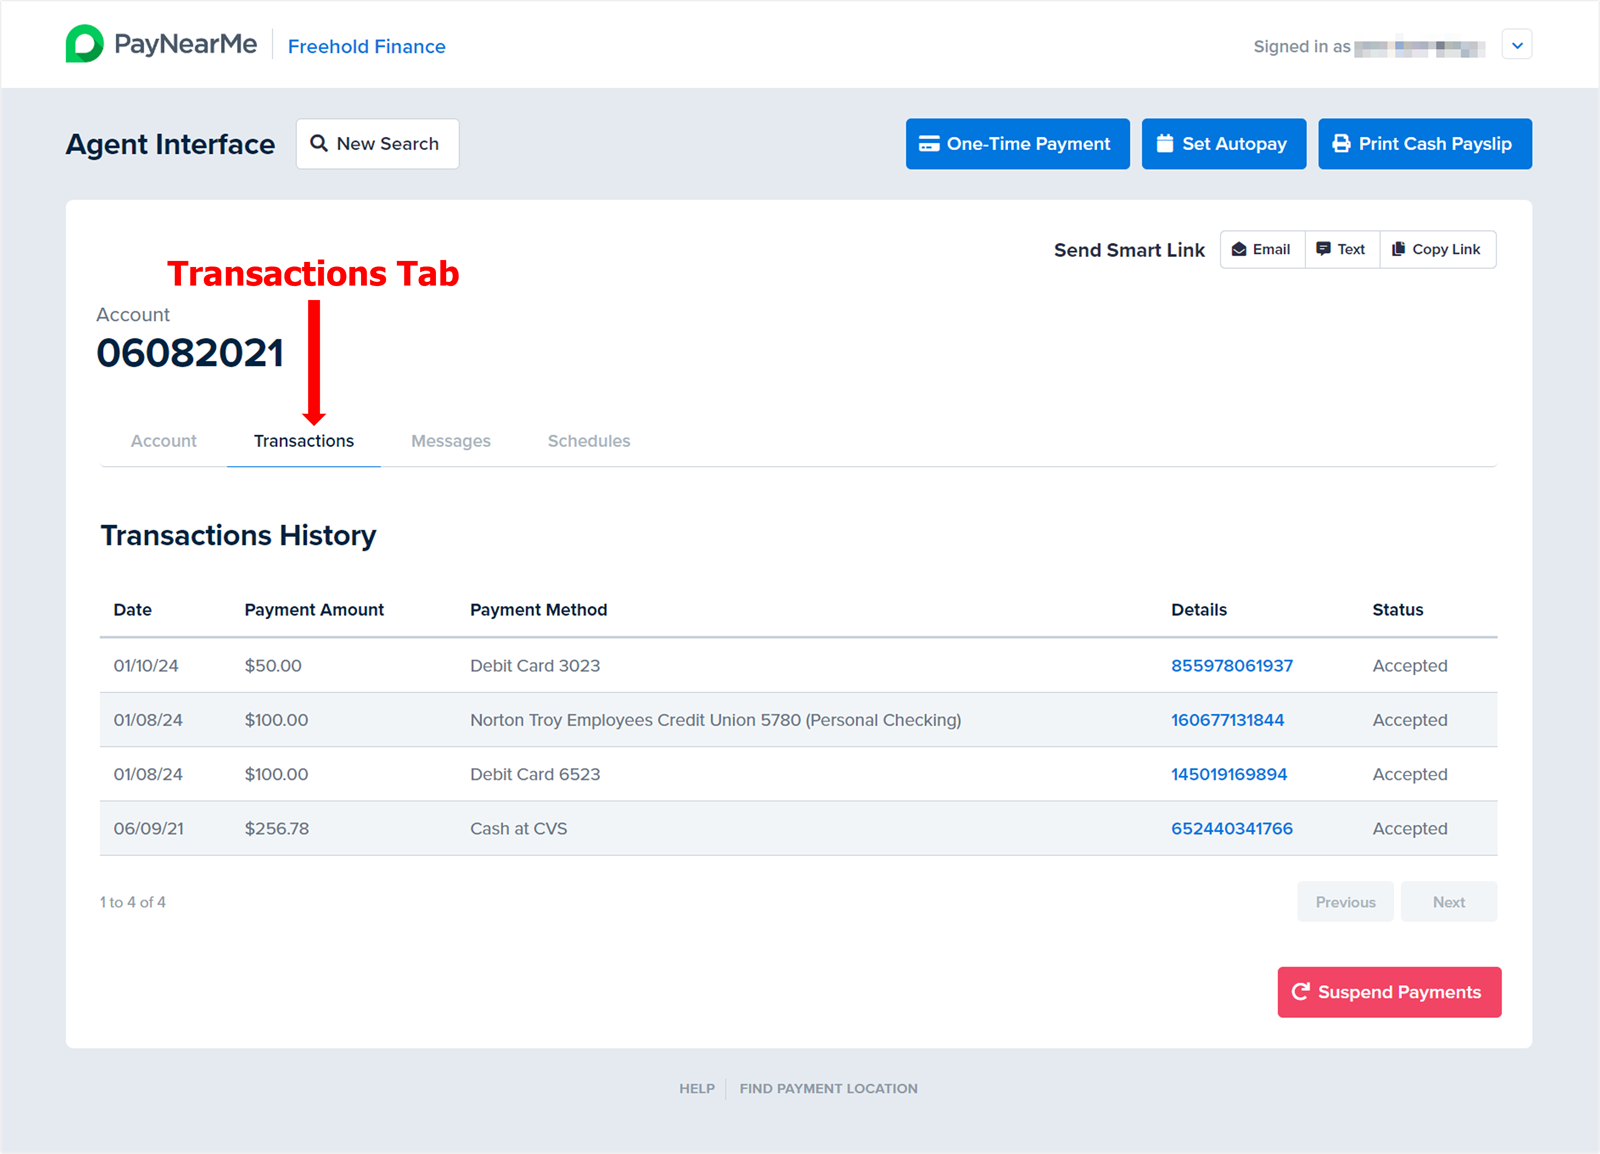
Click the Transactions tab. A list of payments made to the account display.
-
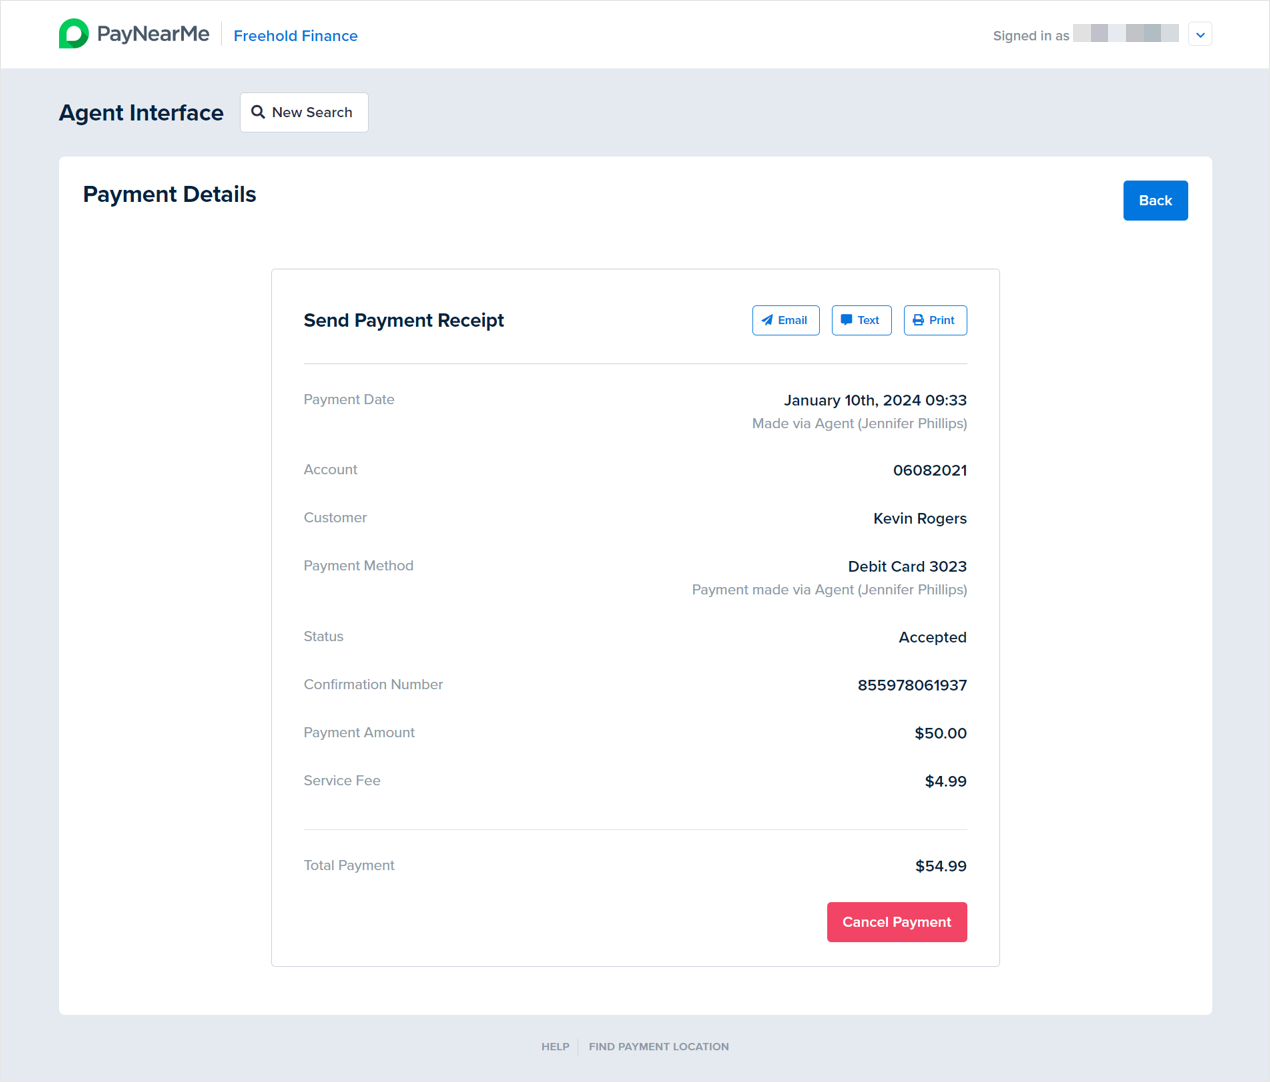
Click the confirmation number of the transaction you wish to cancel. The transaction’s confirmation number displays under the Details header in the table. The transaction’s Payment Details screen displays.
-
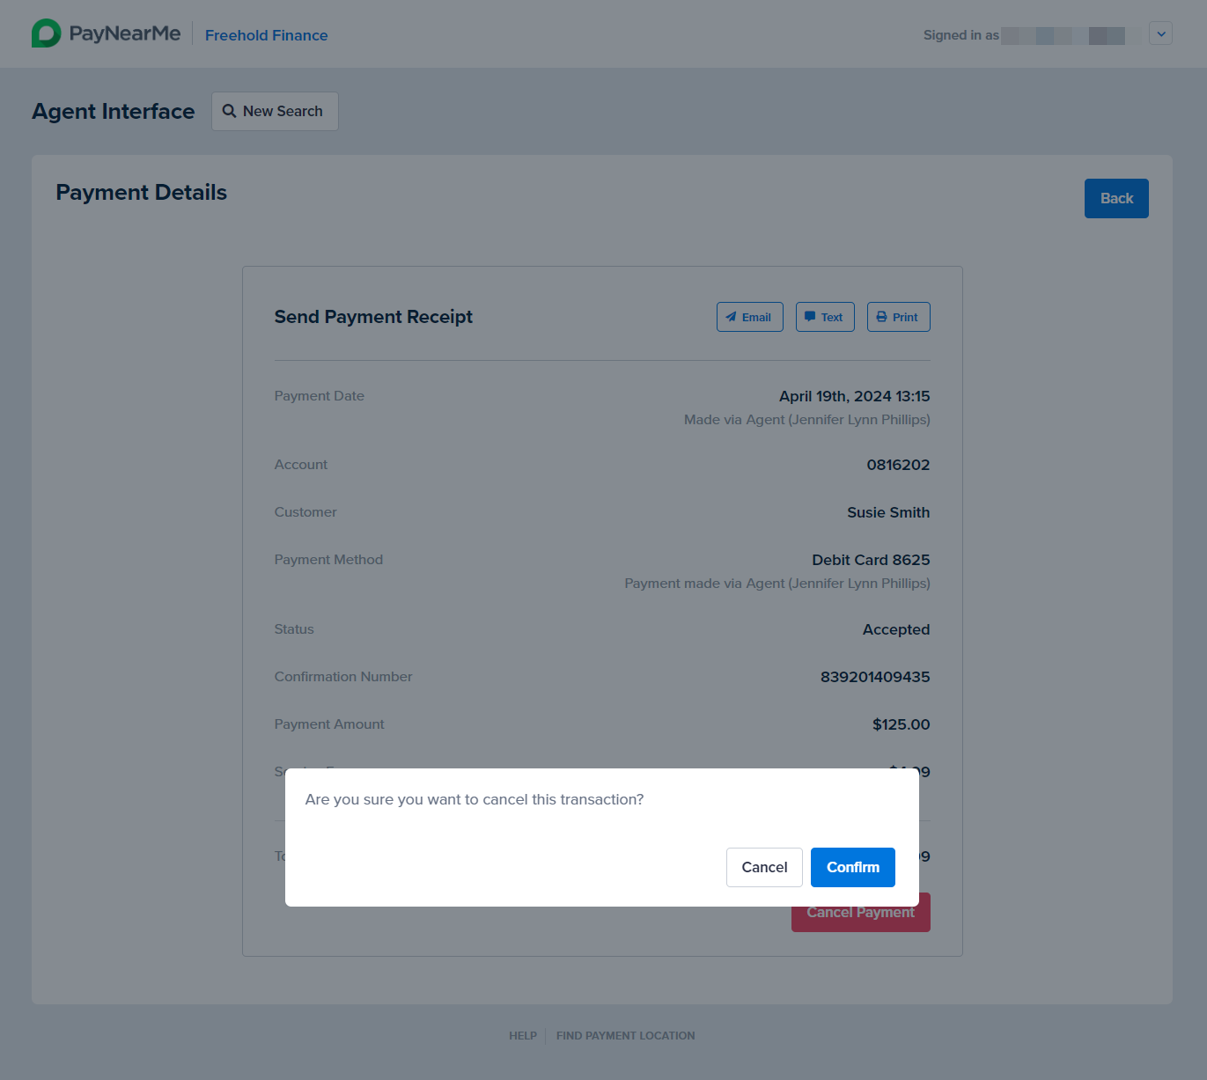
Click the Cancel Payment button. A message displays asking you to confirm the cancellation.
-
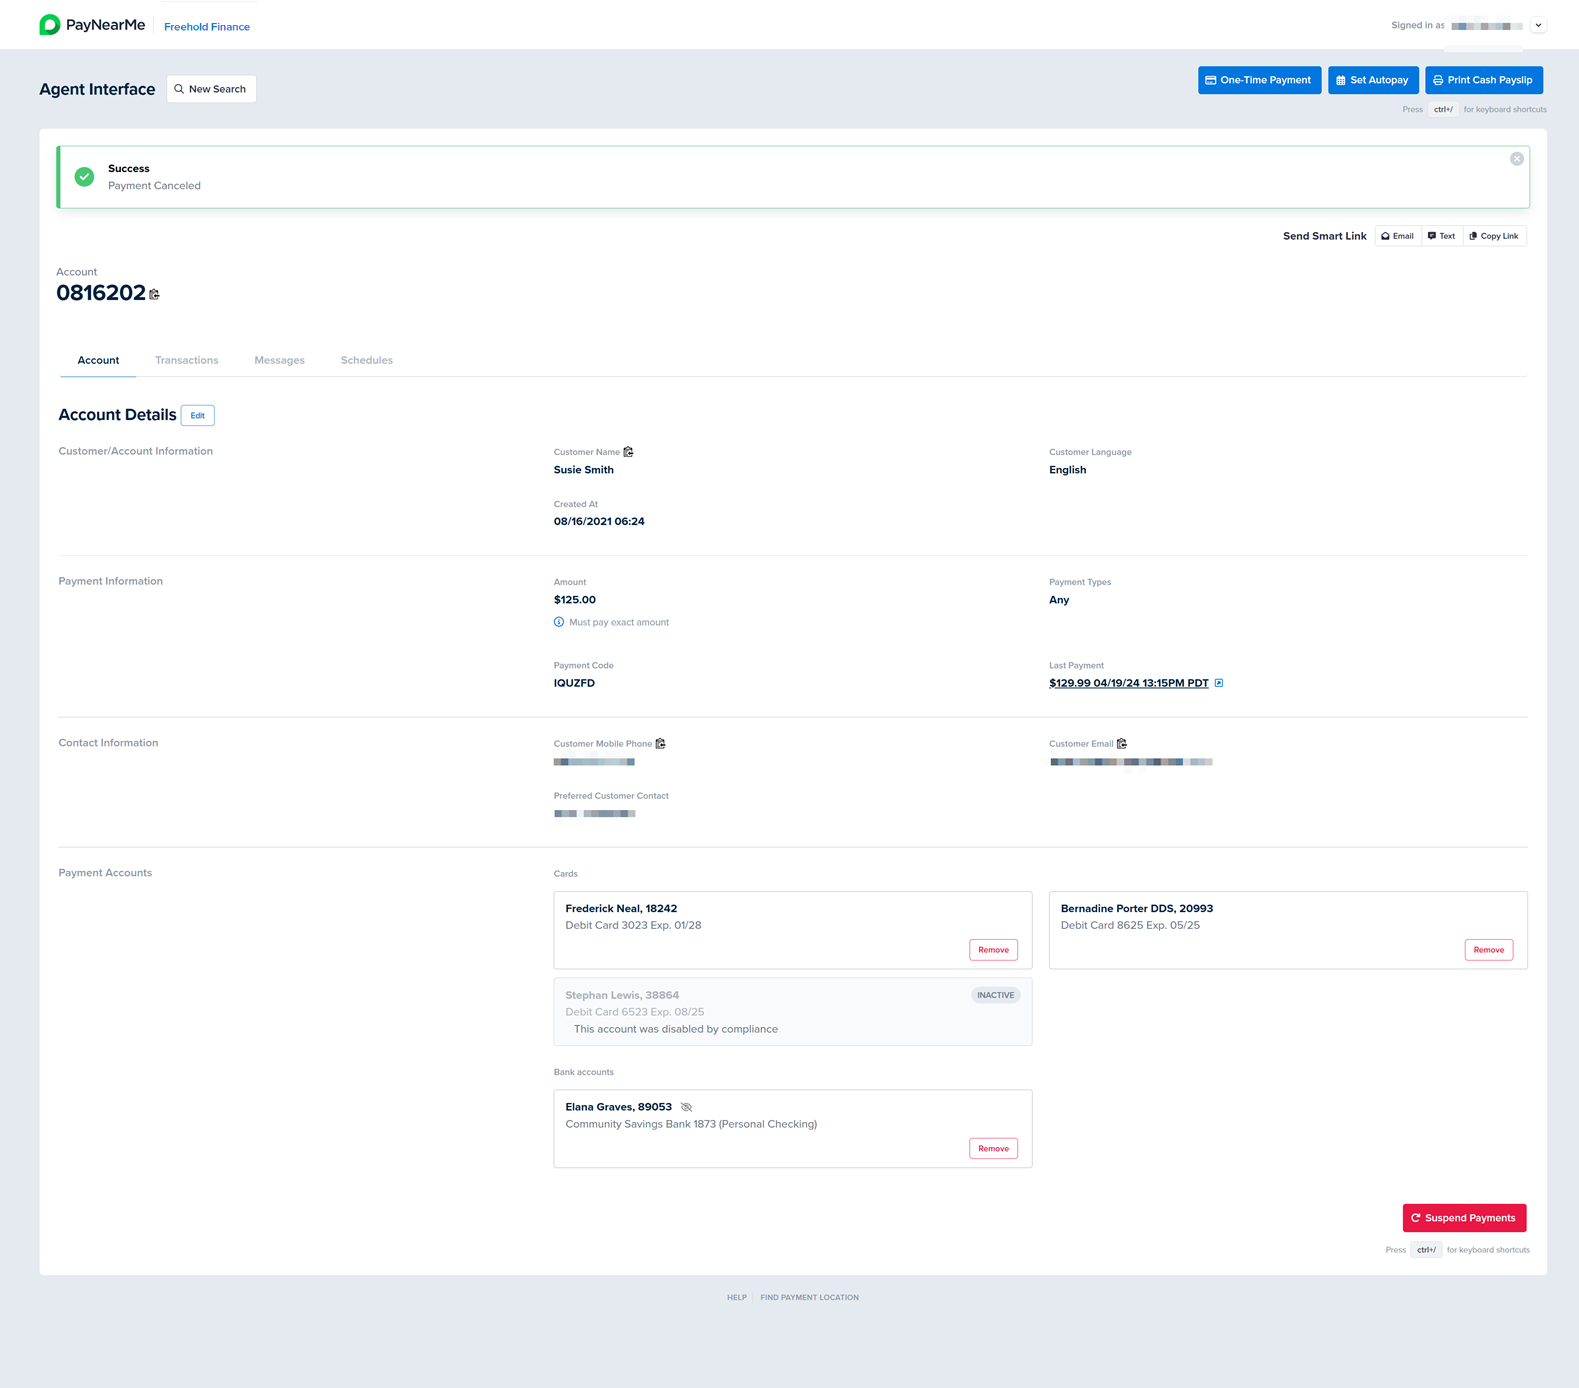
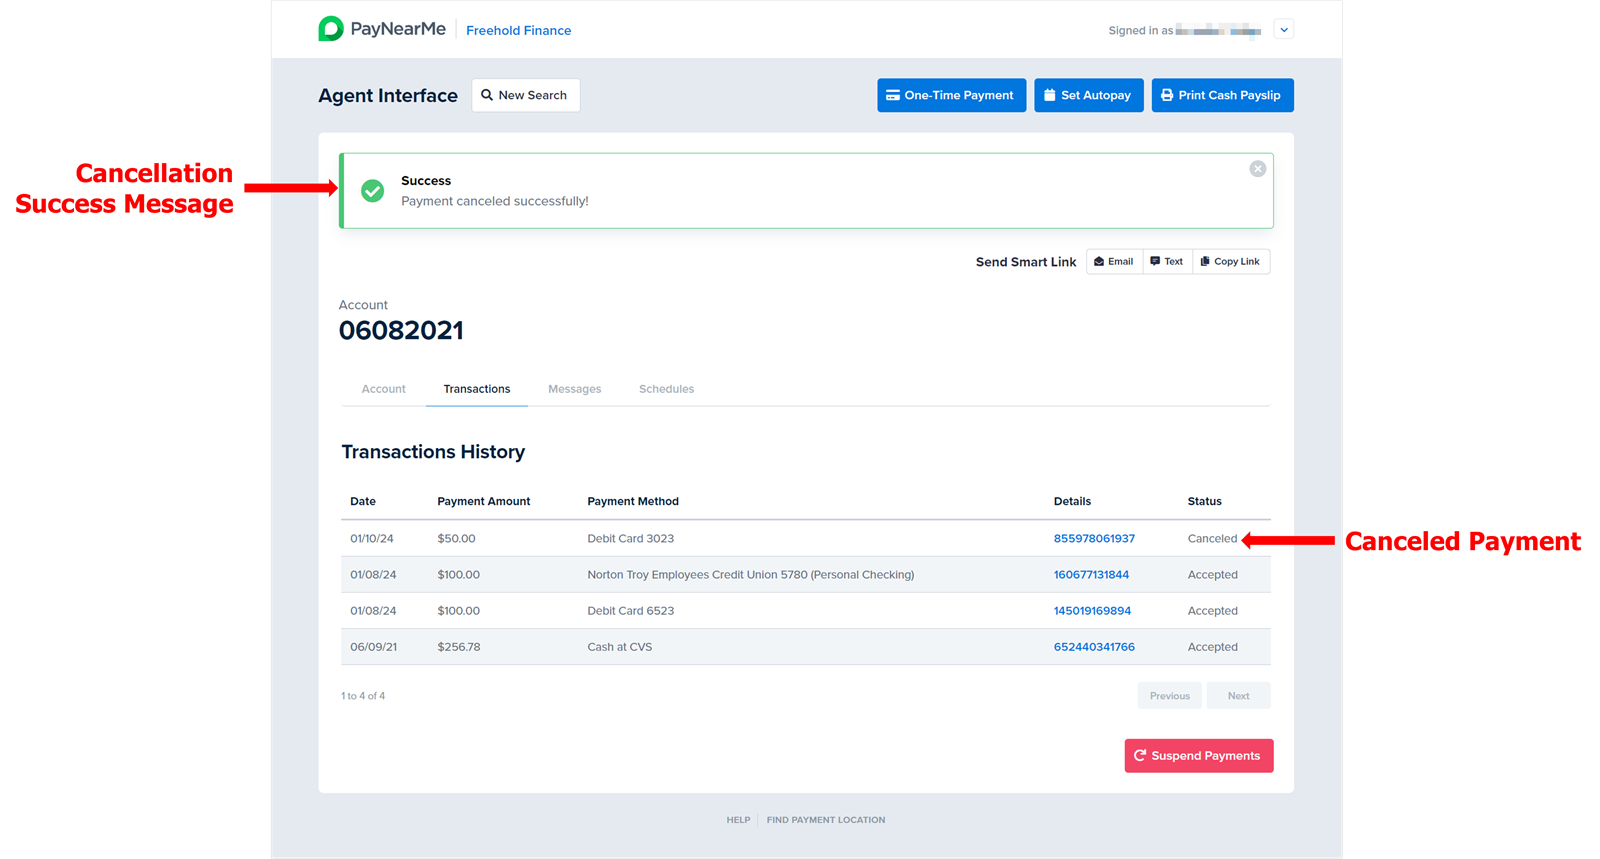
Click the Confirm button to complete the transaction cancellation. The Agent Interface returns to the Transactions tab with a message indicating whether or not the payment was successfully canceled.
Canceling a Scheduled One-Time Payment
All unprocessed, scheduled one-time transactions can be canceled. For ACH payments, this is before the daily batch transfer to the bank on the day of the scheduled transaction. For card payments, the cutoff time is based on the card processing network on the day of the scheduled transaction. To cancel a scheduled one-time payment for a consumer, access his/her/their Account page and complete the following steps:
-
In the Scheduled Payments box on the Account page, click on the scheduled payment you wish to cancel.
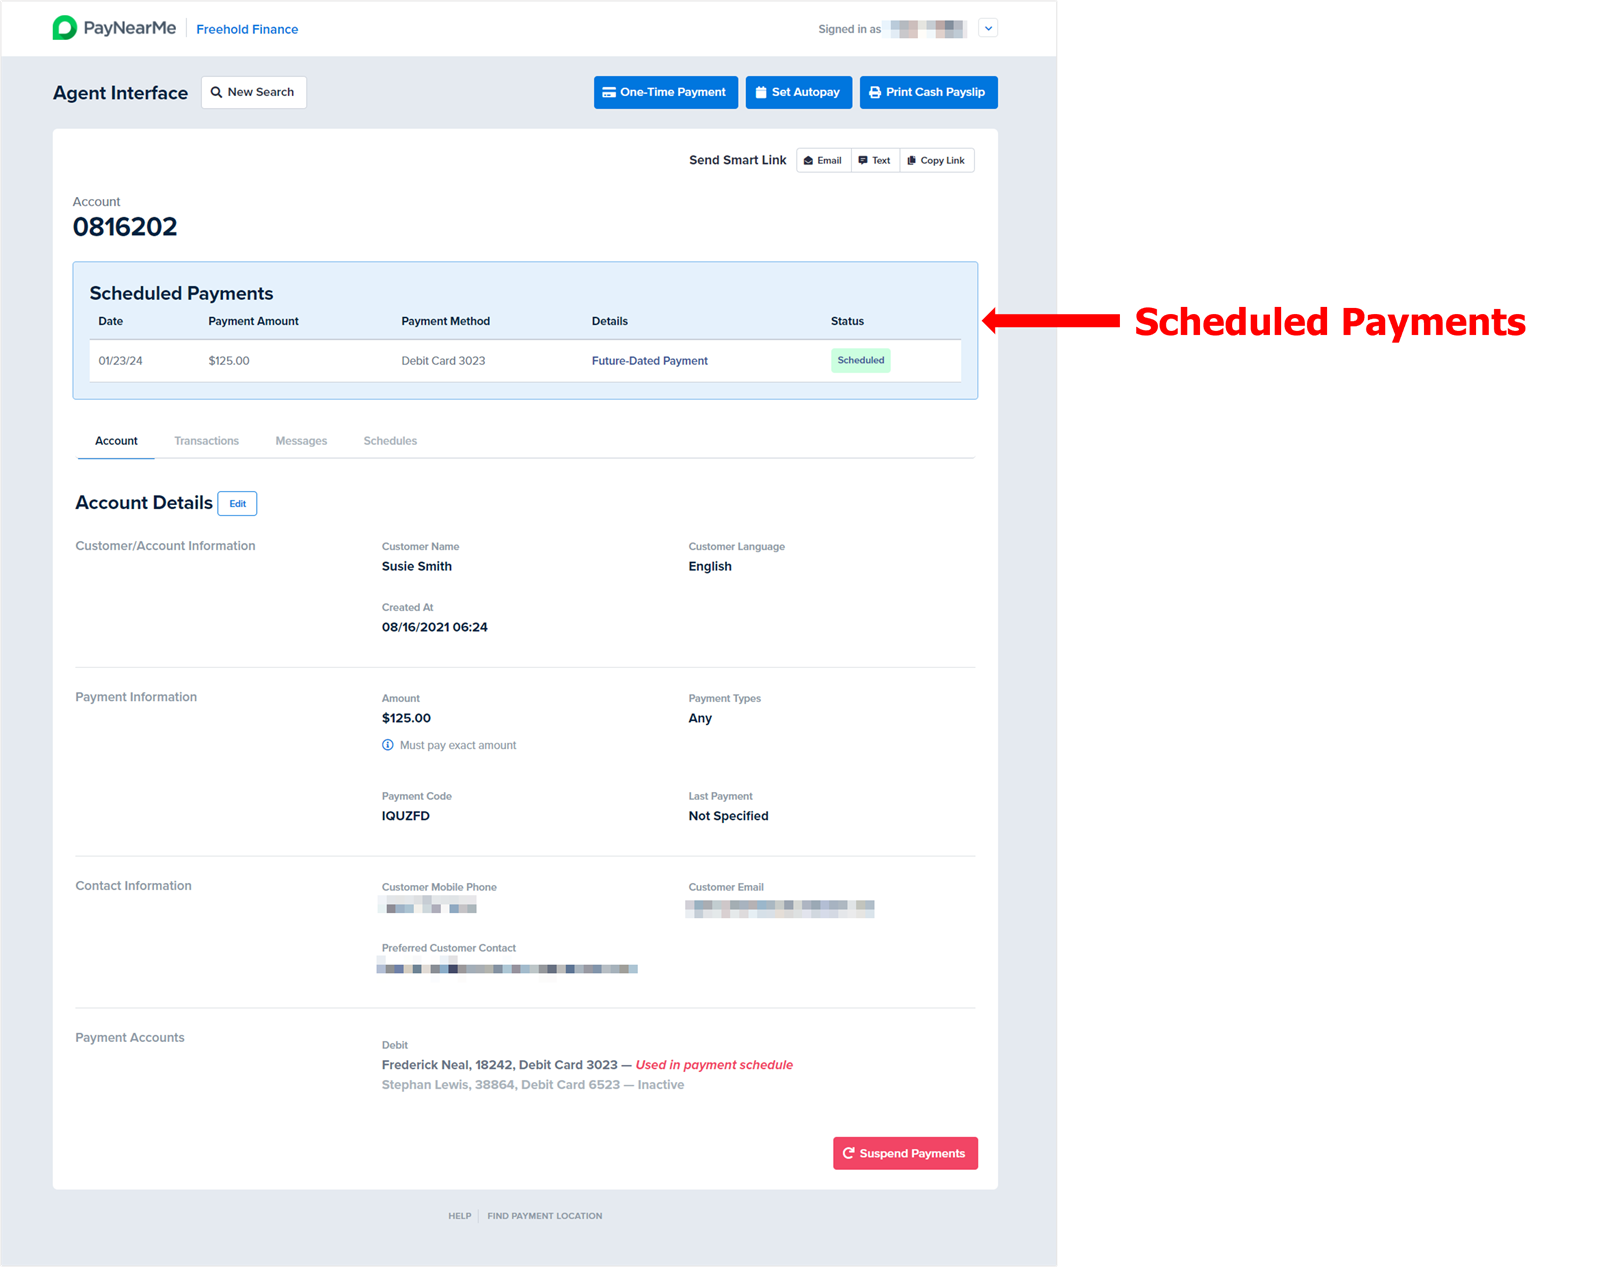
The Scheduled Payment screen displays.
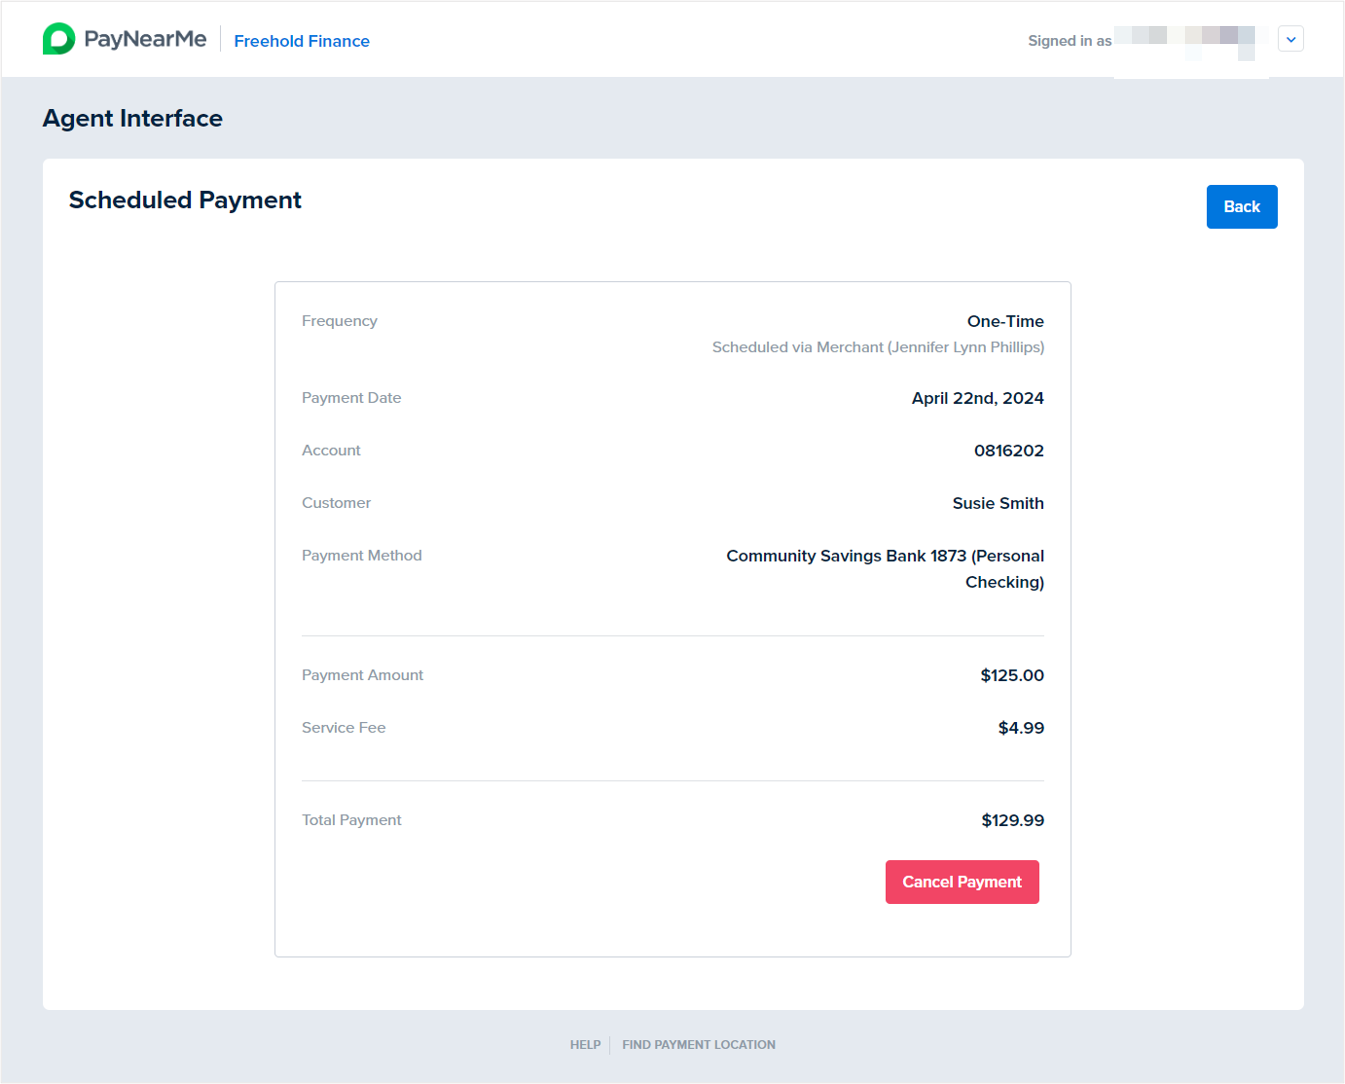
-
Click the Cancel Payment button. A message displays asking you to confirm the cancellation.
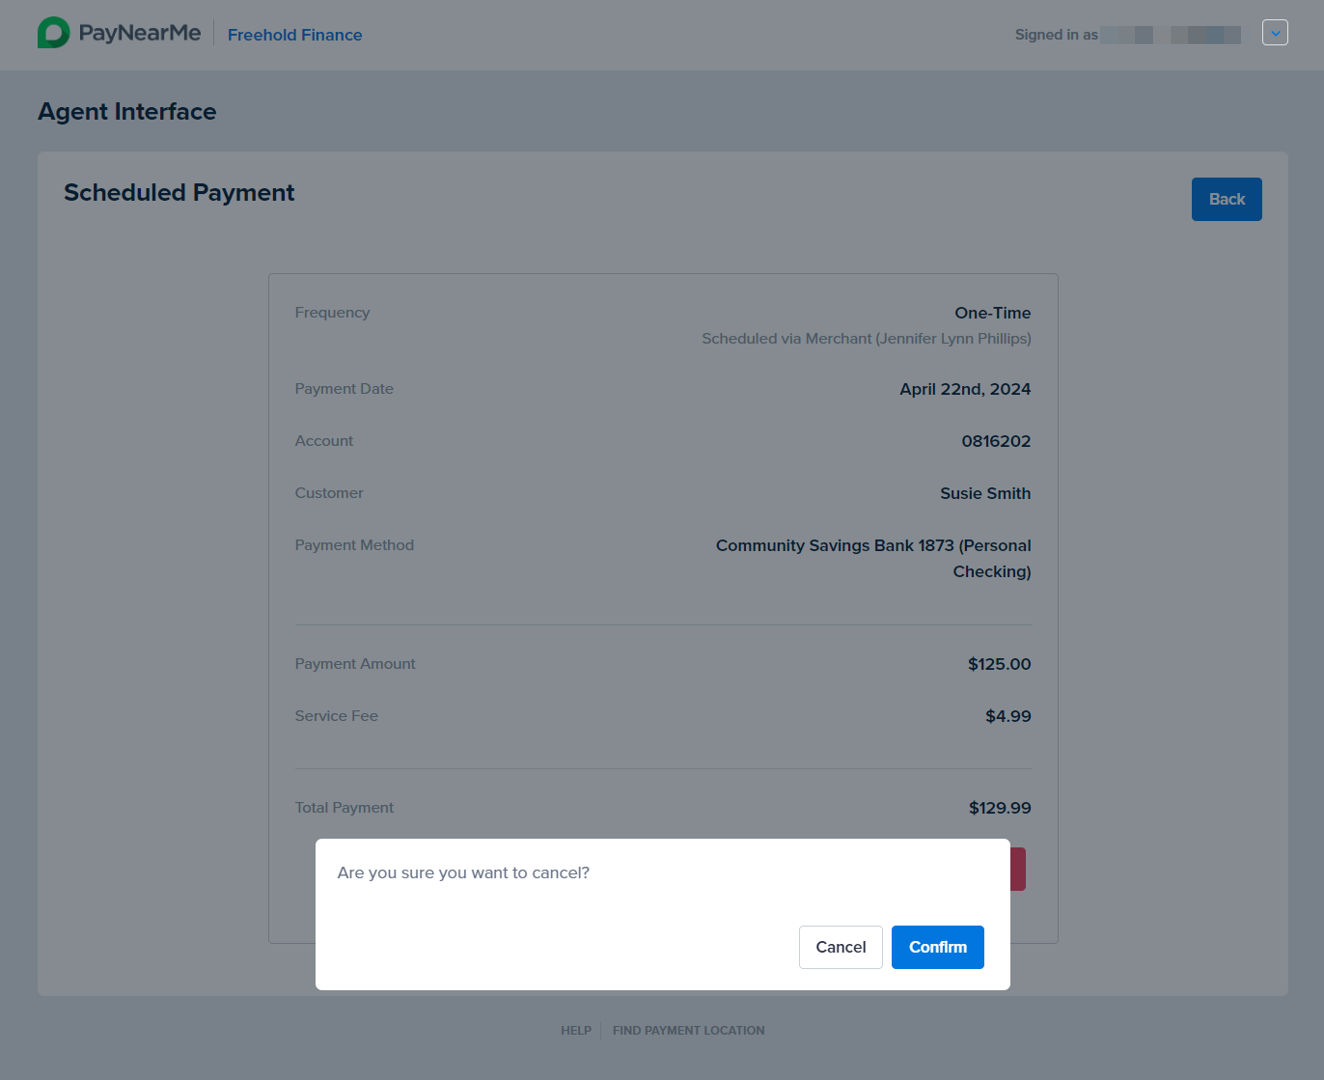
-
Click the Confirm button. The Agent Interface returns you to the Account page with a message indicating whether or not the cancellation was successful.