
Managing Permission Groups
Learn how to create and manage permission groups in the PayNearMe Business Portal, including how to assign users individually or in bulk, edit group permissions, and audit changes using Activity Logs.
Site administrators can create permission groups for predefined roles within the Business Portal to streamline access management. This feature is particularly beneficial for organizations with large user populations where multiple users share the same role and access requirements. When permission changes are needed, administrators can update the associated permission group rather than modifying each user account individually, improving efficiency and consistency.
Creating Permission Groups
To create a permission group, complete the following steps:
-
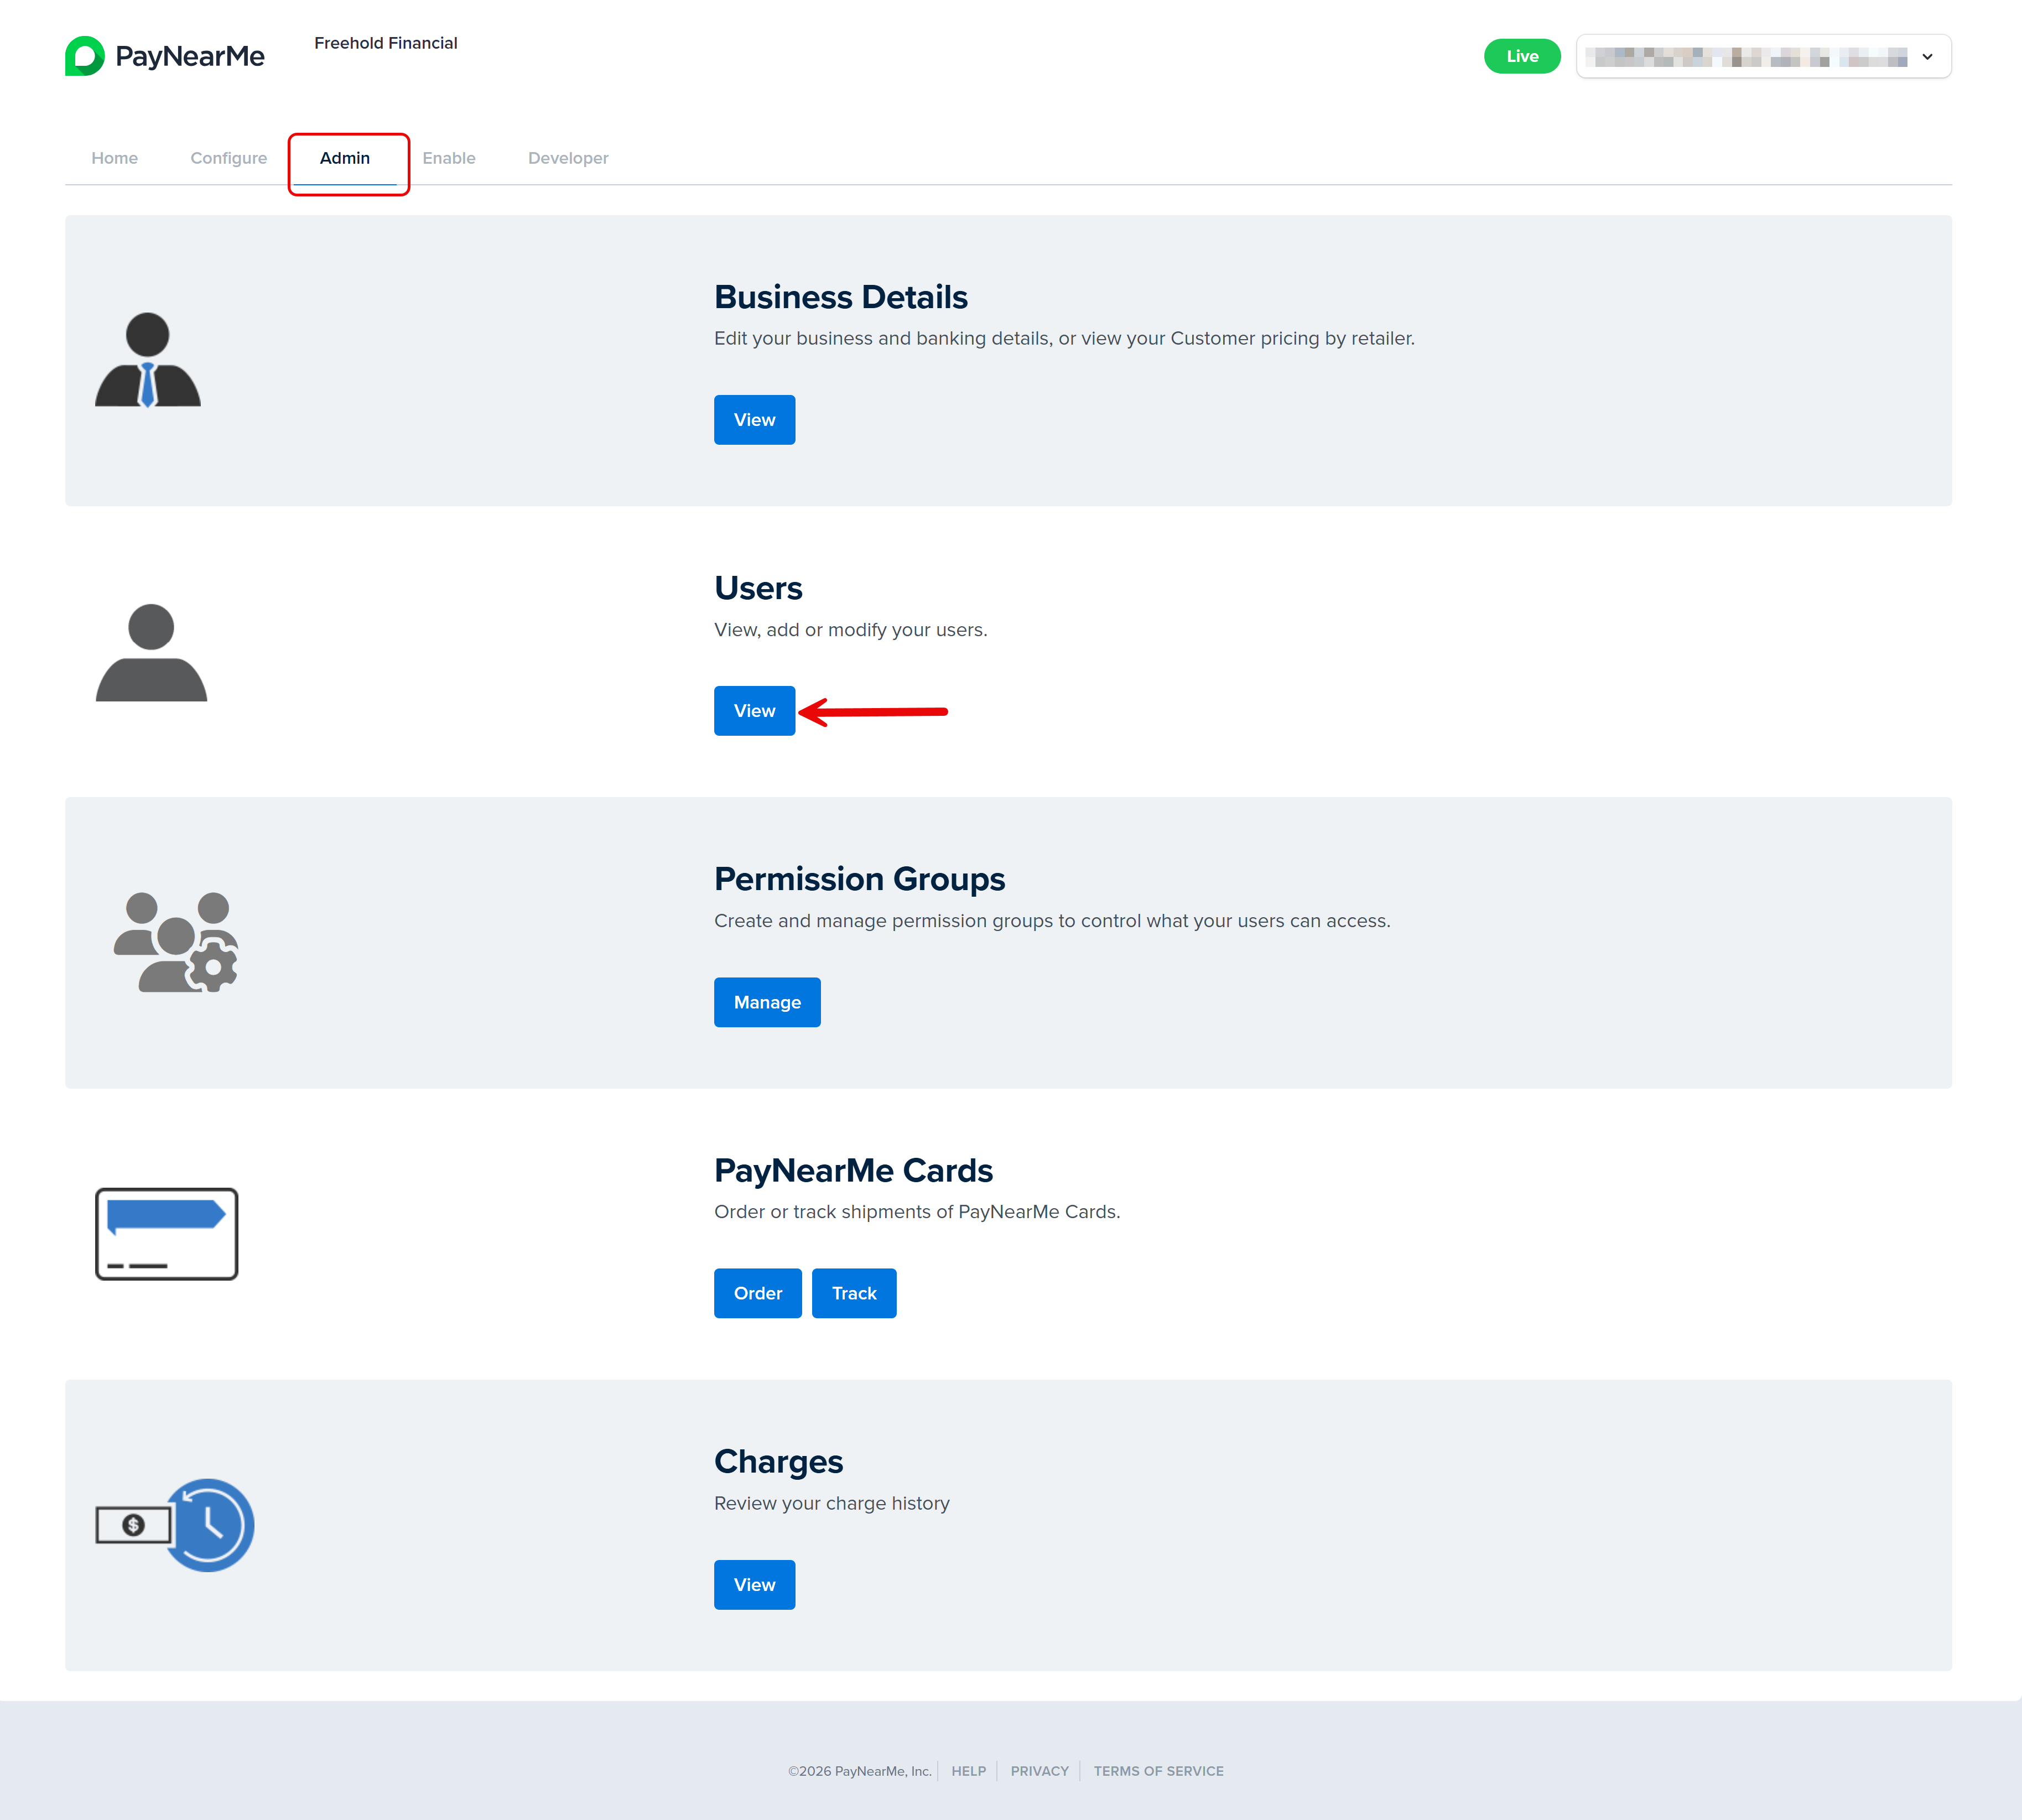
Access the Admin tab of the Business Portal and click Manage under the Permission Groups section. The Permission Groups page displays.

-
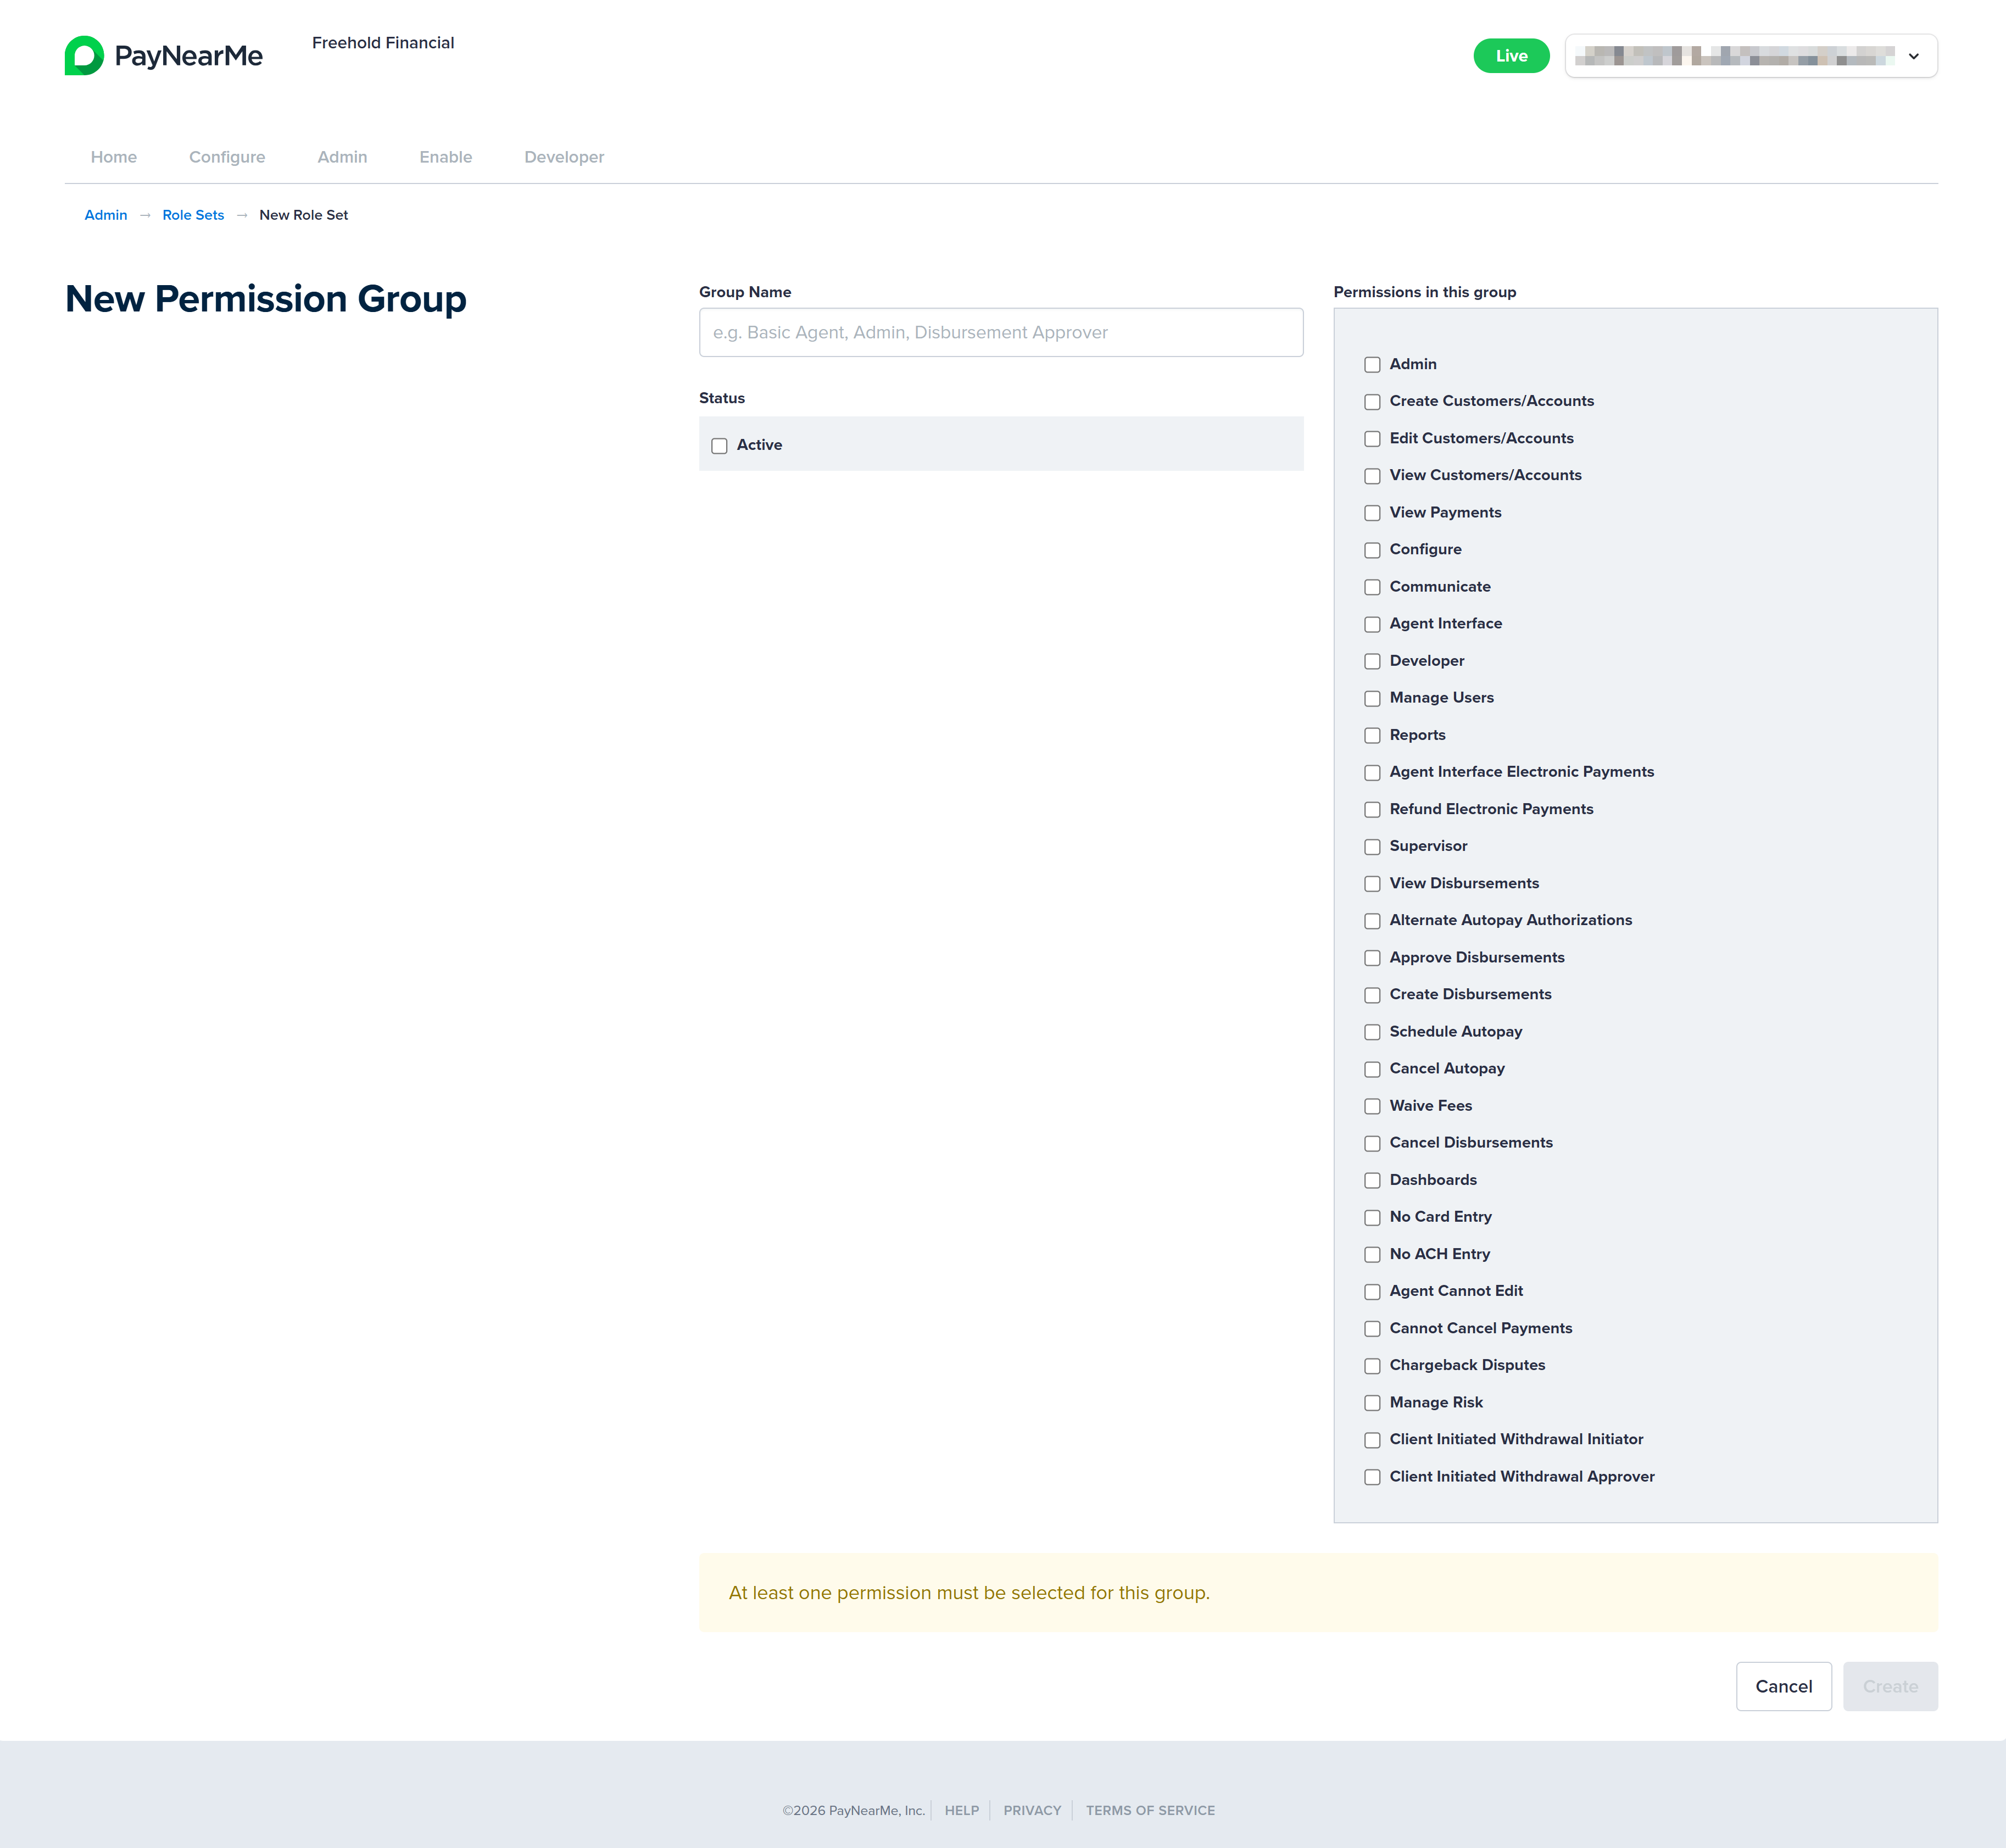
Click New Permission Group. The New Permission Group configuration page displays.
-
Enter a name for the group in the Group Name field.
-
Select the Active checkbox in the Status field.
-
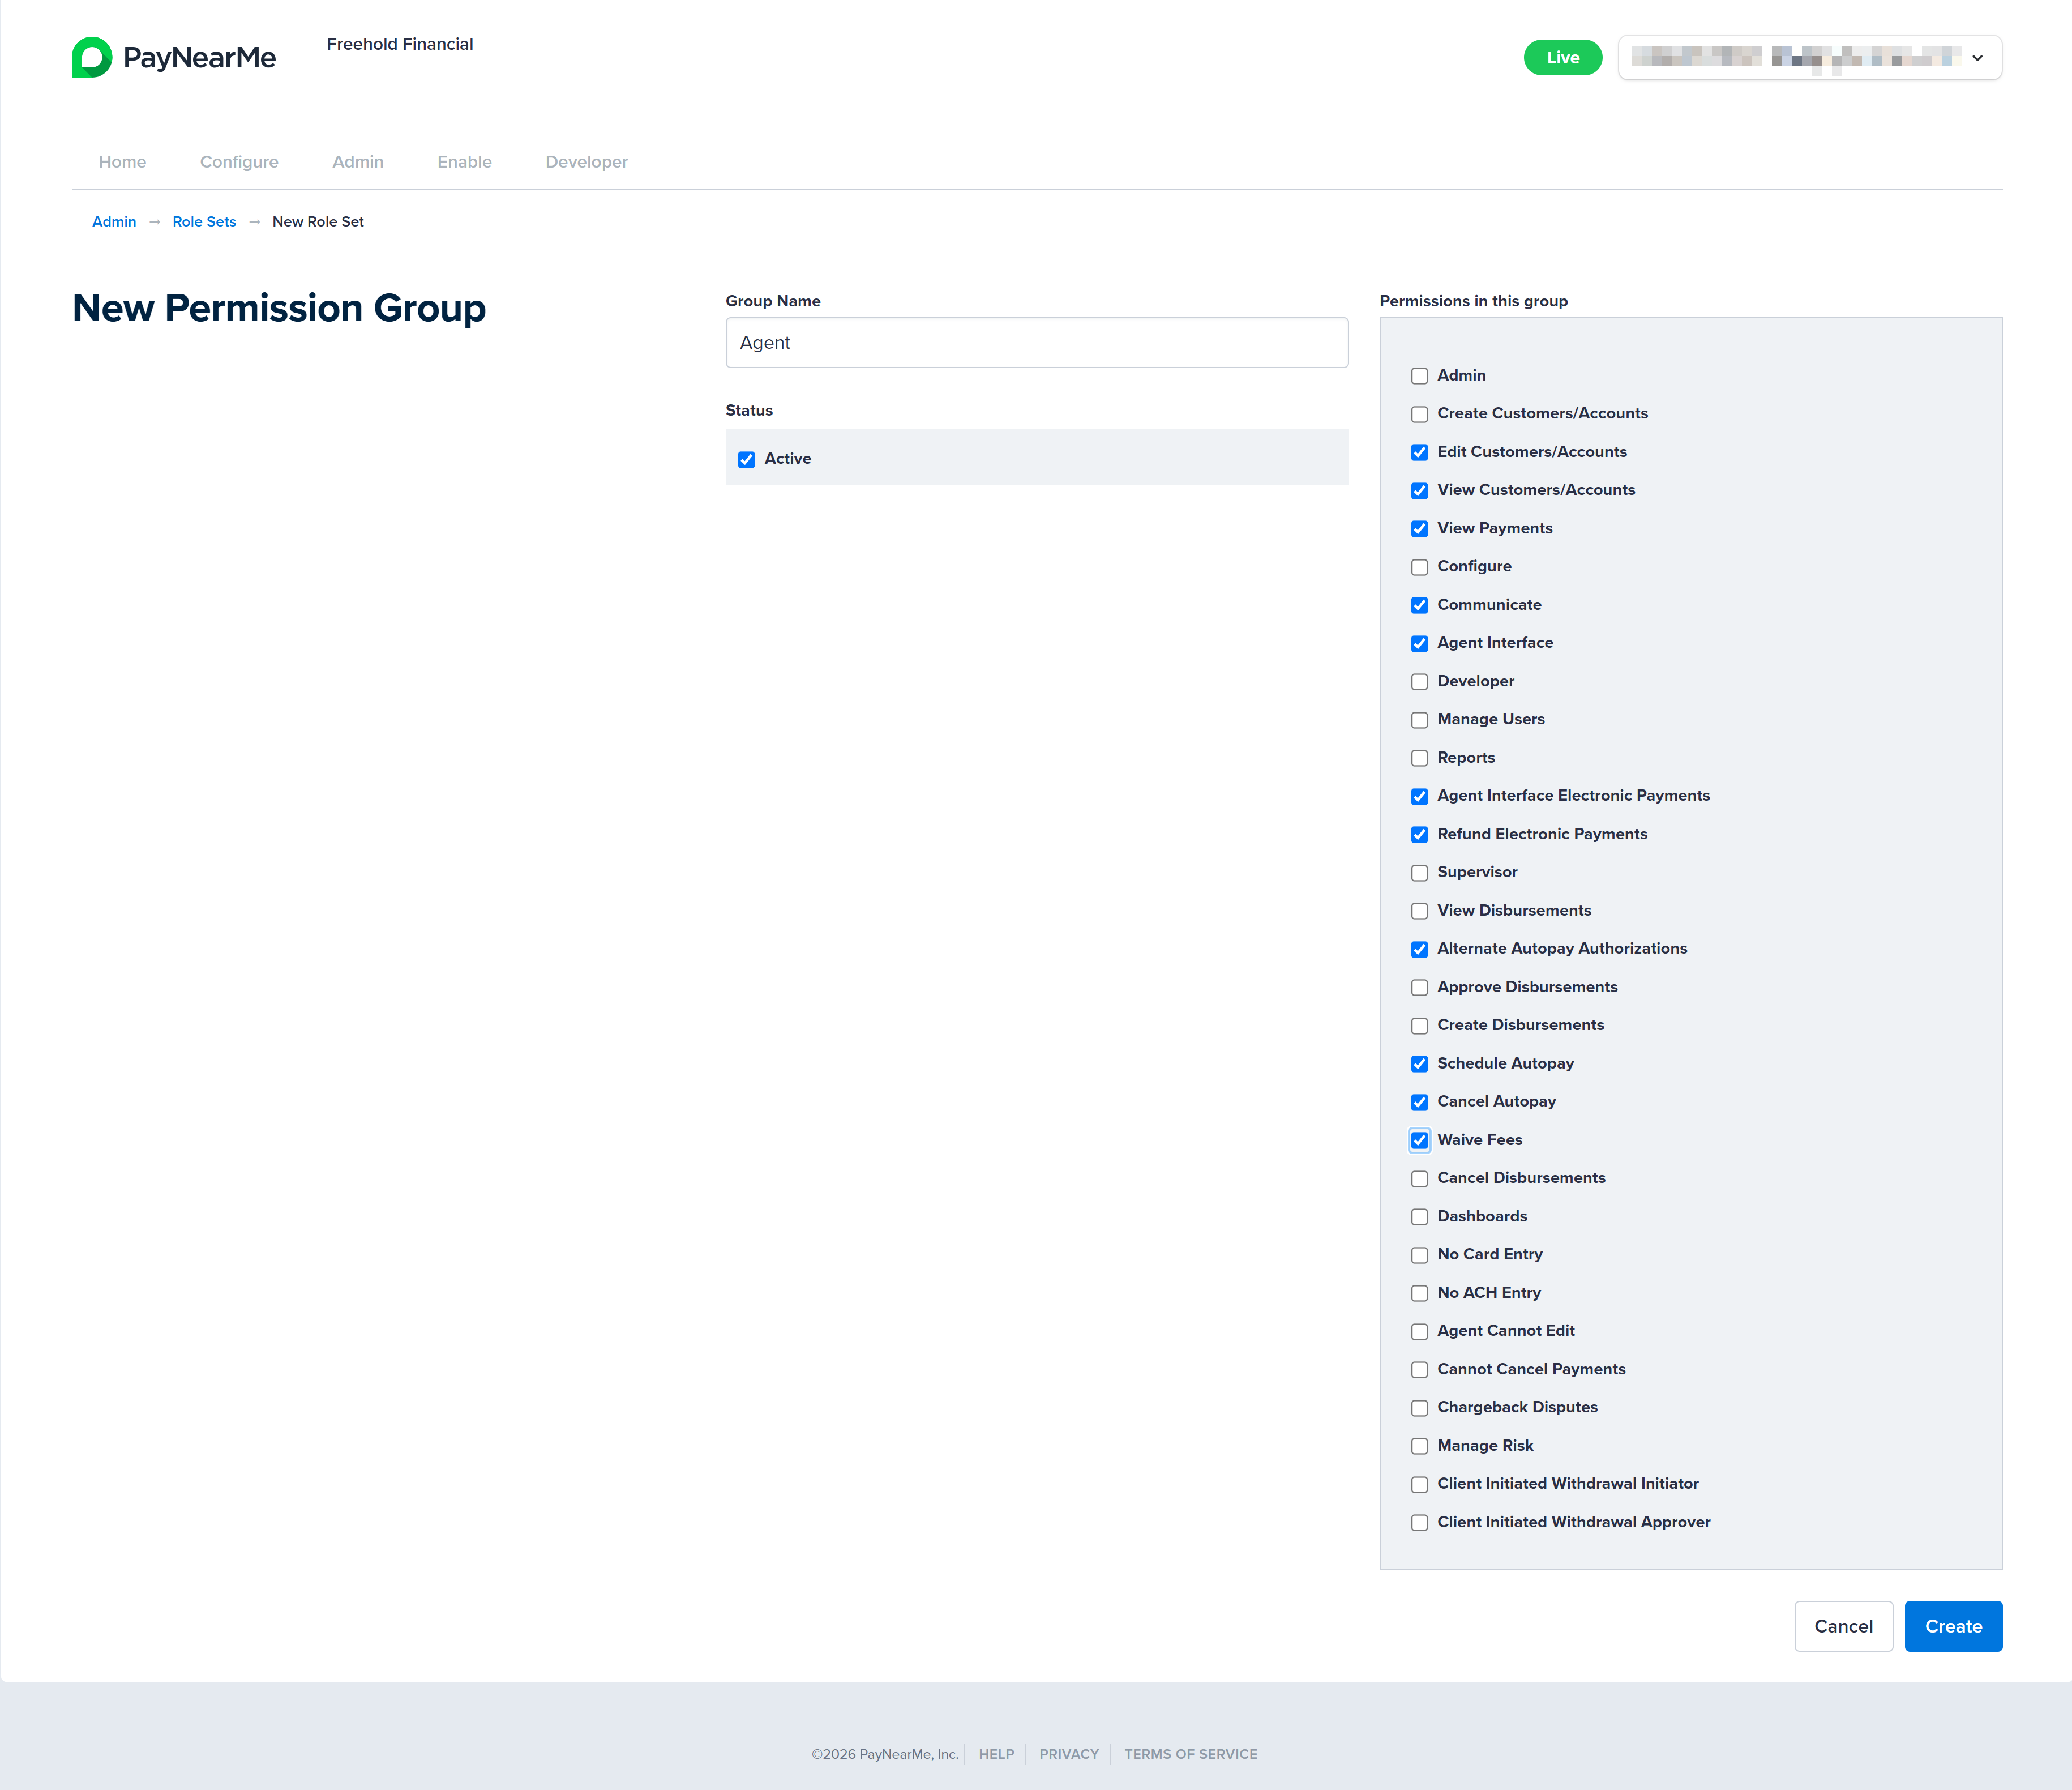
Select the permissions for this role from the displayed list.
-
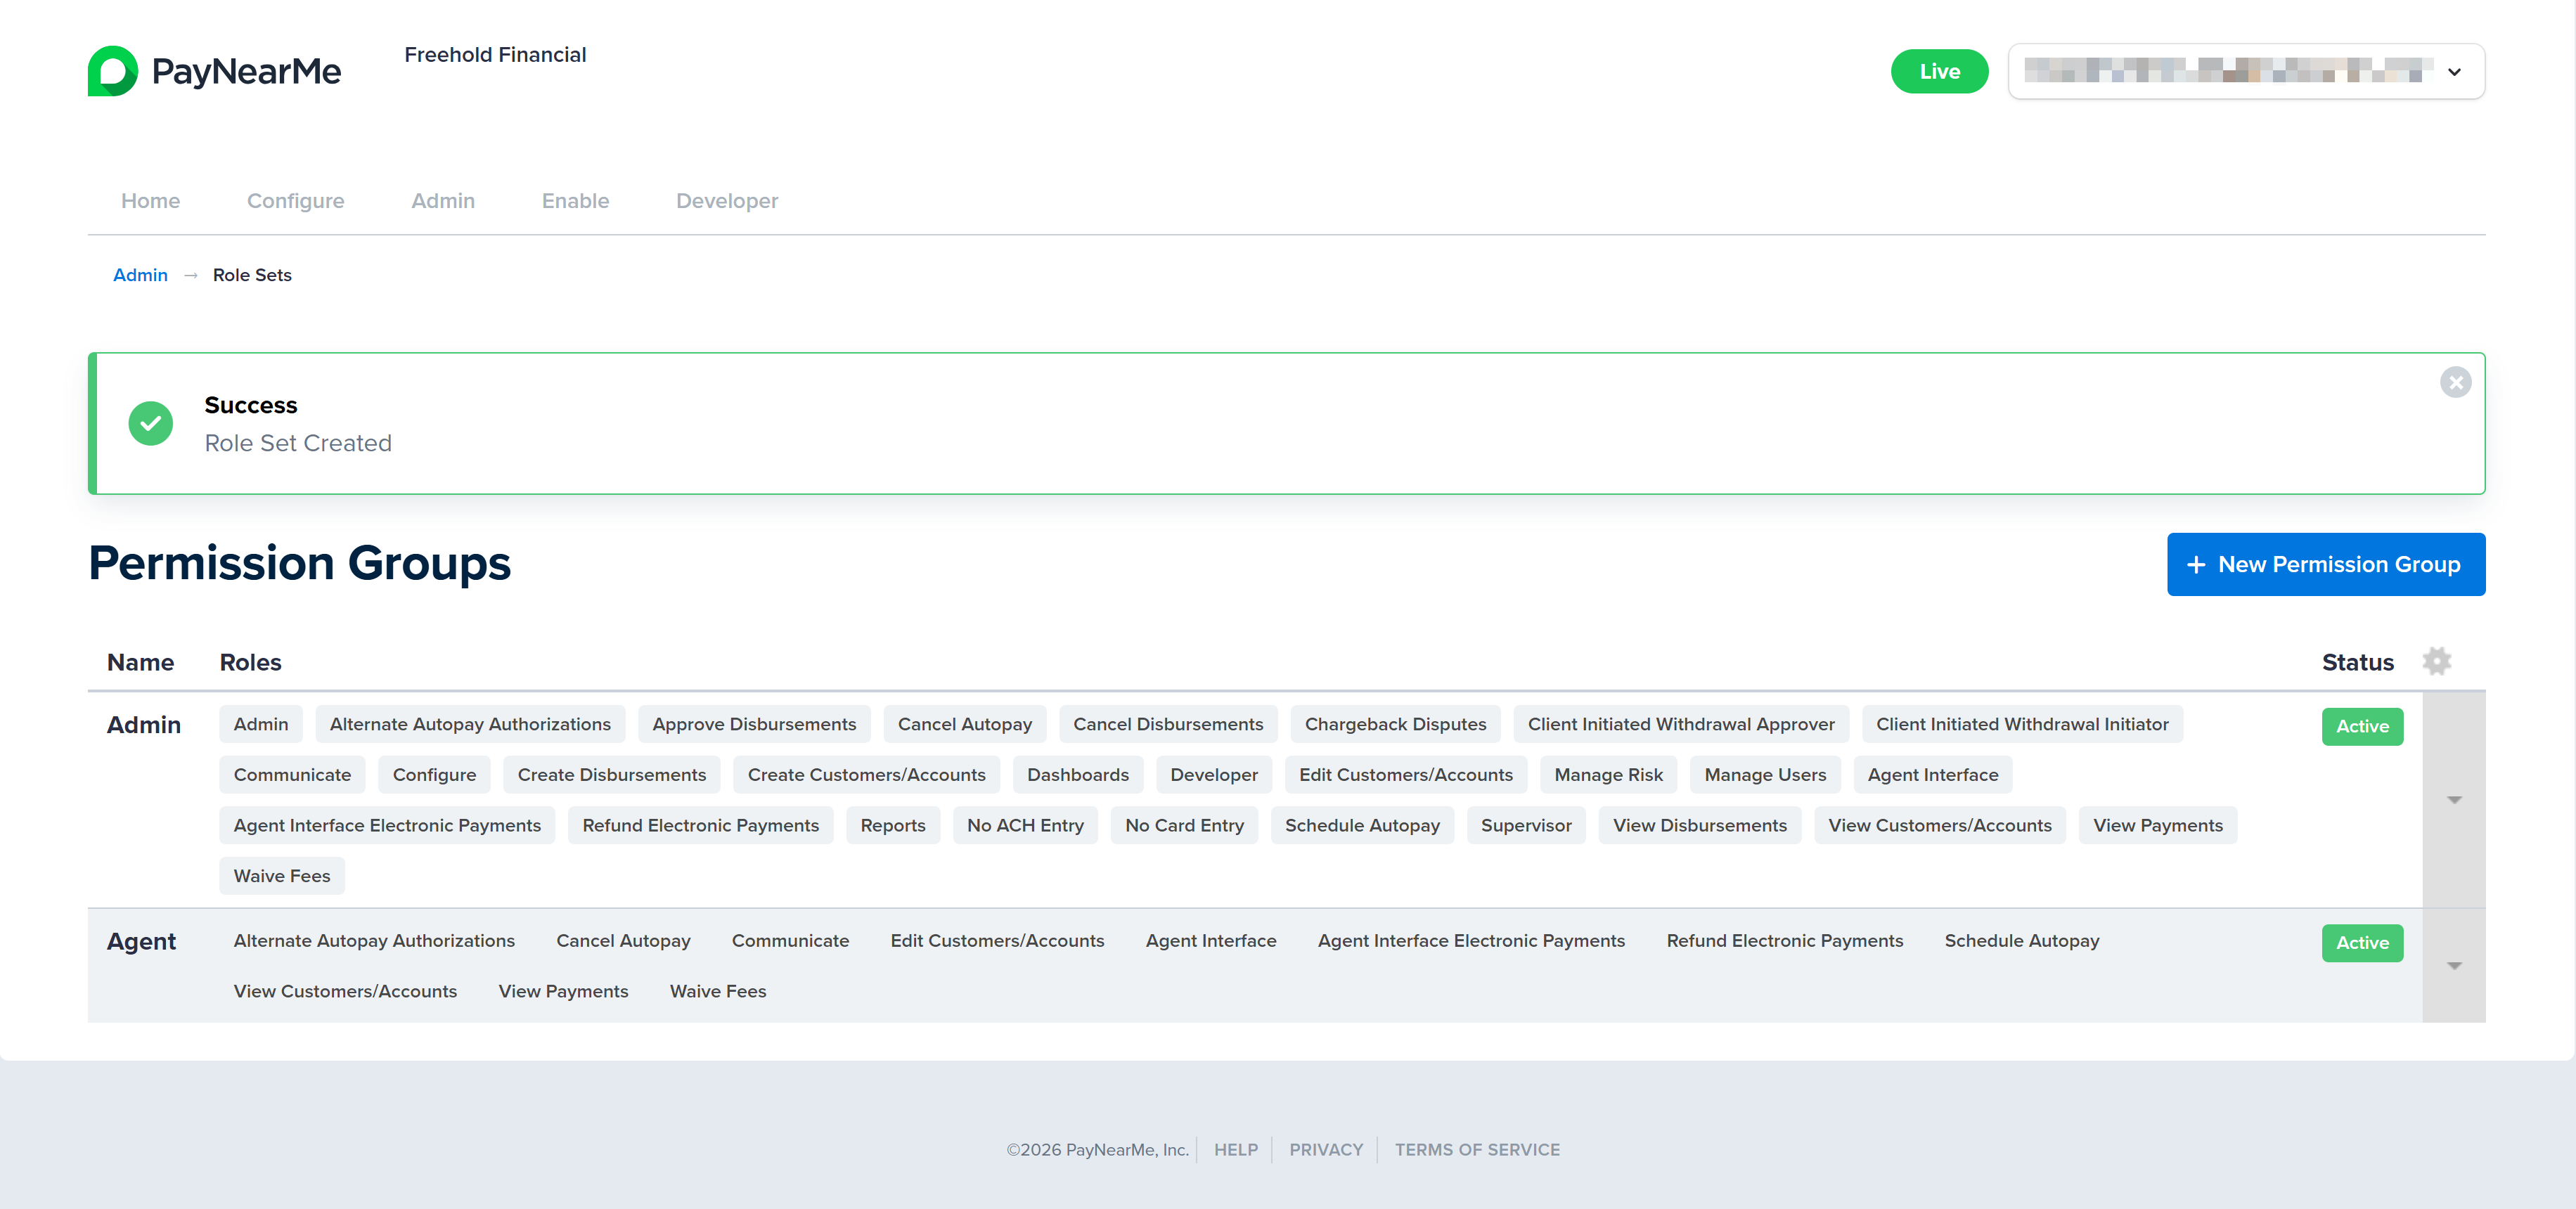
Click Create. The Business Portal returns you to the Permissions Group page and displays a message indicating if the permission group was successfully created.
Assigning Users to a Permission Group
Site Administrators can assign user accounts to permission groups individually or through bulk assignment.
Adding Individual Users to a Permission Group
To add a user account to a permission group, complete the following steps:
-
Log into the Business Portal and access the Admin tab.
-
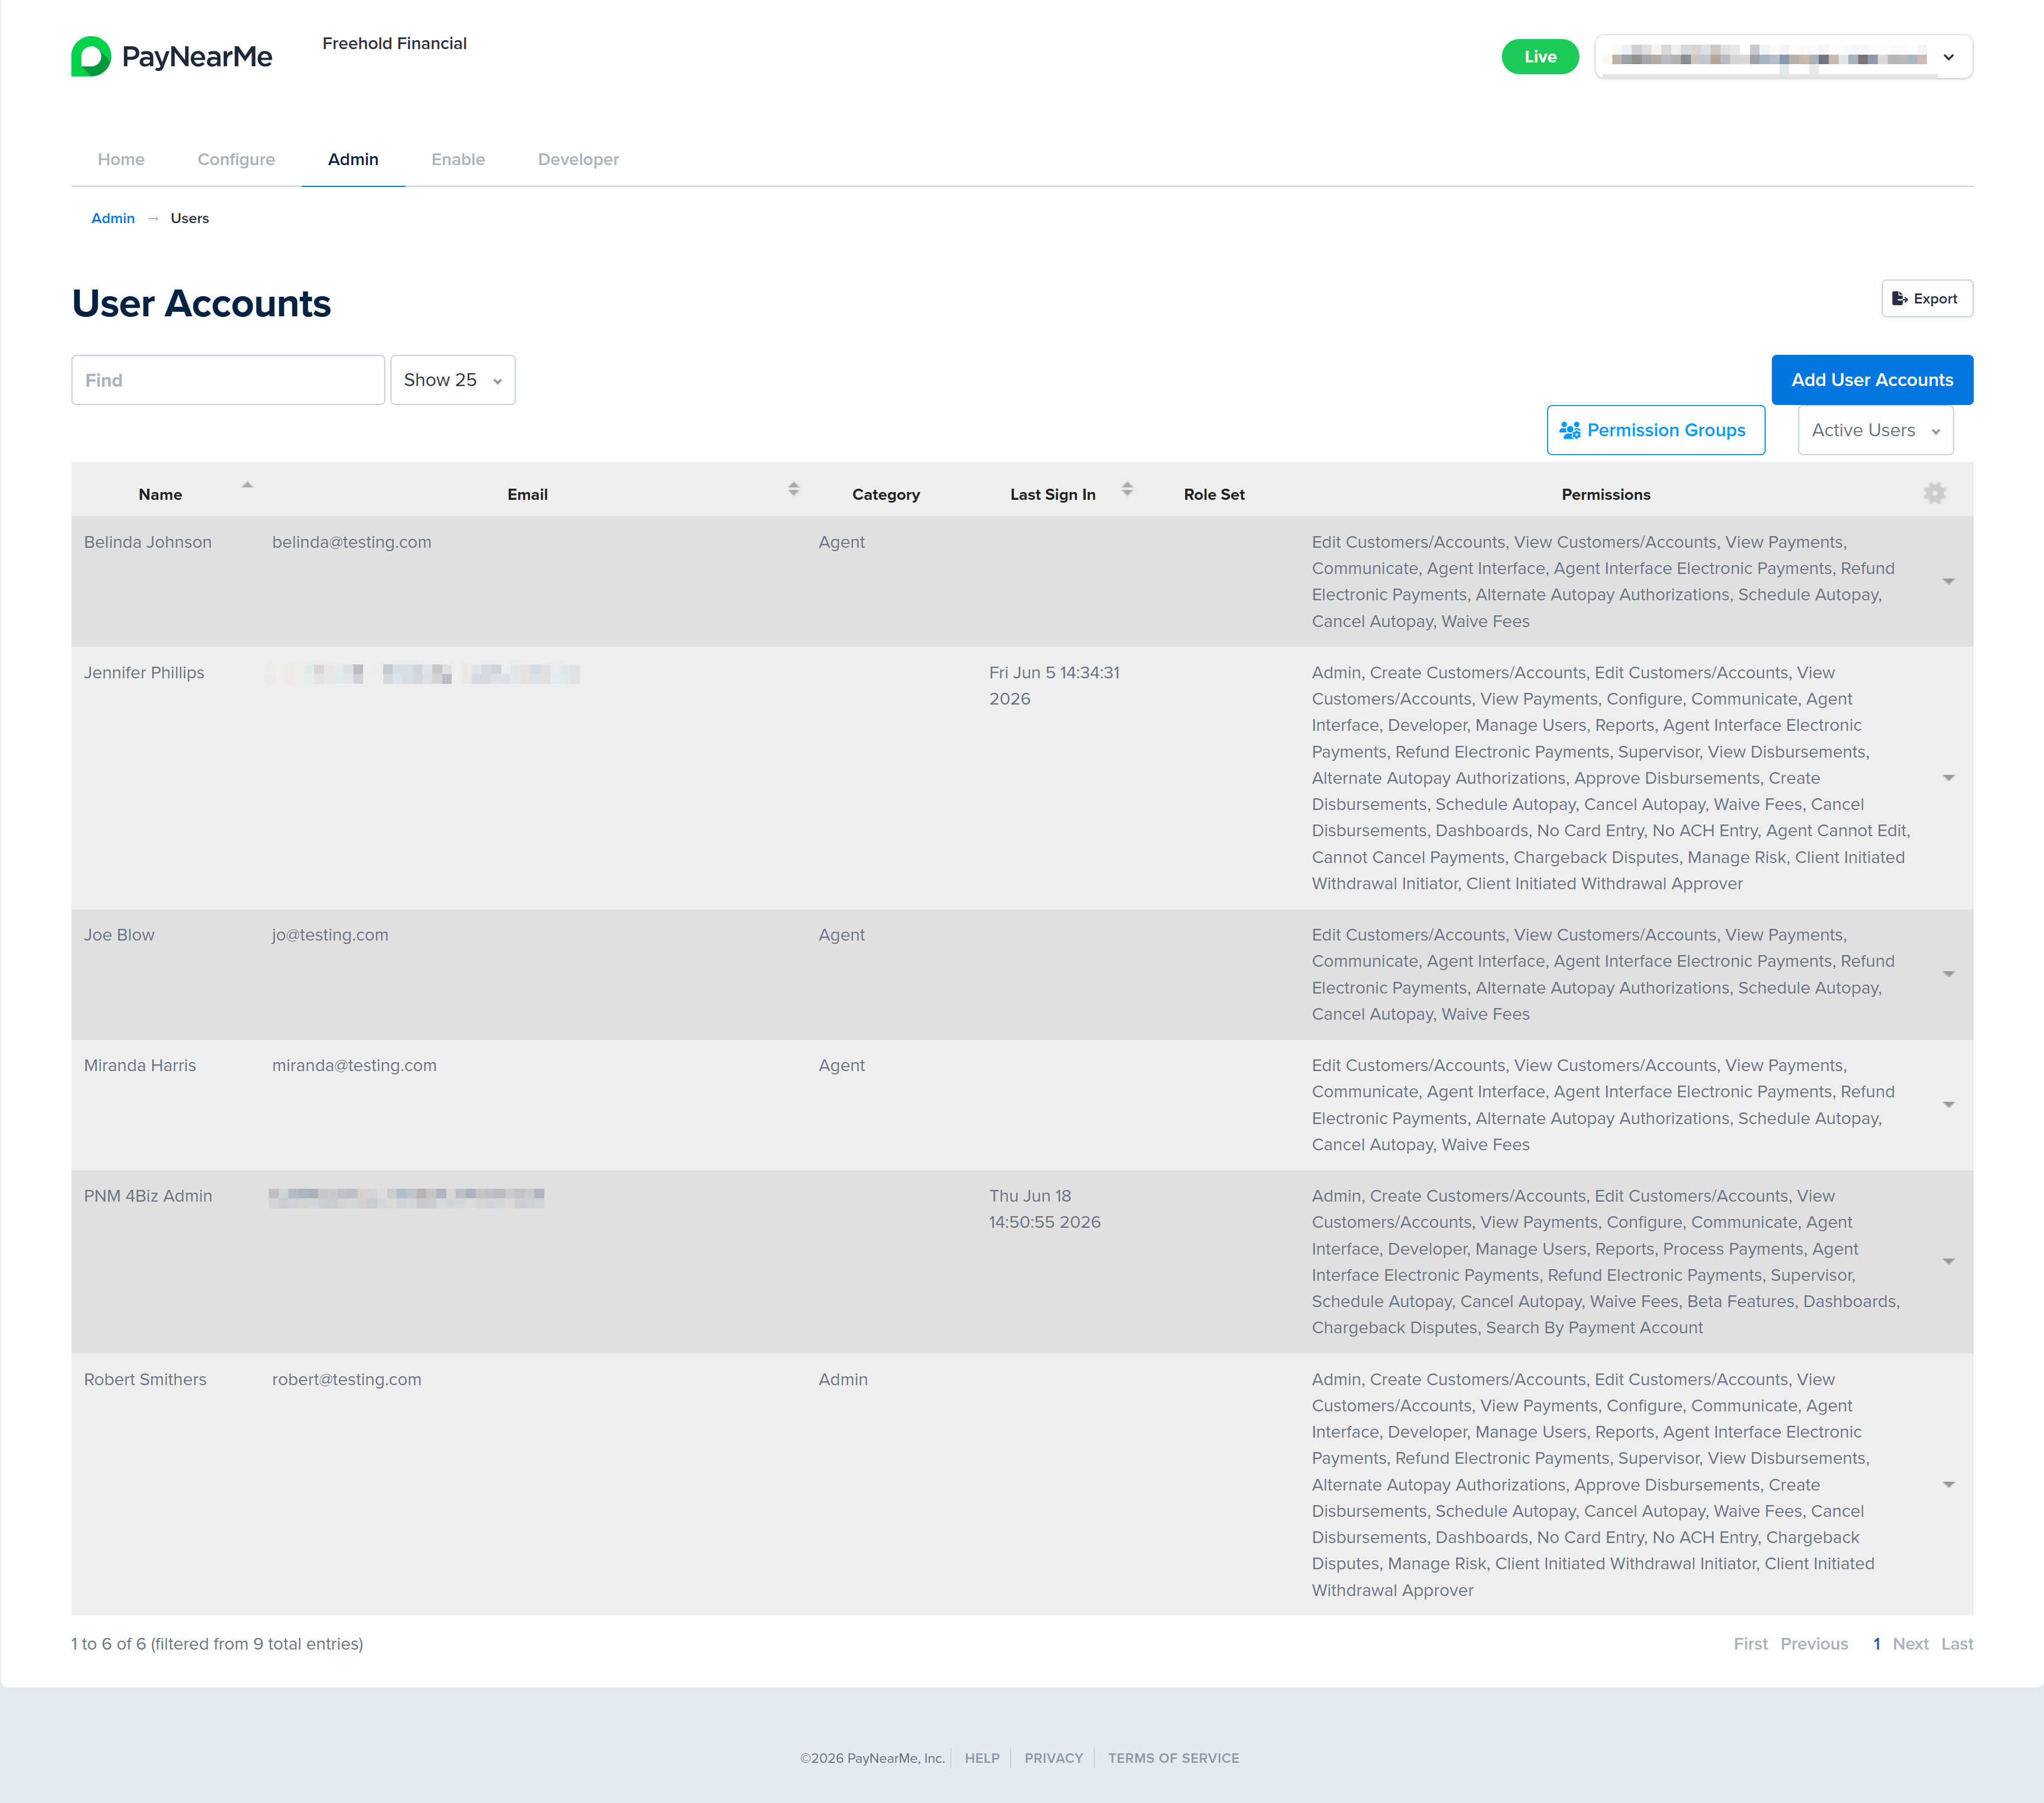
Click View under the Users section. The User Accounts page displays.
-
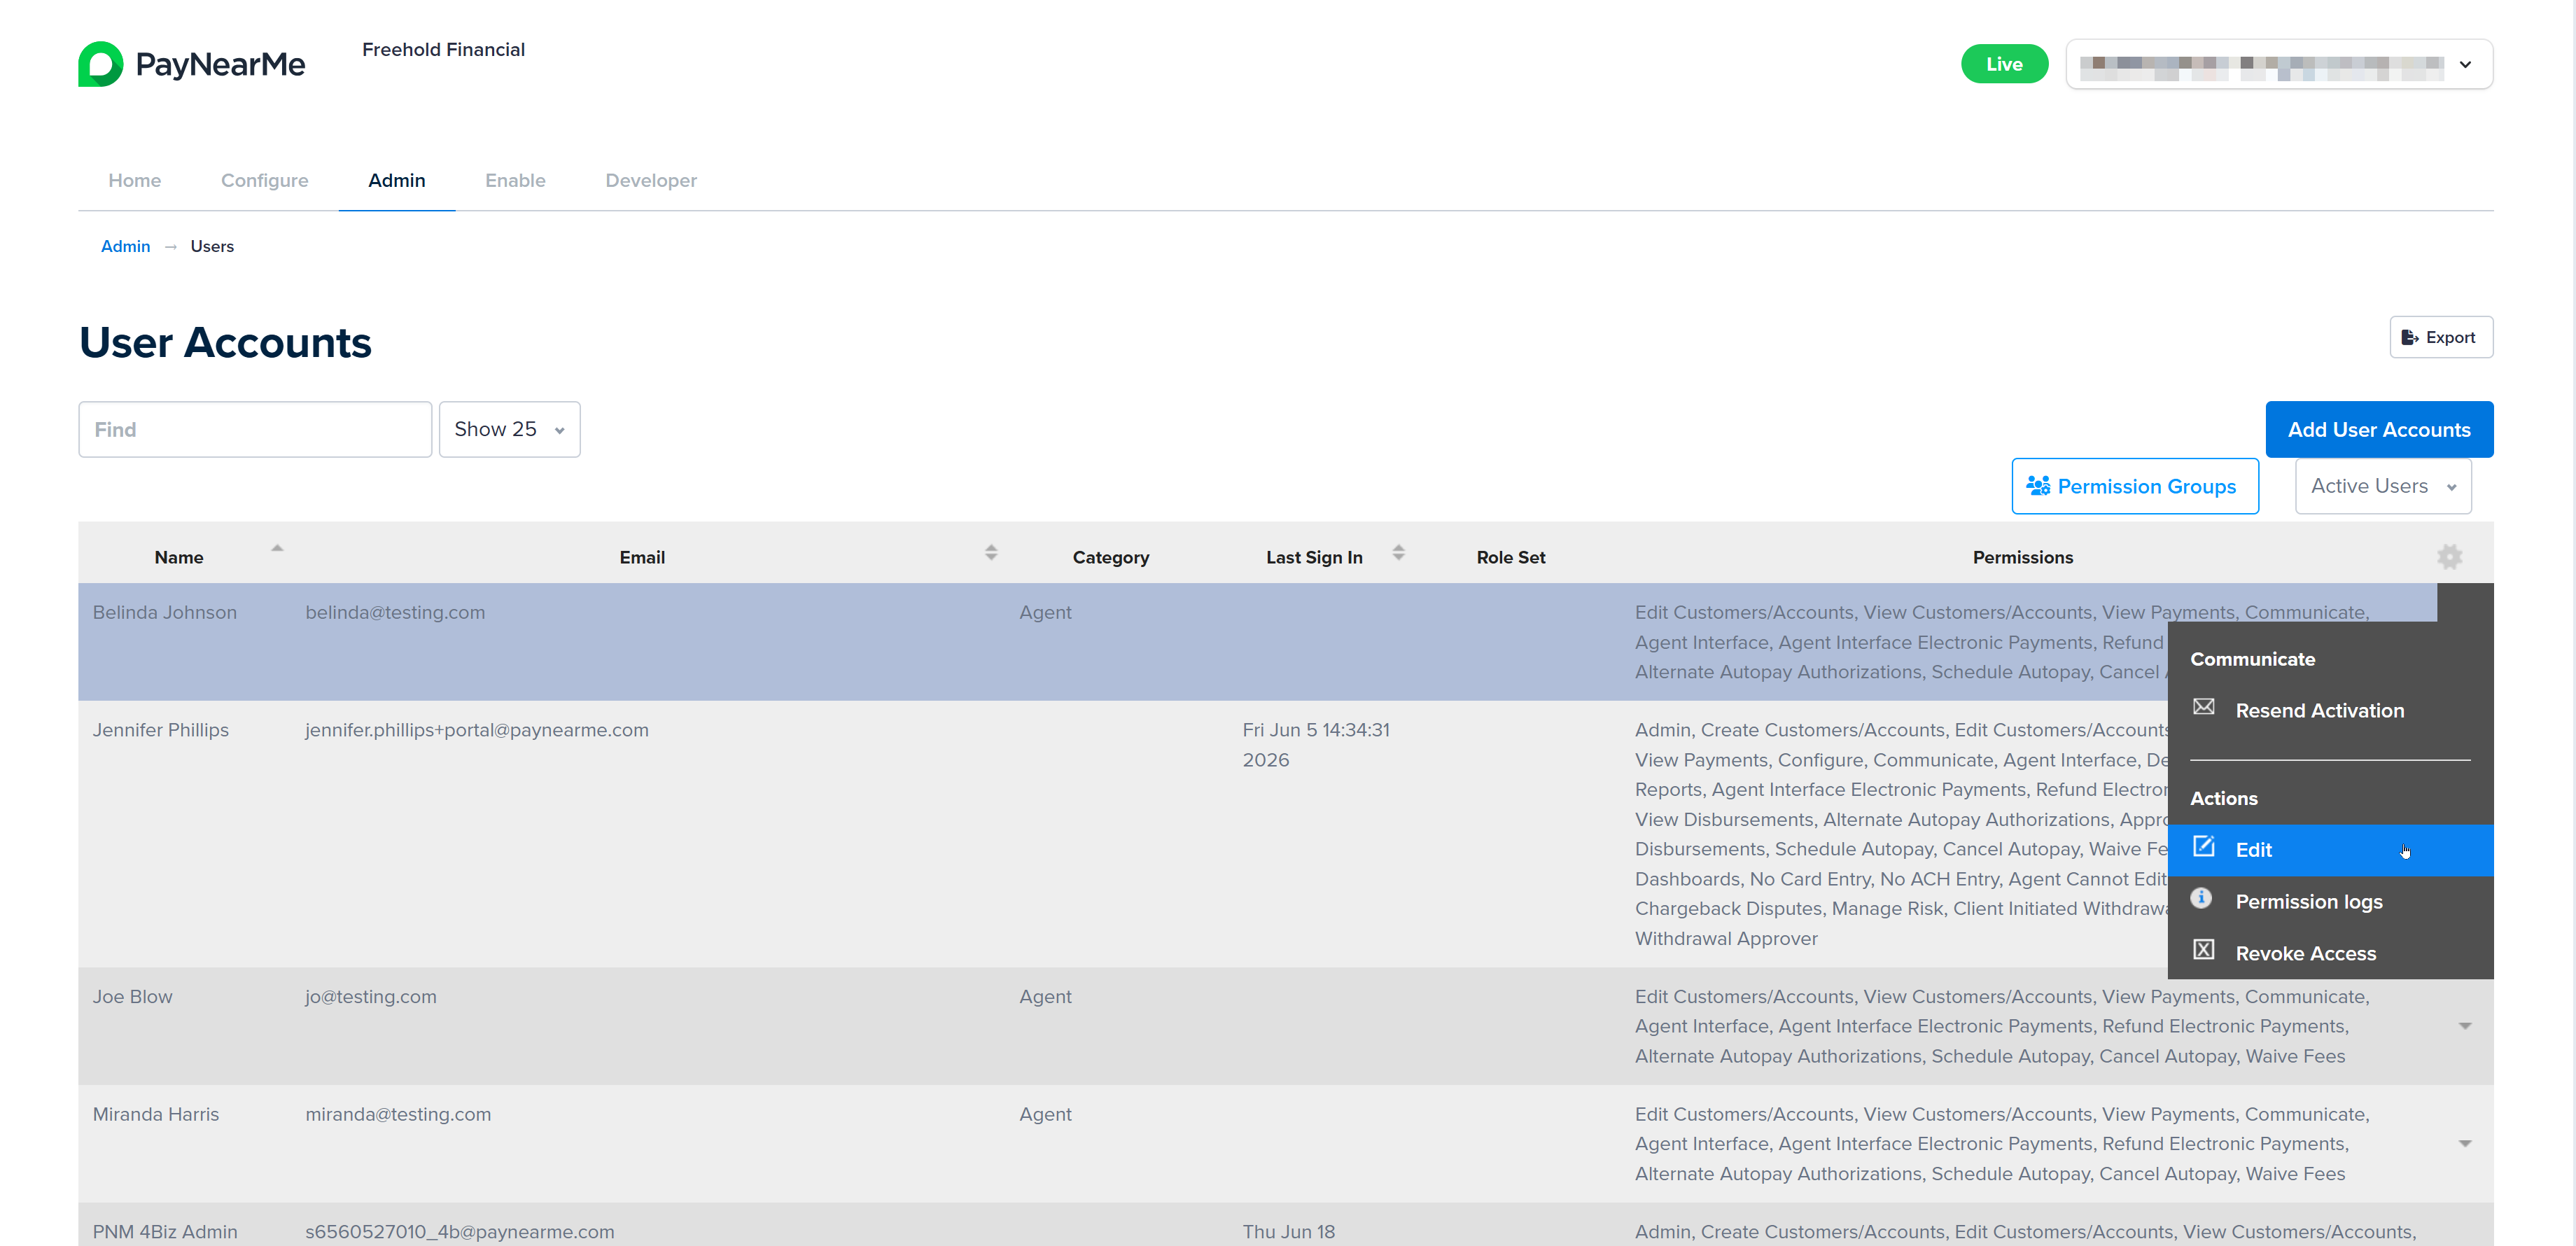
Click the arrow next to the user account you want to add to the permission group and select Edit.
-
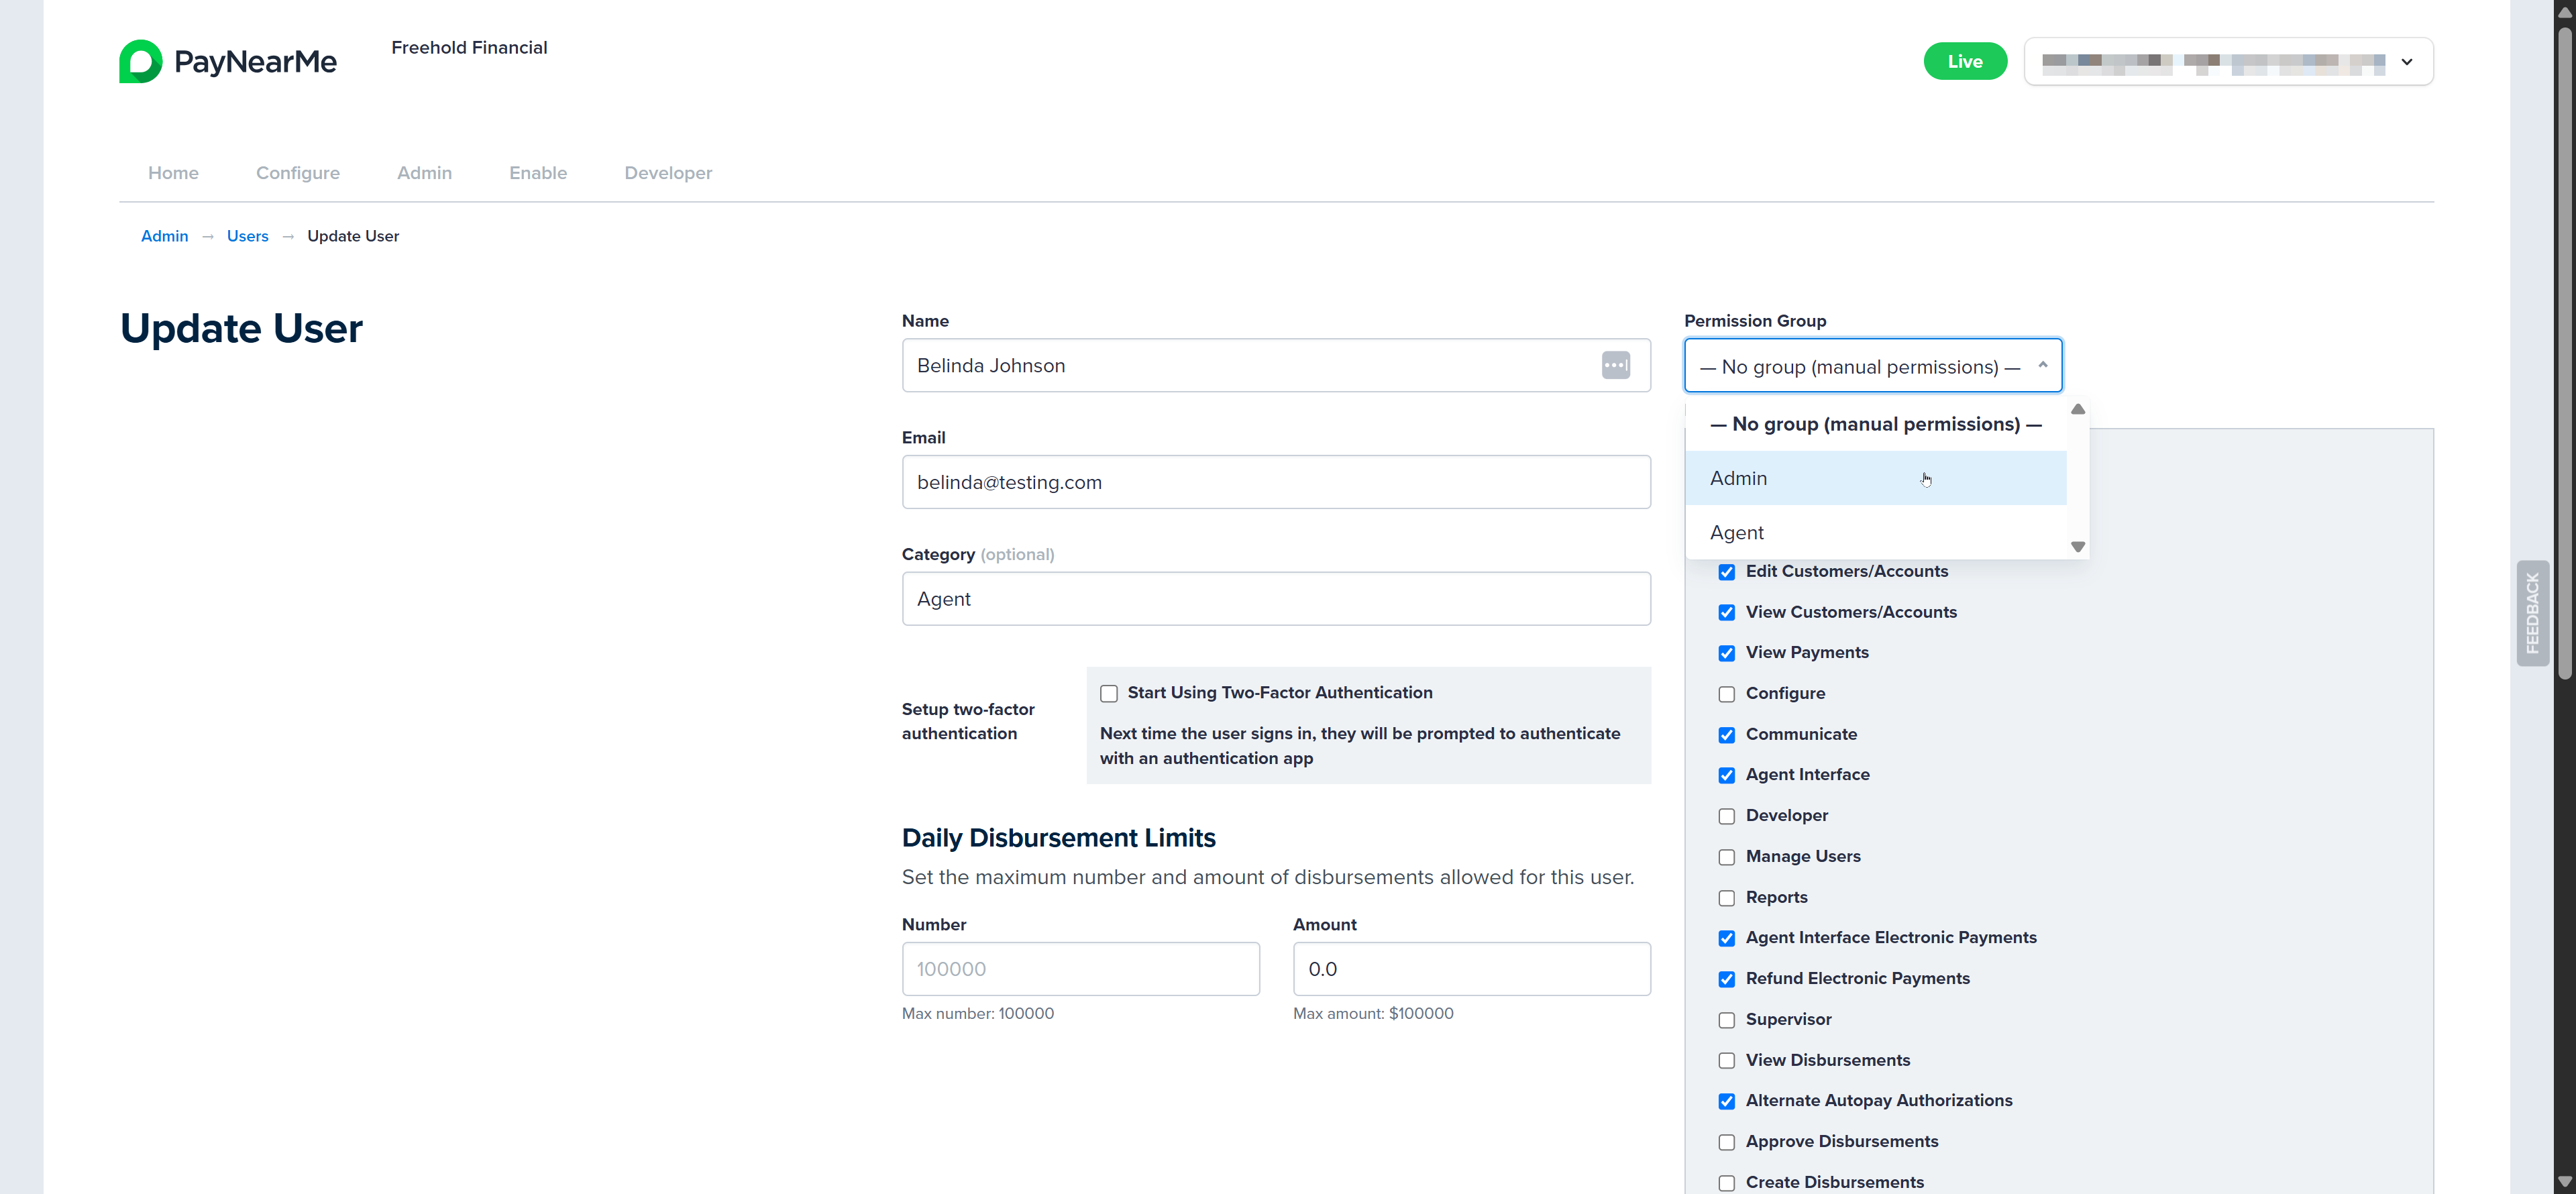
The Update User page displays. Use the Permission Group dropdown menu to assign the user account to a permission group. Once selected, the permissions for that group auto-populate in the list of permissions for that user.
-
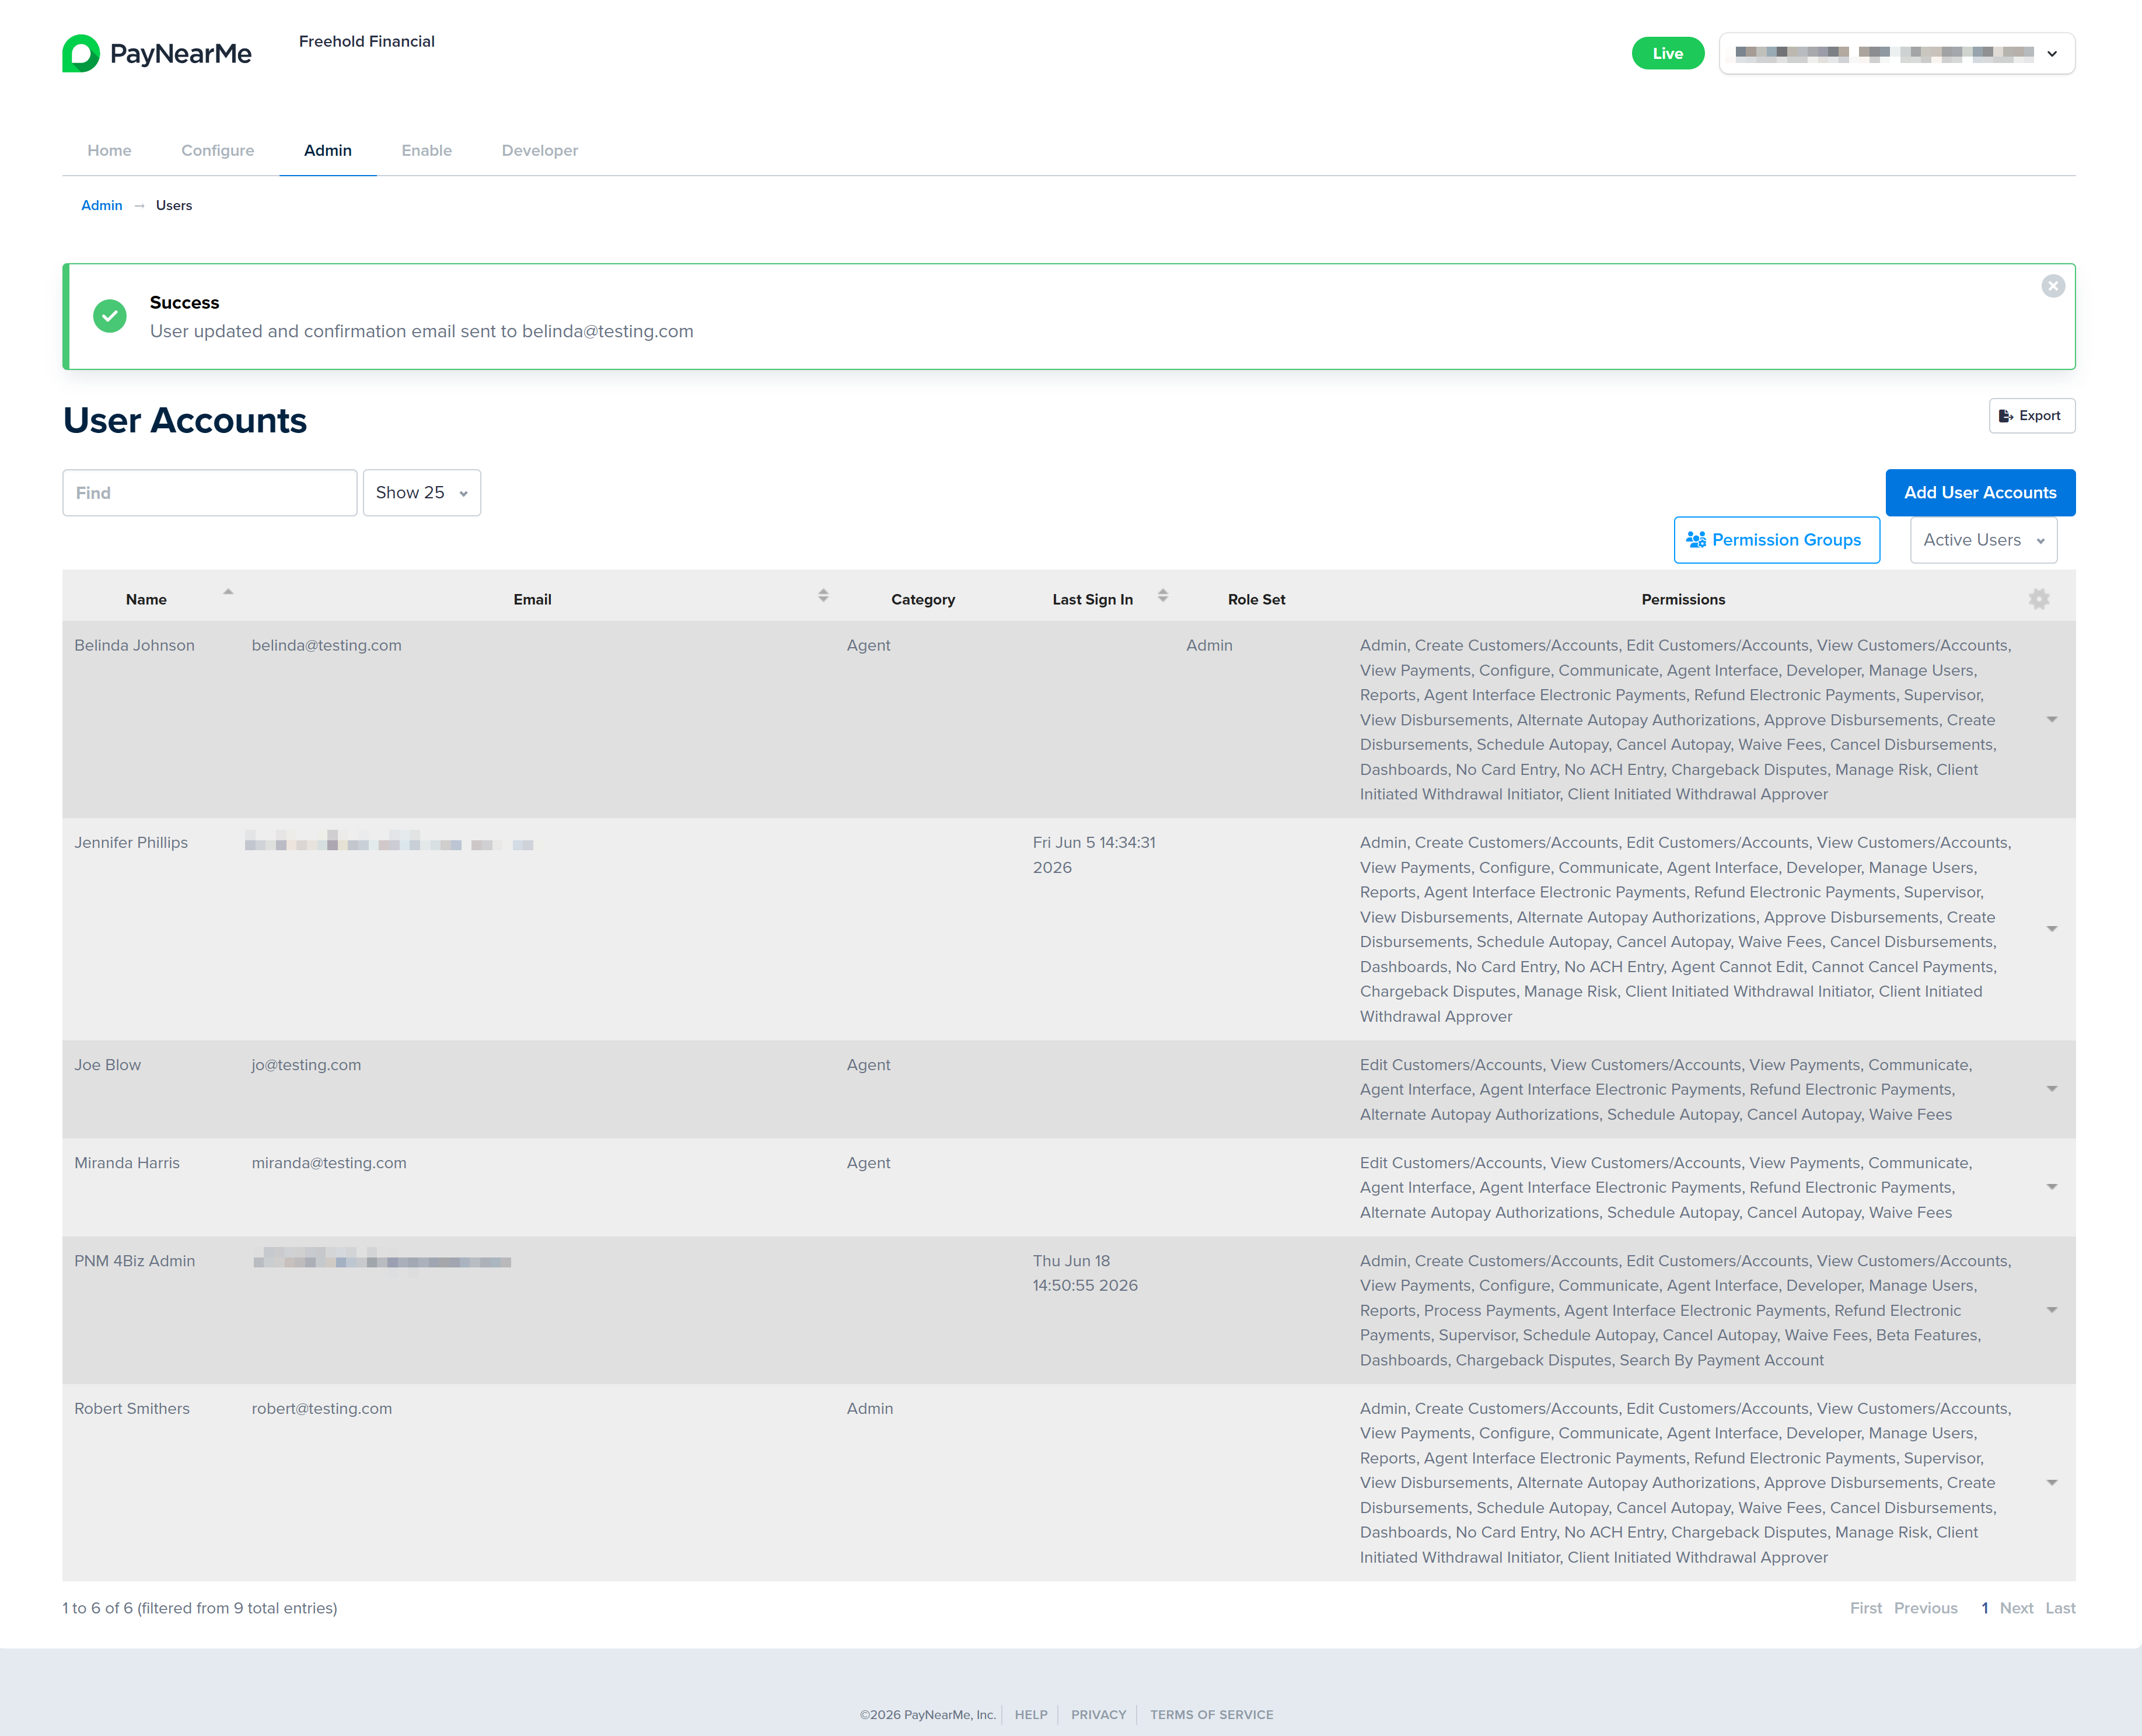
Click Update. The Business Portal returns you to the User Accounts page and displays a message confirming the update.
Adding Multiple Users to a Permission Group
To assign multiple users to a permission group at once, complete the following steps:
-
Log into the Business Portal and access the Admin tab.

-
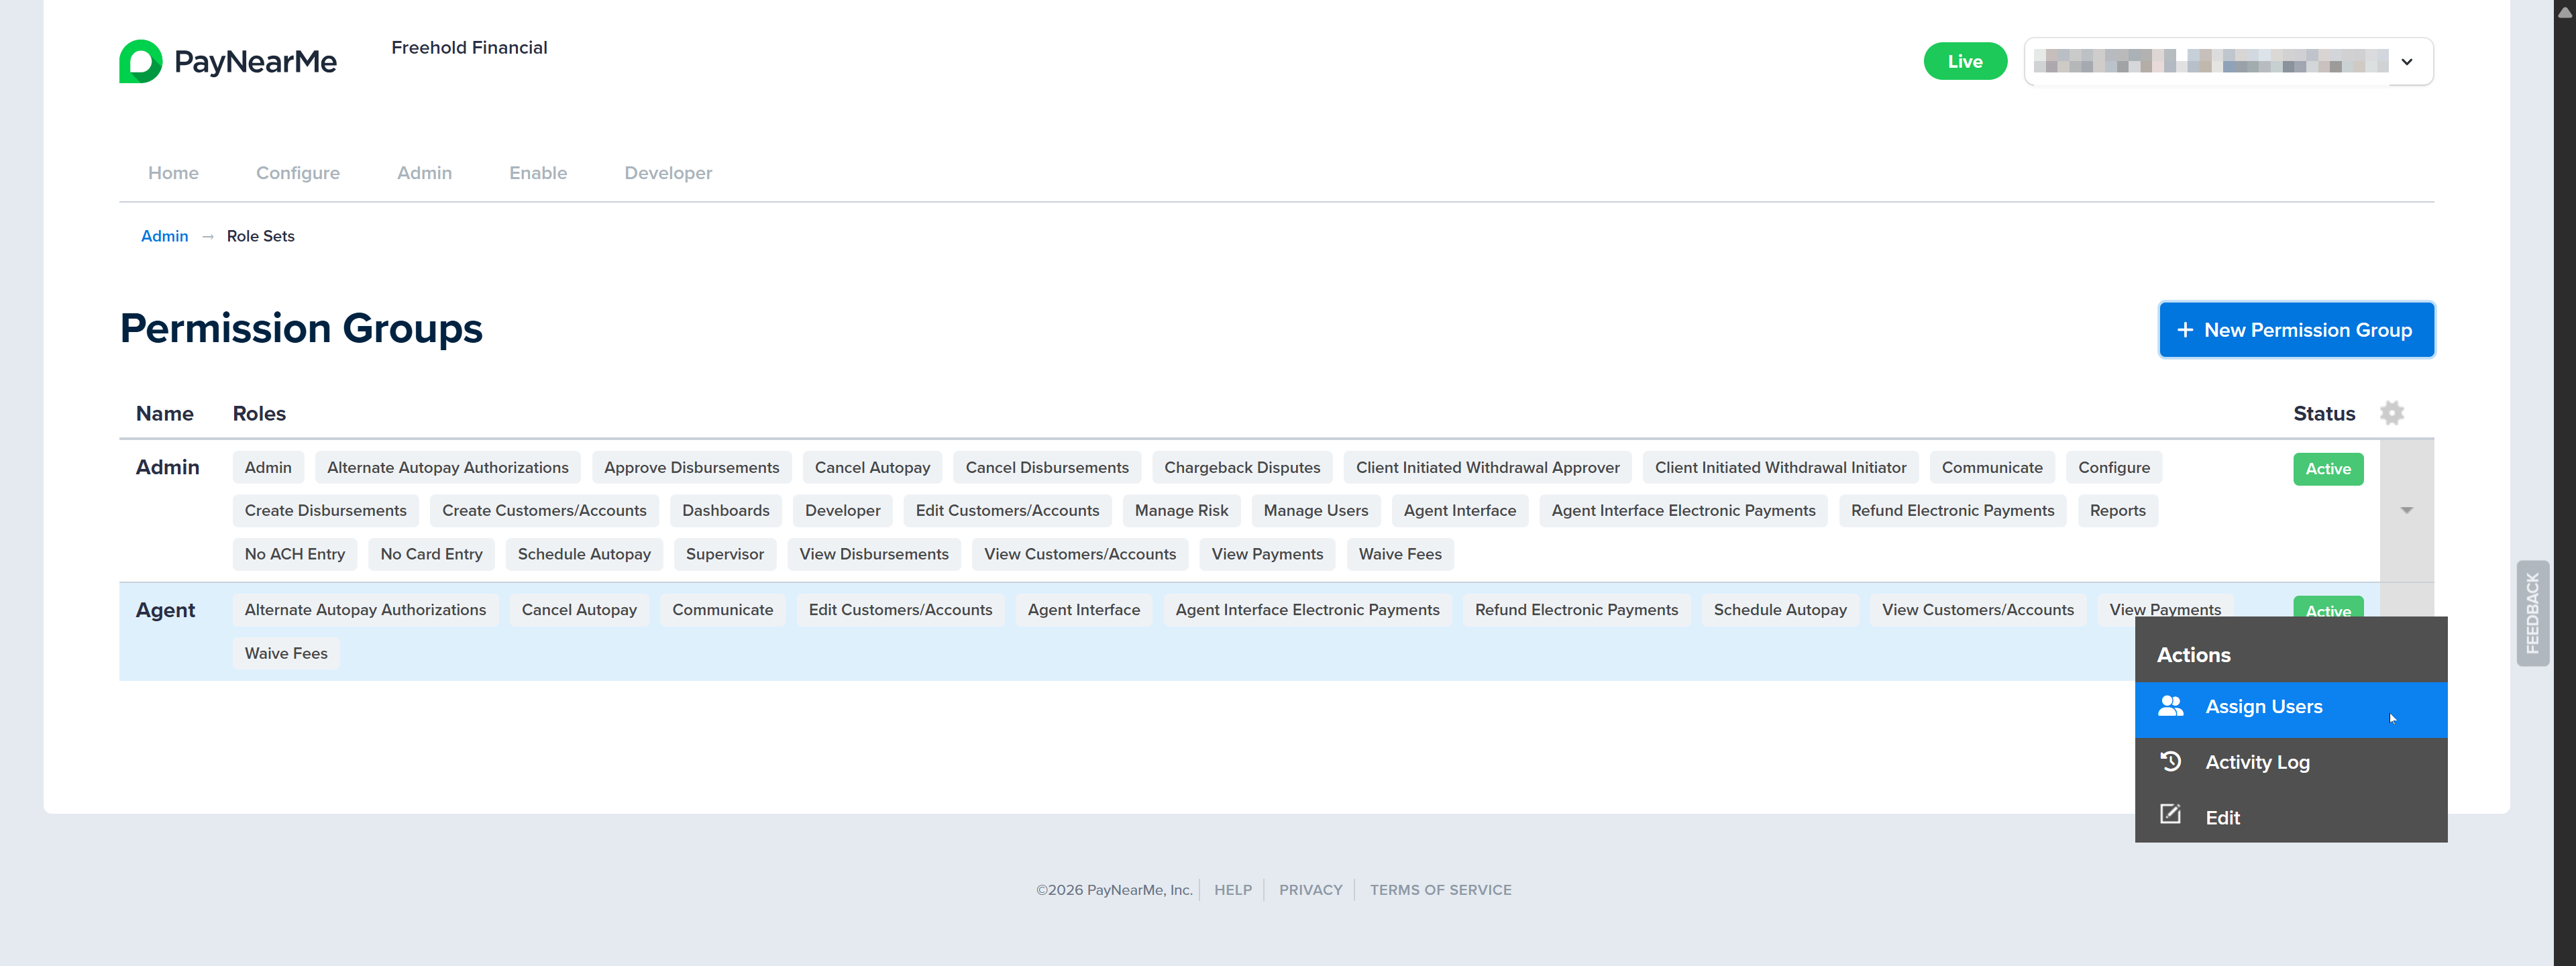
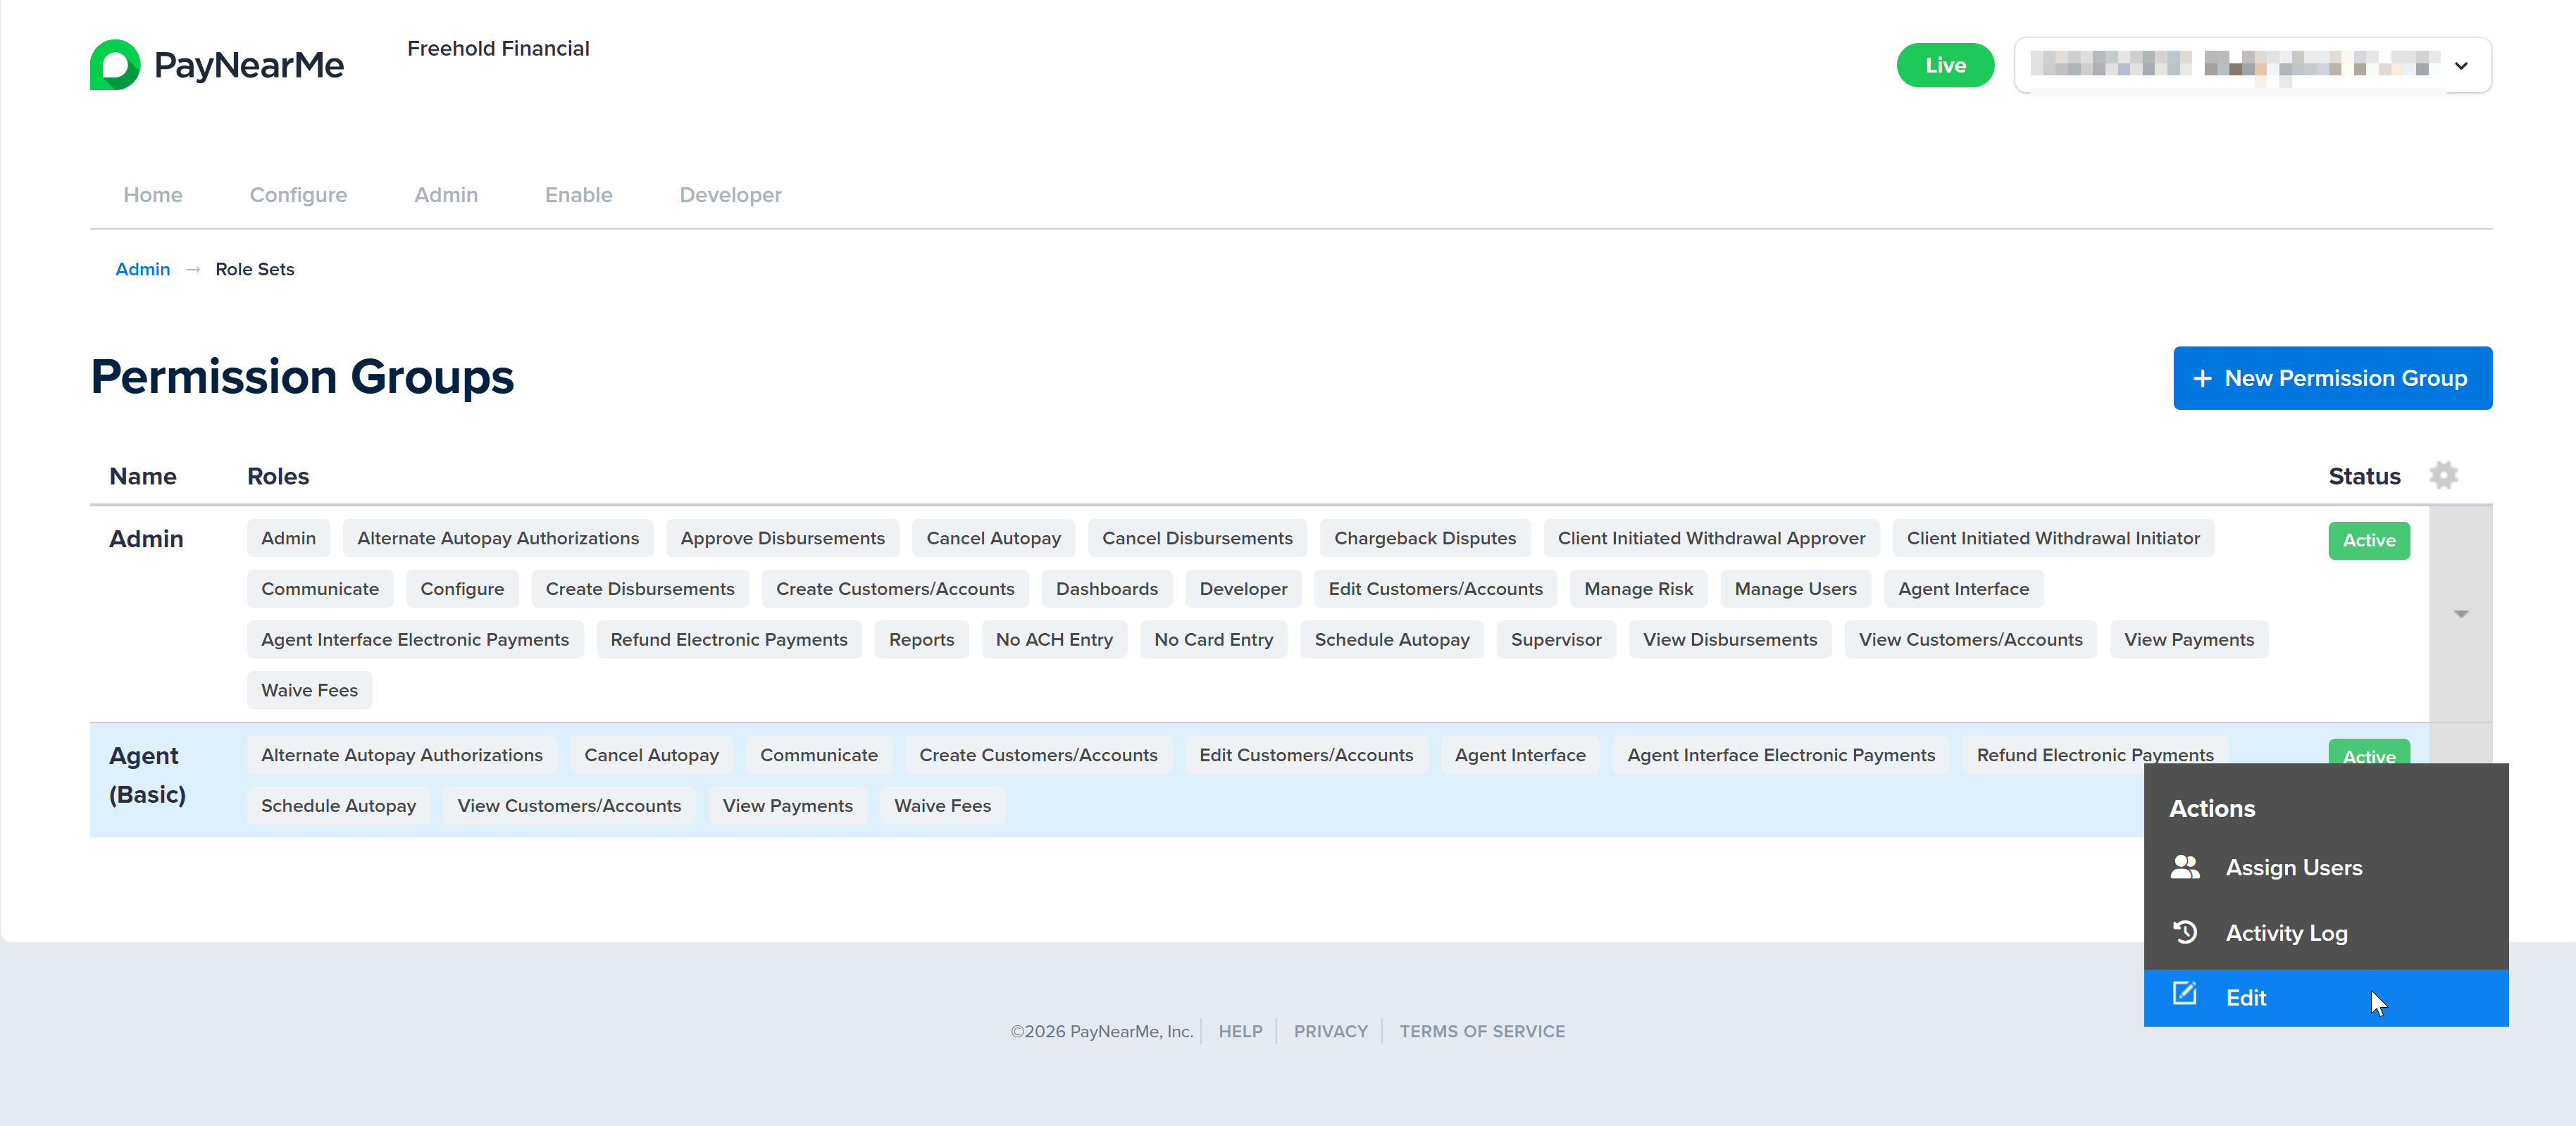
Click Manage under the Permission Groups section. The Permission Groups page displays.

-
Click the arrow next to the desired permission group and select Assign Users.
-
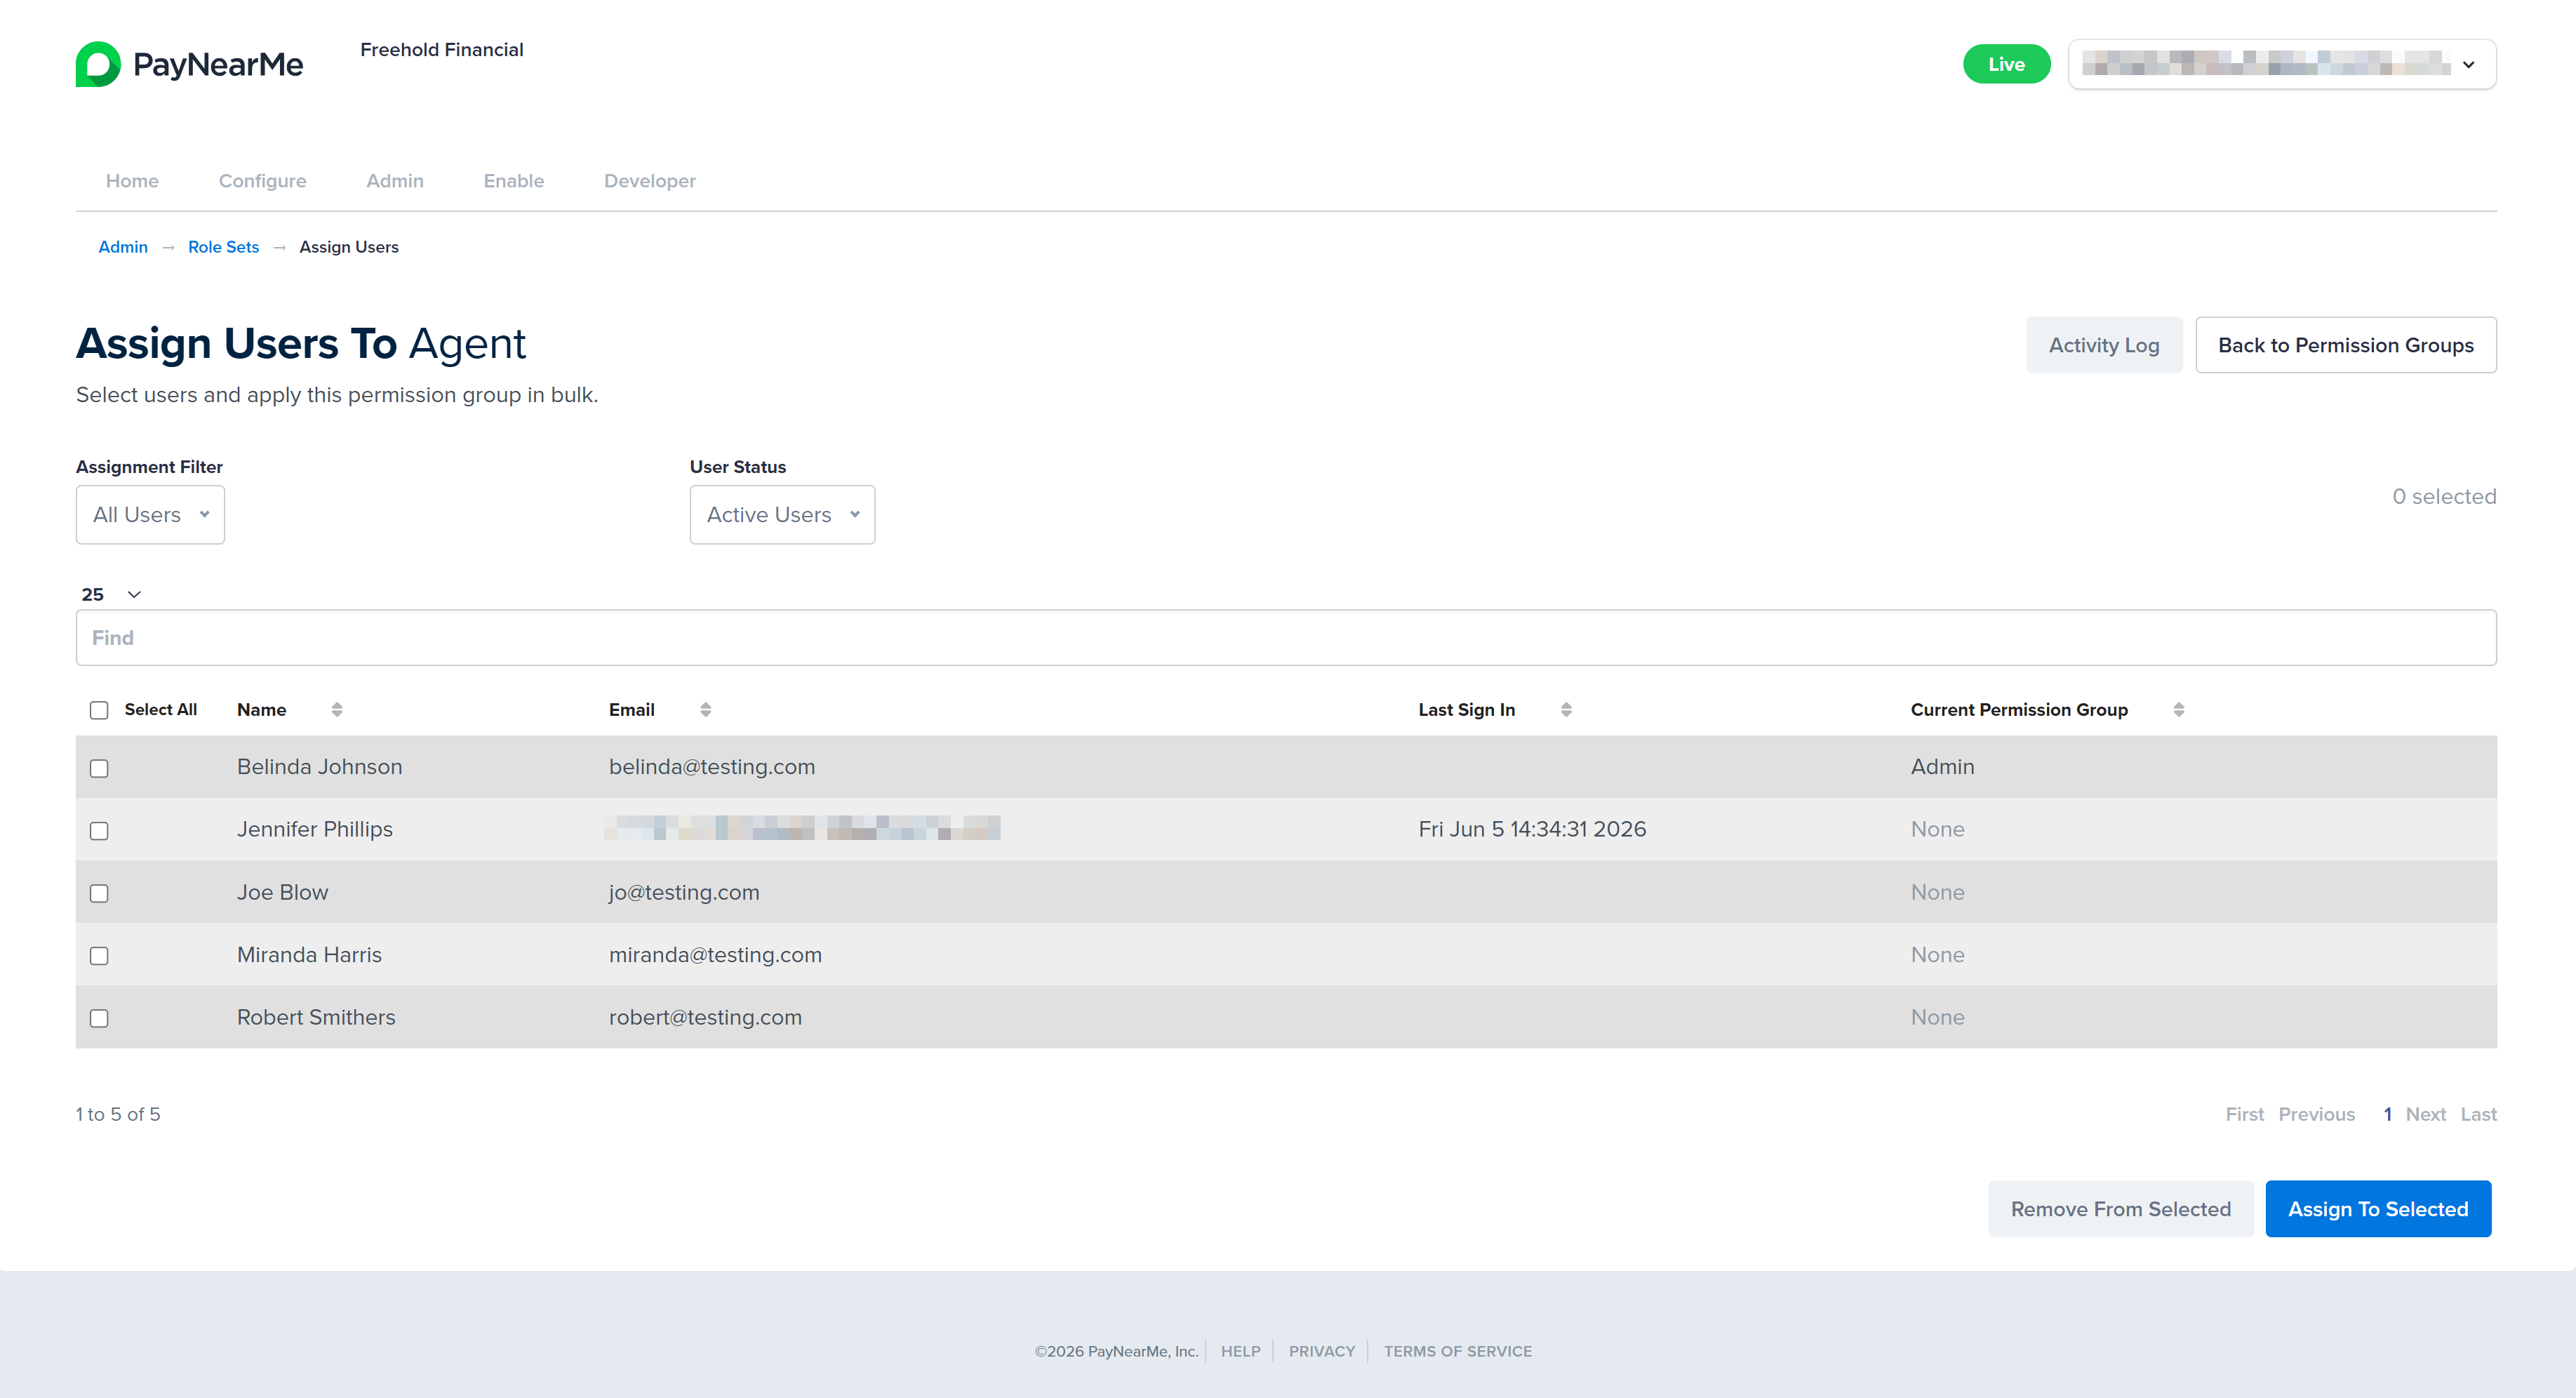
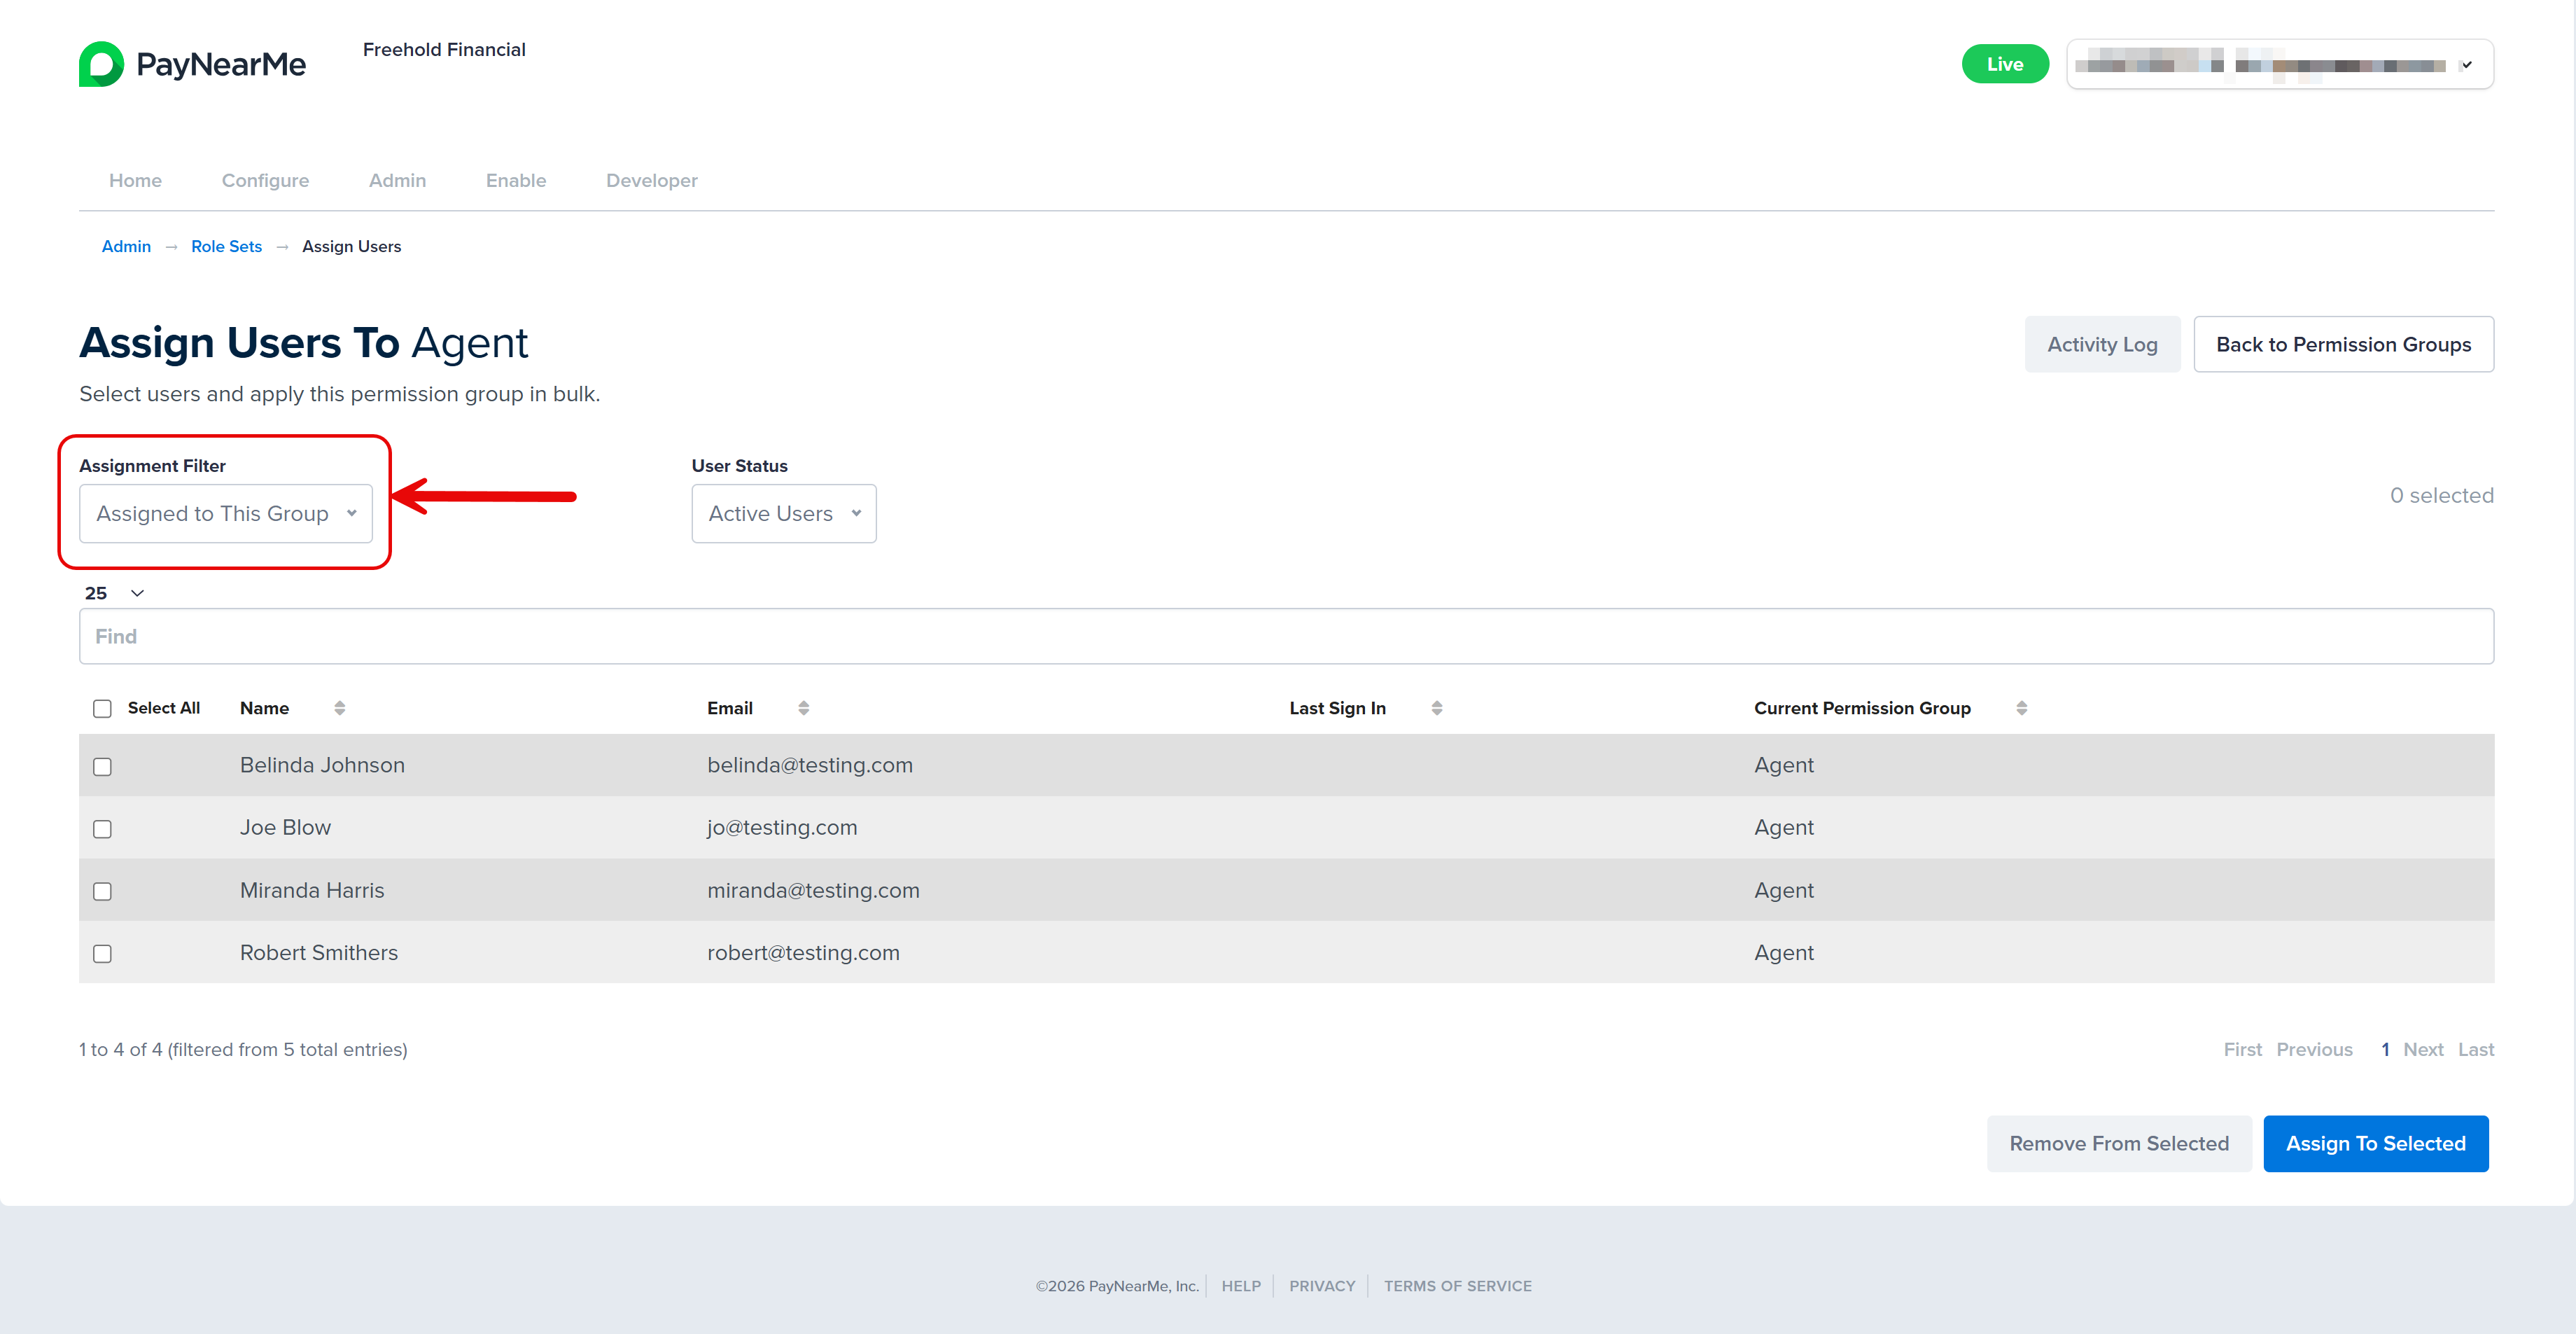
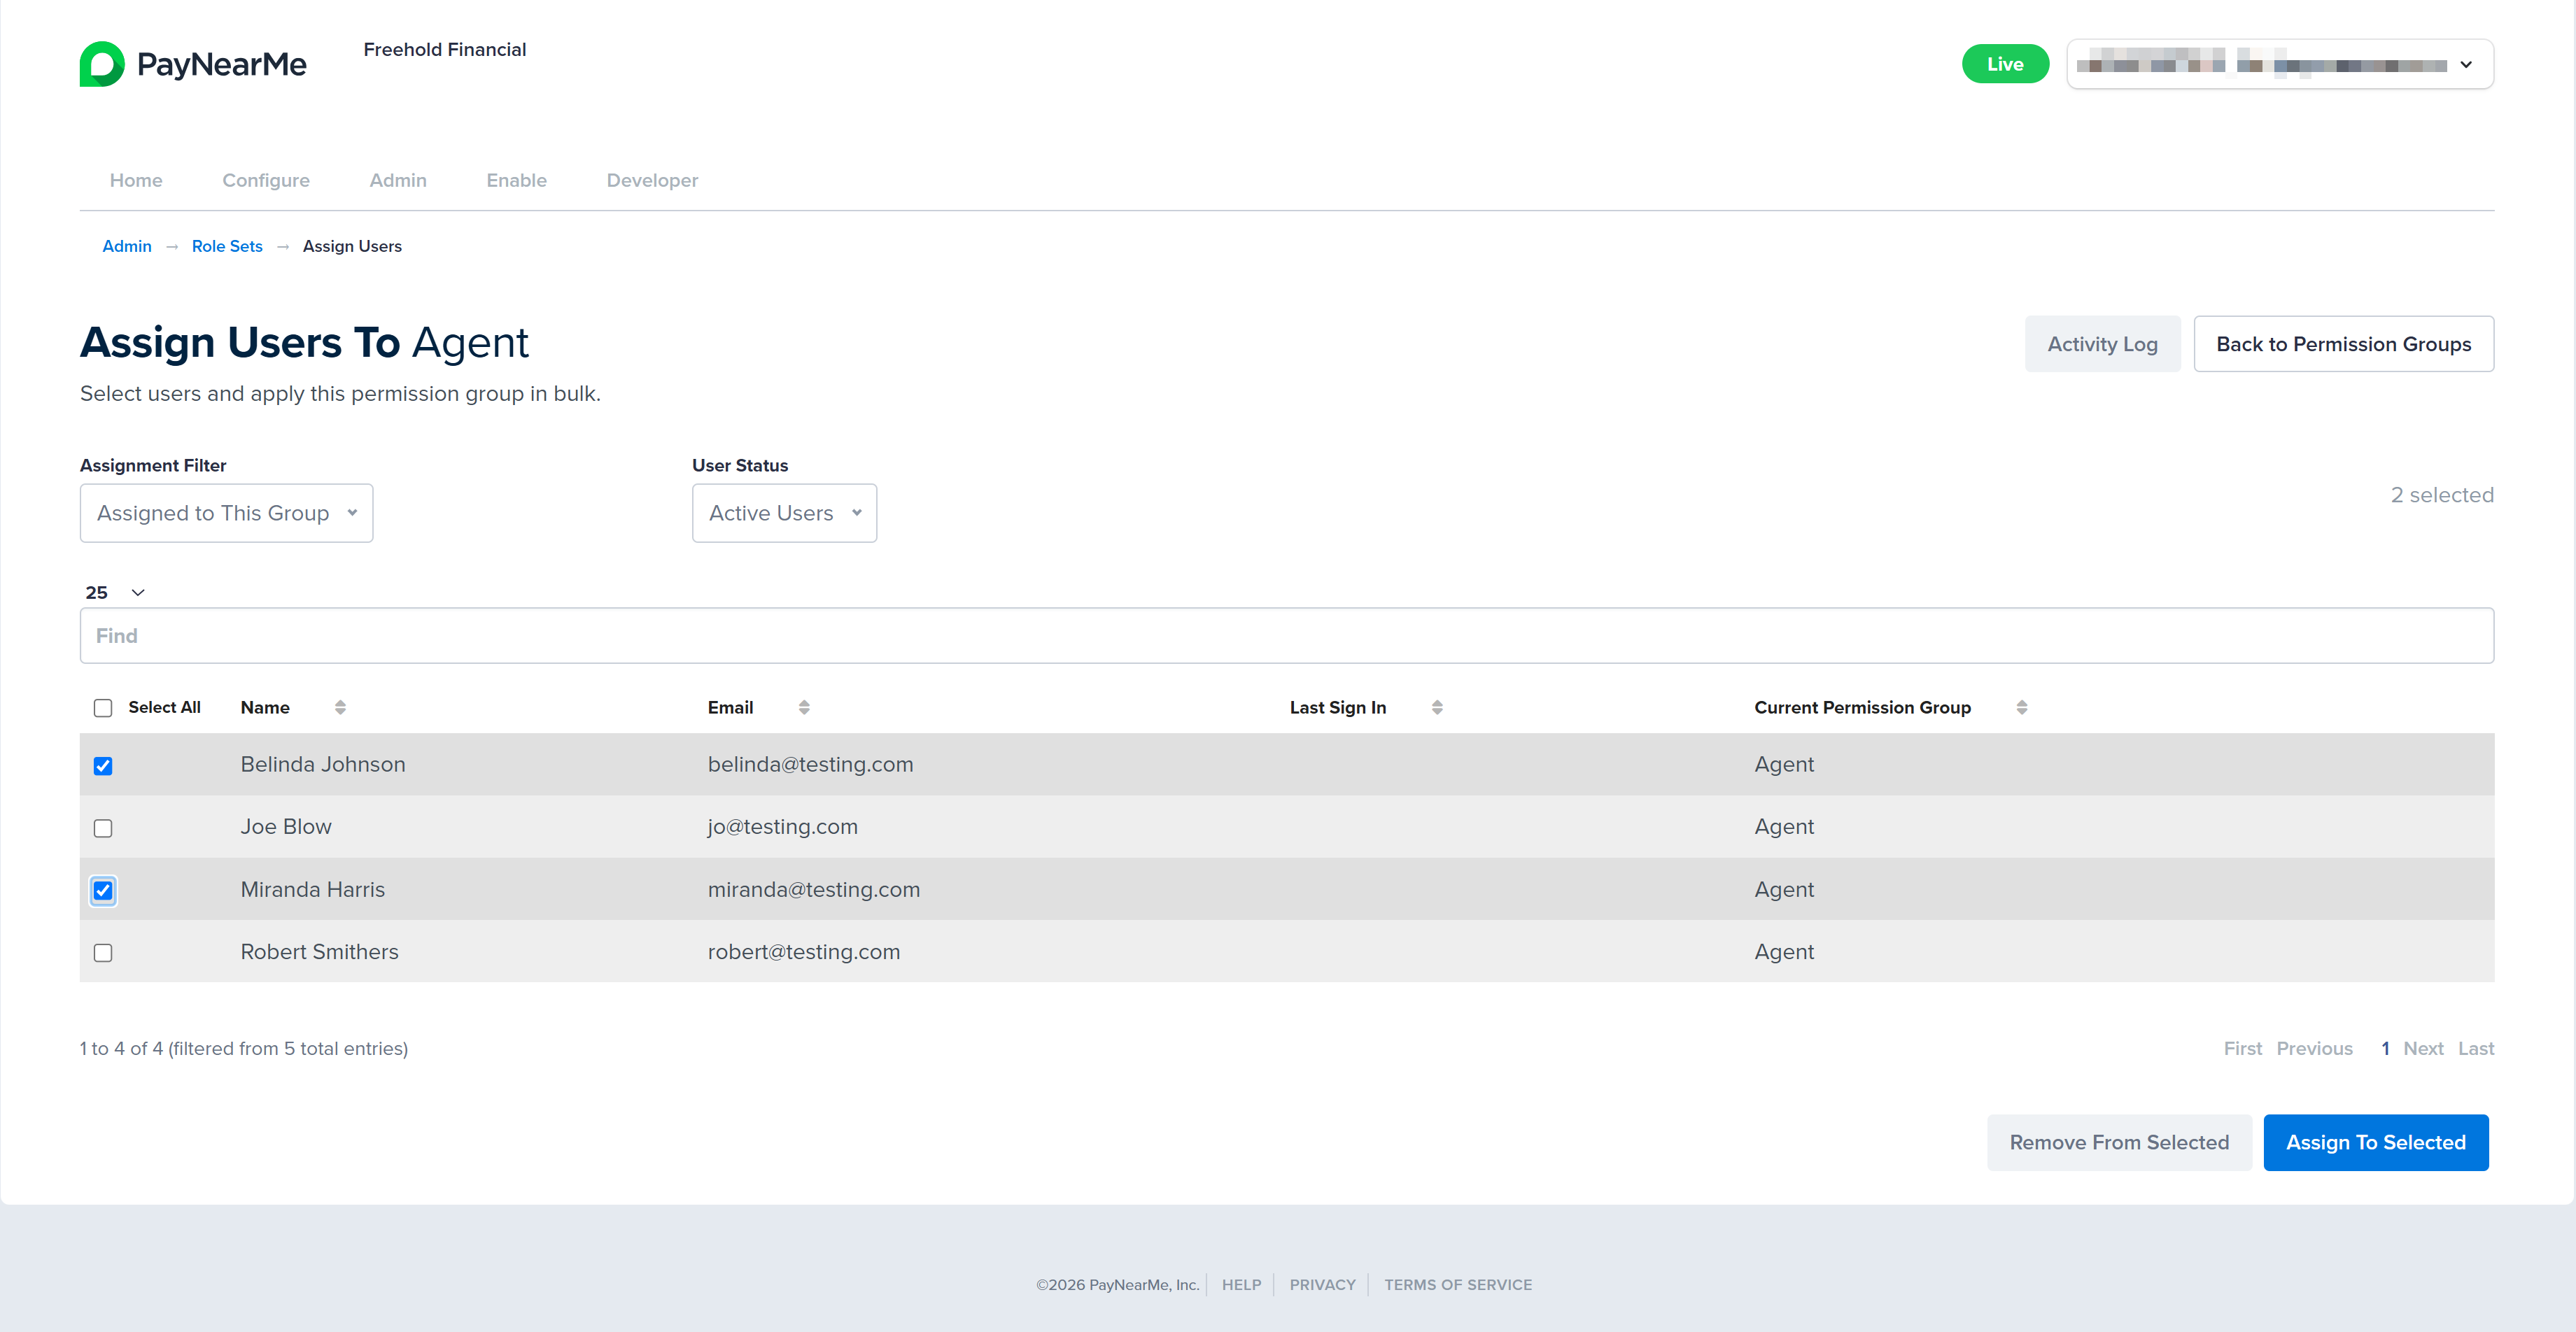
The Assign Users To [Group] page displays for that Permission Group.
-
Use the Assignment Filter, User Status filter, or the Per Page Display filter to narrow down the list of displayed users in the User data grid. You can also search for a specific user account by Name or Email Address.
-
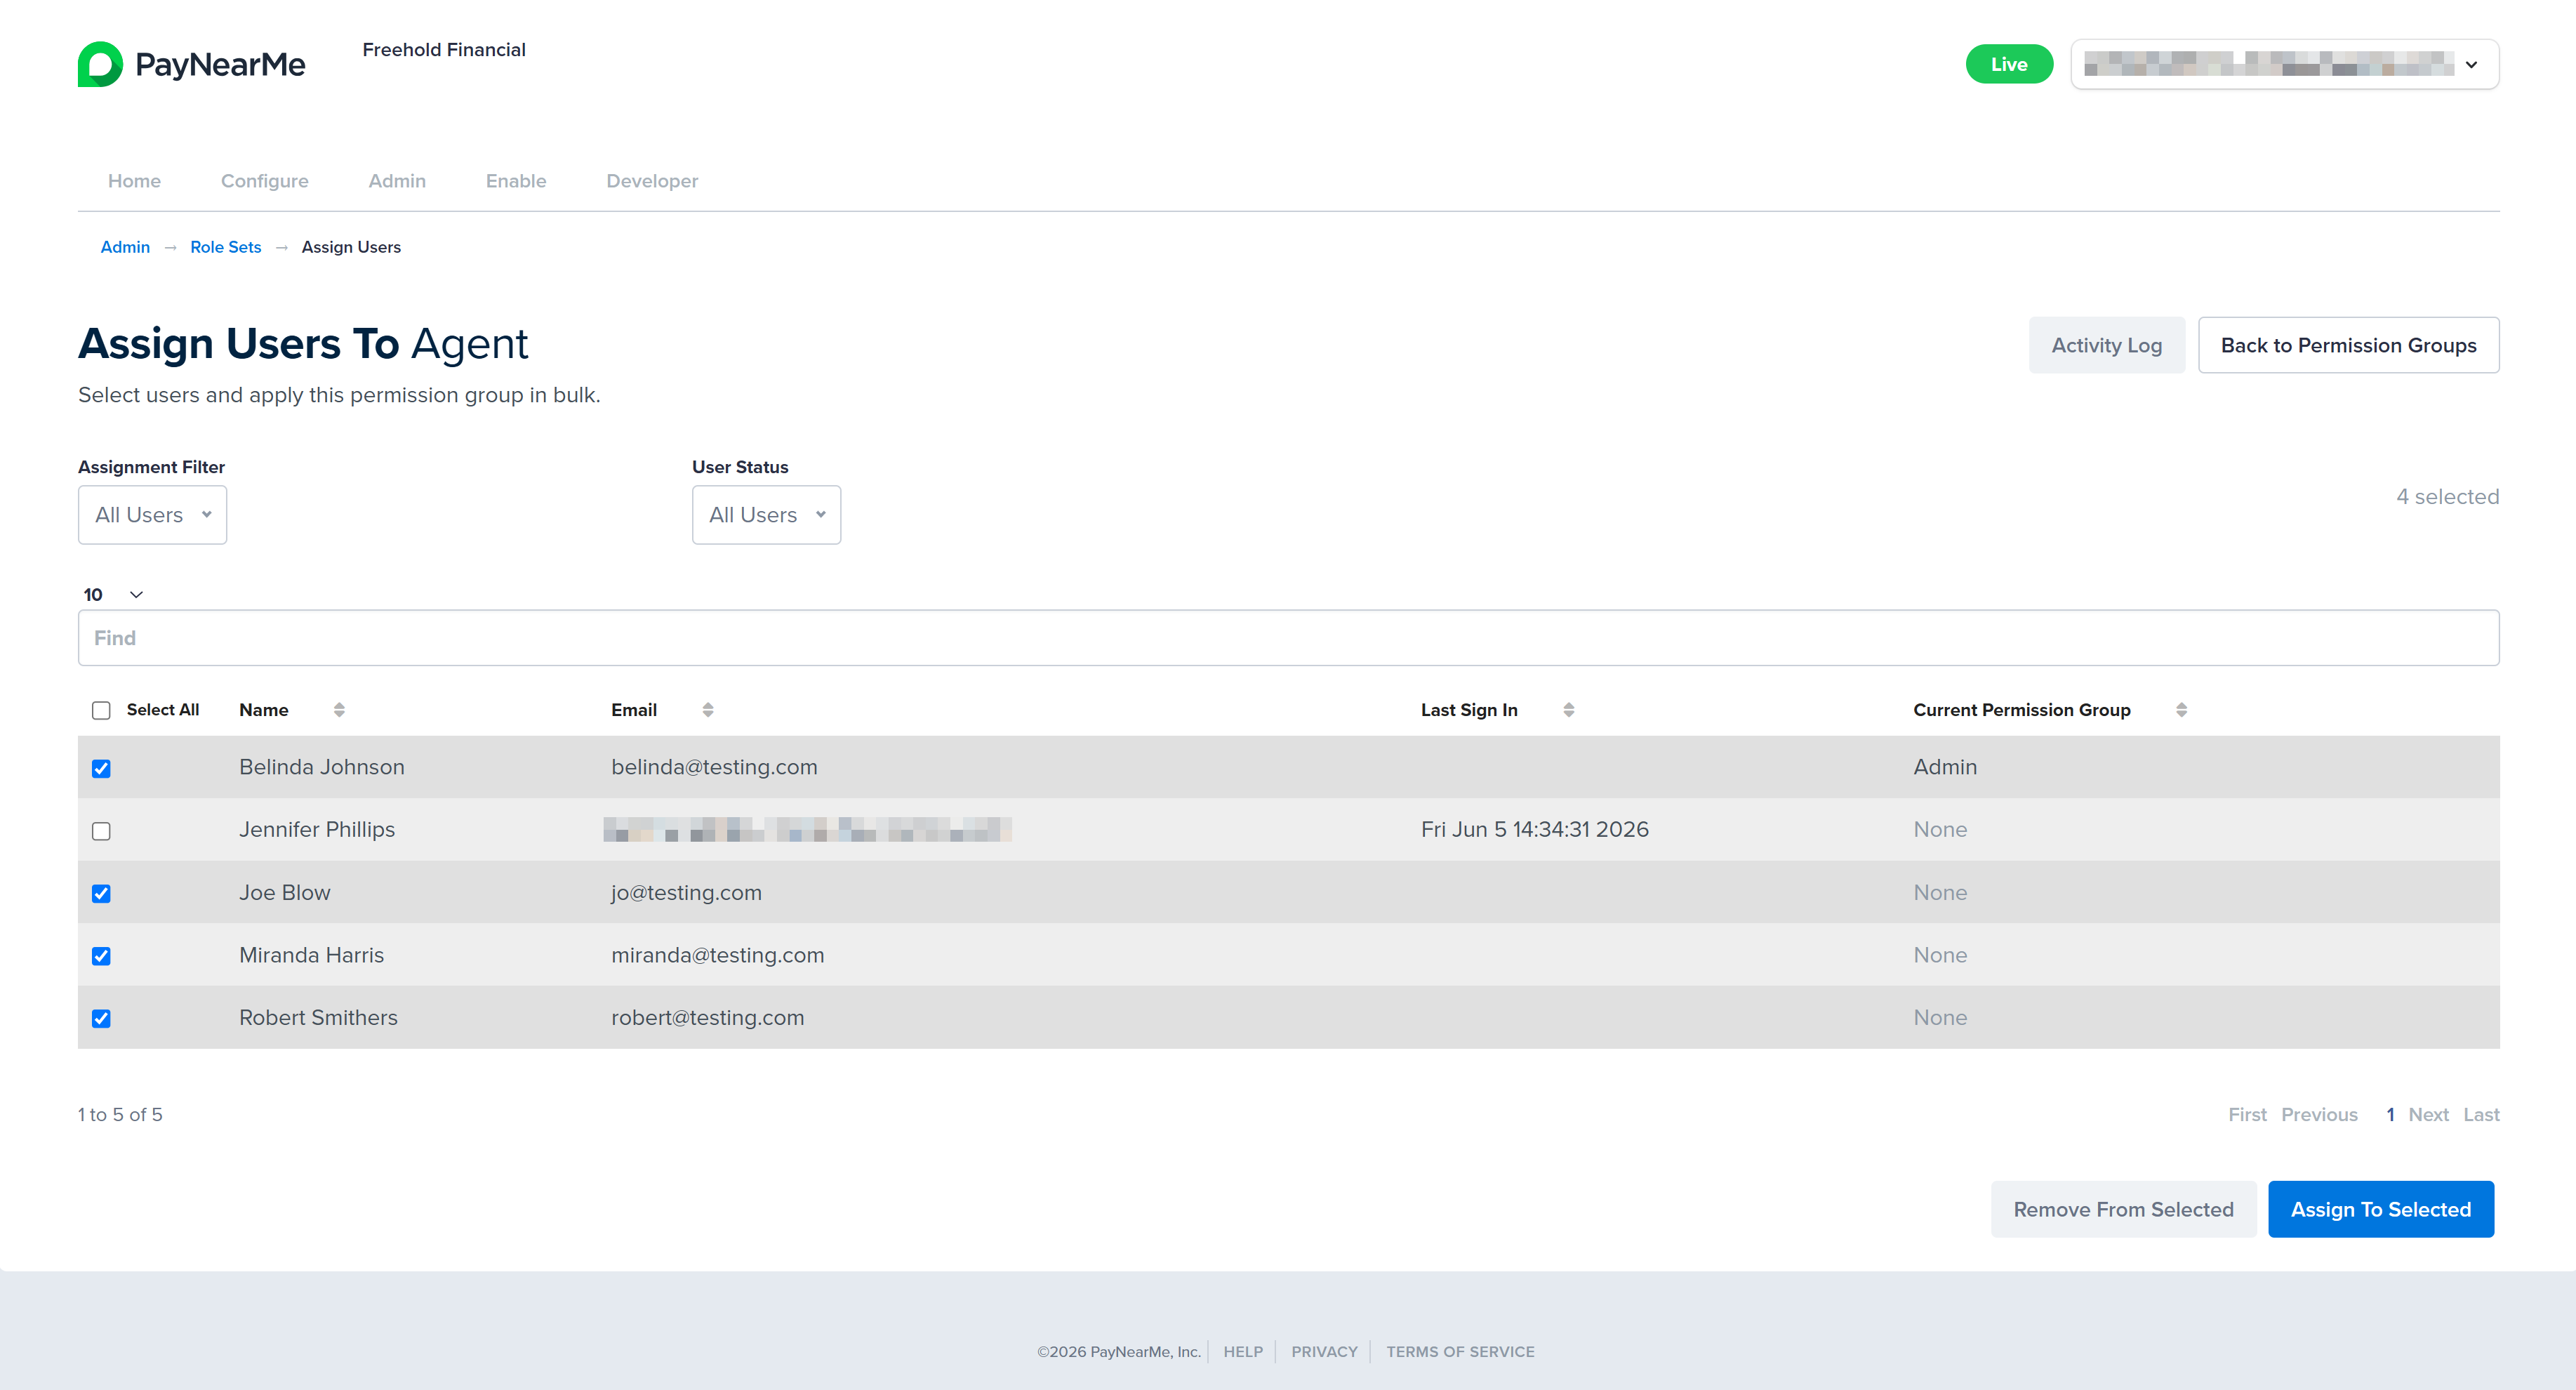
Select the checkboxes next to each user account you want to assign to this permission group. If needed, use the pagination controls at the bottom of the data grid to add more users.
-
Click Assign to Selected. The Business Portal displays a message asking your confirm that you want to assign the selected number of users to the permission group.
-
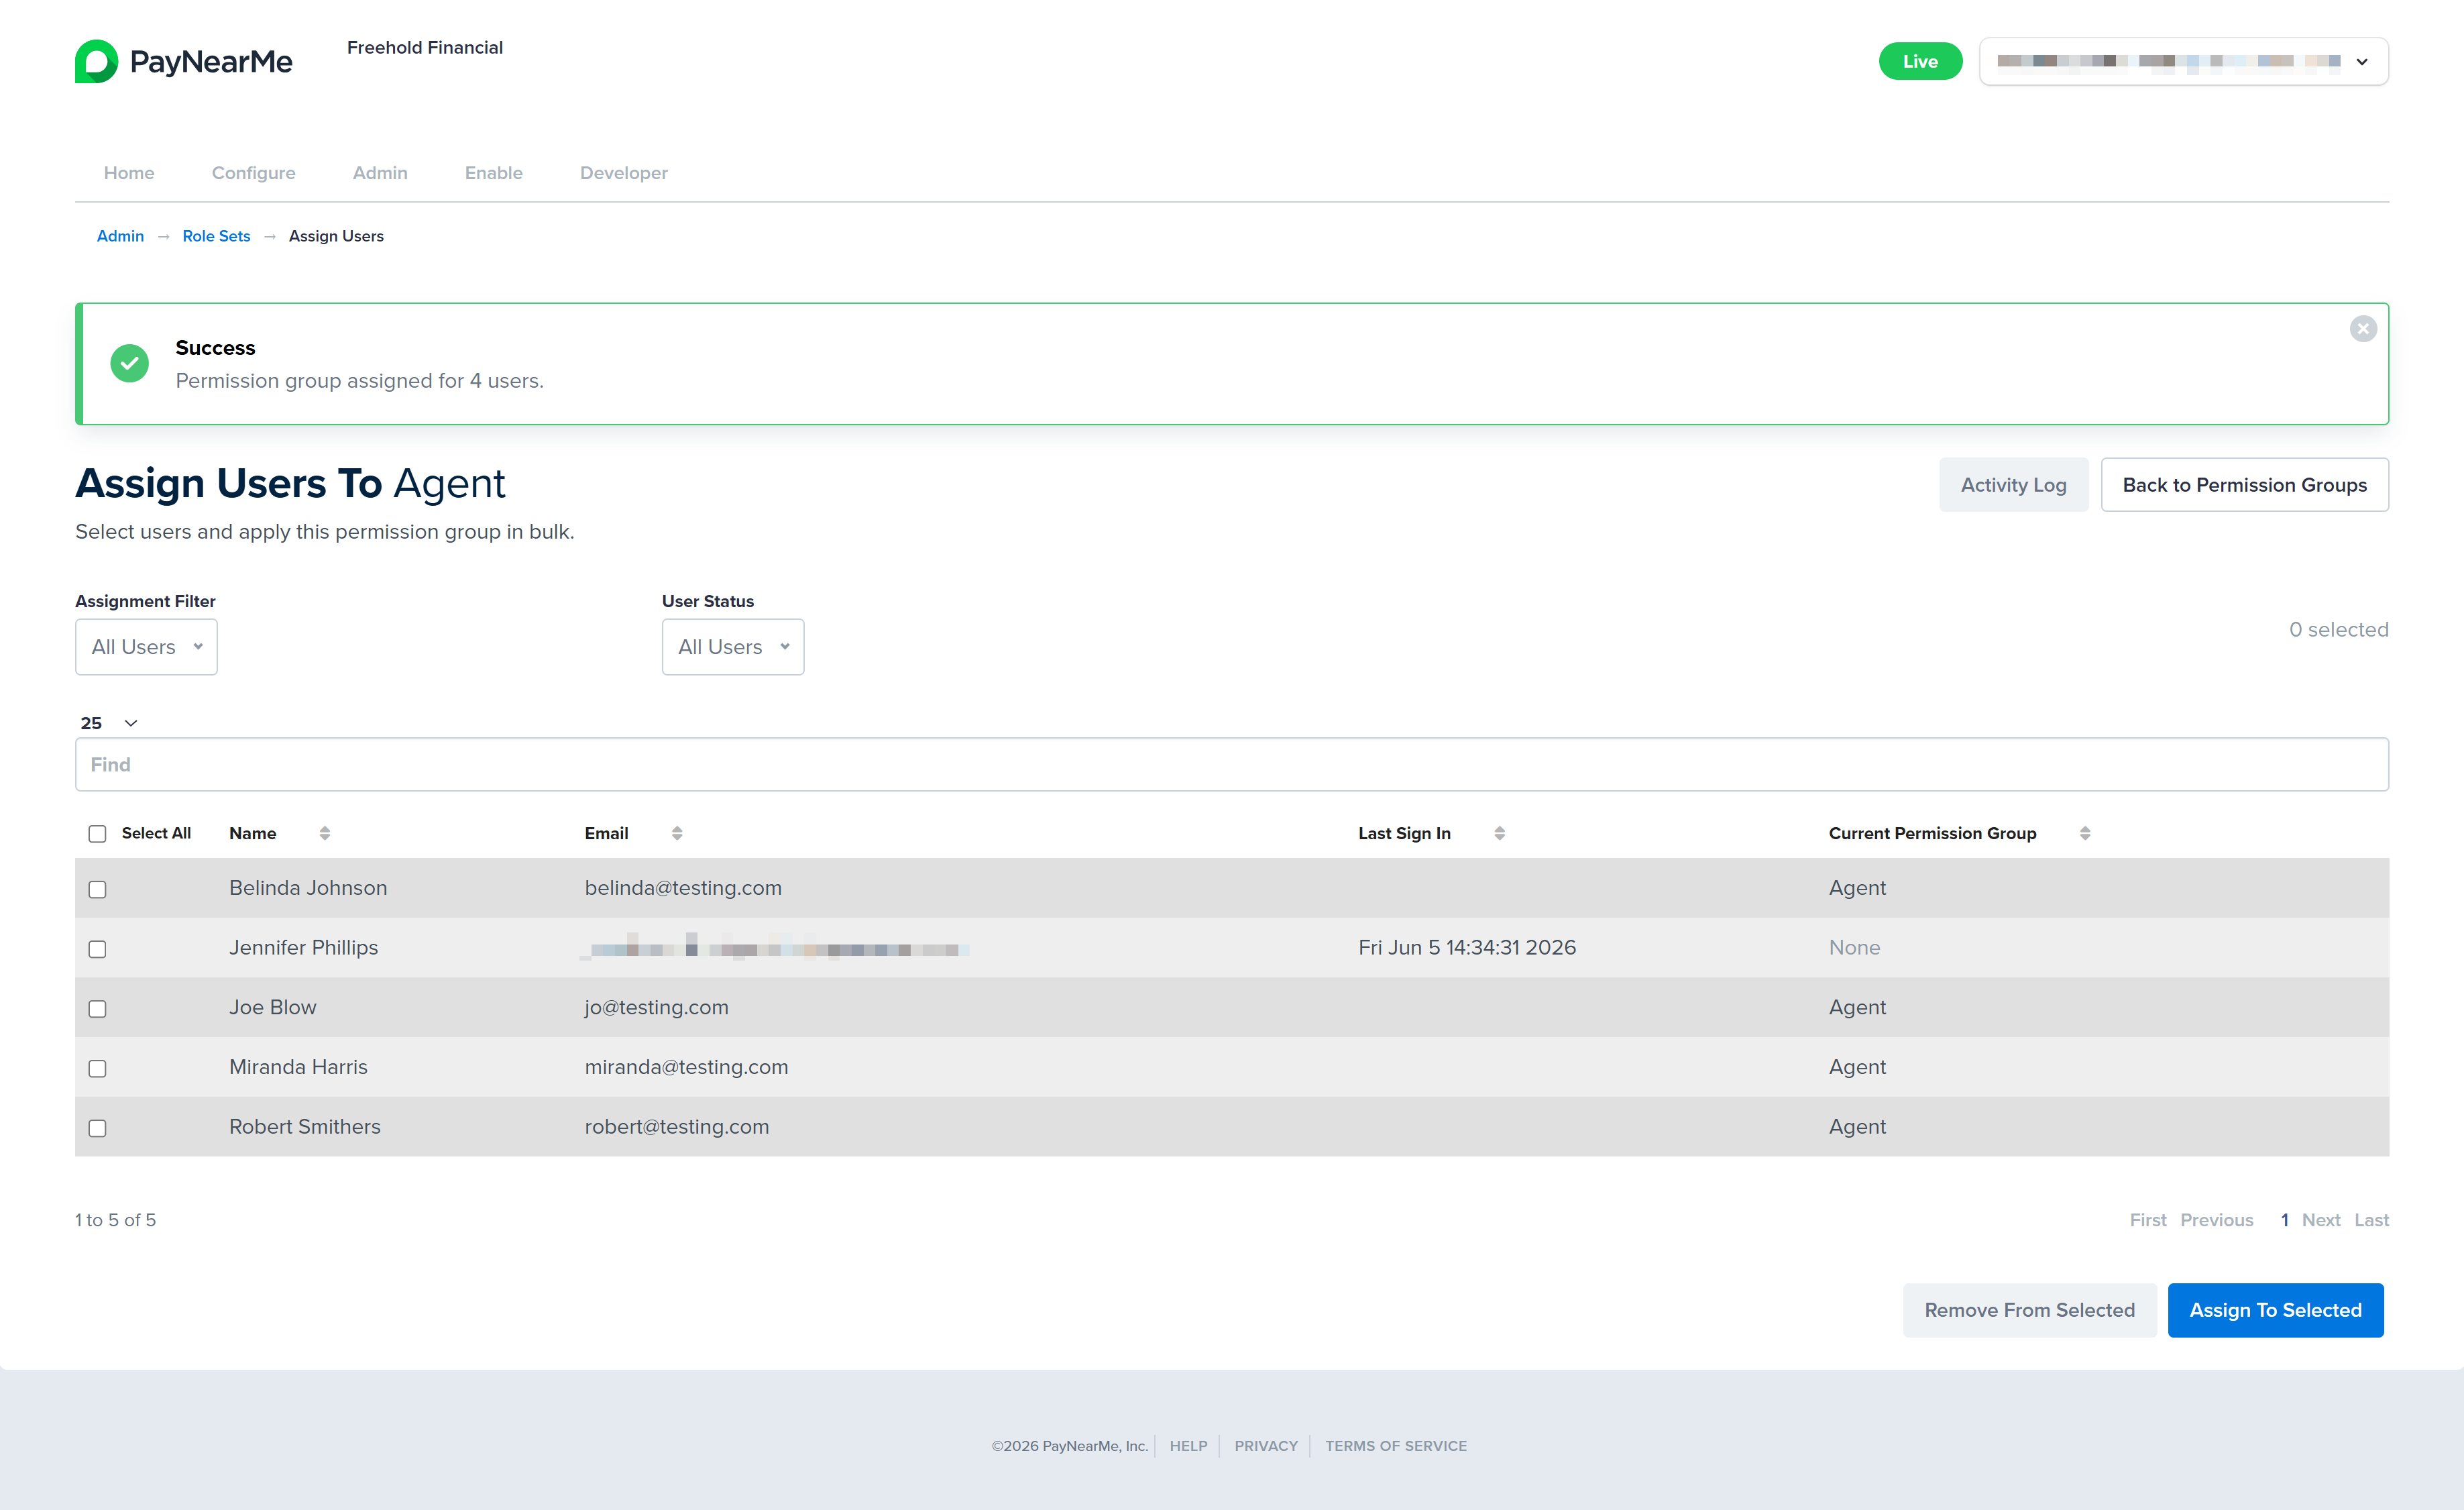
To confirm the assignments, click OK. The Business Portal returns you to the Assign Users to [Group] page and displays a message indicating if the assignments were successful.
Editing Permission Groups
Editing the Permissions of a Permission Group
Permission groups allow Site Administrators to manage access for multiple users simultaneously, eliminating the need to configure permissions for each user individually. To adjust the permissions of a permissions group, complete the following steps:
-
Access the Admin tab of the Business Portal and click Manage under the Permission Groups section. The Permission Groups page displays.

-
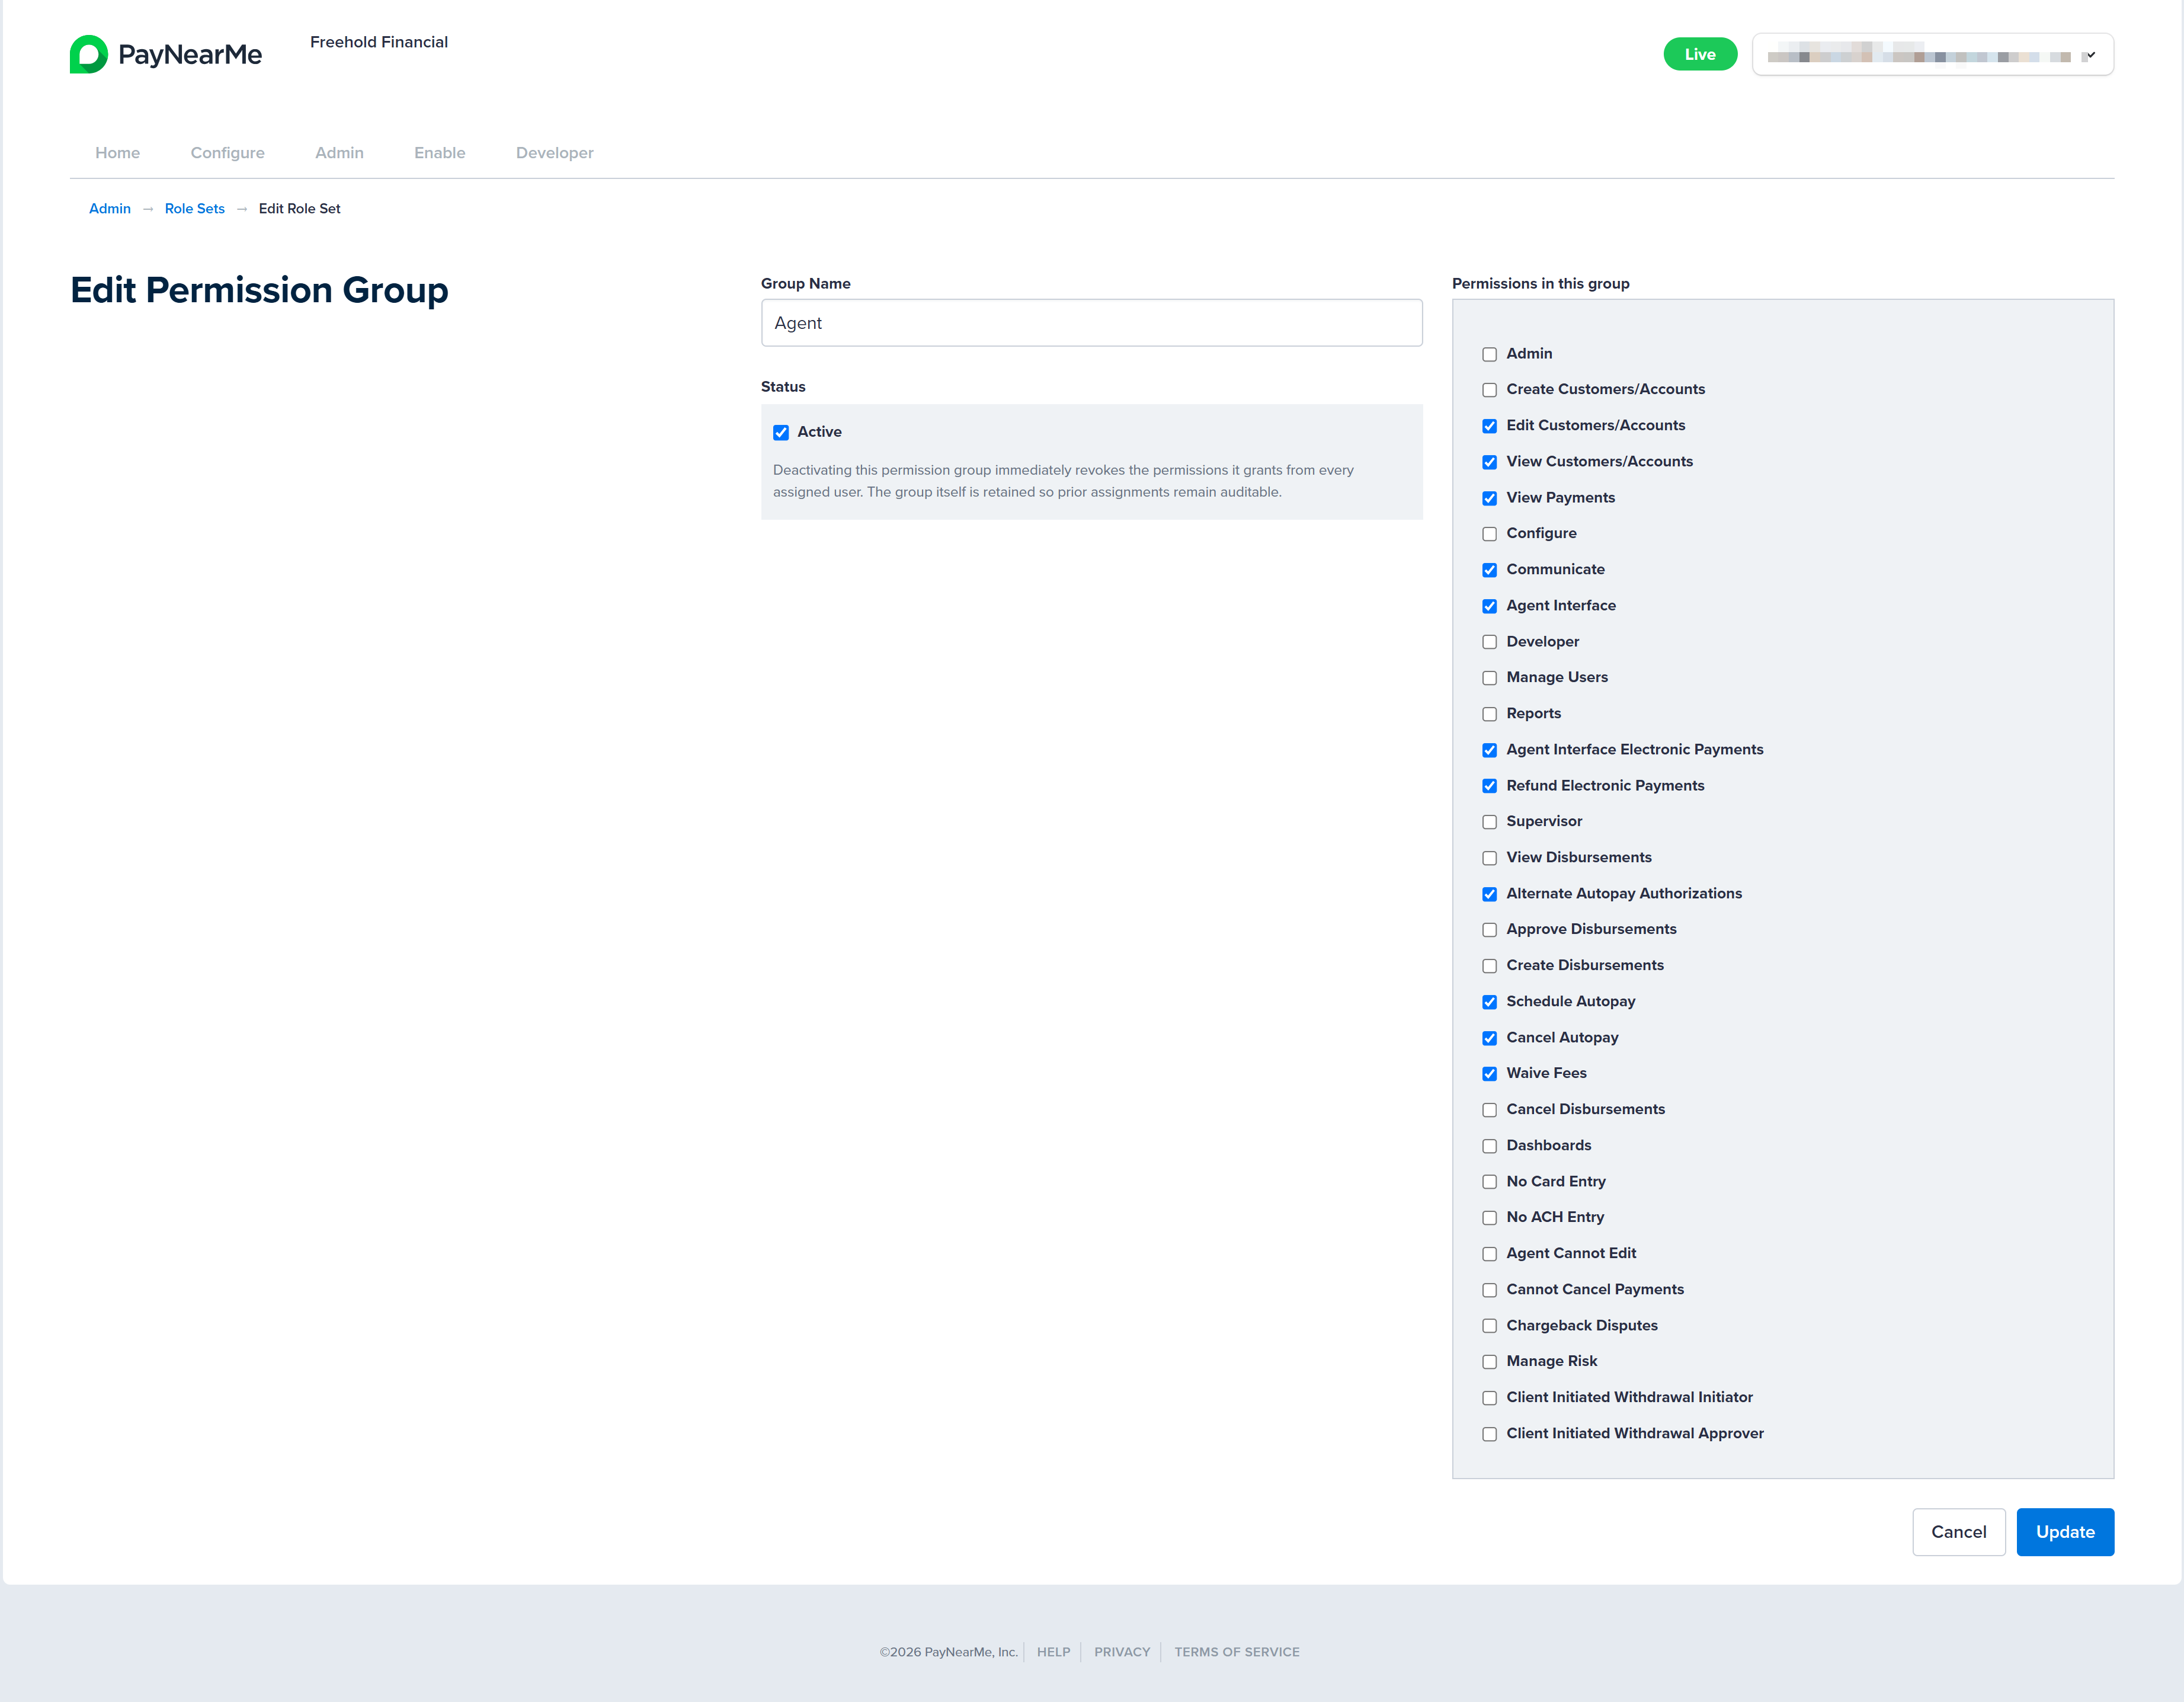
Click the arrow next to the group listing and select Edit. The Edit Permission Group page displays.
-
You can change the name, status, and individual permissions associated with the permission group. NOTE: When deactivated, a permission group no longer grants permissions to assigned users, but its assignment history is retained for auditing purposes. See Viewing Activity Logs for a Permission Group for more information.
-
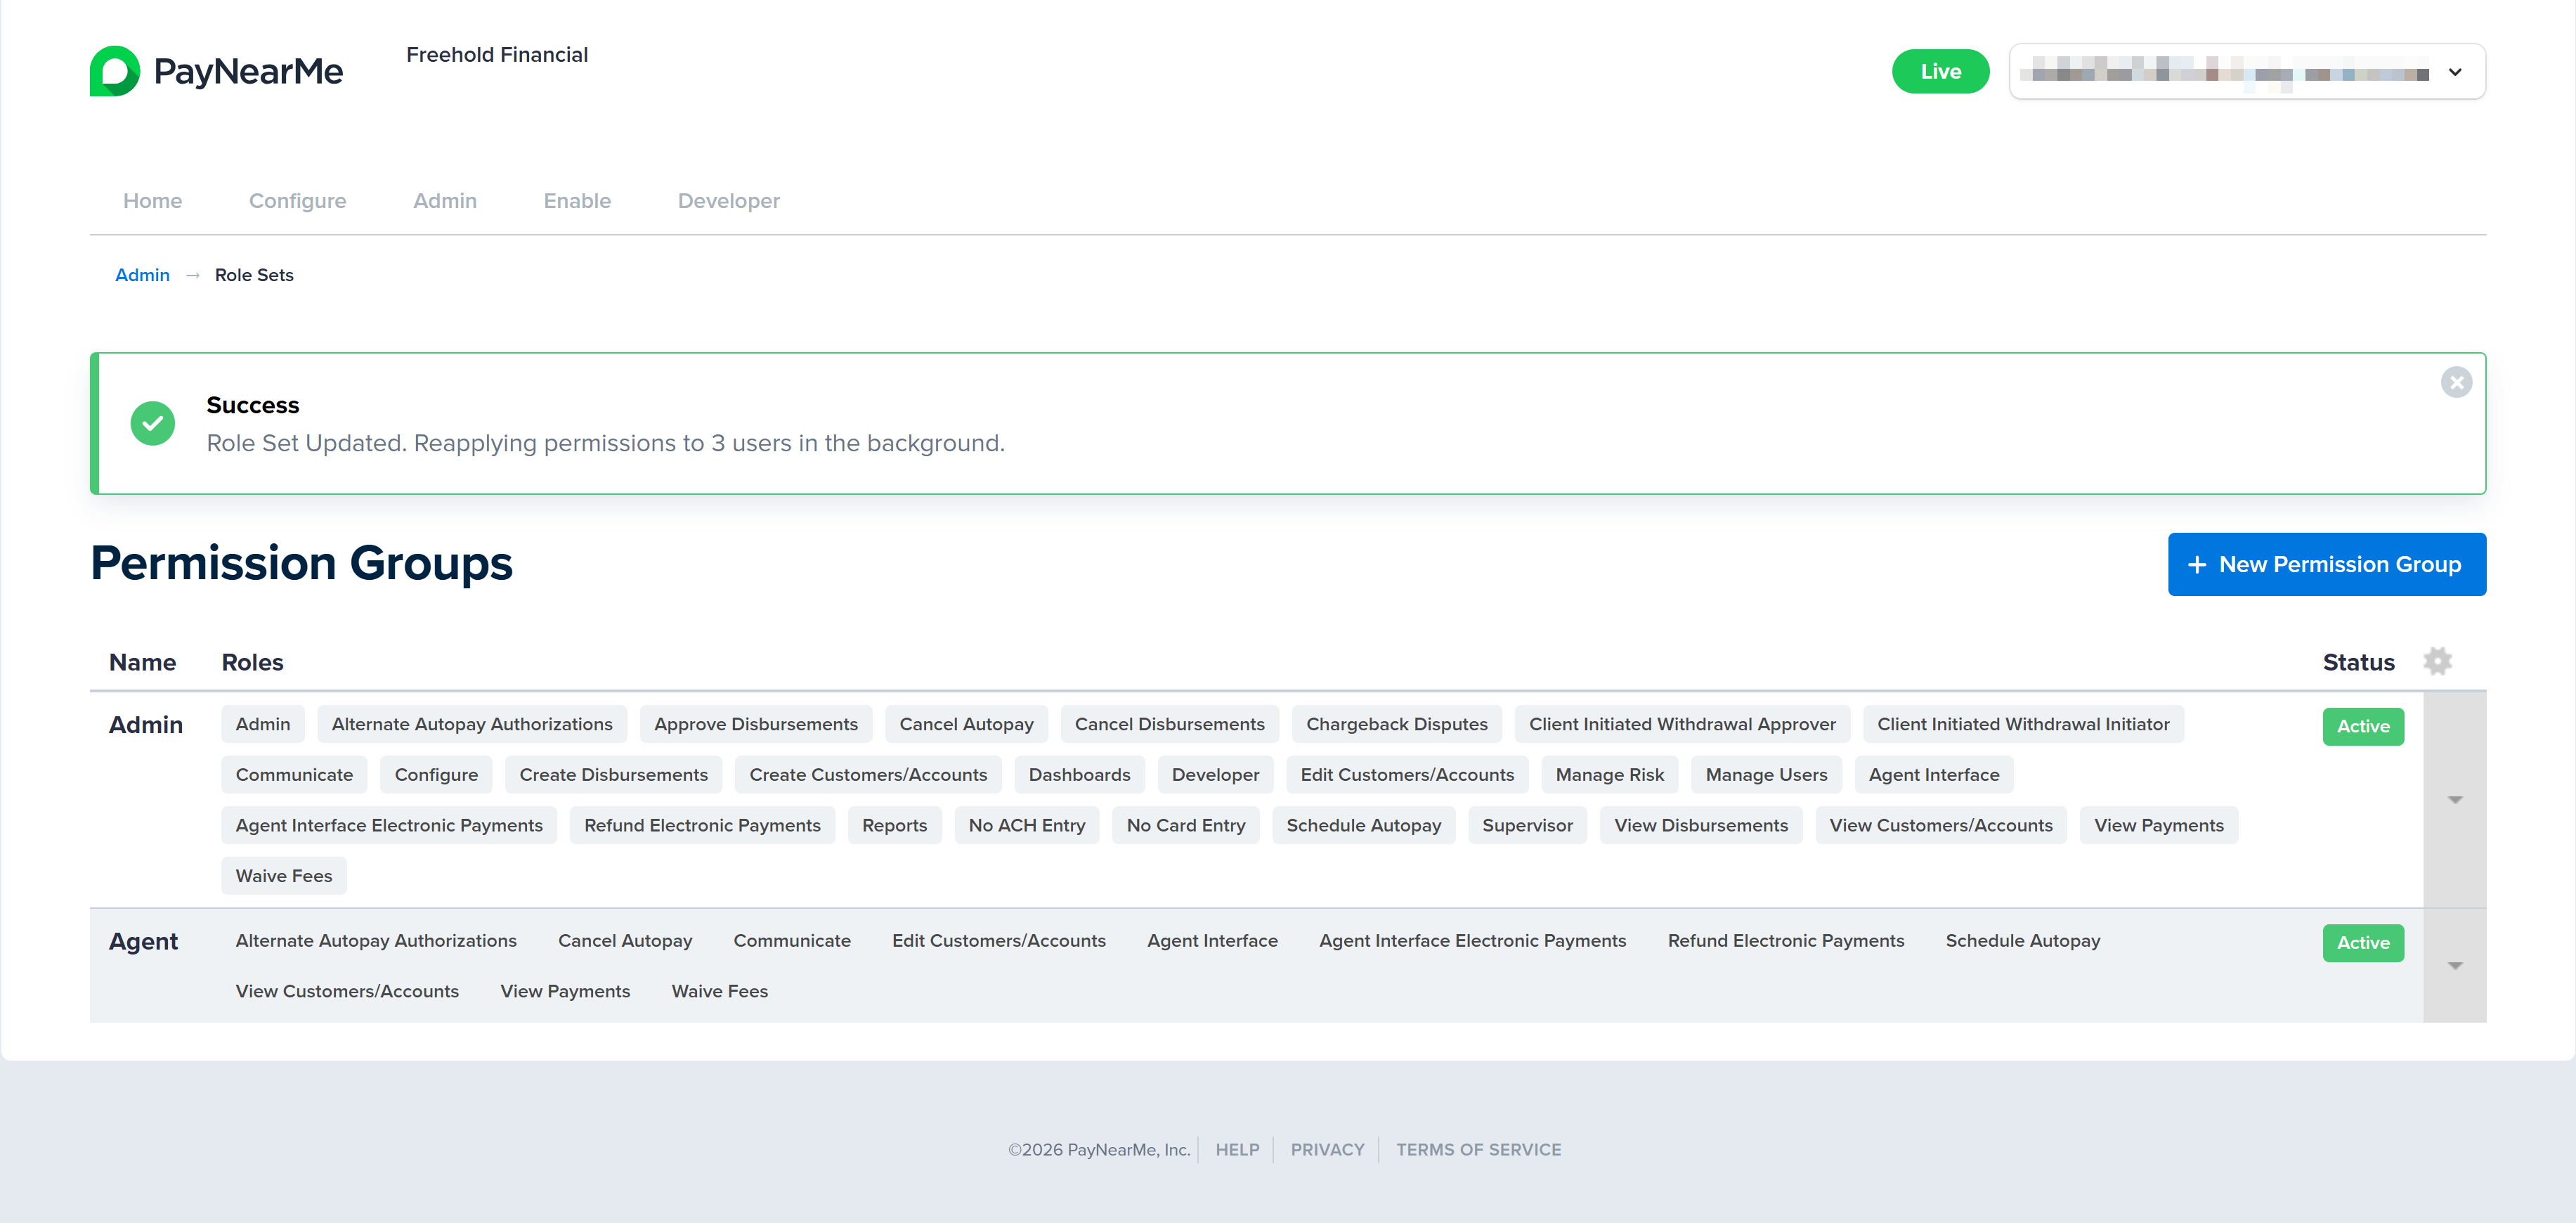
Once you've made your edits click Update. The Business Portal returns you to the Permission Groups page and displays a message indicating if the update was successful.
Editing the Assigned Users of a Permission Group
If users need to be re-assigned or removed from a permission group, follow the steps in Adding Multiple Users to a Permission Group to access the Assign Users to [Group] page and then complete the following steps:
-
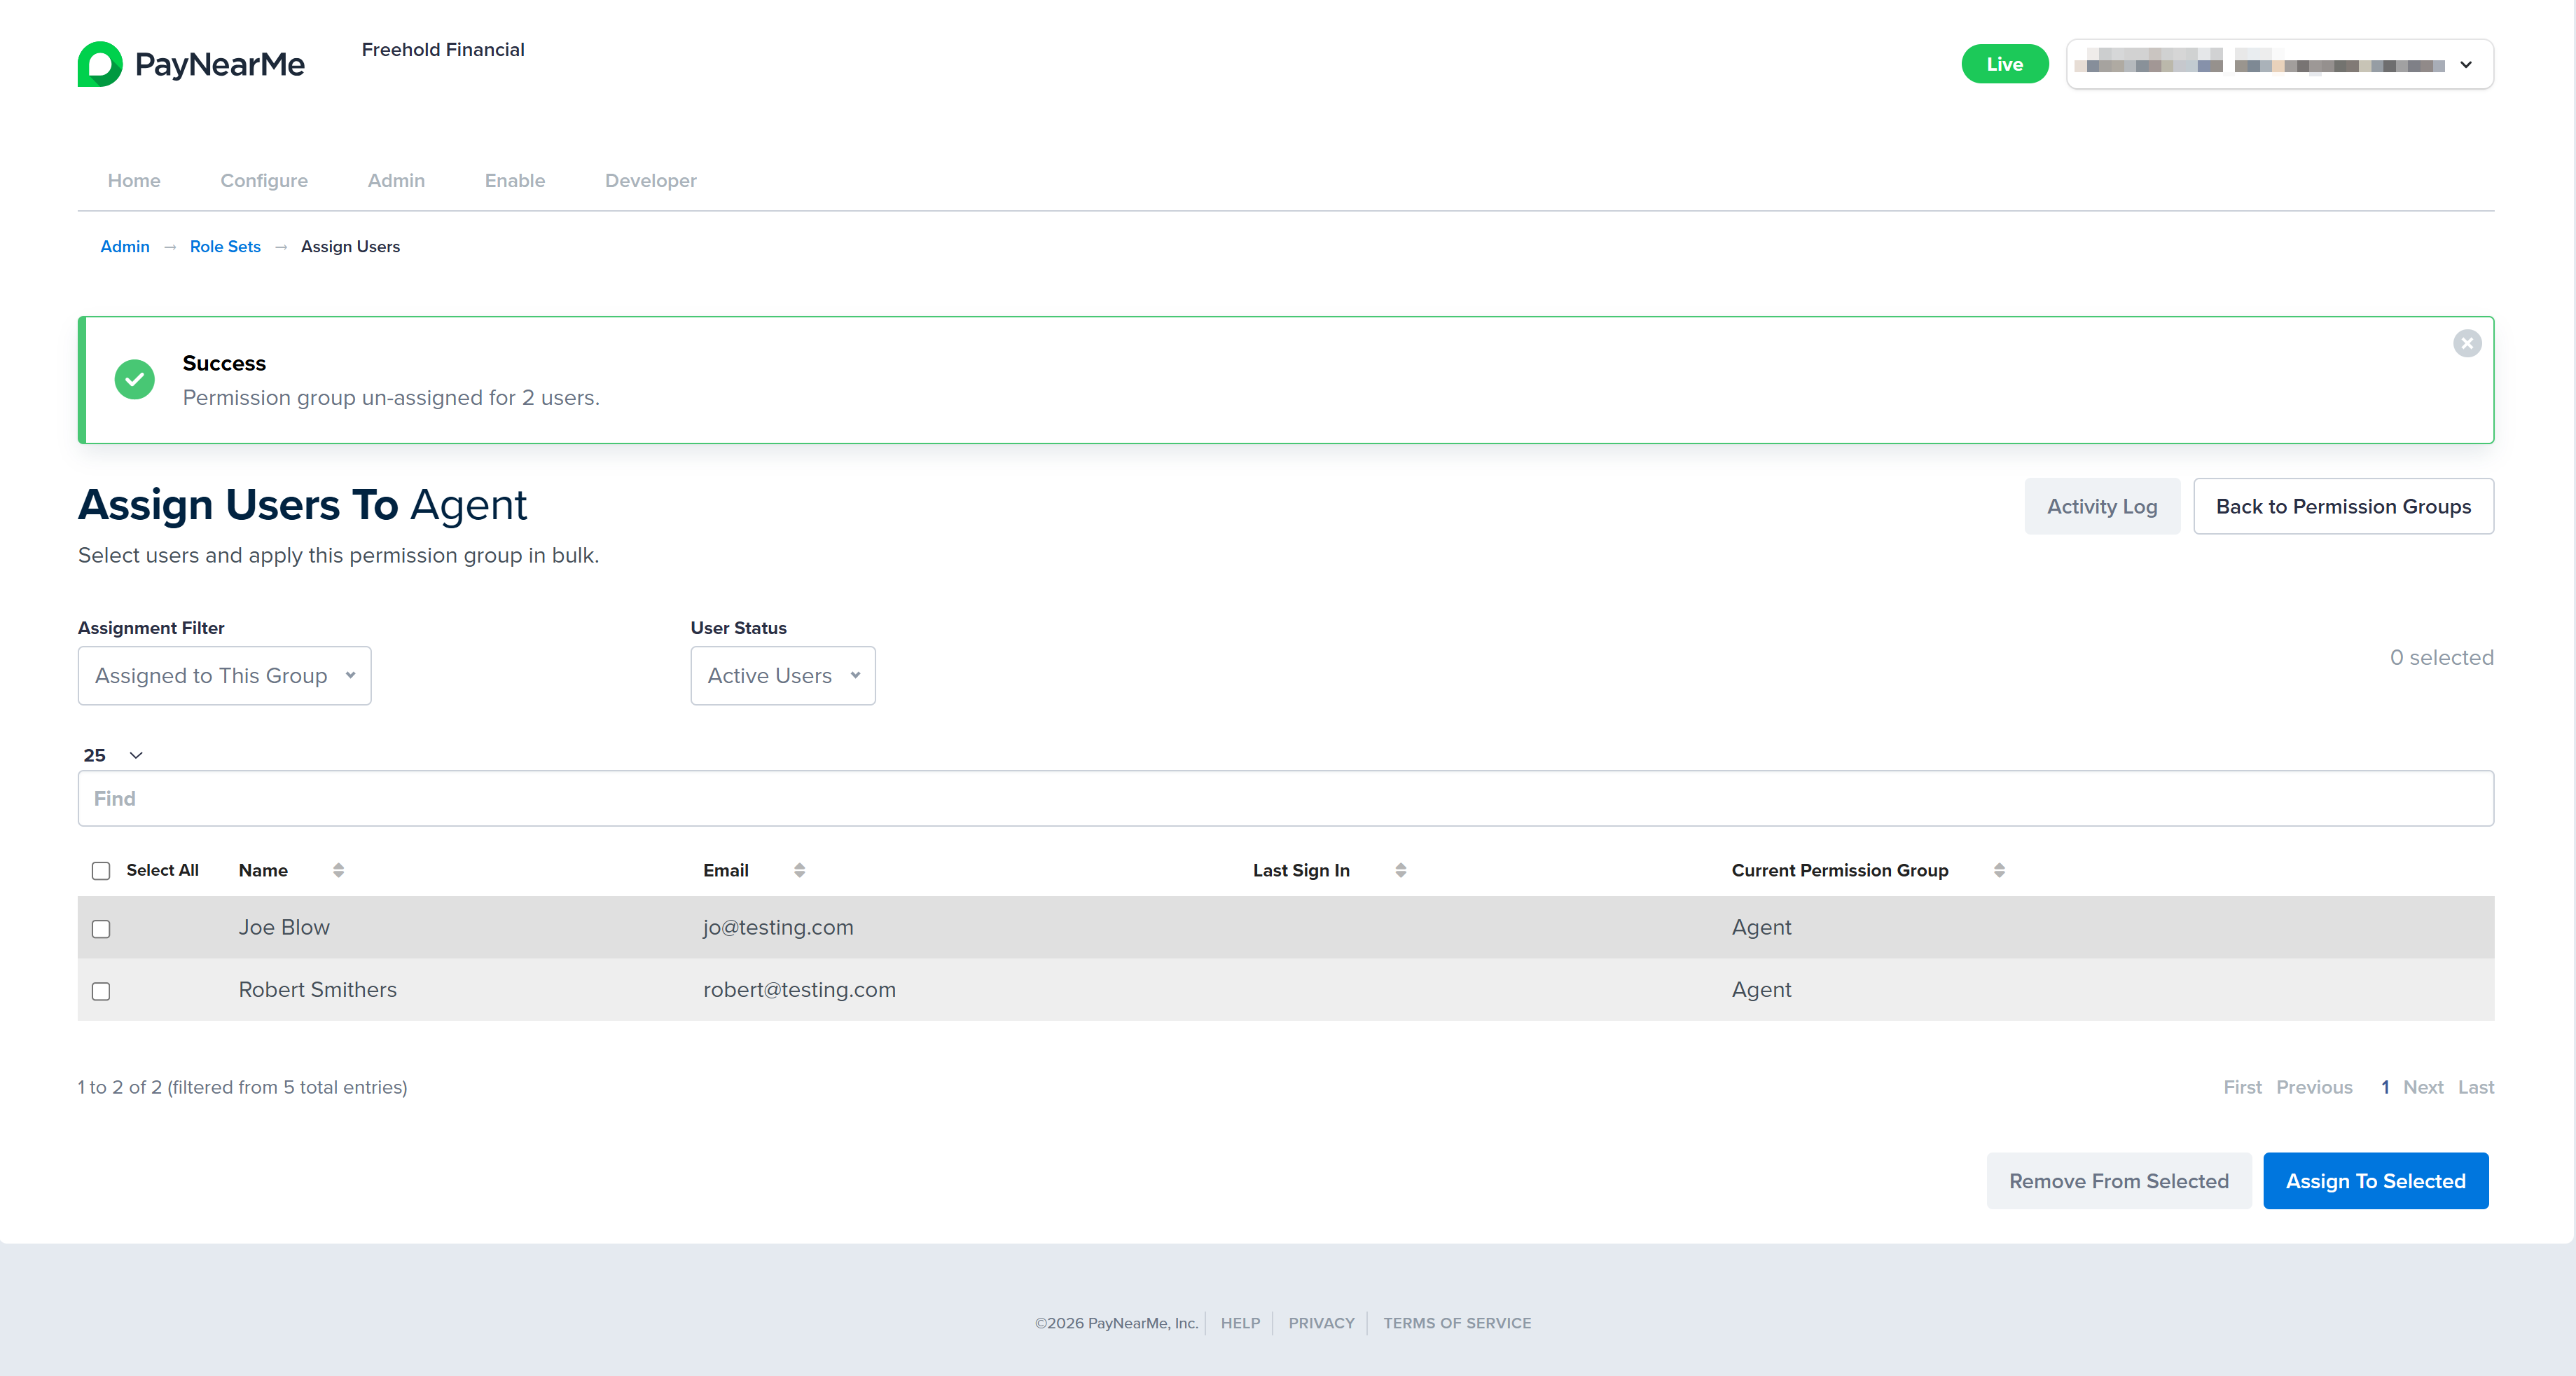
From the Assign Users to [Group] page, select the Assigned to This Group option from the Assignment Filter dropdown menu.
-
Using the list of currently assigned users, scroll through and select the user accounts you want to remove from this permission group. If needed, use the pagination controls at the bottom of the data grid to select more users.
-
Click Remove from Selected. The Business Portal displays a message asking your confirm that you want to remove the selected number of users from the permission group.
-
To confirm the removal, click OK. The Business Portal returns you to the Assign Users to [Group] page and displays a message indicating if the removal operation was successful.
Removing a User from a Permission Group Does Not Remove AccessThe Business Portal supports both permission groups and individually assigned permissions. Removing a user from a permission group does not automatically remove the permissions or application access that the user currently has. The user's existing permissions will remain unchanged until they are manually modified.
If the user requires a different set of permissions, either edit the user's permissions directly (see Editing User Accounts) or assign the user to a different permission group.
If the user's access to the application should be completely removed, you must revoke the user account (see Revoking the User).
Viewing Activity Logs for a Permission Group
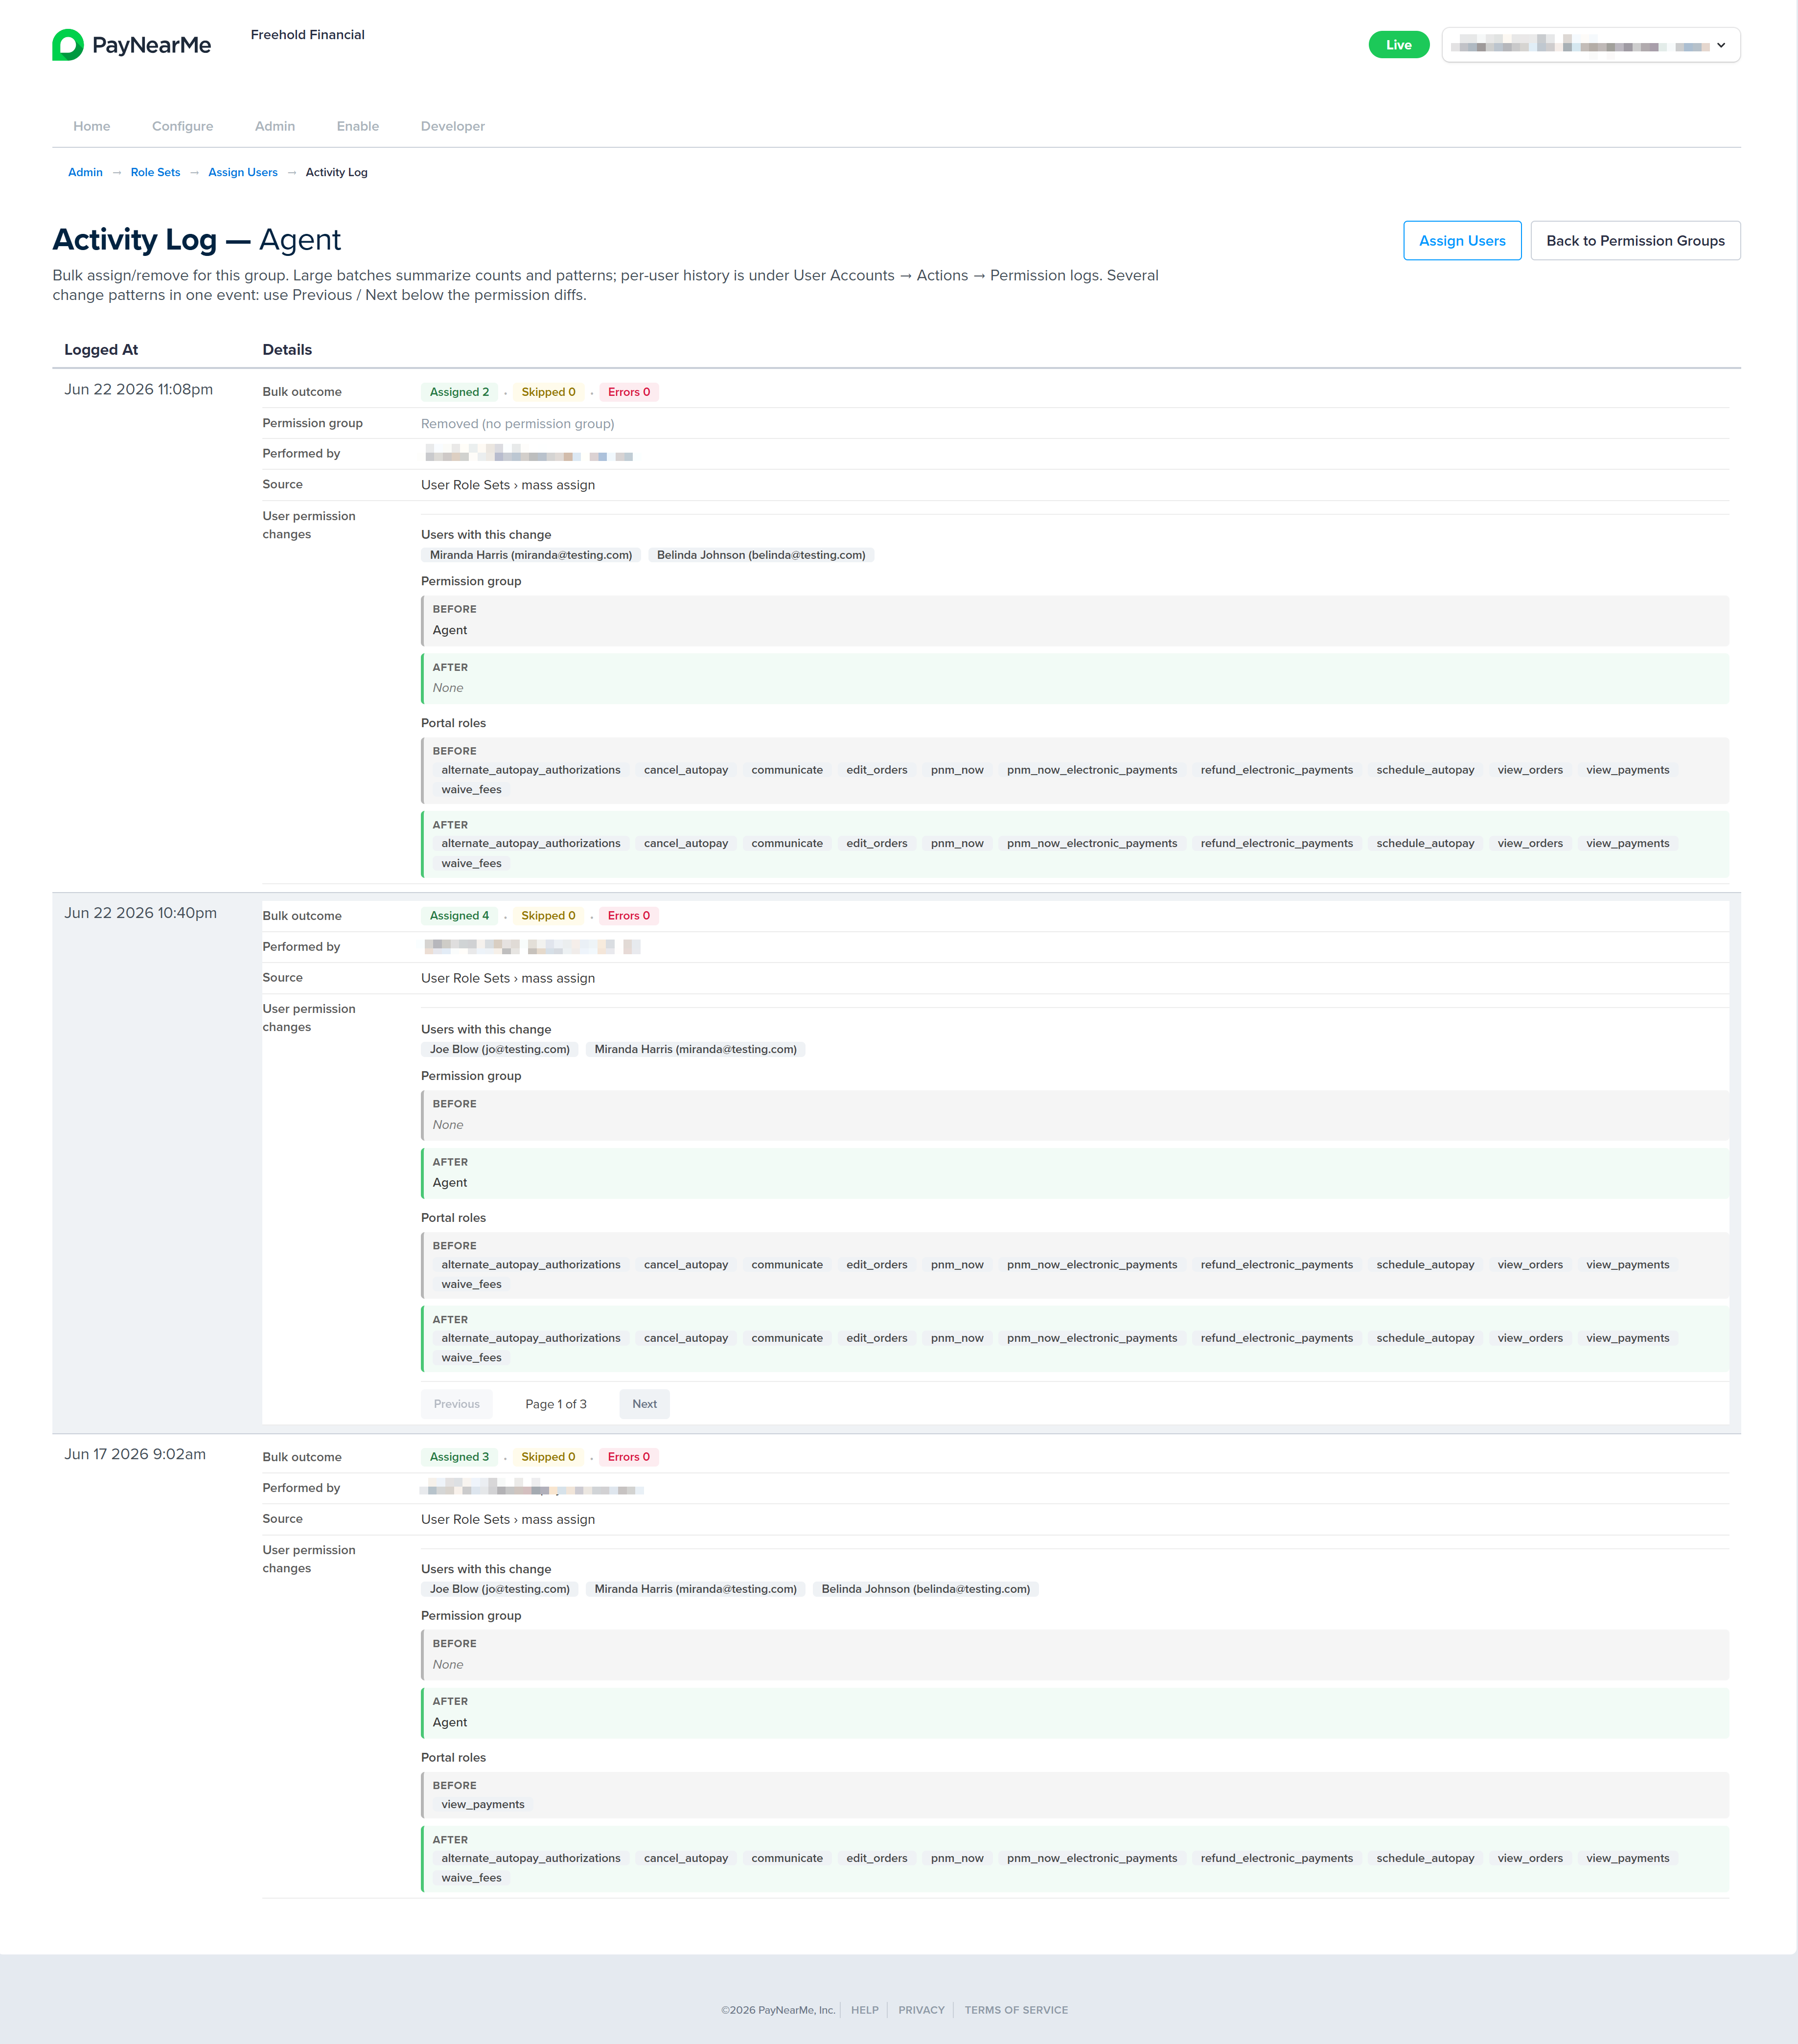
When you create, edit, or bulk-assign permission groups, the Business Portal records an audit trail of those changes so Site Administrators can review who modified access and when. Each permission group has a dedicated Activity Log that shows mass-assignment history for that group—including the administrator who made the change, the date and time, and a summary of how many users were assigned, un-assigned, skipped, or encountered errors. For large batches, the log summarizes the outcome and lets you open a detail view to see the full list of affected users without cluttering the main screen. You can also open Permission Logs for an individual user from the User Accounts menu to review that user's permission history, including permission group assignments and individual permission changes.
Use the permission group's Activity Log to audit changes at the group level—such as bulk assignments from the Assign Users page—and use Permission Logs on a user account to audit access changes for a specific person. Together, these views help you maintain consistent permissions across a large user base and support internal review or compliance needs.
To access a permission group's Activity Log, complete the following steps:
-
Log into the Business Portal and access the Admin tab.
-
Click Manage under the Permission Groups section. The Permission Groups page displays.
-
Click the arrow next to the desired permission group and select Activity Log.

-
The Activity Log for the permission group displays. From here you can scroll to view the details of each time user accounts were assigned to or removed from the group.
-
Click Back to Permission Groups to return to the Permissions Groups page or click Assign Users to go the Assign Users To [Group] page.