
Managing User Accounts
Learn how to create individual or bulk user accounts, manage permissions, revoke access, and audit permission changes in the PayNearMe Business Portal.
Once your PayNearMe Technical Account Manager (TAM) has set up your Site Administrator account, you can create and manage user accounts for staff who need access to the Business Portal and Agent Interface. This page walks you through the day-to-day account tasks available in the Users section of the Admin tab—creating accounts one at a time or in bulk, updating user details and permissions, revoking access when someone should no longer use the portal, and reviewing the permission change history for an individual user.
Before you create or edit accounts, review Defining Access for Users to understand how access is defined through permission groups, individually customized permissions, or both, and to see descriptions of each available permission.
Creating Users in the Business Portal
Once you're set up as a Site Administrator, you can log into the Business Portal and begin creating user accounts.
Creating an Individual User Account
To create one user account at a time, complete the following steps:
-
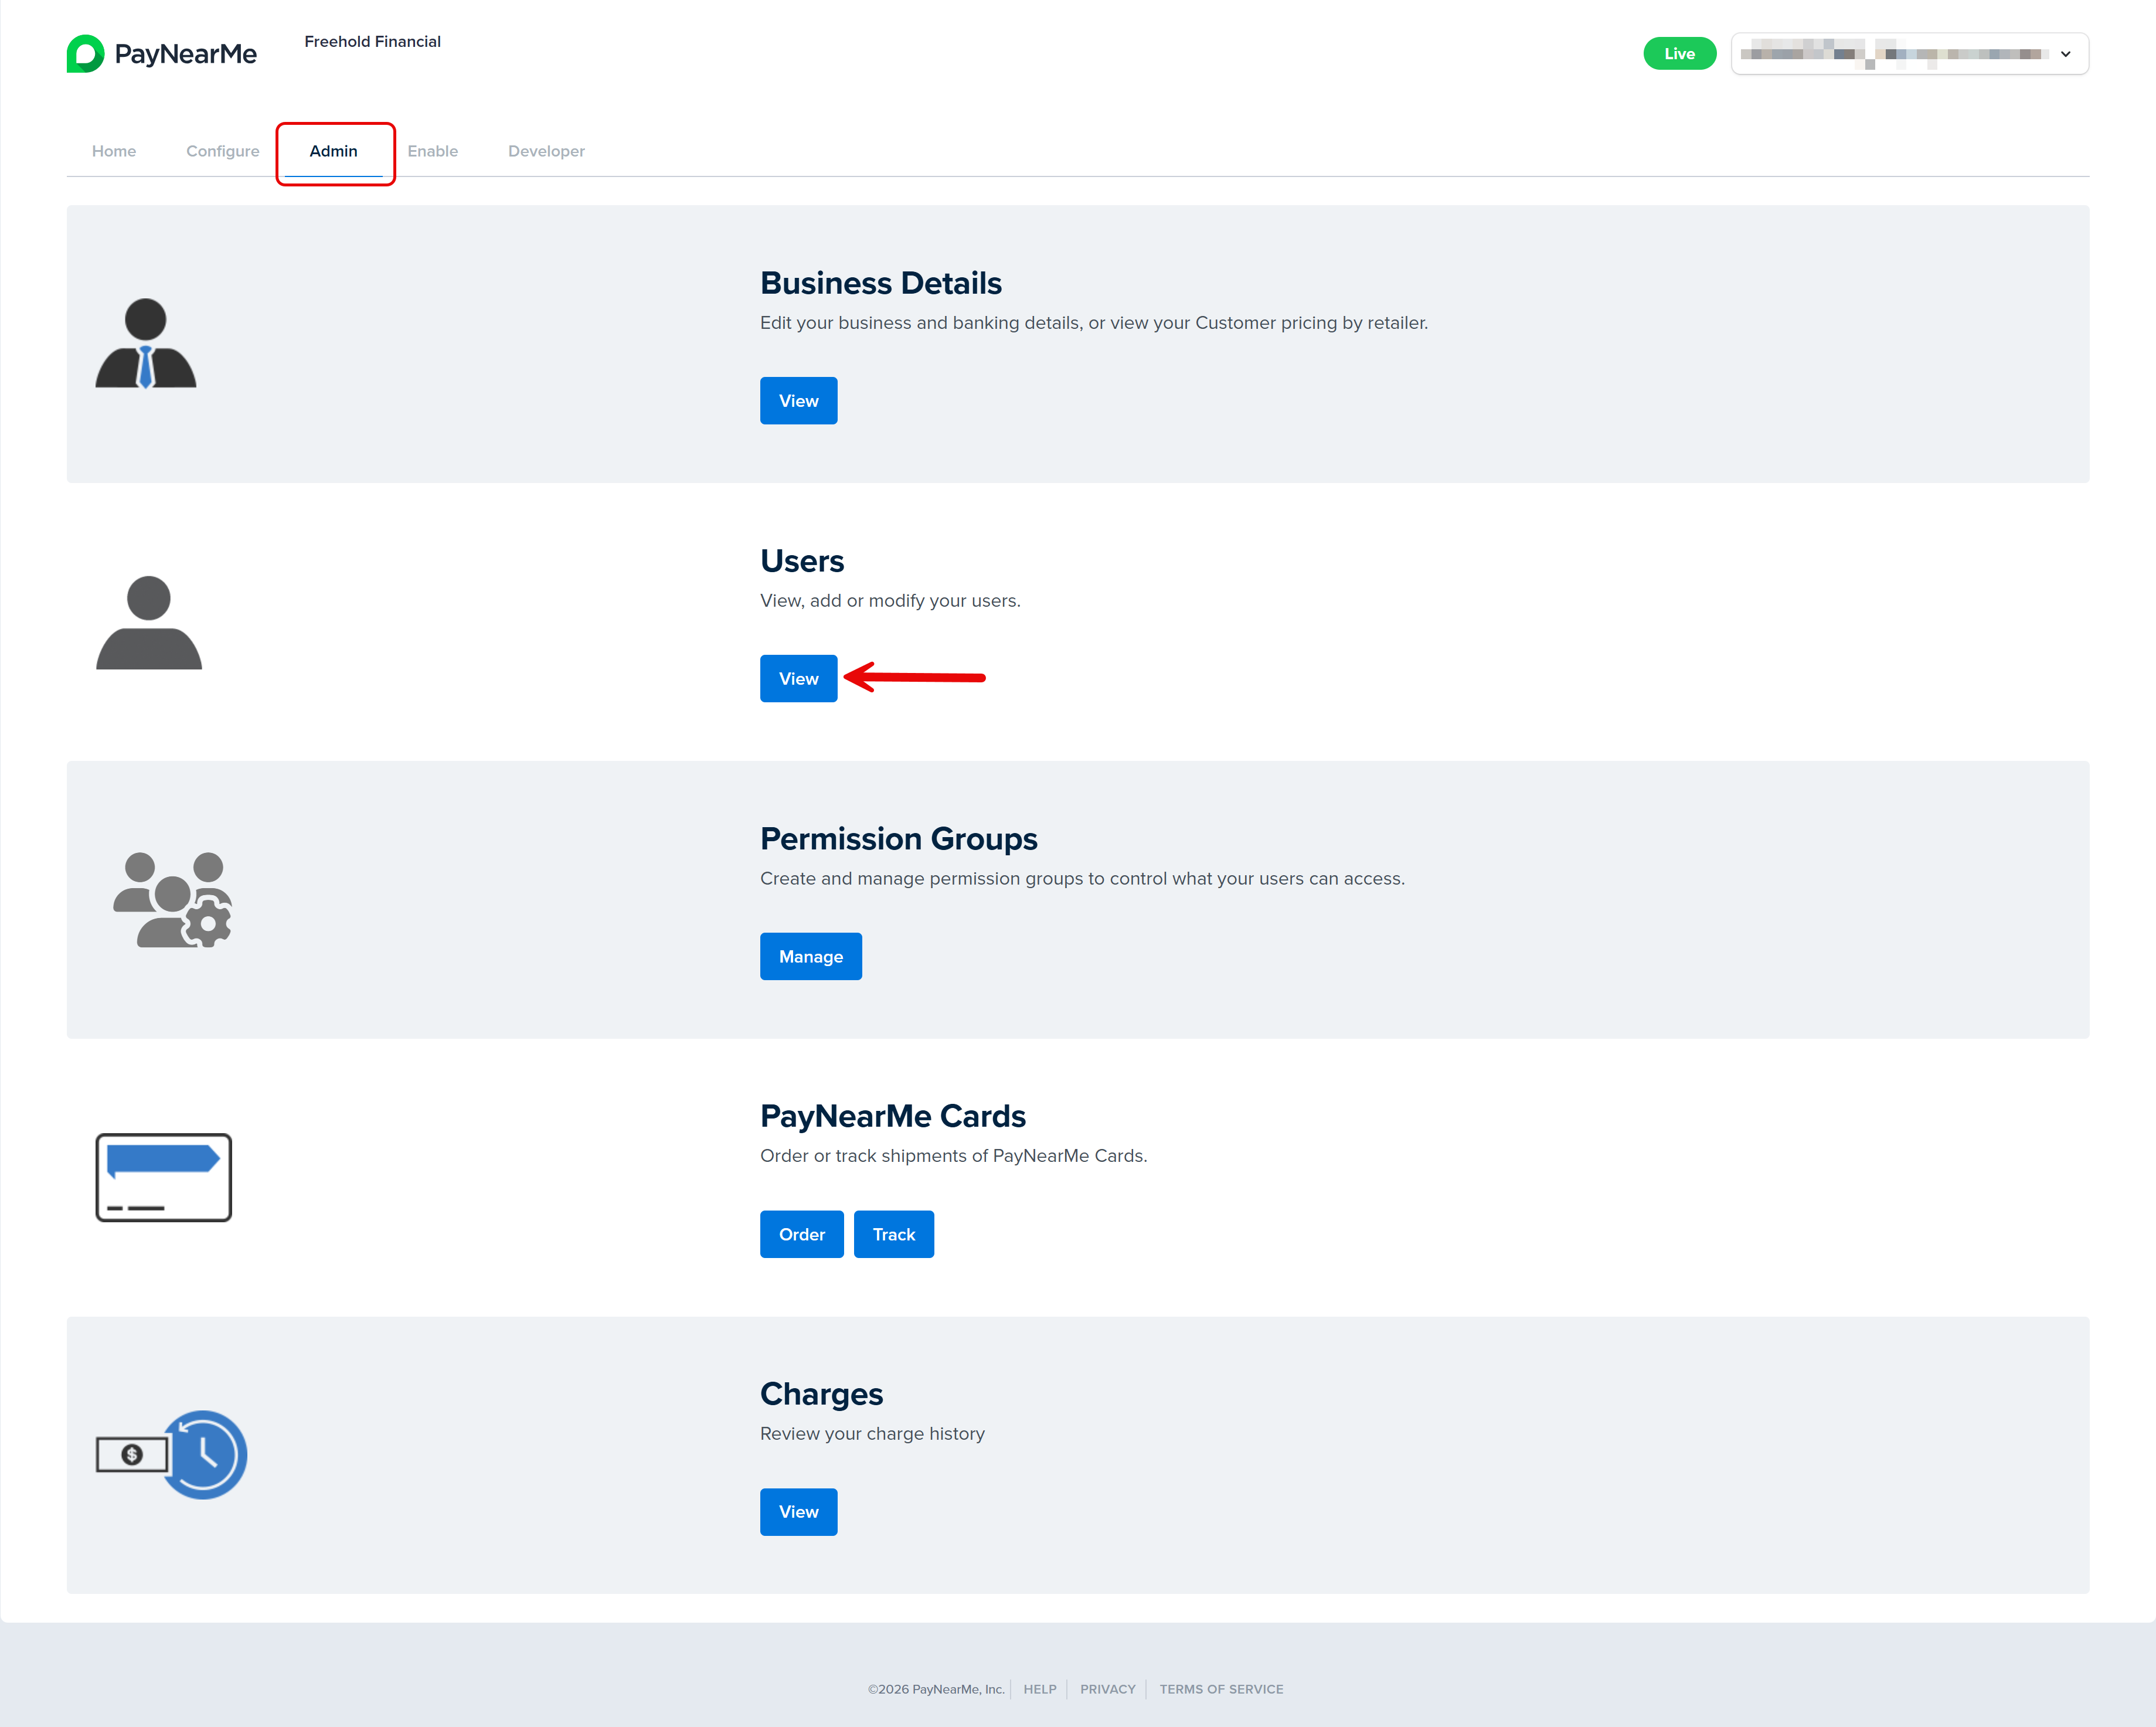
From the Business Portal homepage, click the Admin tab and then View in the Users section.

-
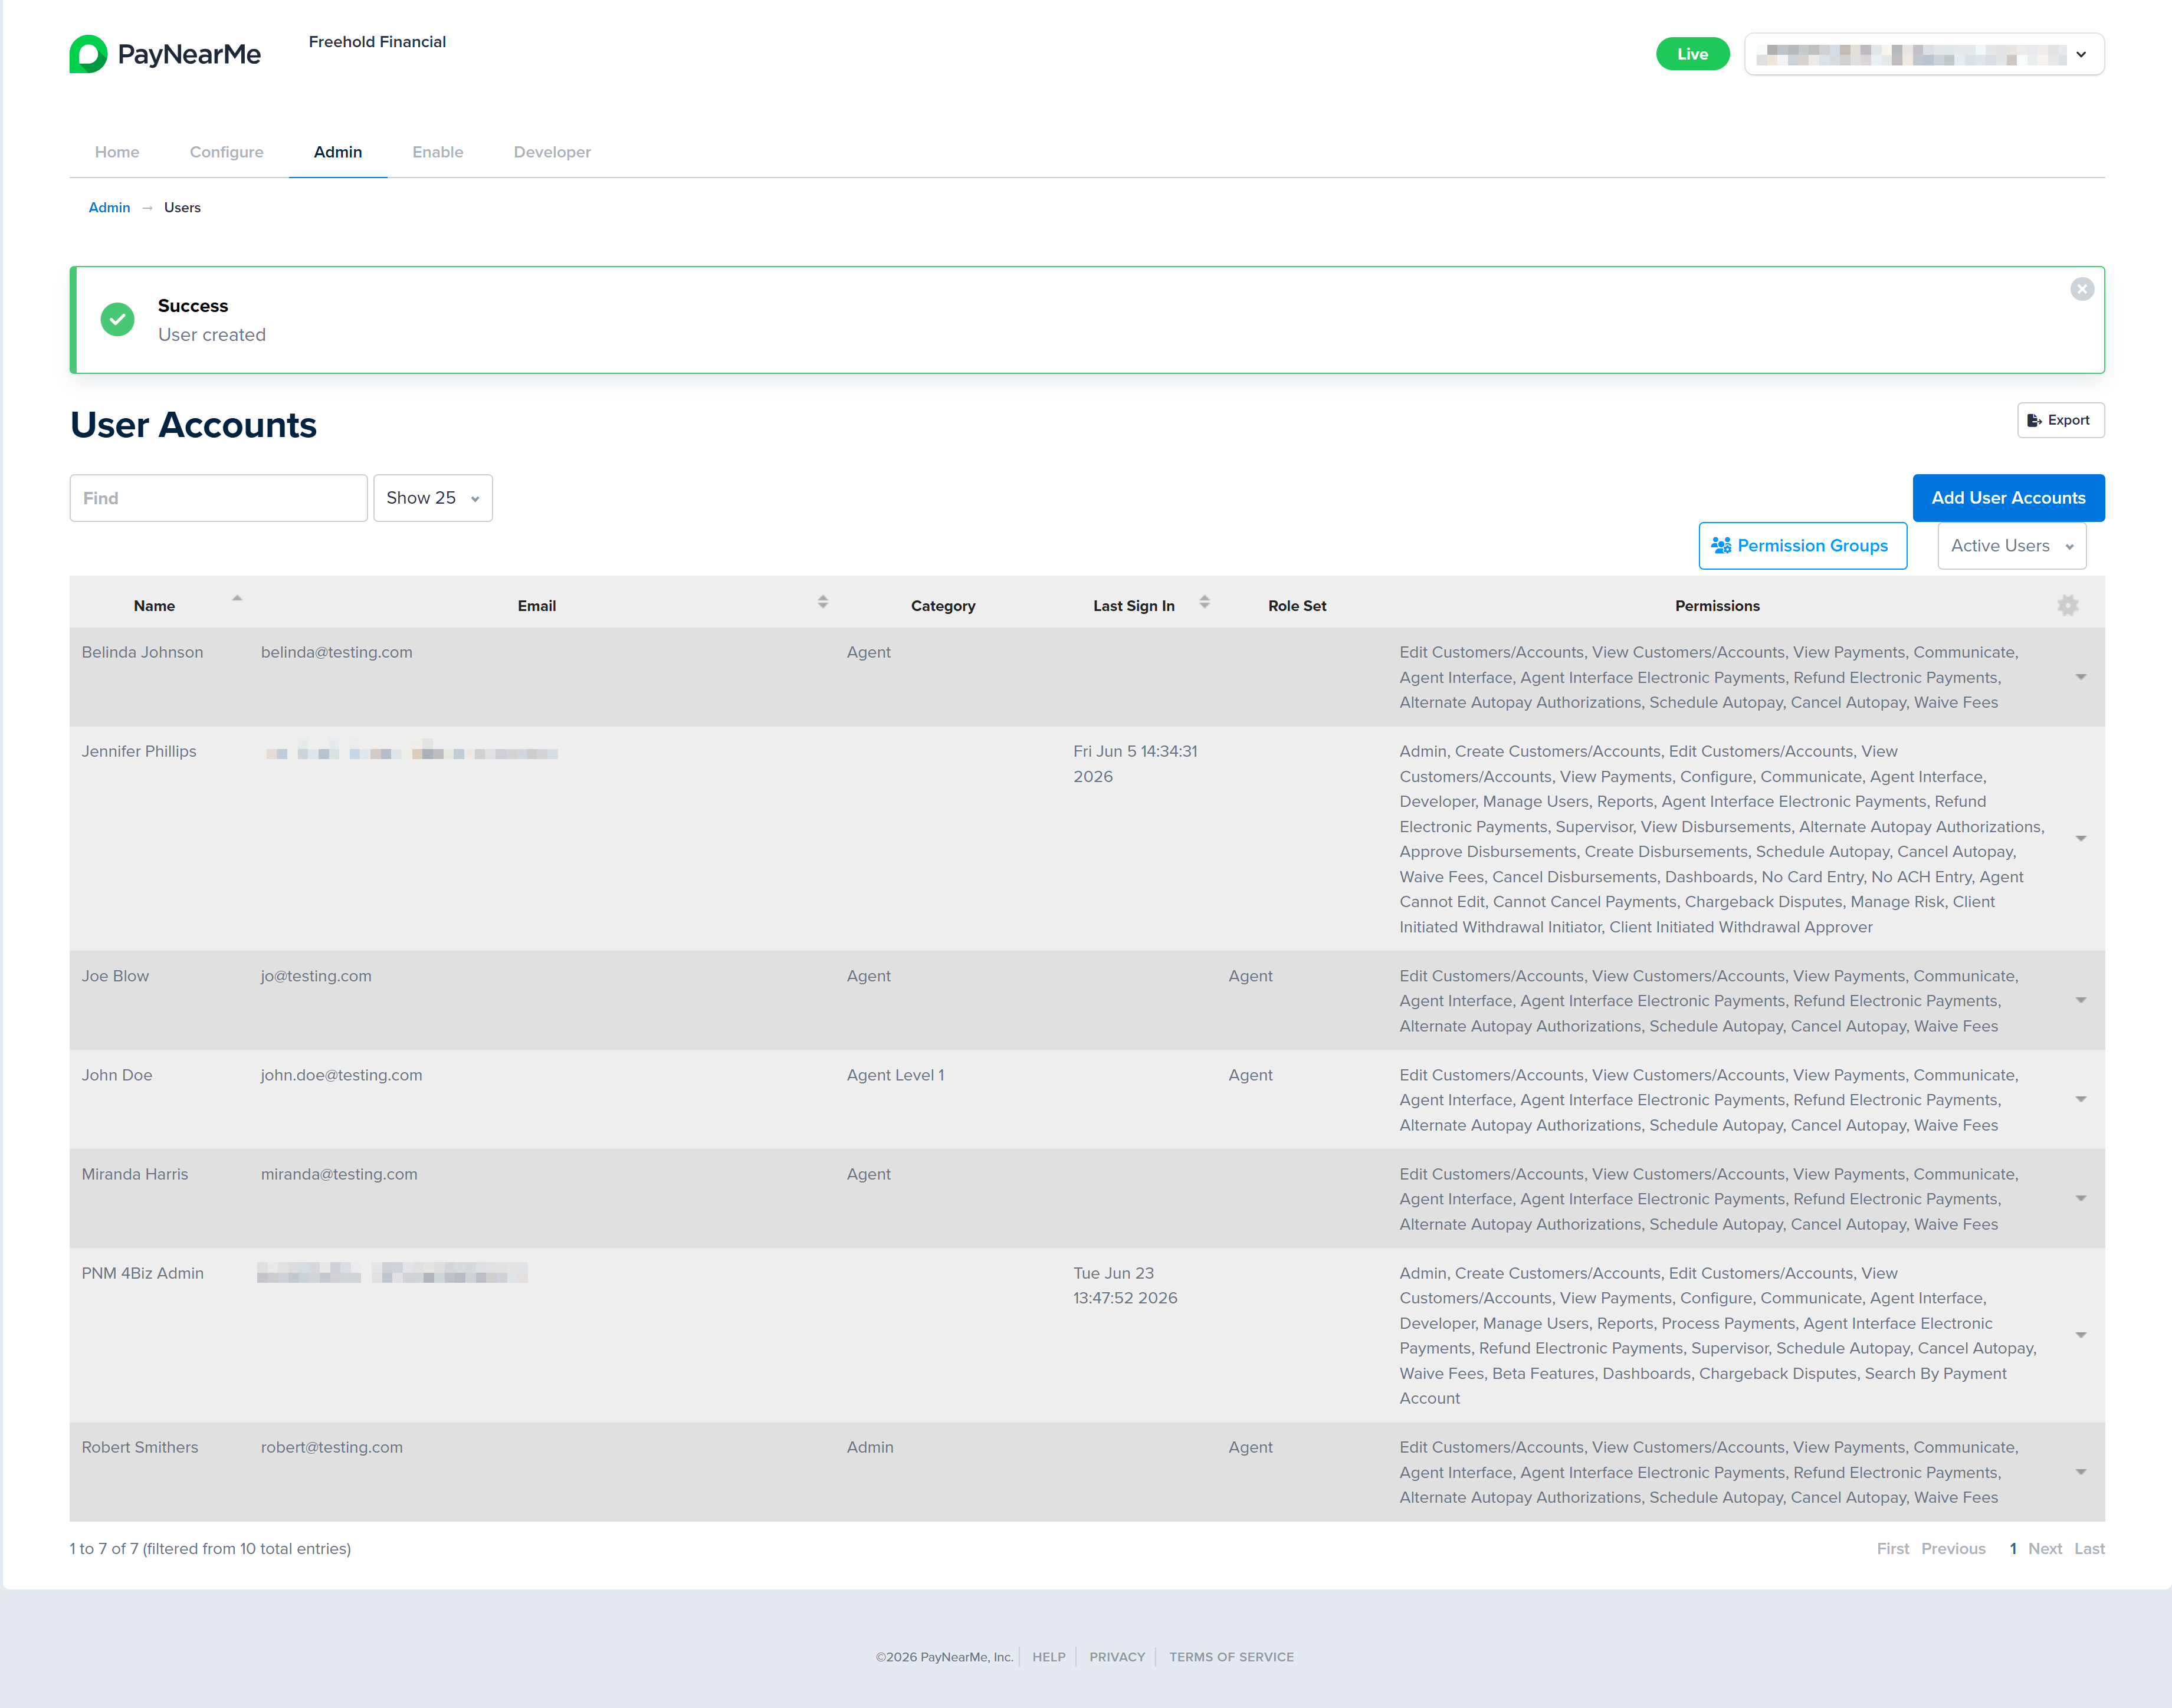
The User Accounts screen displays. Click Add User Accounts to display the Add User screen.

-
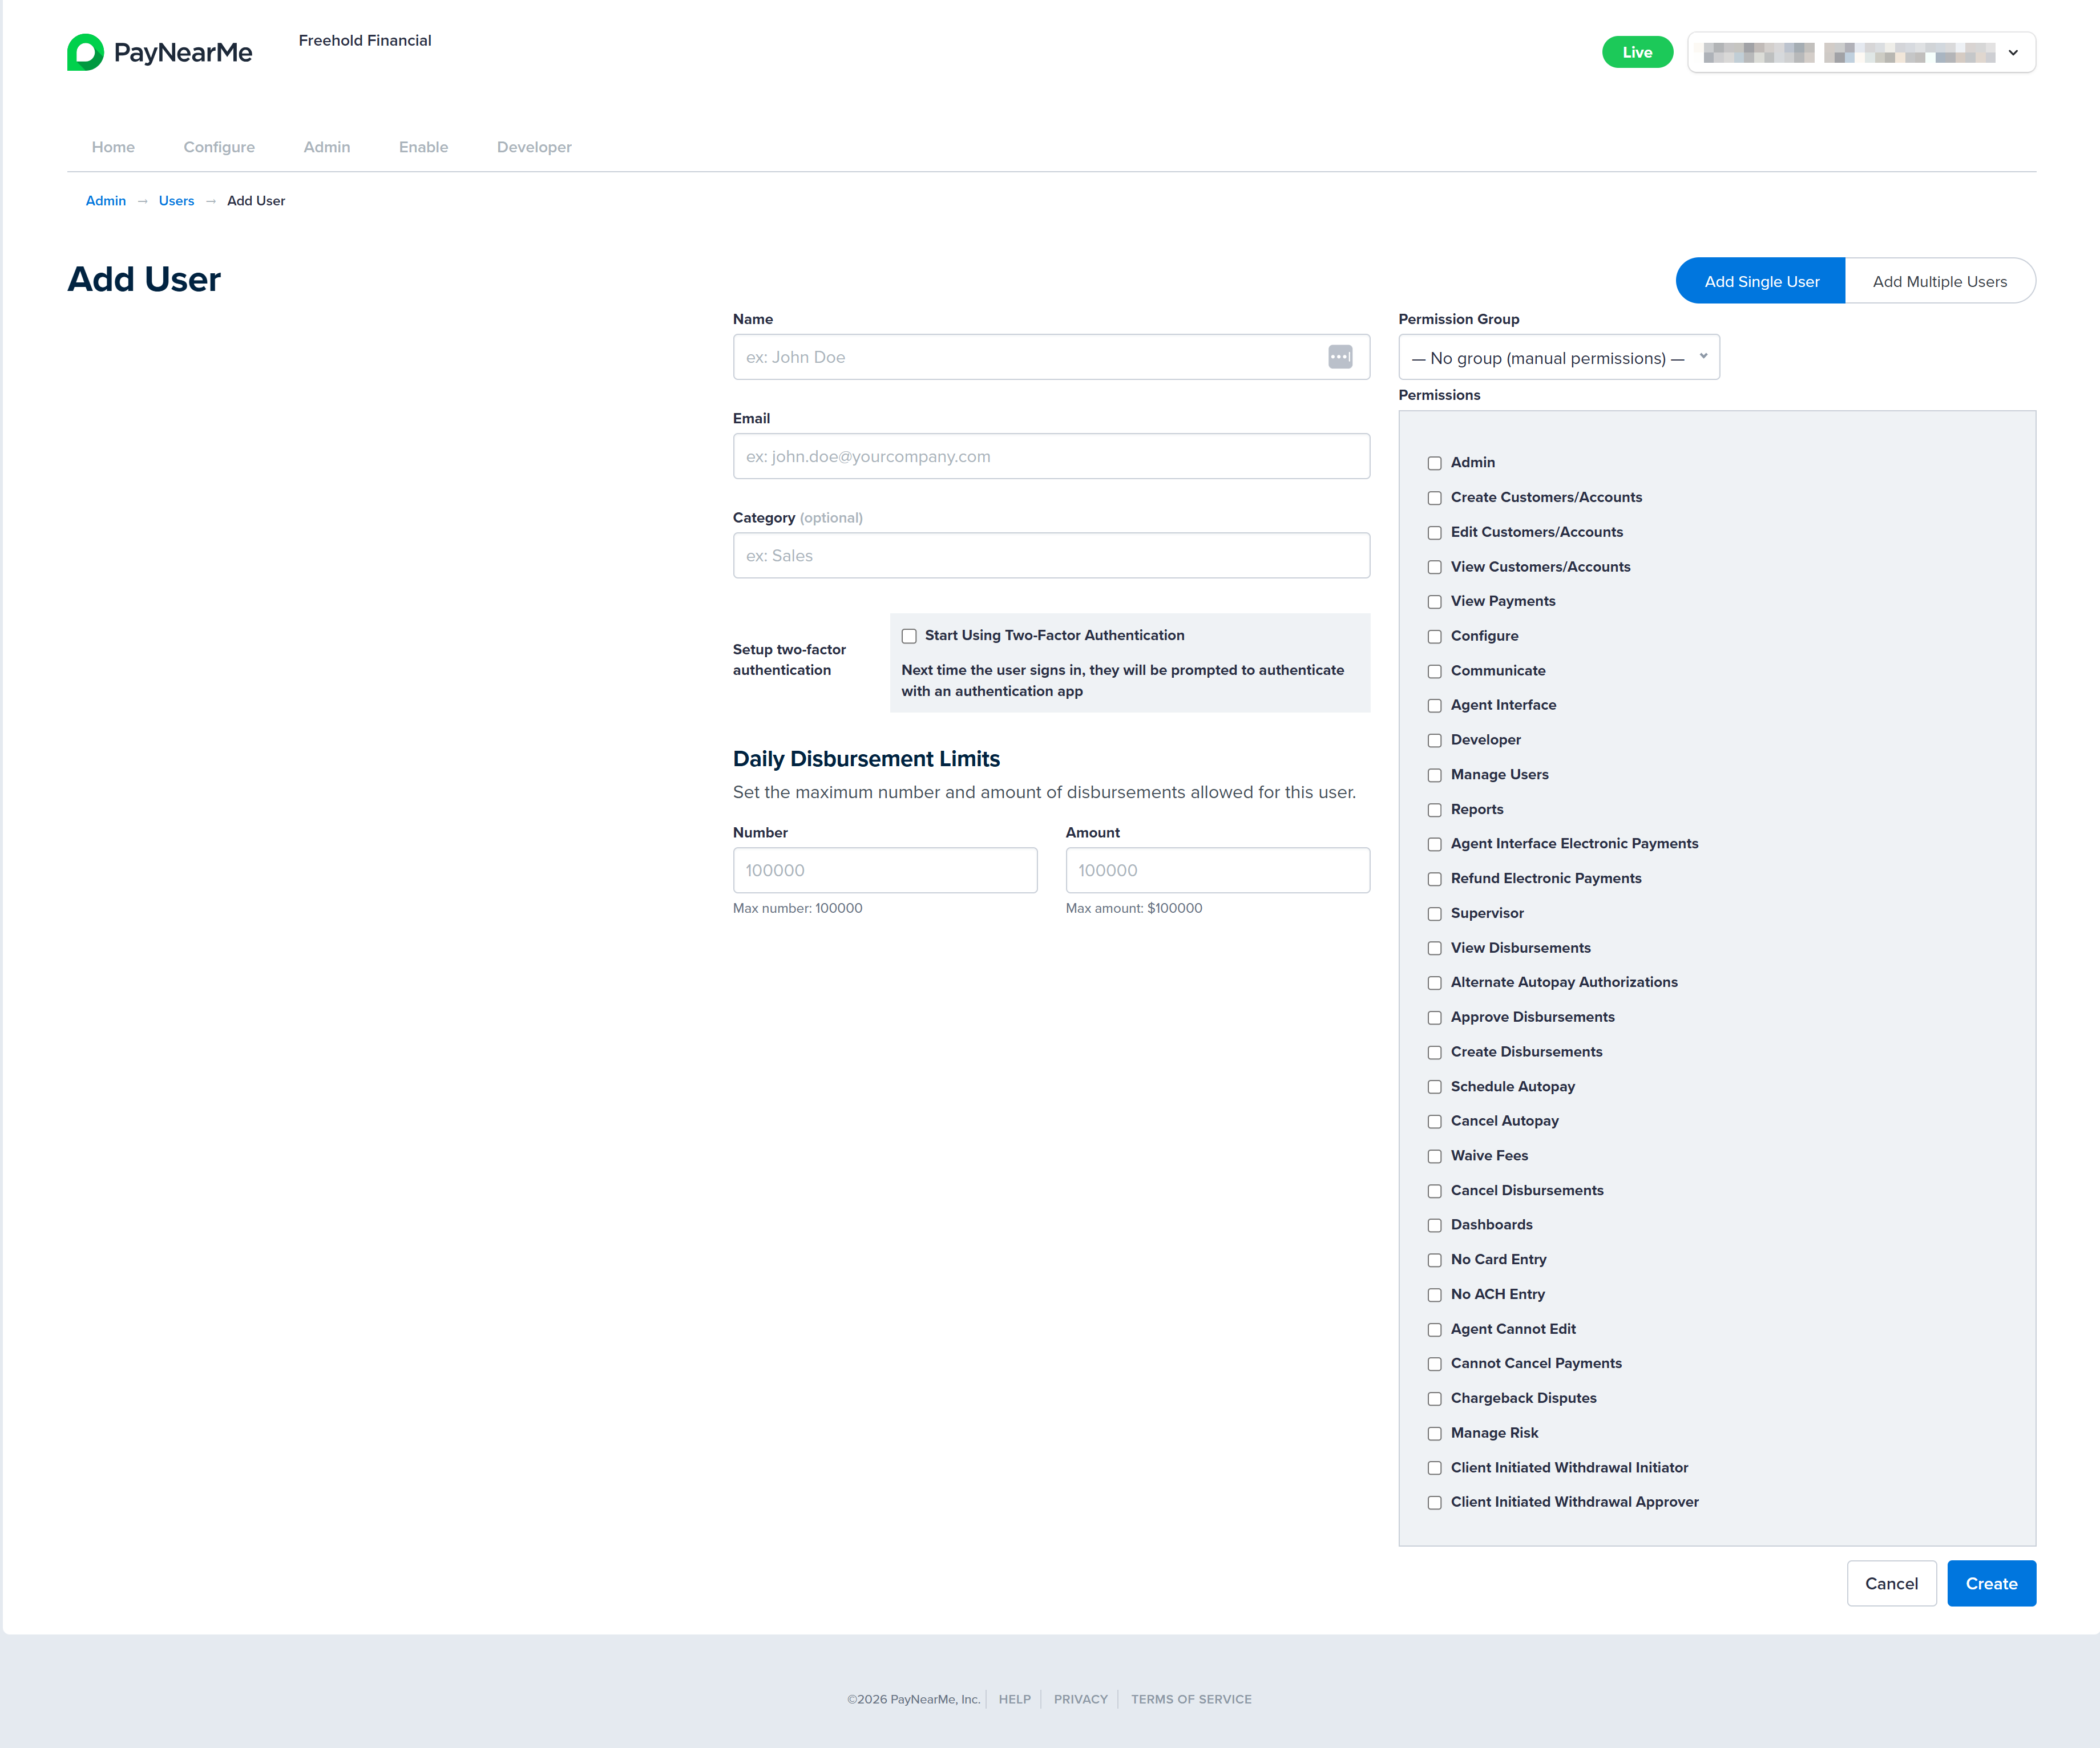
Ensure the Add Single User option is selected (i.e., blue) and then enter the first and last name of the user in the Name field.
-
Enter the user's email address in the Email field.
-
Enter the user type/role in the Category field. This field is optional.
-
If your site is configured to process disbursement payments, you can define daily disbursement limits at the individual user level. To do this, specify the maximum number of disbursements the user is allowed to initiate per day in the Number field, and enter the maximum total dollar amount permitted for daily disbursements in the Amount field. By default, PayNearMe enforces a maximum of 100,000 disbursements per user per day and a daily disbursement limit of $100,000 per user.
-
In the Permissions section, you can either
- Select the checkbox next to each permission you wish to assign to the user account. Certain permissions are interdependent and must be enabled together. The Business Portal will display confirmation messages when such dependencies exist. For example, enabling Create Customers/Accounts also requires View Customers/Accounts to be selected.
- Select a permissions group from the the dropdown menu in the Permissions Group field. Once you select a group, the relevant permissions are automatically selected and the checkboxes next to any additional permissions are disabled.
-
Click Create after completing the required fields and selecting the relevant permissions. The Business Portal returns you to the User Accounts screen and displays a message indicating if the user was successfully created.
Creating Multiple User Accounts
To create multiple users accounts at once, complete the following steps:
-
From the Business Portal homepage, click the Admin tab and then View in the Users section.
-
The User Accounts screen displays. Click Add User Accounts to display the Add User screen.
-
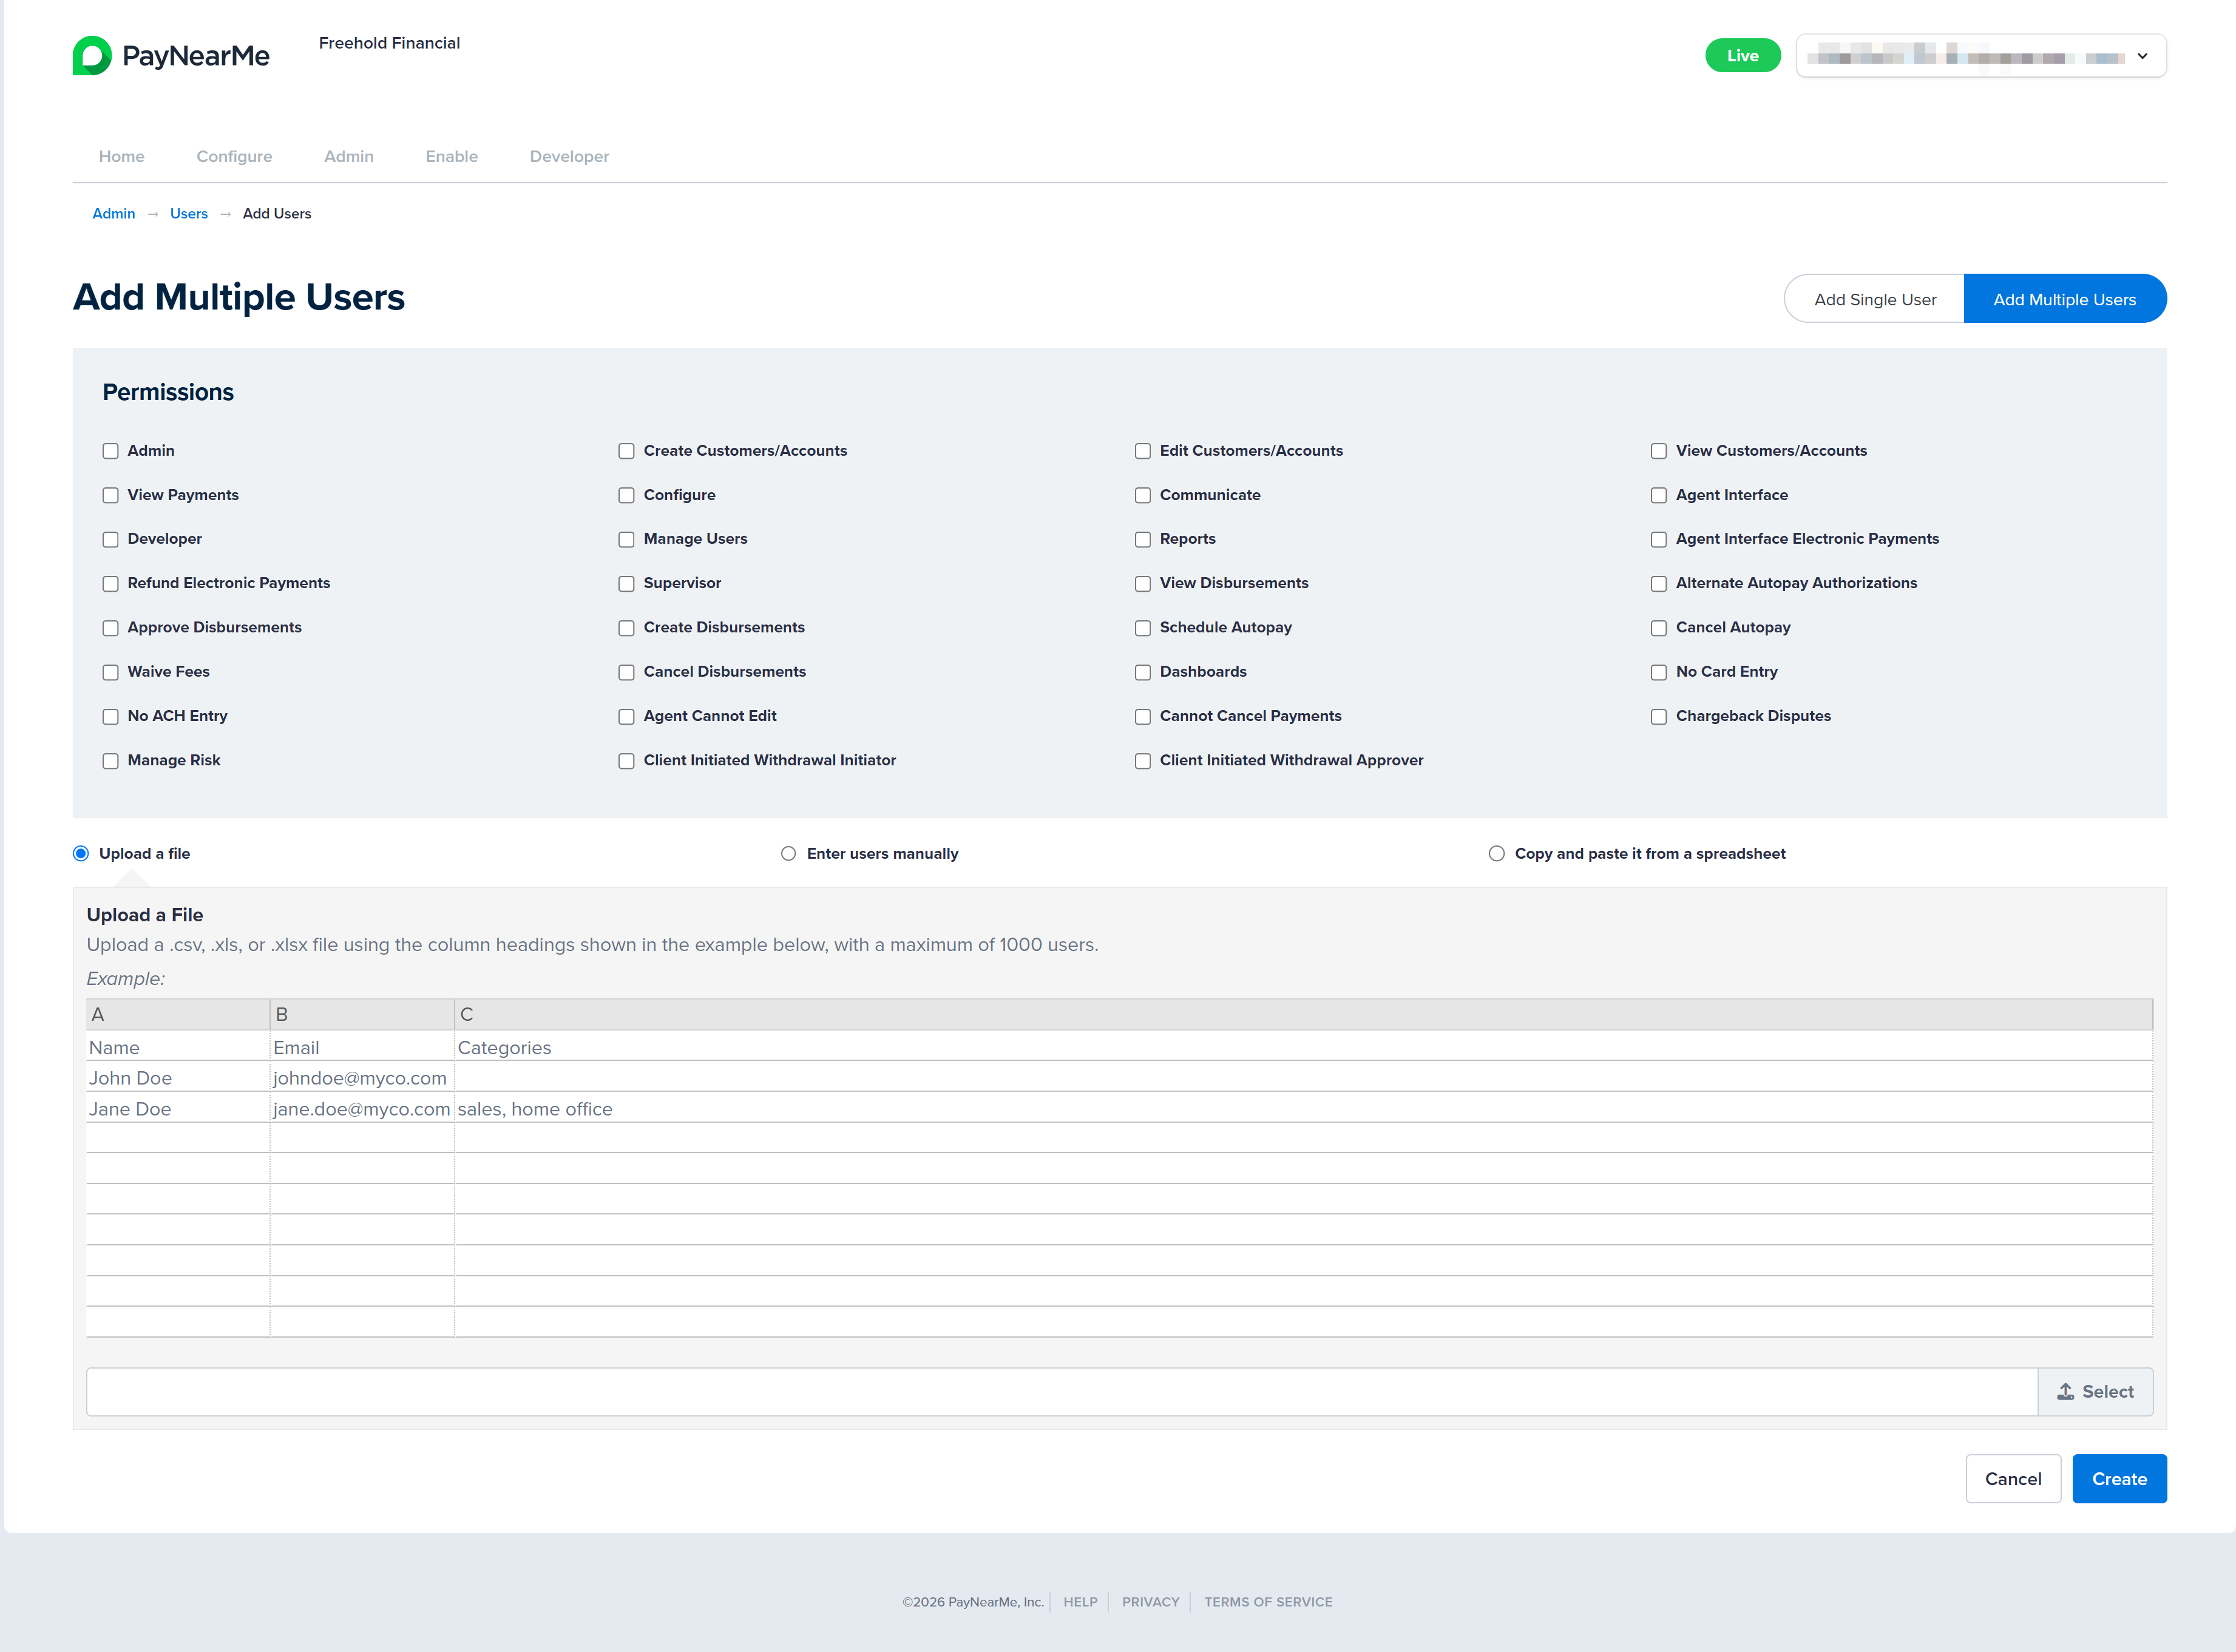
Select the Add Multiple Users option. The Add Multiple Users screen display.
-
In the Permissions section, select the checkboxes next to each permission you wish to assign to this group of user accounts. NOTE: Permission Groups cannot be selected when creating multiple users. Certain permissions are interdependent and must be enabled together. The Business Portal will display confirmation messages when such dependencies exist. For example, enabling Create Customers/Accounts also requires View Customers/Accounts to be selected.
-
Choose one of the following methods to upload the users of this group: upload a file, manually enter the data, copy and past from a spreadsheet.
Upload a File
Upload up to 1000 users at a time by creating a .csv, .xls, or .xlsx file with column headers for the user's Name, Email, and Categories. Select the Upload a file button (if not already selected) and then complete the following steps:
- Click Select. A file explorer window displays.
- Select the file and then click Open on the file explorer window. The file name displays in the Business Portal.
- Click Create. The Business Portal displays the list of users from the file in the form.
- Click Confirm. The Business Portal returns you to the User Accounts screen and displays a message indicating if the user group was successfully created.
Manually Enter each User
Select the Enter Users Manually button and then complete the following steps in the form that displays:
- Enter the first and last name of each user in the under the Name column heading.
- Enter the email address of each user under the Email column heading.
- Enter the user type/role of each user under the Category column heading.
- Click Create.
- Review the data you've entered to ensure it's correct and then click Confirm. The Business Portal returns you to the User Accounts screen and displays a message indicating if the user group was successfully created.
Copy and Paste from a Spreadsheet
Select the Copy and paste it from a spreadsheet button and then complete the following steps in the form that displays:
- Ensure your spreadsheet matches the Name, Email, Categories column heading format and then copy it.
- Paste your data into the form that displays in the Business Portal and then click Create.
- Review the data you've pasted in to ensure it's correct and then click Confirm. The Business Portal returns you to the User Accounts screen and displays a message indicating if the user group was successfully created.
Disbursement Limits When Creating Multiple UsersDisbursement limits cannot be added to a user account when creating multiple users at once. After creating the user account, you must manually add disbursement limits to each account through the Edit action. For more information on editing permissions, see Editing User Accounts.
Editing User Accounts
Use the Edit action to add or remove permissions for certain user accounts. To edit the permissions of a user account, complete the following steps:
-
From the Business Portal homepage, click the Admin tab and then View in the Users section.

-
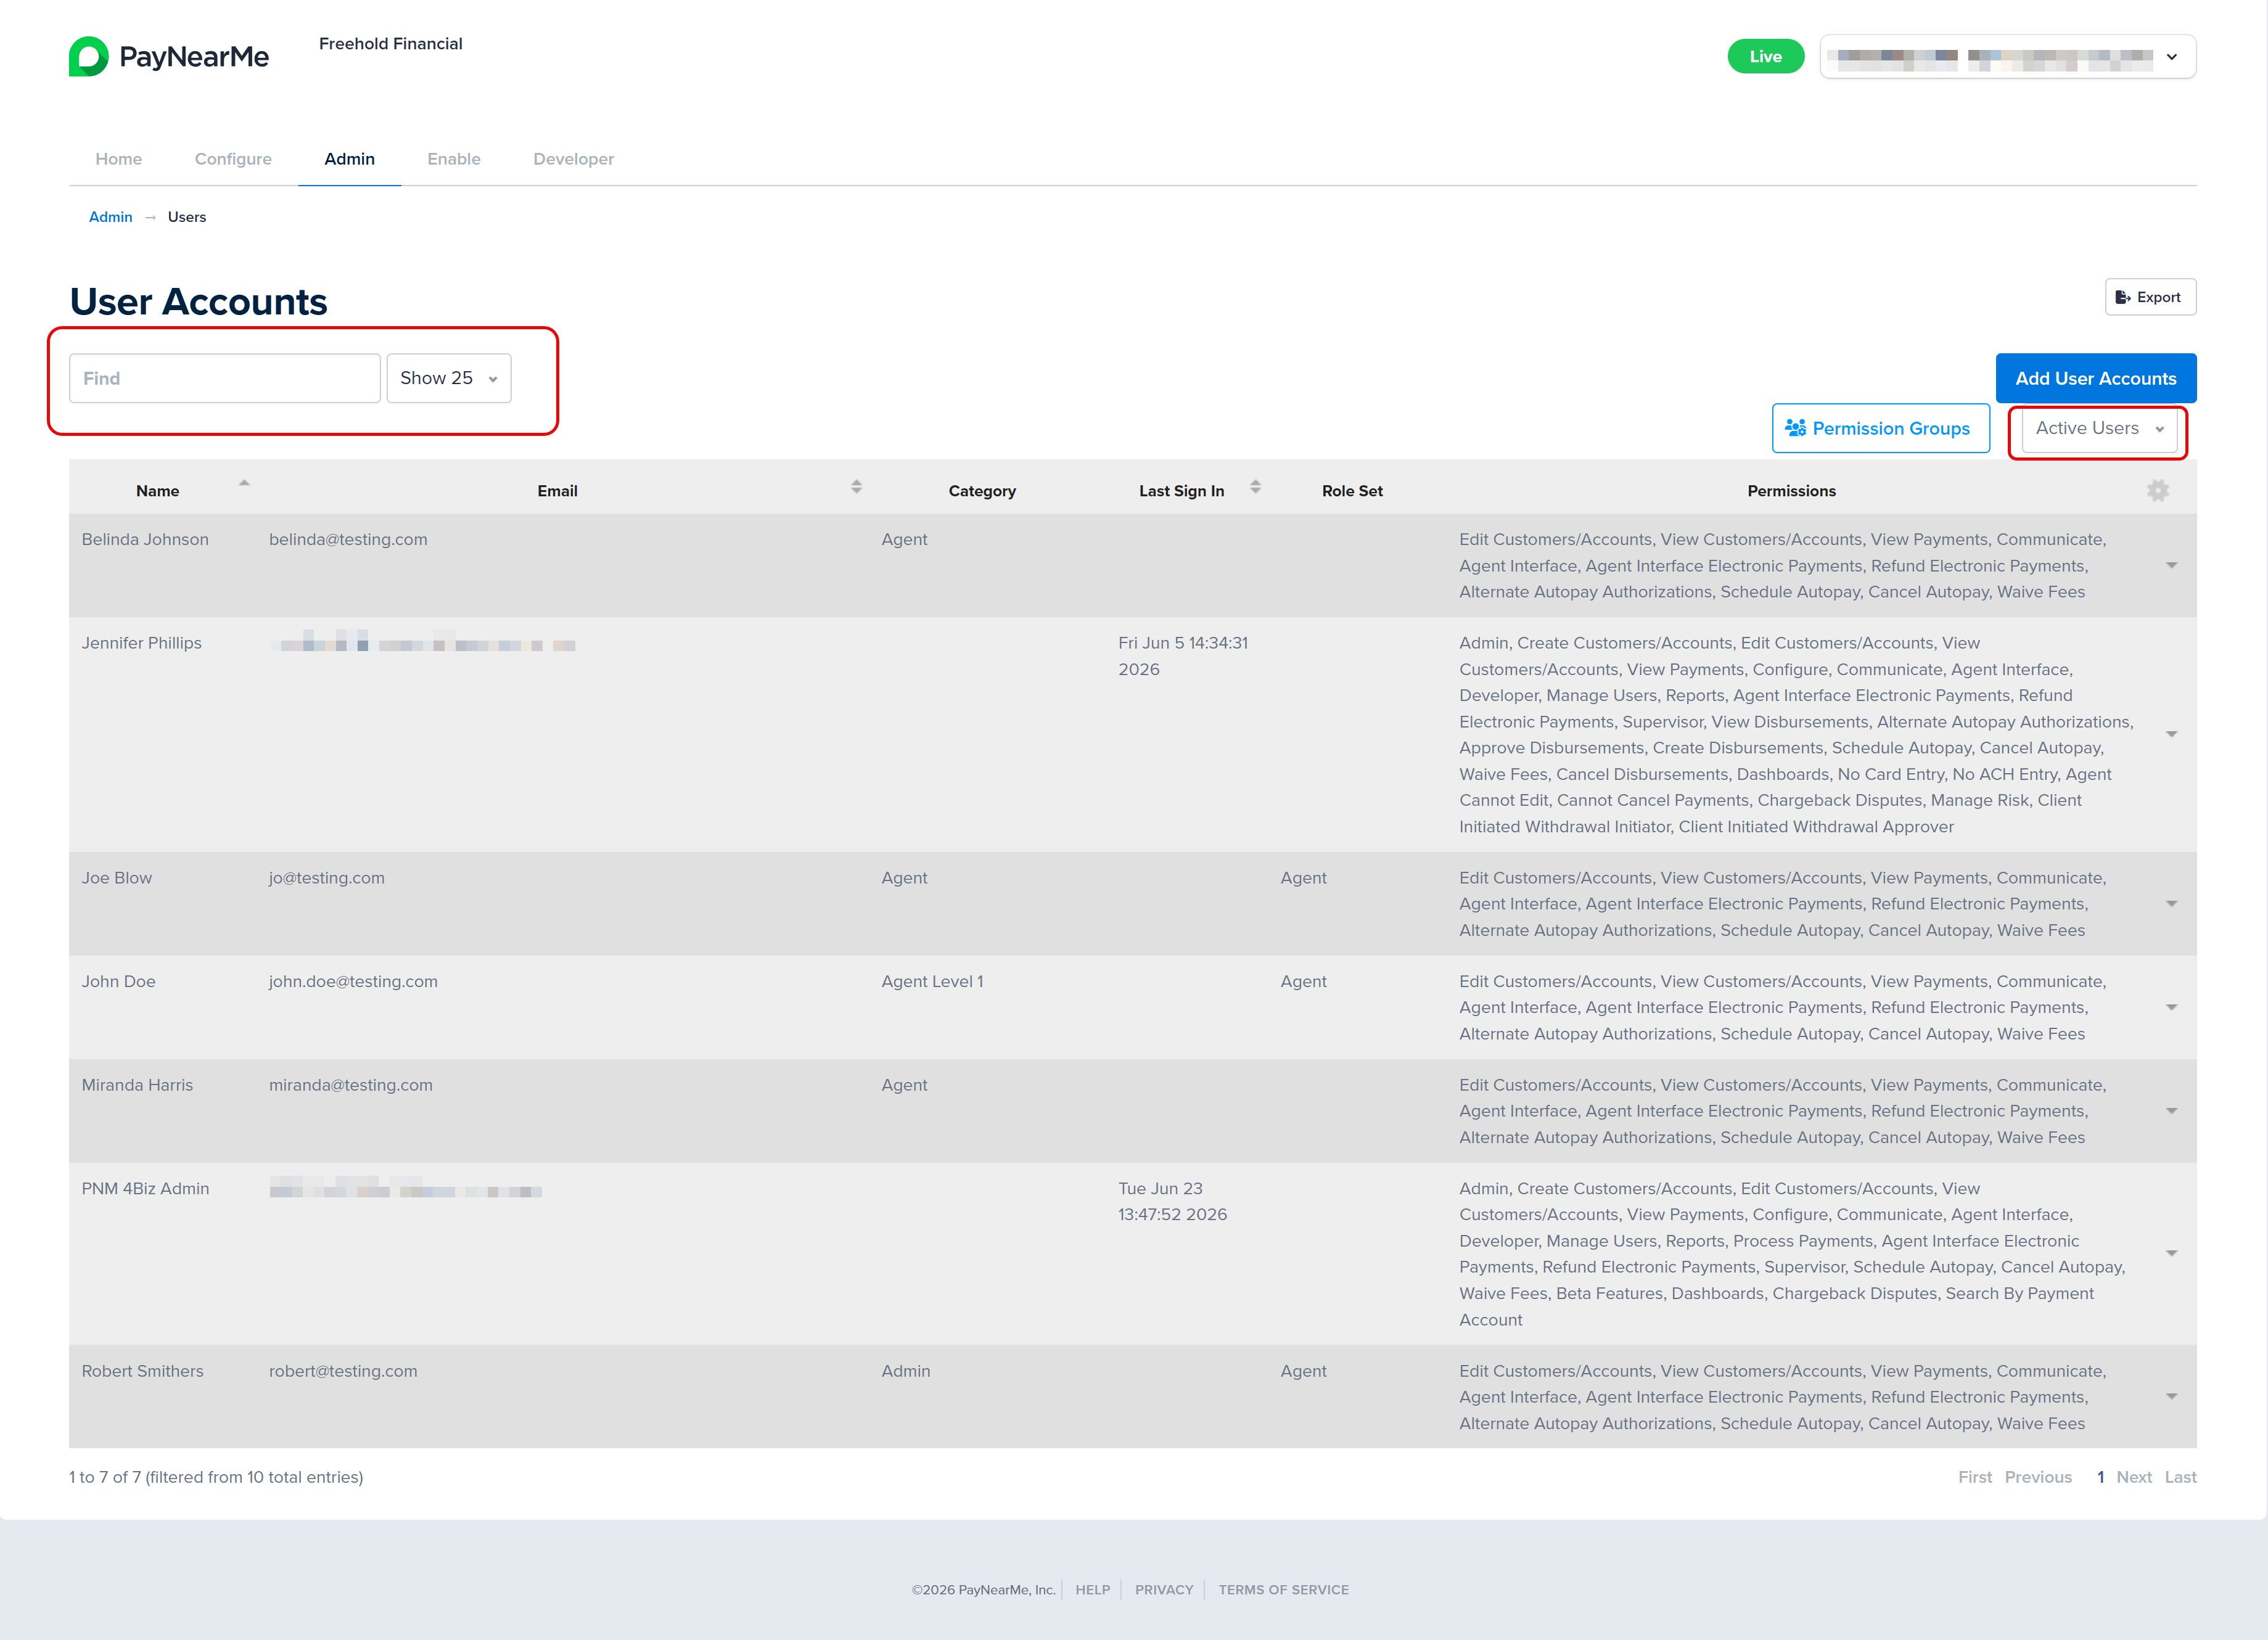
The User Accounts screen displays. Use either the Search field or the Account Status filter to find the user account you want to edit.

-
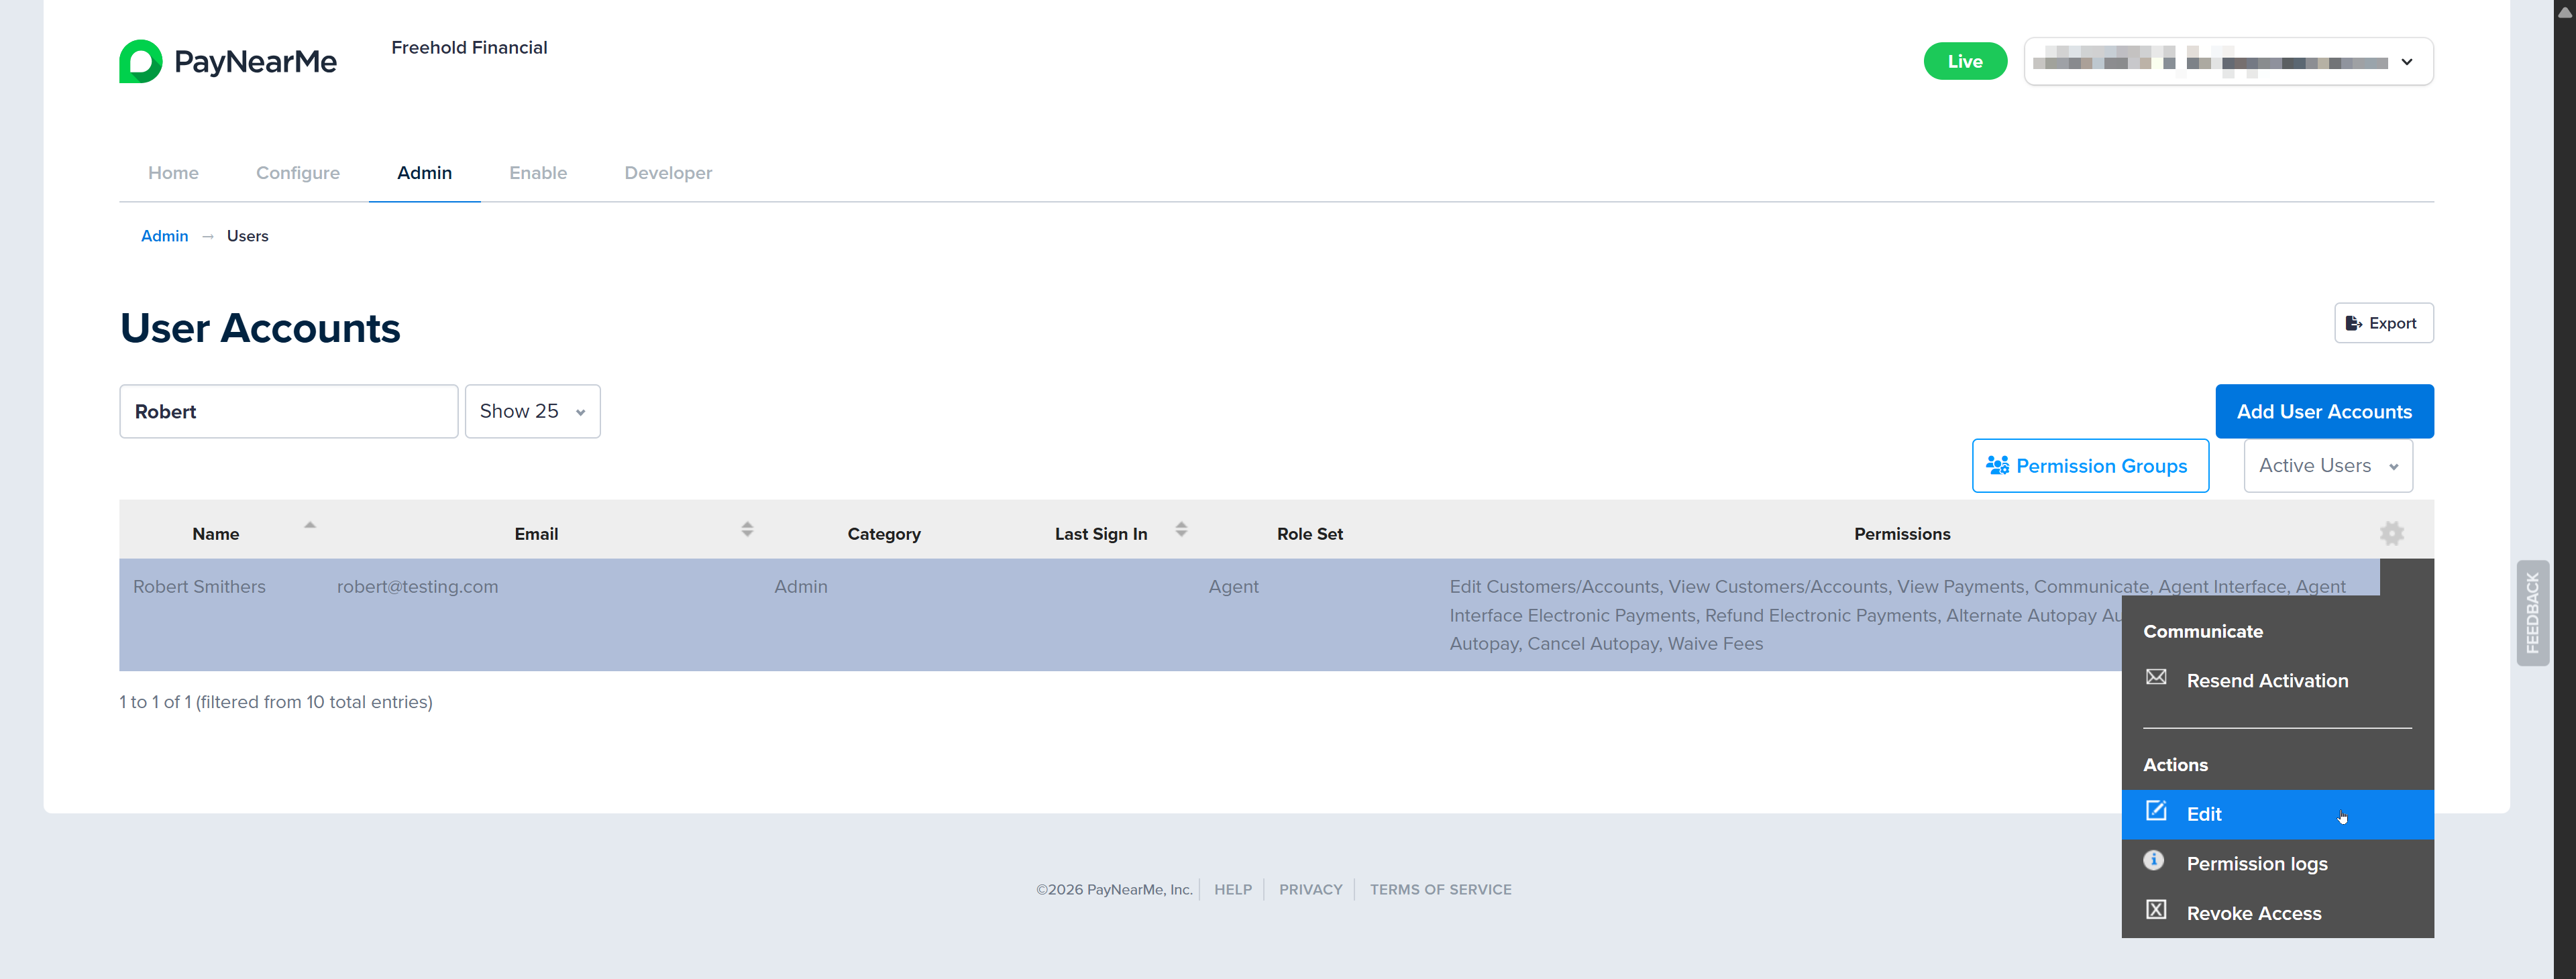
When you find the account you want to edit, hover your cursor on the dropdown arrow that displays next to the account and select Edit.
-
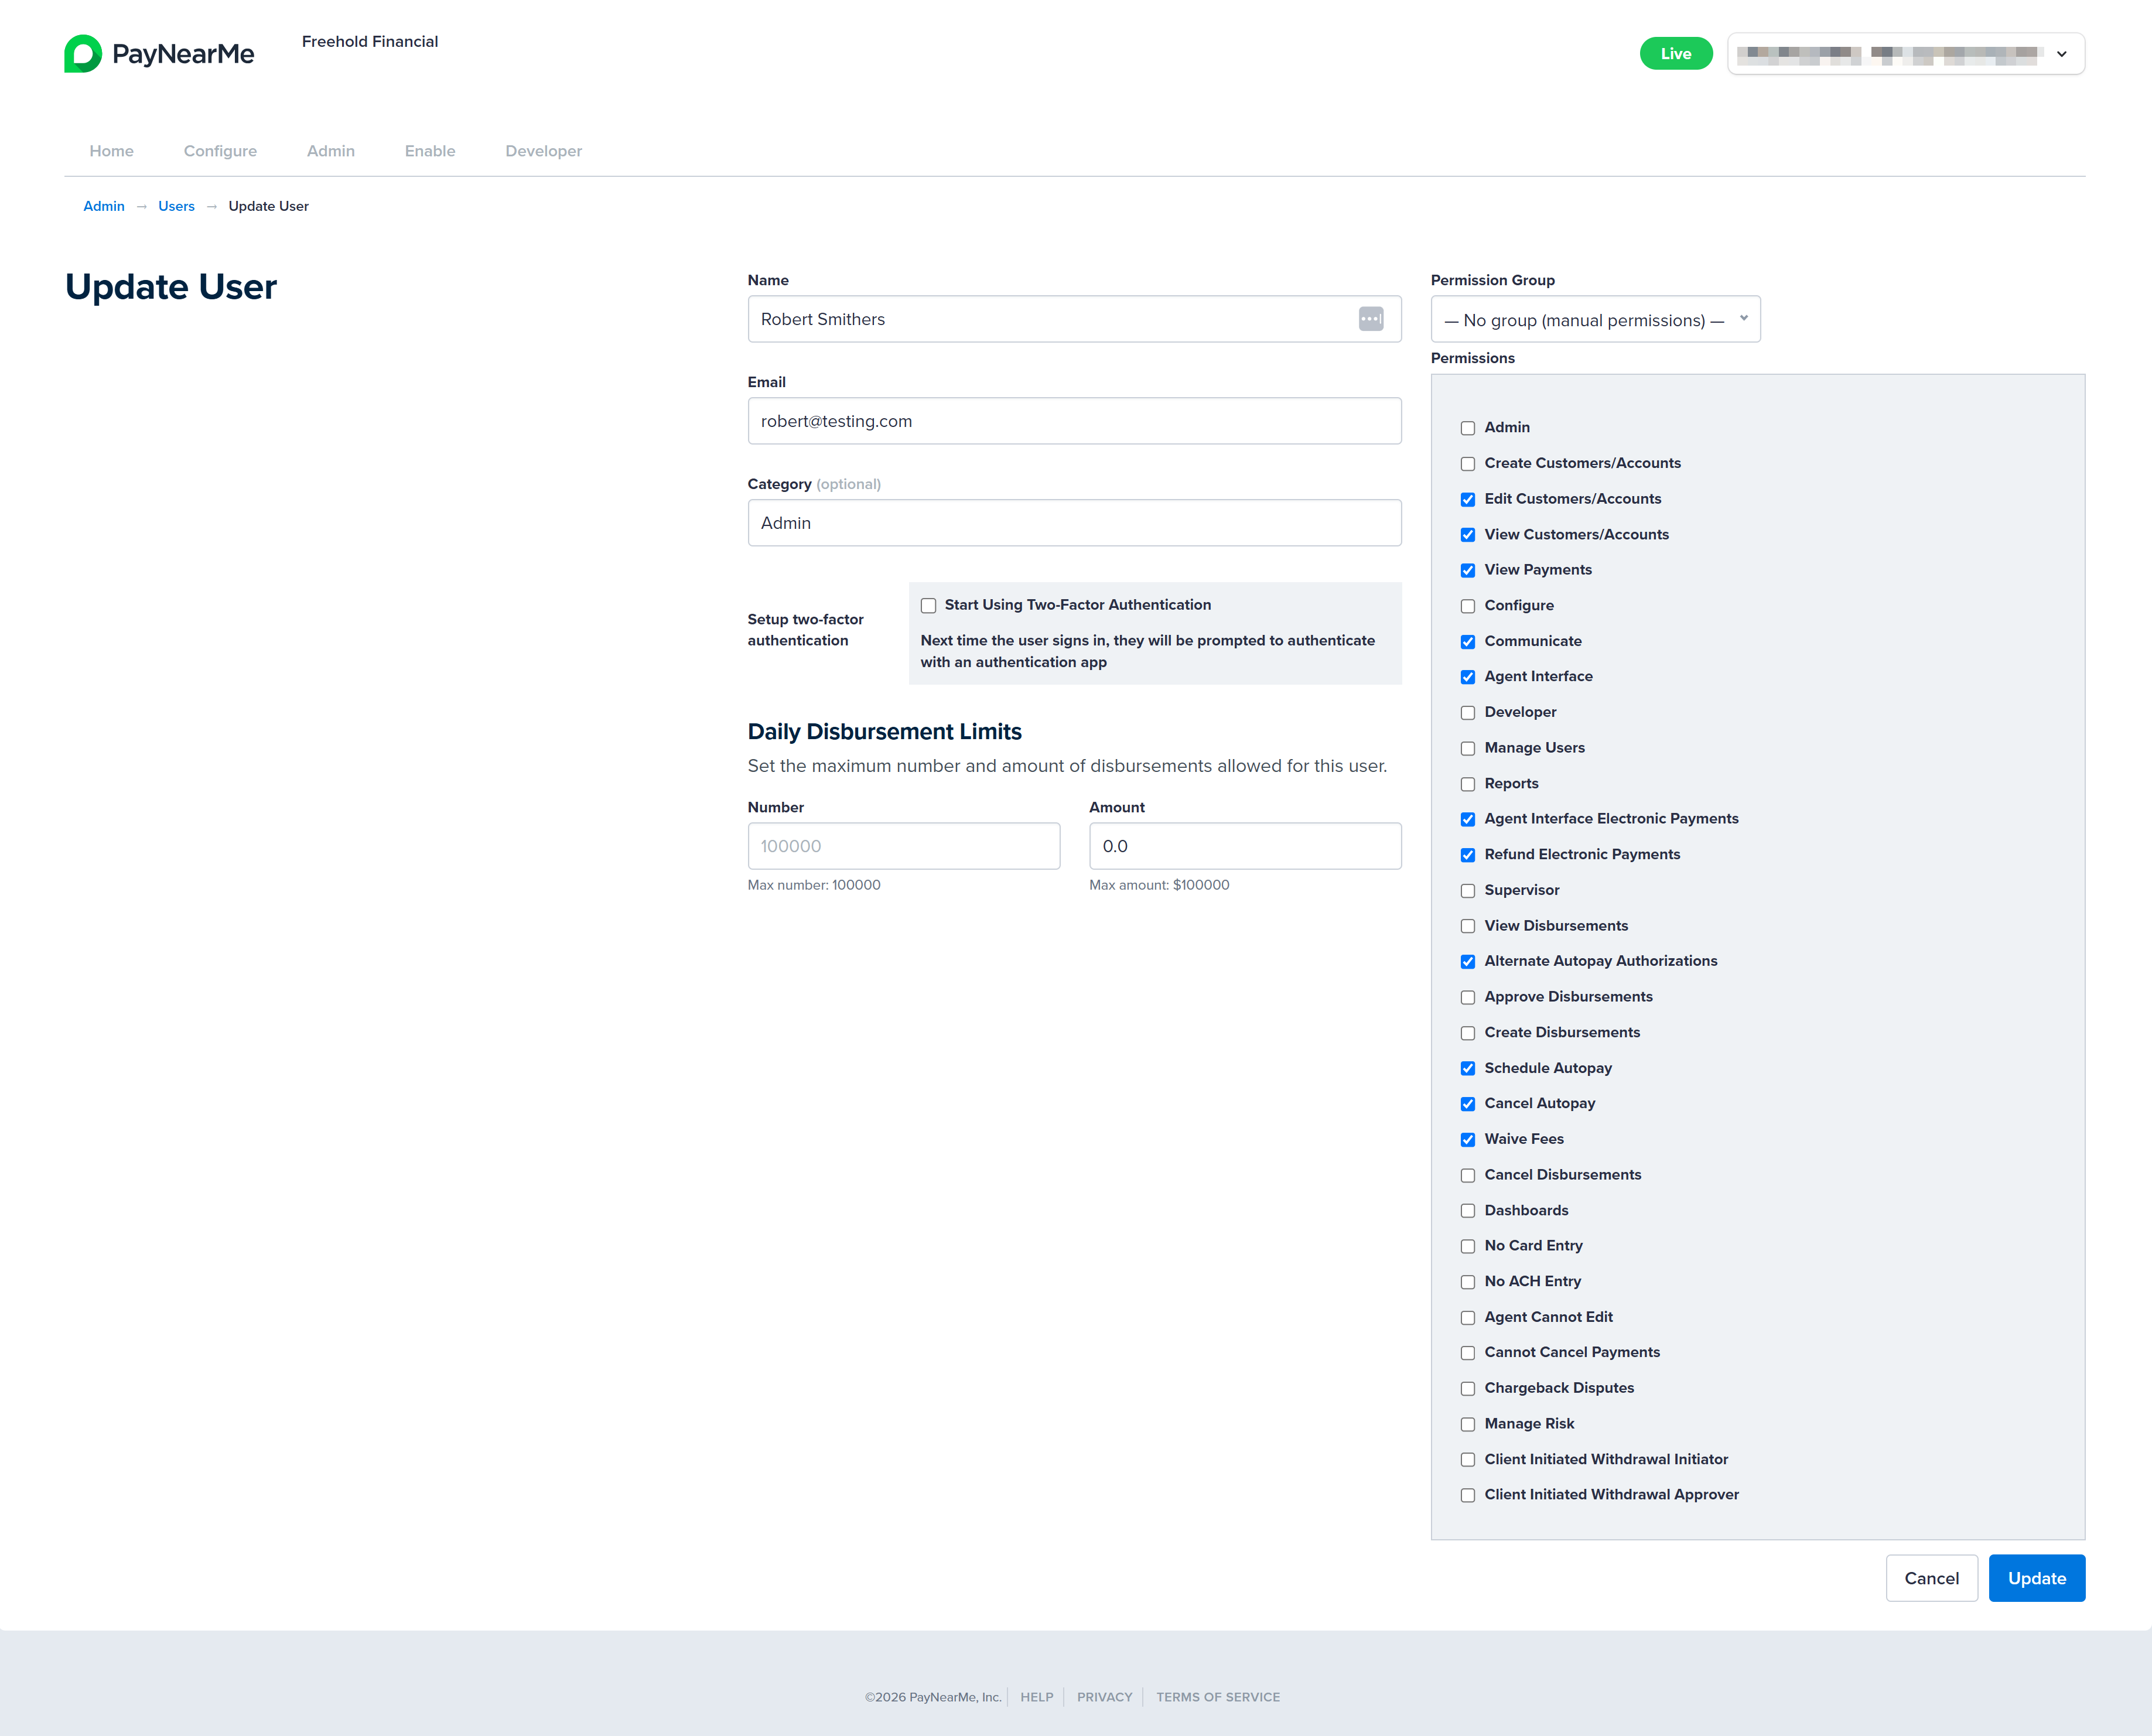
The Update User screen displays. Edit the desired fields and permissions. NOTE: Users assigned to a permission group inherit that group's permissions. To change access for one user without affecting others in the group, select No Group (manual permissions) from the Permission Group dropdown on the Update User screen. This removes the user from the group but retains the group's current permissions, so that you can customize access for that user. To change access for all users in the group, edit the permission group instead.
-
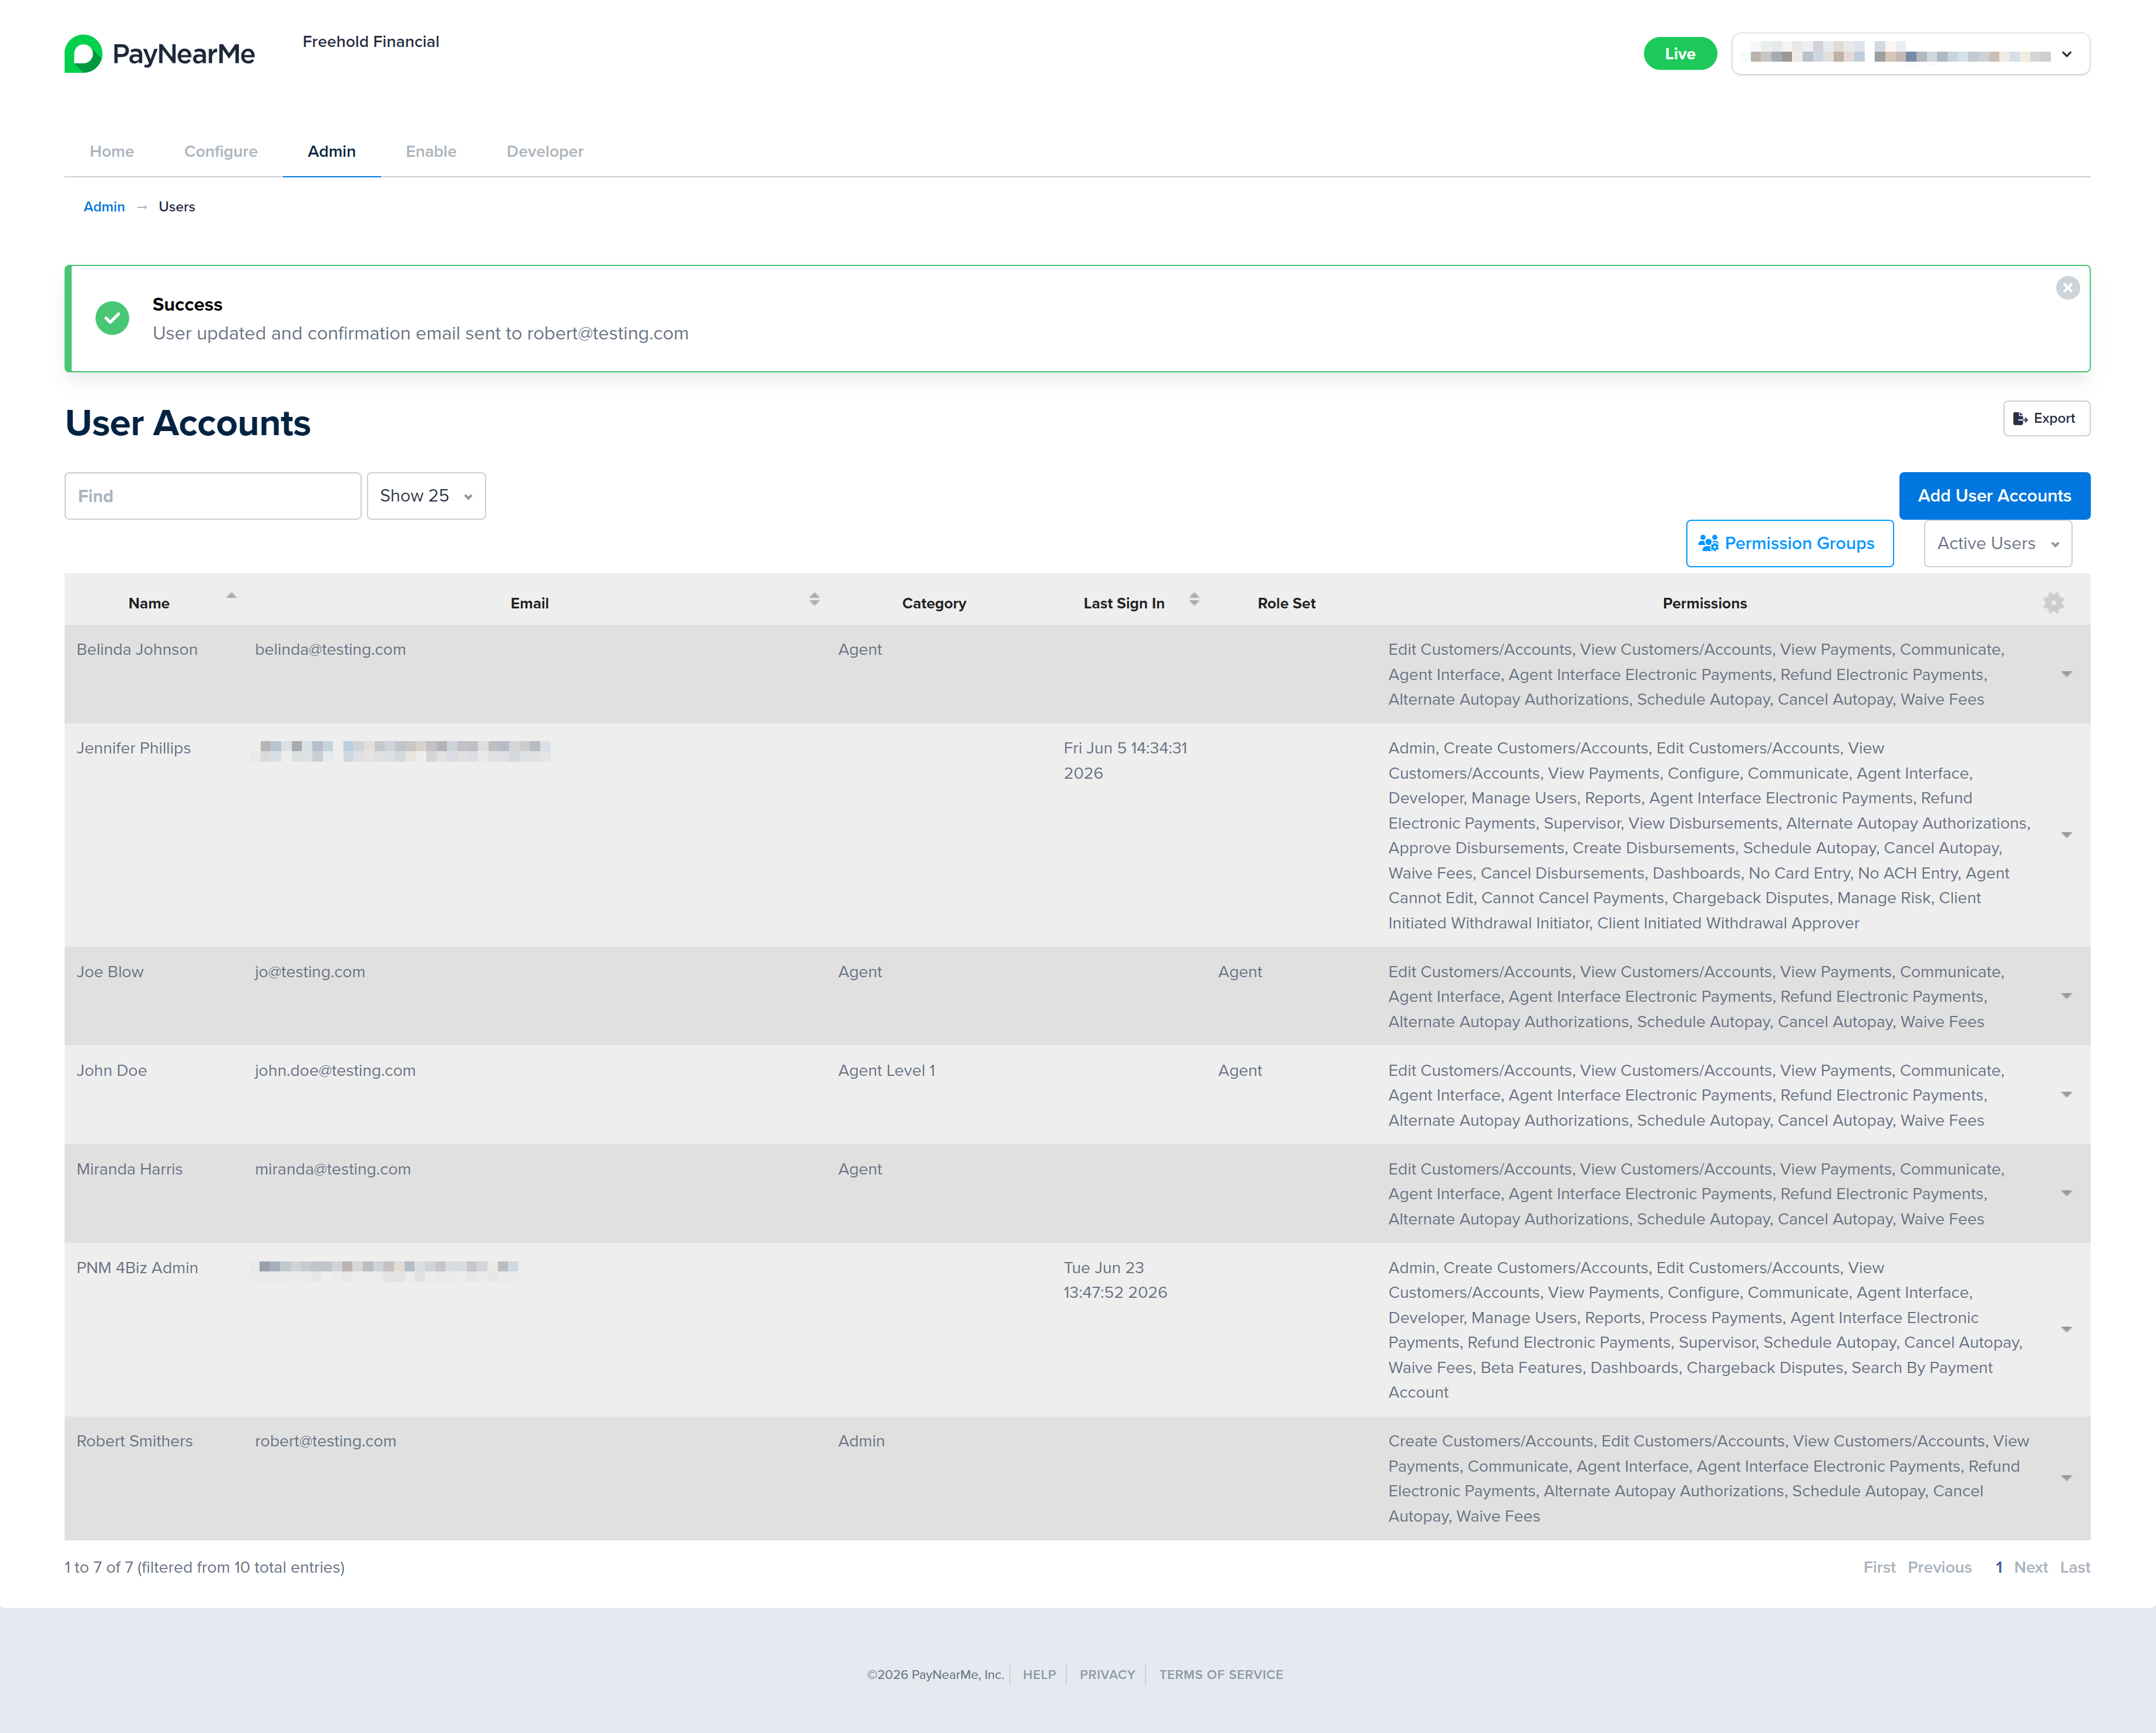
Click Update. The Business Portal returns you to the User Accounts screen and displays a message indicating whether or not the update was successful.
Revoking User Accounts
Revoking a user account completely removes the user's access to the Business Portal. Revoked user accounts can be displayed on the User Accounts screen by selecting All Users from the Account Status filter. Revoked user accounts can be reactivated through the Edit action.
To revoke a user account, complete the following steps:
-
From the Business Portal homepage, click the Admin tab and then View in the Users section.

-
The User Accounts screen displays. Use either the Search field or the Account Status filter to find the user account you want to revoke.
-
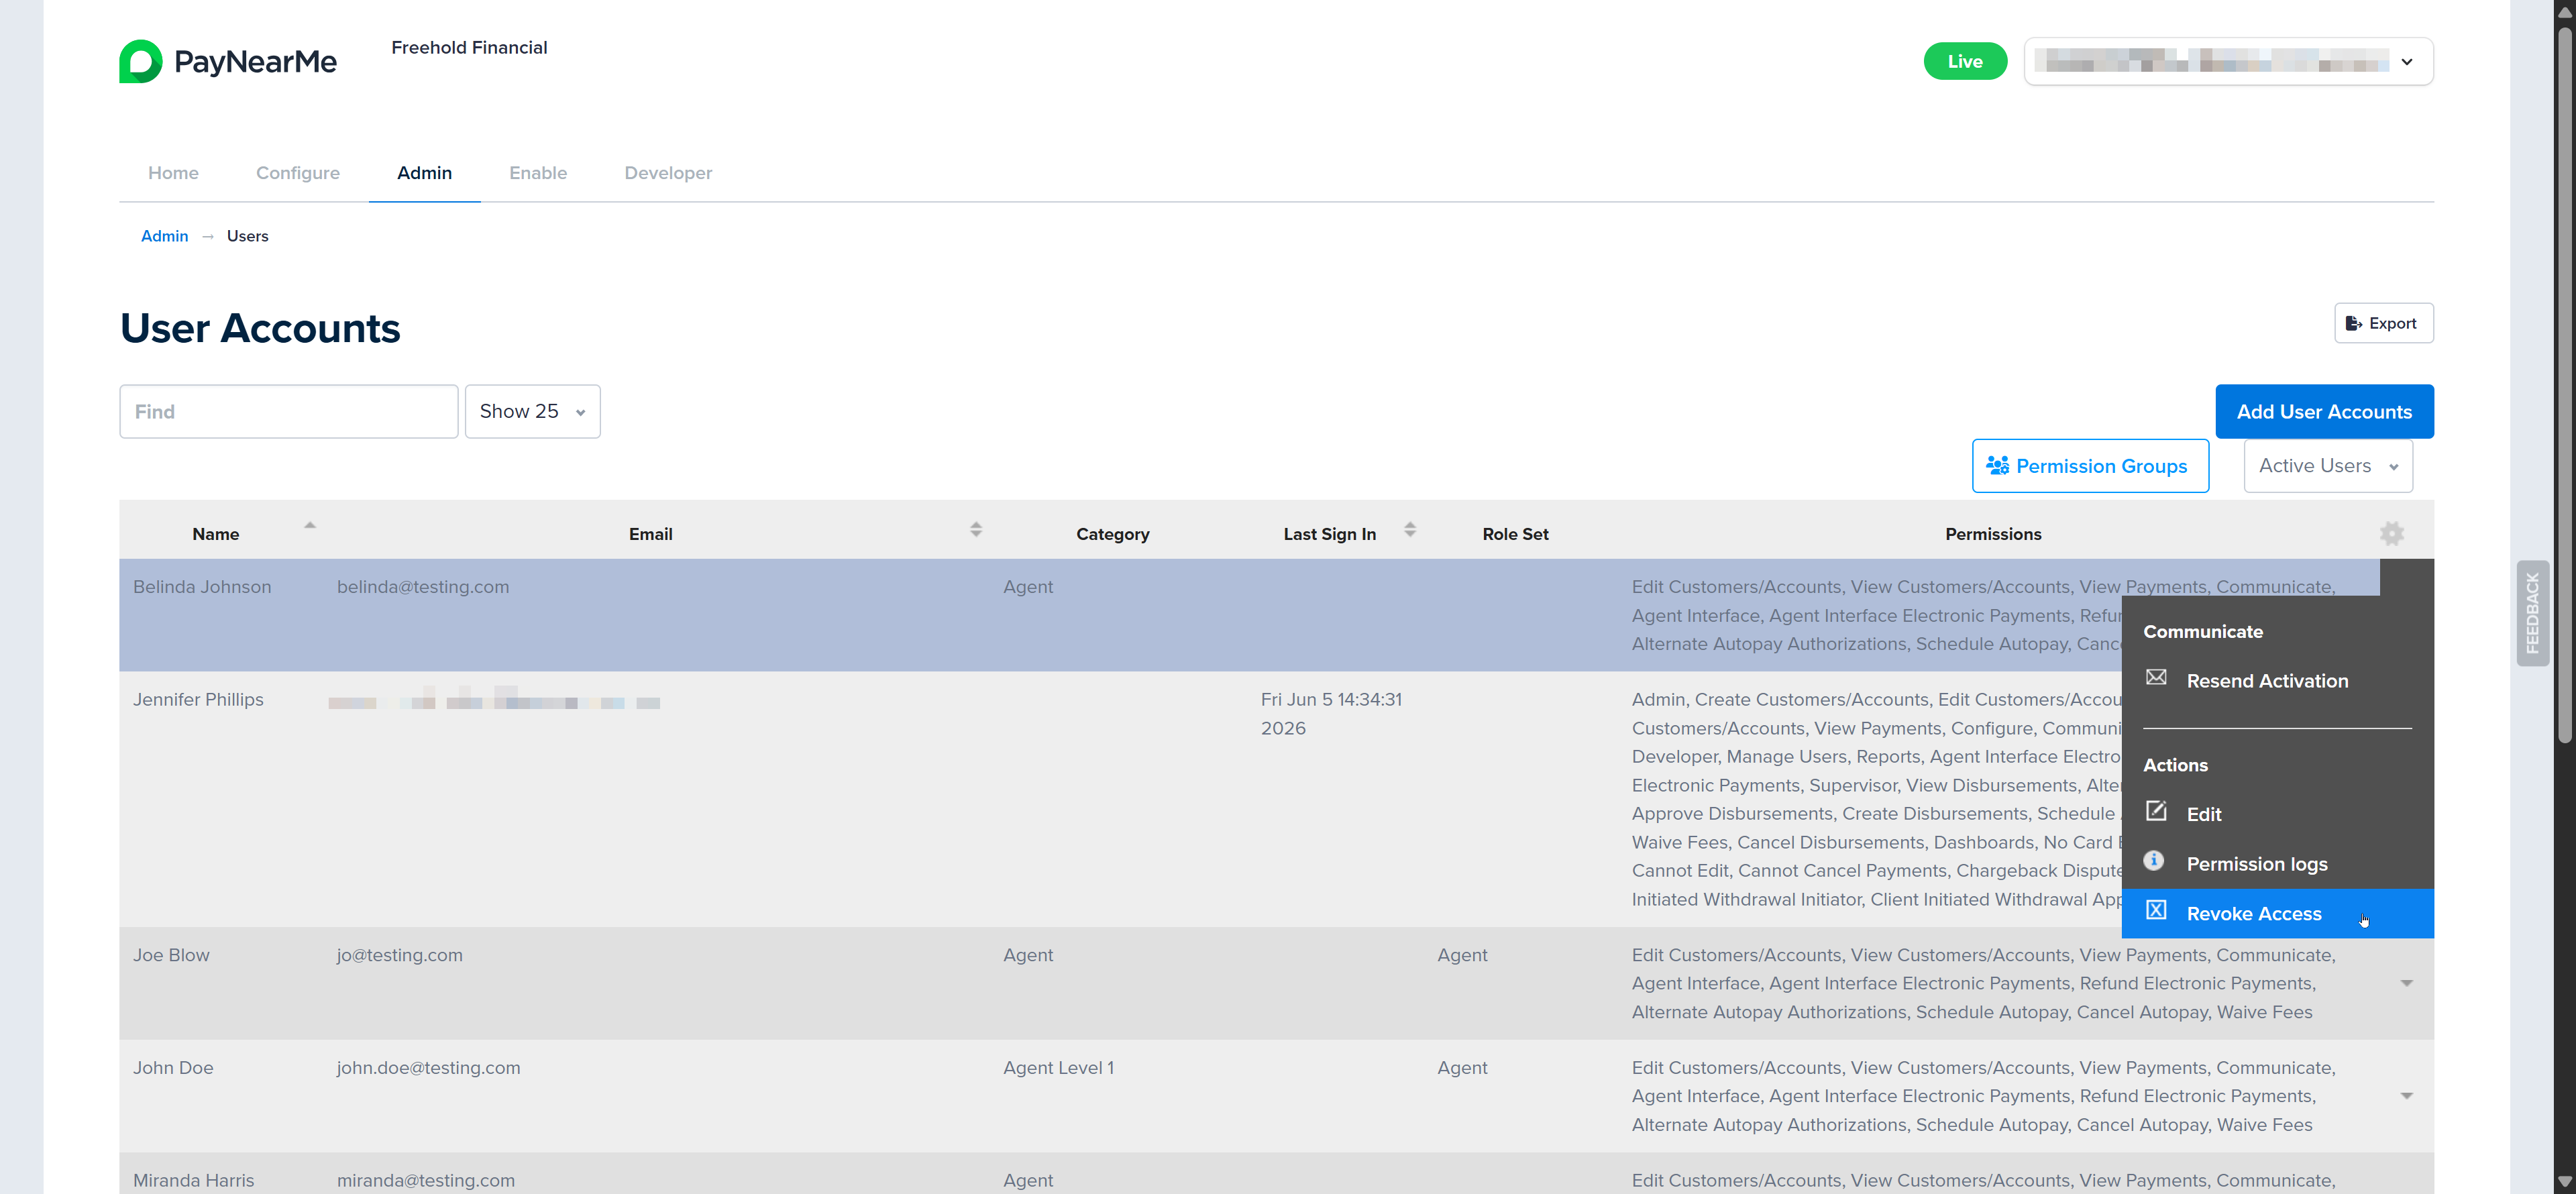
When you find the account you want to revoke, hover your cursor on the dropdown arrow that displays next to the account and select Revoke Access.
-
The Business Portal displays a message asking you to confirm you want to revoke this user's access. Click OK to confirm the action.
-
The Business Portal returns you to the User Accounts screen and displays a message indicating if the user account was successfully revoked.
Viewing Permission Logs of a User Account
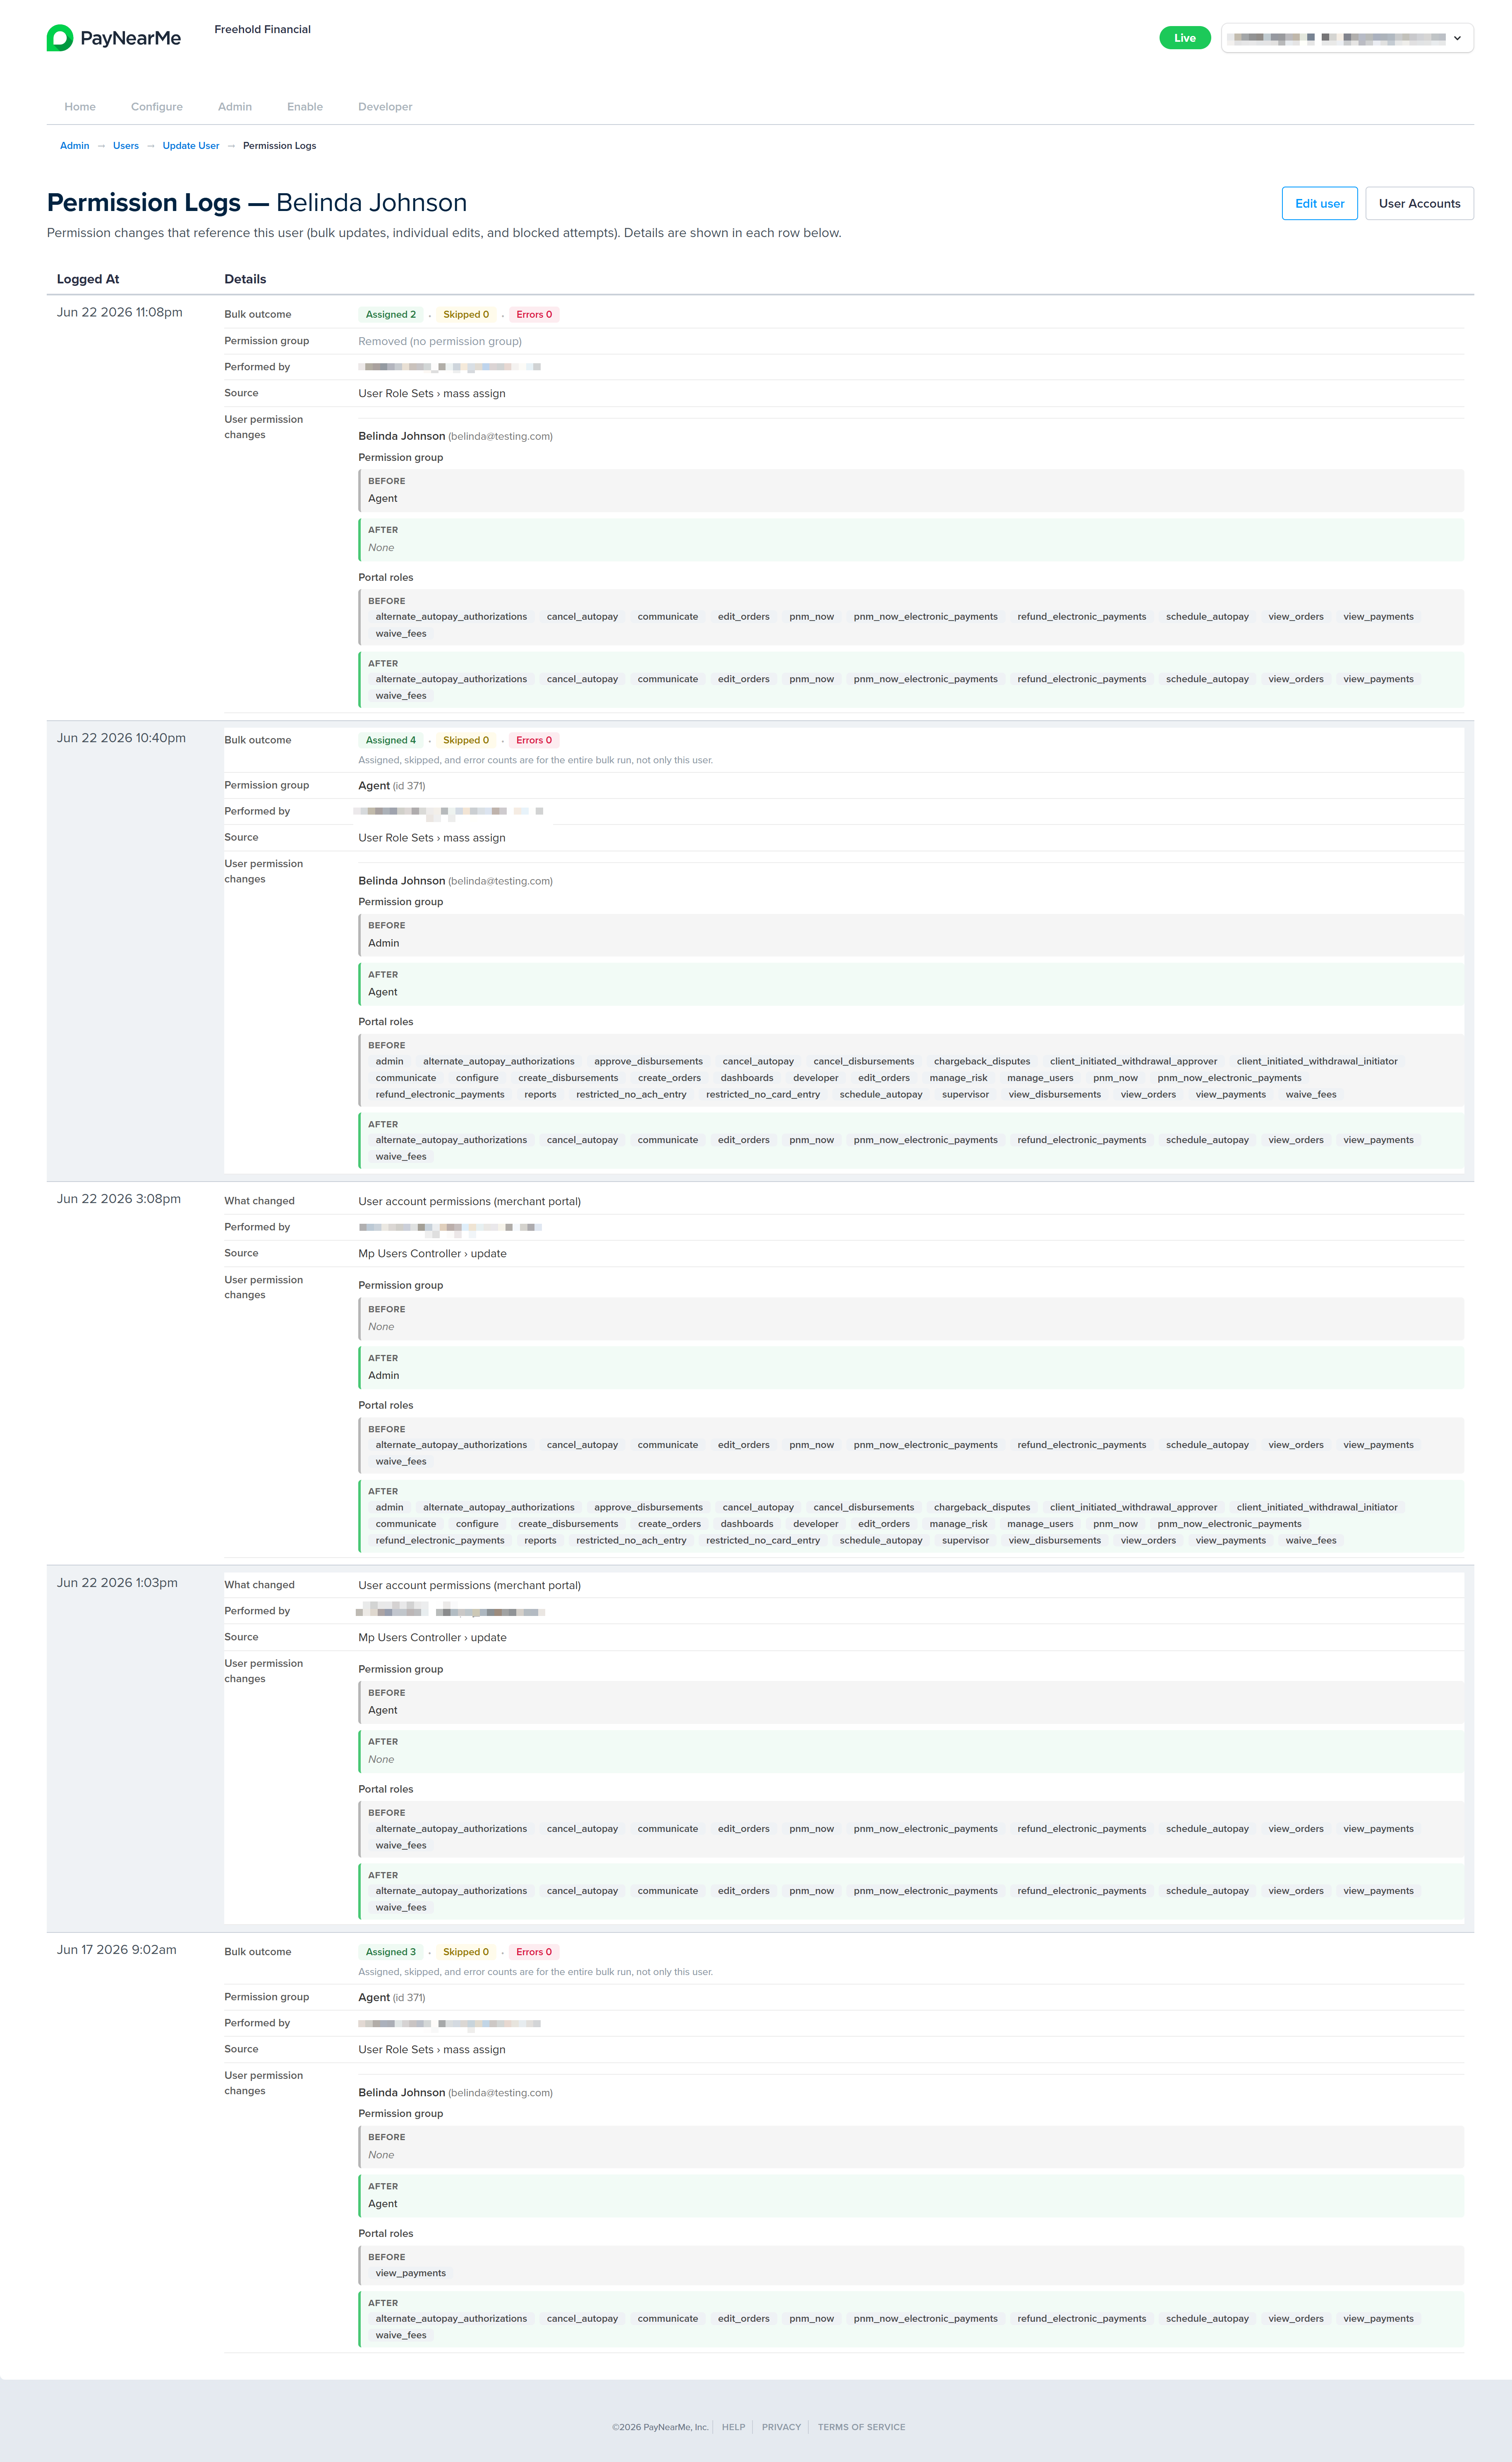
The Business Portal maintains a Permission Log for each user account, giving Site Administrators a record of how that user's access has changed over time. For a history of bulk assignments and other changes at the permission group level, see the permission group's Activity Log. Use Permission Logs to review who made a change, when it occurred, and what permissions or permission group assignments were added, removed, or updated. Permission log entries are created when a user's permissions are edited individually on the Update User screen and when permission group assignments affect that user—for example, through bulk assignment from a permission group. This view helps you audit access for a specific person, investigate unexpected portal behavior, and support internal review or compliance needs without reviewing changes across your entire user base.
To access a specific user's Permission Log, complete the following steps:
-
From the Business Portal homepage, click the Admin tab and then View in the Users section.
-
The User Accounts screen displays. Use either the Search field or the Account Status filter to find the relevant user account.
-
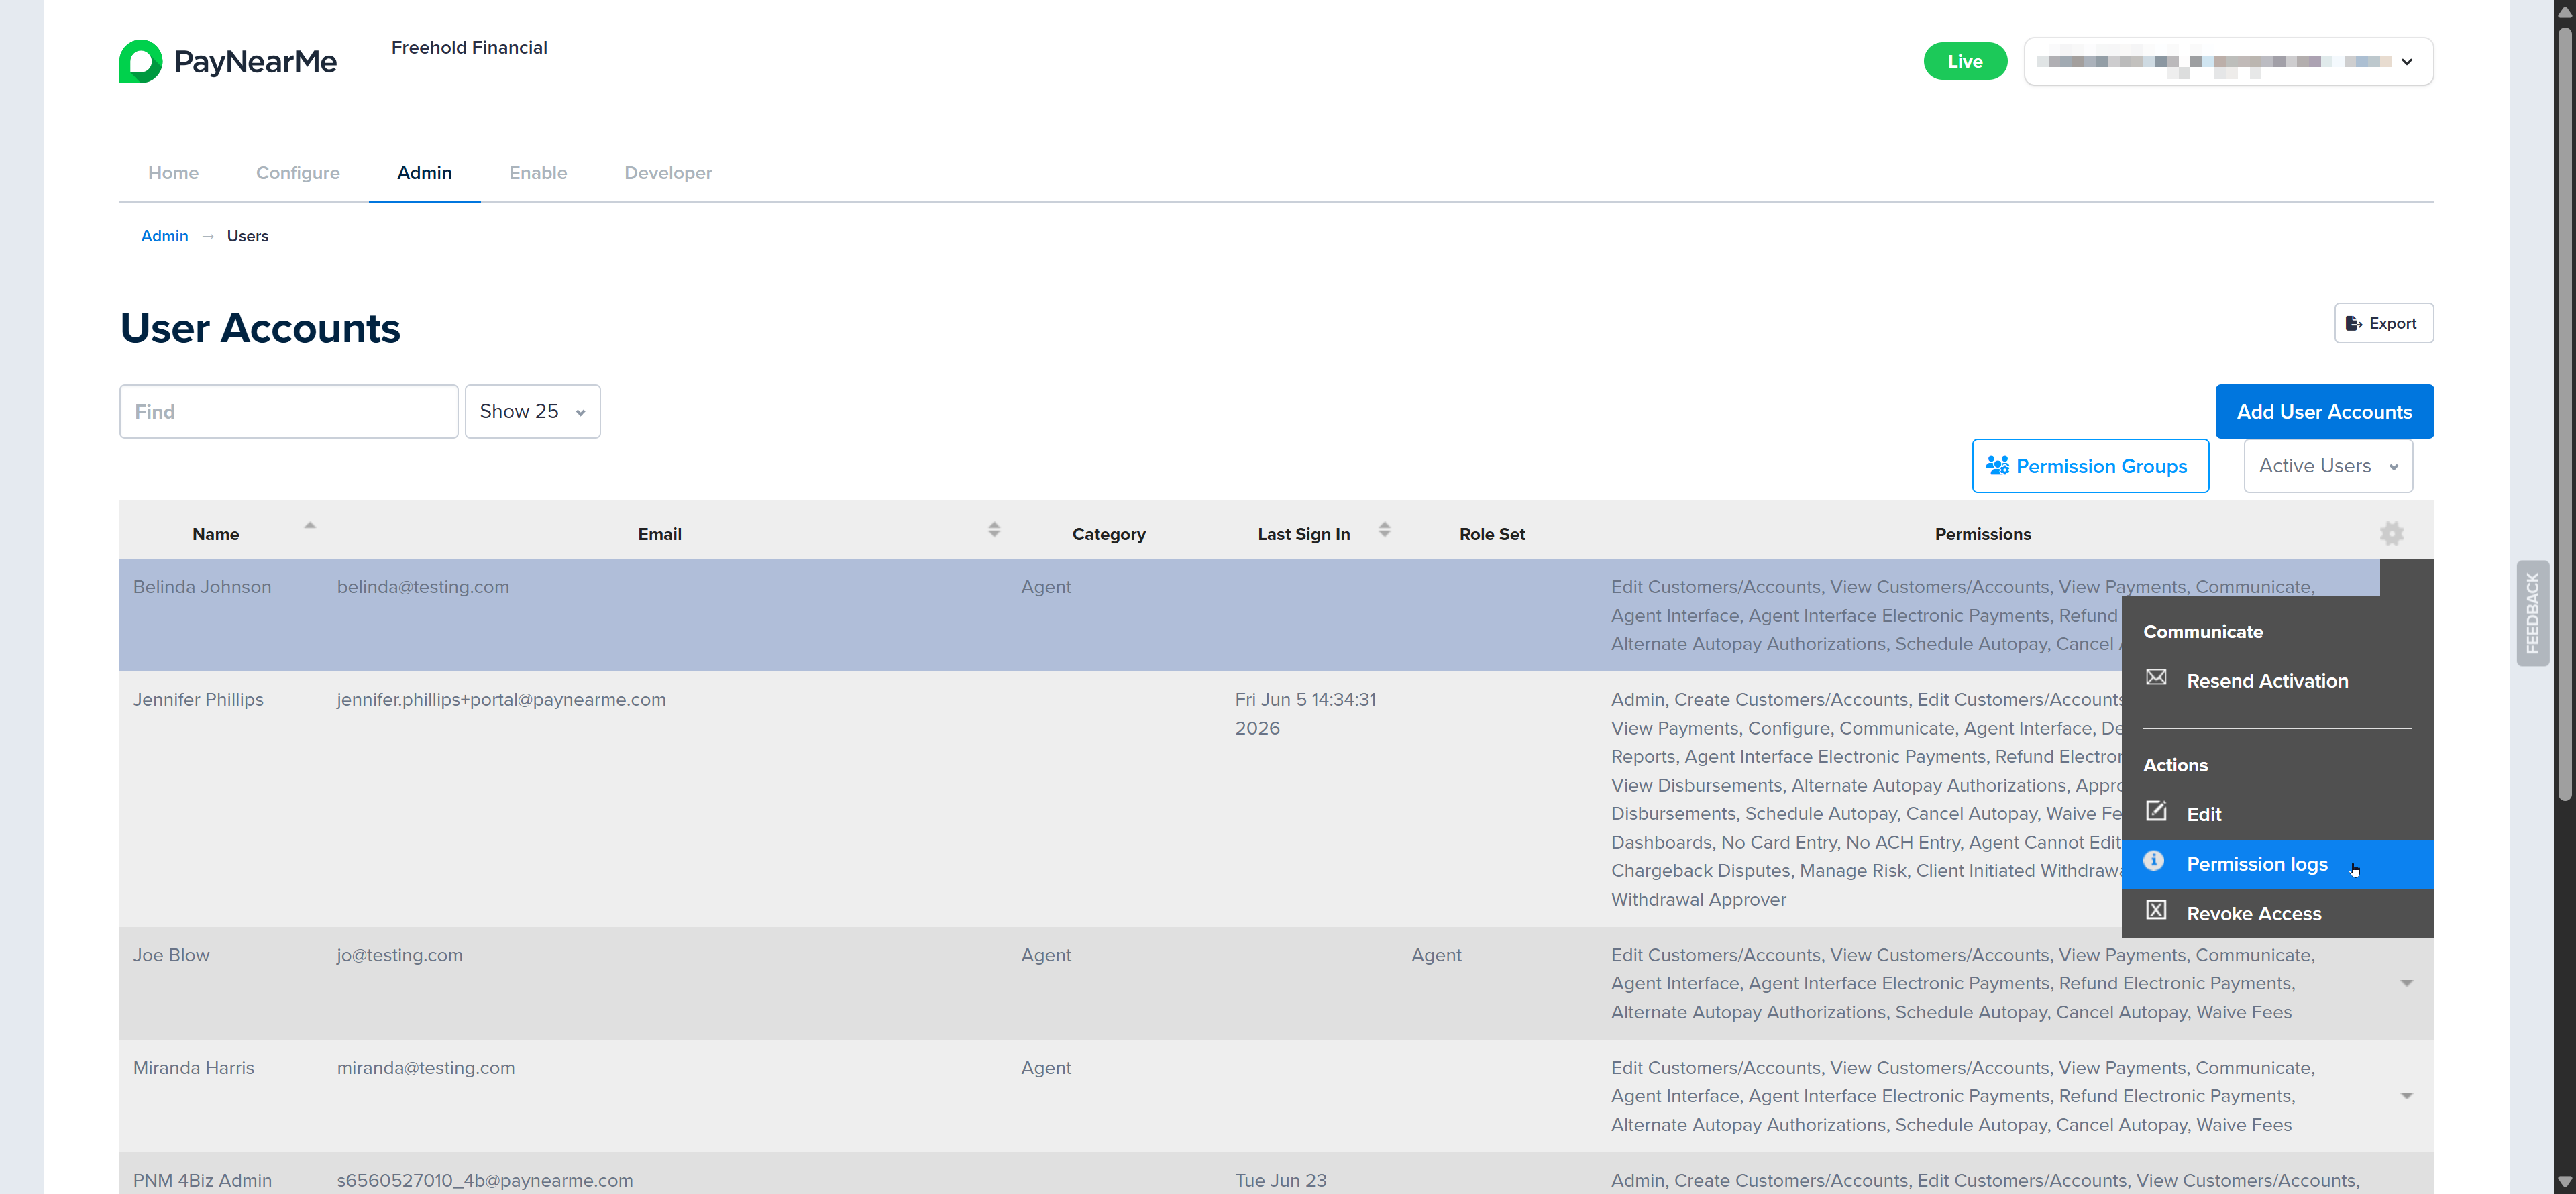
When you find the account, hover your cursor on the dropdown arrow that displays next to the account and select Permission Log.
-
The Permission Log for the user displays. From here you can scroll to view the details of each time the permissions of this user's account was modified.
-
Click Edit User to make additional edits to this user's account or click User Accounts to return to the User Account screen.